Bistro
I. Installation
There are two ways to install a UberTheme Magento theme:
- General Installation: Applicable if you have installed a Magento base on your server before.
- Quickstart Installation: Applicable if you want to get a whole new site as per Demo.
Decide which way to follow. Once downloaded, unzip the package to get the following folders:
- mage_ext: contains all built-in extensions of the theme.
- mage_tpl: contains the theme files only.
- quickstart: a full Magento CMS version with the theme already integrated to match the demo.
- source: contains all source files of the theme.
Provided that you have installed the Magento base already, General Installation will help you adapt the theme and its extensions with your current site.
Note: Your store must be ready before the installation. If not, get it done quickly by following the Magento Installation Guide. See also the following docs for general installations and configurations.
For more details, please check the documentation of the specific extension here.
II. Layout and Block positions
The Bistro front-page uses 4 static blocks on Theme:
- Position 6
- Position 7
- Position 8
- Position 9
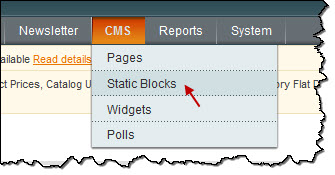
To create these blocks, go to CMS >> Static Block and select page that you want to display this block on.(e.g: Homepage):

You can add a new block by clicking on Add New Block button to create new block and input the content of this block as you need. Please see How to create New Static Block.
2.1 Position 6 :
<div class="block block-left">
<div class="bock-ct">
<ul class="static-links">
<li><a title="Sample link" href="#"><span>+</span> Checkout Order Status</a></li>
<li><a title="Sample link" href="#"><span>+</span> Returns & Exchanges</a></li>
<li><a title="Sample link" href="#"><span>+</span> Shipping Options</a></li>
<li><a title="Sample link" href="#"><span>+</span> Product Recall</a></li>
</ul>
</div>
</div>

2.2 Position 7 :
<div class="block">
<div class="bock-ct">
<ul class="static-links">
<li><a title="Sample link" href="#"><span>+</span> Internet Marketing</a></li>
<li><a title="Sample link" href="#"><span>+</span> Business Consulting</a></li>
<li><a title="Sample link" href="#"><span>+</span> Network Support</a></li>
<li><a title="Sample link" href="#"><span>+</span> IT Services</a></li>
</ul>
</div>
</div>

2.3 Position 8 :
<div class="block">
<div class="bock-ct">
<ul class="static-links">
<li><a title="Sample link" href="#"><span>+</span> Training</a></li>
<li><a title="Sample link" href="#"><span>+</span> Support</a></li>
<li><a title="Sample link" href="#"><span>+</span> Professional Services</a></li>
<li><a title="Sample link" href="#"><span>+</span> Certificates</a></li>
</ul>
</div>
</div>

2.4 Position 9 :
<div class="block block-right">
<div class="bock-ct">
<div class="block-contact"><strong>If you want us to make plan for your home?</strong><span class="phone-number">(+844) 988 686 868</span></div>
</div>
</div>

III. Extensions Configuration
3.1 Product Extension
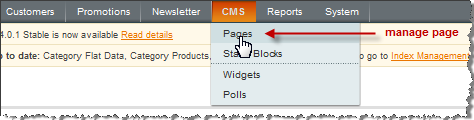
To push this extension into front page like our demo site, go to CMS >> Pages:
Then click on Homepage >> Content tab.

Please fill in Content parameter with syntax below:
{{block type="joomlart_jmproducts/list" name="jmproducts"}}
Back-end Settings
Navigate to System >> Configuration >> Products and configure default criteria as per screenshot below for Product extension:


You can configure the Number Of Products or Number Of Items/Row as you need.
3.2 Product Slider Extension
Bistro used Product Slider extensions, named: Today’s Special.
Navigate to System>Configuration>Products Slider and configure default criteria as per screenshot below:

Go to Catalog > Manage Categories, see the Category ID that you would like to display on Product Slider:

To push this extension onto front page on top, go to CMS >> Pages >> Homepage >> In Design tab, please fill in Layout Update XML parameter as below:
<reference name="productsslider">
    <block type="joomlart_jmproductsslider/list" name="jmproductsslider" />
</reference>
Then, see how it works on front-page:

3.3 Slideshow Extension
Navigate to System >> Configuration >> Slideshow and configure default criteria as per screenshot below:
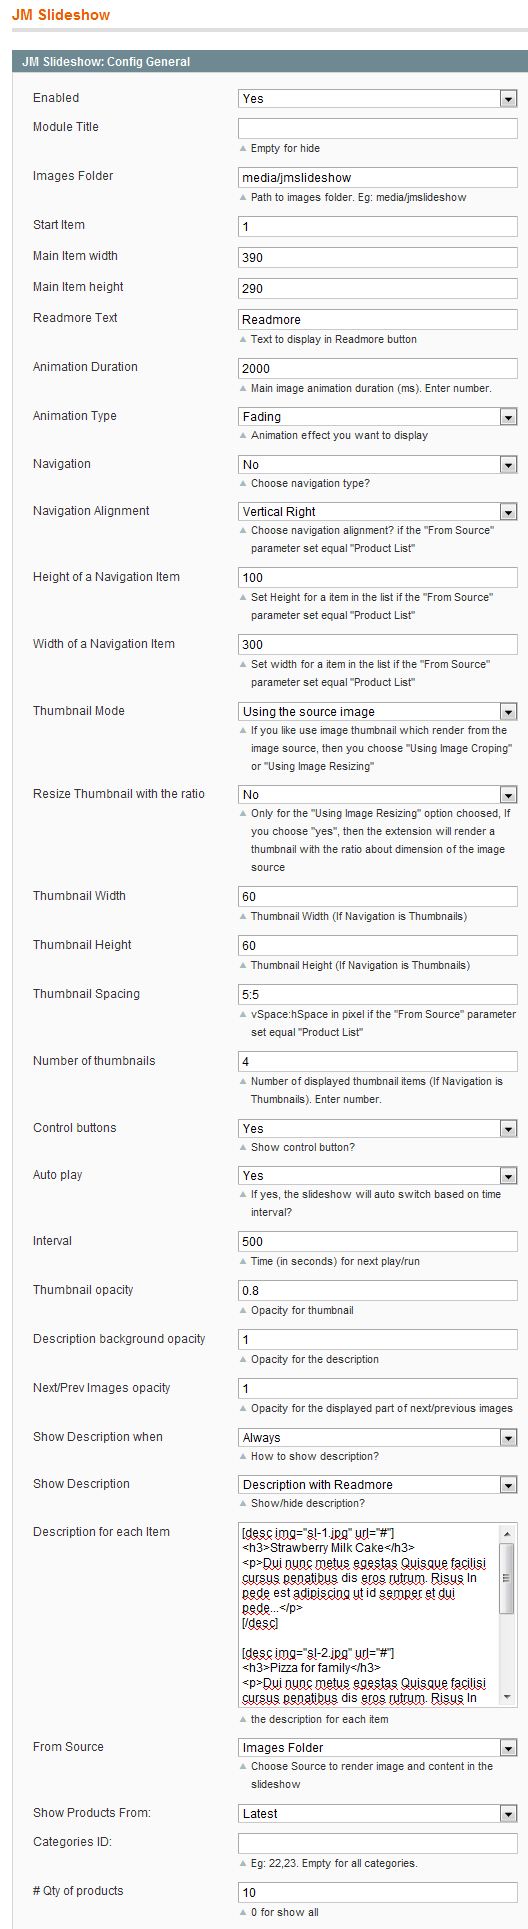
In Bistro, displayed images in the slideshow are from Image Folder media/jmslideshow.
Description for each item :
[desc img="sl-1.jpg" url="#"]
<h3>Strawberry Milk Cake</h3>
<p>Dui nunc metus egestas Quisque facilisi cursus penatibus dis eros rutrum. Risus In pede est adipiscing ut id semper et dui pede...</p>
[/desc]

[desc img="sl-2.jpg" url="#"]
<h3>Pizza for family</h3>
<p>Dui nunc metus egestas Quisque facilisi cursus penatibus dis eros rutrum. Risus In pede est adipiscing ut id semper et dui pede...</p>
[/desc]

[desc img="sl-3.jpg" url="#"]
<h3>Strawberry Milk Cake</h3>
<p>Dui nunc metus egestas Quisque facilisi cursus penatibus dis eros rutrum. Risus In pede est adipiscing ut id semper et dui pede...</p>
[/desc]
To push this extension onto front page like our demo site, access your site’s folder: ..app\design\frontend\default\jm_bistro\layout > Open file page.xml and declare extension position in this file as below :
 <reference name="slideshow">
            <block type="joomlart_jmslideshow/list" name="jmslideshow" />
        </reference>

IV. Menu Configuration
Bistro uses Mega Menu. Follow the guide below to get it configured properly.
To enable Mega Menu, please navigate Back-end >> System >> Configuration >> Mega Menu.

To add menu items, please navigate Back-end >> Mega Menu >> Manage Menu Item, you must create add new Menu Group. The settings below belong to English group. Other language groups have similar settings menu item.
4.1 Home Menu

Back-end Settings
4.2 Wedding Menu
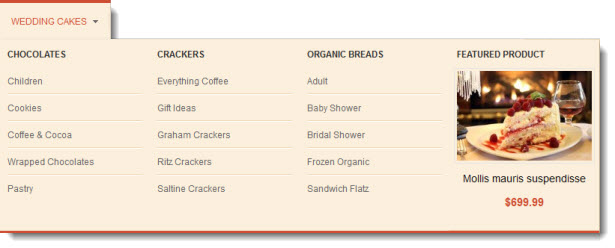
Back-end Settings
4.3 X-Rated Cakes Menu
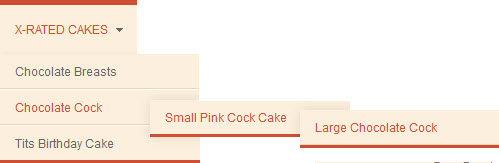
Back-end Settings
- Item 1: X-Rated Cakes Item
- Item 2: Chocolate Cock Item
- Item 3: Small Pink Cock Cake Item
- Item 4: Large Chocolate Cock Item
Other menu items have similar settings with items above.