Haga
I. Installation
So you are about to install our responsive Magento theme Haga -- the professional Magento fashion theme for eCommerce Magento stores. The theme is packed up with long-listed complementary Magento extensions.
There are two ways to install a UberTheme Magento theme like Haga:
- General Installation: Applicable if you have installed a Magento base on your server before.
- Quickstart Installation: Applicable if you want to get a whole new site as per Demo.
Decide which way to follow. Once downloaded, unzip the package of Haga to get the following folders:
- mage_ext: contains all built-in extensions of the theme.
- mage_tpl: contains the theme files only.
- quickstart: a full Magento CMS version with Haga already integrated to match the demo.
- source: contains all source files of the theme.
Provided that you have installed the Magento base already, General Installation will help you adapt Haga and its extensions with your current site.
Note: Your store must be ready before the installation. If not, get it done quickly by following the Magento Installation Guide. See also the following docs for general installations and configurations.
For more details, please check the documentation of the specific extension here.
II. Static Blocks
The Haga front-page uses 12 static blocks on Theme:
- Position-1
- Position-2
- Position-3
- Position-4
- Our Brands
- Advertising List
- Store Information
- Services Support
- Position 10
- Lemmon Slider
- Hot Line
- Footer Links
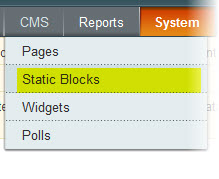
To create these blocks, go to CMS > Static Block and select page that you want to display this block on.(e.g: Homepage):
To add a new block, please see here.
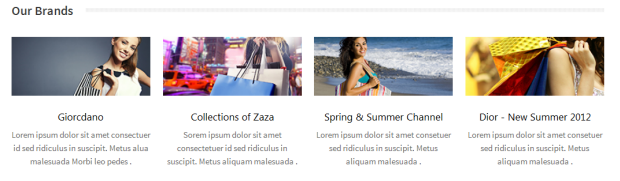
Our Brands:
<div class="block">
<div class="block-title"><strong> <span>Our Brands</span> </strong></div>
<div class="block-content">
<ul class="our-brands-list clearfix col4-set">
<li class="first col-1">
<div class="inner-list"><a title="Giorcdano" href="#"><img src="{{media url="wysiwyg/brand-1.jpg"}}" alt="Giorcdano" /></a>
<h3><a title="Giorcdano" href="#">Giorcdano</a></h3>
<p>Lorem ipsum dolor sit amet consectuer id sed ridiculus in suscipit. Metus alua malesuada Morbi leo pedes .</p>
</div>
</li>
<li class="col-2">
<div class="inner-list"><a title="Collections of Zaza" href="#"><img src="{{media url="wysiwyg/brand-2.jpg"}}" alt="Collections of Zaza" /></a>
<h3><a title="Collections of Zaza" href="#">Collections of Zaza</a></h3>
<p>Sorem ipsum dolor sit amet consectetuer id sed ridiculus in suscipit. Metus aliquam malesuada .</p>
</div>
</li>
<li class="col-3">
<div class="inner-list"><a title="Spring & Summer Channel" href="#"><img src="{{media url="wysiwyg/brand-3.jpg"}}" alt="Spring & Summer Channel " /></a>
<h3><a title="Spring & Summer Channel" href="#">Spring & Summer Channel</a></h3>
<p>Lorem ipsum dolor sit amet consetuer sed ridiculus in suscipit. Metus aliquam malesuada .</p>
</div>
</li>
<li class="last col-4">
<div class="inner-list"><a title="Dior - New Summer 2012" href="#"><img src="{{media url="wysiwyg/brand-4.jpg"}}" alt="Dior - New Summer 2012" /></a>
<h3><a title="Dior - New Summer 2012" href="#">Dior - New Summer 2012</a></h3>
<p>Lorem ipsum dolor sit amet consetuer sed ridiculus in suscipit. Metus aliquam malesuada .</p>
</div>
</li>
</ul>
</div>
</div>
Advertising List:
<div class="advertising-list"><a title="" href="#"><img src="{{media url="wysiwyg/banner3.jpg"}}" alt="" /></a> <a title="" href="#"><img src="{{media url="wysiwyg/banner2.jpg"}}" alt="" /> </a><a title="" href="#"><img class="last" src="{{media url="wysiwyg/banner1.jpg"}}" alt="" /></a></div>

Store Information:
<div class=" col-narrow">
<div class="block block-list">
<div class="block-title"><strong> <span>Store infomation</span> </strong></div>
<div class="block-content"><ol>
<li><a title="Privacy and Security" href="#">Privacy and Security</a></li>
<li><a title="Terms of Use" href="#">Terms of Use</a></li>
<li><a title="Movie Trailers" href="#">Movie Trailers</a></li>
<li><a title="International Sites" href="#">International Sites</a></li>
<li><a title="Career Opportunities" href="#">Career Opportunities</a></li>
<li><a title="Galleries" href="#">Galleries</a></li>
</ol></div>
</div>
</div>

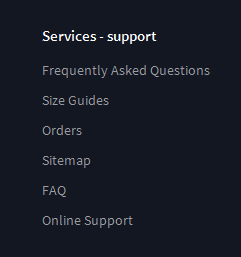
Services Support:
<div class=" col-narrow">
<div class="block block-list">
<div class="block-title"><strong> <span>Services - support</span> </strong></div>
<div class="block-content"><ol>
<li><a title="Frequently Asked Questions" href="#">Frequently Asked Questions</a></li>
<li><a title="Size Guides" href="#">Size Guides</a></li>
<li><a title="Orders" href="#">Orders</a></li>
<li><a title="Sitemap" href="#">Sitemap</a></li>
<li><a title="FAQ" href="#">FAQ</a></li>
<li><a title="Online Support" href="#">Online Support</a></li>
</ol></div>
</div>
</div>
Position-10:
<div class="col-wide">
<div class="block">
<div class="block-content">
<div class="contact-list">
<div class="mobile">08 245 568 899</div>
<div class="mail"><a href="#">[email protected]
<div class="social"><a class="facebook" title="facebook" href="#"><span>Facebook<
/span></a> <a class="google" title="google" href="#"><span>Google</span></a>
<a class="twitter" title="twitter" href="#"><span>Twitter</span></a> <a class="vimeo"
title="Vimeo" href="#"><span>Vimeo</span></a> <a class="linkedin" title="linkedin" href="#">
<span>Linkedin</span></a></div>
</div>
</div>
</div>
</div>
- Back-end Settings
-

Lemmon Slider:
<!-- Necessary HTML -->
<div class="lemmon-slider">
<div id="jm-slider-main" class="slider">
<ul>
<li><a title="sample logo" href="#"><img src="{{media url="wysiwyg/logo/logo1.png"}}" alt="" /></a></li>
<li><a title="sample logo" href="#"><img src="{{media url="wysiwyg/logo/logo2.png"}}" alt="" /></a></li>
<li><a title="sample logo" href="#"><img src="{{media url="wysiwyg/logo/logo3.png"}}" alt="" /></a></li>
<li><a title="sample logo" href="#"><img src="{{media url="wysiwyg/logo/logo4.png"}}" alt="" /></a></li>
<li><a title="sample logo" href="#"><img src="{{media url="wysiwyg/logo/logo5.png"}}" alt="" /></a></li>
</ul>
</div>
<div class="controls"><a class="prev-slide" href="#">Prev Slide</a> <a class="next-slide" href="#">Next Slide</a></div>
</div>
<script type="text/javascript">// <![CDATA[
       jQuery(window).load(function(){
            jQuery( '#jm-slider-main' ).lemmonSlider({'infinite' : true});
        });
// ]]></script>
Hot Line:
<div class="hotline">
<p>HOT LINE: 123-4567-0000</p>
</div>

Footer Links:
<ul>
<li><a href="{{store direct_url="about-magento-demo-store"}}">About Us</a></li>
<li><a href="{{store direct_url="customer-service"}}">Customer Service</a></li>
<li class="last privacy"><a href="{{store direct_url="privacy-policy-cookie-restriction-mode"}}">Privacy Policy</a></li>
</ul>


III. Extensions Configuration
Slideshow Module
Navigate to System > Configuration > Slideshow and configure default criteria as Back-end Settings as in Demo
Update this code at Description value:
[desc img="sl-1.jpg" url="#"]
<h3>New Look on bags deal and famous shoes for ladies</h3>
[/desc]
[desc img="sl-2.jpg" url="#"]
<h3>Sneak Peek: The perfect business suit and luggage</h3>
[/desc]
[desc img="sl-3.jpg" url="#"]
<h3>Free shipping coming soon plus 20% off on denim bags</h3>
[/desc]
[desc img="sl-4.jpg" url="#"]
<h3>Clothing & Fashion Coupons, Coupon Codes and Deals</h3>
[/desc]
[desc img="sl-5.jpg" url="#"]
<h3>Let Get elegant and fresh: denim bags buy 2 get 1 free.</h3>
[/desc]
To push this extension onto front-page on top, go to CMS > Pages >> Homepage >> In Design tab, please fill in Layout Update XML parameter as below :
<reference name="mass-top">
<block type="joomlart_jmslideshow/list" name="jmslideshow" template="joomlart/jmslideshow/list.phtml" />
   </reference>

To be able to use Product attribute of Type of product display , you need to create a new attribute. Please see How to use Product Slider
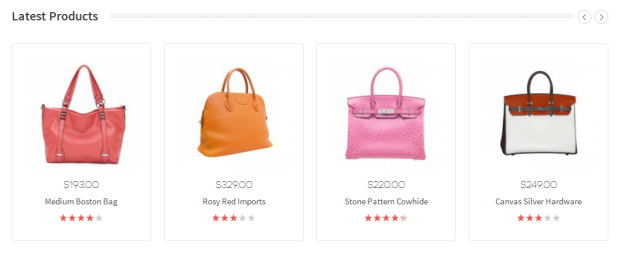
Product Slider Module
Navigate to System > Configuration > Products Slider and configure default criteria as Back-end Settings as in Demo
To push this extension onto front-page on top, go to CMS > Pages >> Homepage >> In Content tab, please fill in Layout Update XML parameter as below :
{{block type="joomlart_jmproductsslider/list" name="jmproductsslider" template="joomlart/jmproductsslider/list.phtml" }}
To be able to use Product attribute of Type of product display , you need to create a new attribute. Please see How to use Product Slider
Product Module
Navigate to System > Configuration > Products and configure default criteria as Back-end Settings as in Demo
In Haga, this extension will be used as the data of Tabs Extension.
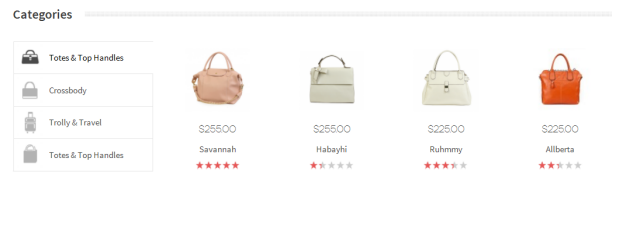
Tabs Module
Navigate to System > Configuration > Products and configure default criteria as Back-end Settings as in Demo
Content Configuration
To create content of Tabs, go to CMS > Static Block > Add New Block
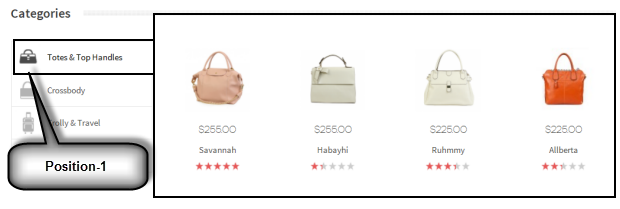
Position-1
<div>{{block type="joomlart_jmproducts/list" name="home.jmproducts.list" template="joomlart/jmproducts/list.phtml" catsid="49"}}</div>
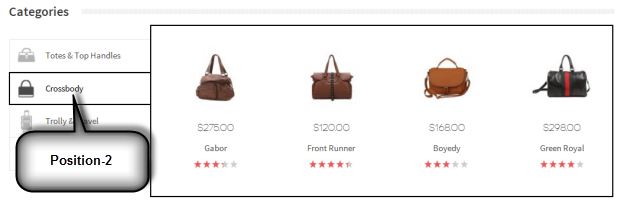
Position-2
<div>{{block type="joomlart_jmproducts/list" name="home.jmproducts.list" template="joomlart/jmproducts/list.phtml" catsid="45"}}</div>
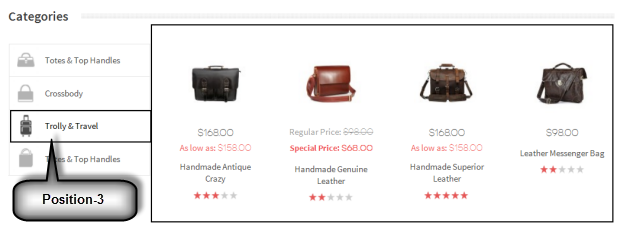
Position-3
<div>{{block type="joomlart_jmproducts/list" name="home.jmproducts.list" template="joomlart/jmproducts/list.phtml" catsid="13" }}</div>
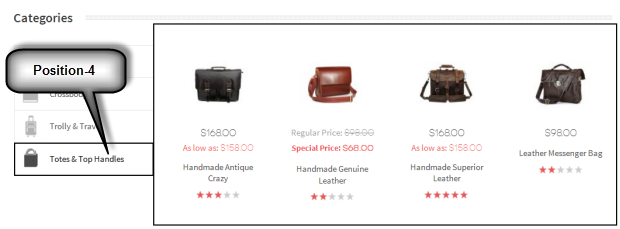
Position-4
<div>{{block type="joomlart_jmproducts/list" name="home.jmproducts.list" template="joomlart/jmproducts/list.phtml" catsid="13" }}</div>
Design Config:
To push this extension onto front-page on top, go to CMS > Pages >> Homepage >> In Design tab, please fill in Layout Update XML parameter as below :
<reference name="head">
            <action method="addCss"><stylesheet>joomlart/jmtabs/css/jm.tabs.css</stylesheet></action>
        </reference>
        <reference name="content">
            <block type="joomlart_jmtabs/core" name="jmtabs">
                <action method="addTabs_staticblock">
                    <title>Totes & Top Handles</title>
                    <identifier>position-1</identifier>
                </action>
                <action method="addTabs_staticblock">
                    <title>Crossbody</title>
                    <identifier>position-2</identifier>
                </action>
                <action method="addTabs_staticblock">
                    <title>Trolly & Travel</title>
                    <identifier>position-3</identifier>
                </action>
                <action method="addTabs_staticblock">
                    <title>Totes & Top Handles</title>
                    <identifier>position-4</identifier>
                </action>
</block>
        </reference>
To be able to use Product attribute of Type of product display , you need to create a new attribute. Please see How to use Product Slider
IV. Menu Configuration
Haga uses Mega Menu. Follow the guide below to get it configured properly.
To enable Mega Menu, please navigate Back-end >> System >> Configuration >> Mega Menu

Enable Mega Menu
To add menu items, please navigate Back-end >> Mega Menu >> Manage Menu Item you must create add new Menu Group.The settings below belong to English group. Other language groups have similar settings menu item.
4.1 Home Menu

Front-end appreance
Back-end Settings
4.2 Collections Menu
Front-end Appearance

Front-end appreance
Back-end Settings
- Item 1: Collections Item
- Item 2: Category Item
- Item 3: Fall -- Winter 2012 Item
- Item 4: Fashion Show Item
- Item 4: Hotsale Item
4.3 Men Menu

Front-end appreance
Back-end Settings
4.4 Manage Page -- 404 Not Found page
To config this page, please navigate to CMS >> Pages, then select 404 Not Found 1 page to update the settings as below:
Paste the code below on Content field:
<div id="jm-error">
<div class="page-head-alt">
<h3>Whoops...</h3>
</div>
<dl><dt>The page you requested was not found, and we have a fine guess why.</dt><dd>
<ul class="disc">
<li>If you typed the URL directly, please make sure the spelling is correct.</li>
<li>If you clicked on a link to get here, the link is outdated.</li>
</ul>
</dd></dl><dl><dt>What can you do?</dt><dd>Have no fear, help is near! There are many ways you can get back on track with Magento Demo Store.</dd><dd>
<ul class="disc">
<li><a onclick="history.go(-1);" href="#">Go back</a> to the previous page.</li>
<li>Use the search bar at the top of the page to search for your products.</li>
<li>Follow these links to get you back on track!<a href="{{store url=""}}">Store Home</a><a href="{{store url="customer/account"}}">My Account</a></li>
</ul>
</dd></dl></div>

Front-end appreance