How to install Magento 2.0 on localhost
I. Overview
To help Magento developers get to know the latest Magento CE 2, today, we would like to walk you through the steps needed when installing the latest version of this leading eCommerce platform.
This Installation Guide helps you install the Magento software on your localhost. Firstly, you must choose the installation that’s right for you.

Magento Community Edition 2.0 Installation
II. Choose how to install the Magento software
1. Easy installation with a compressed software archive
This way has an advantage: easy installation, no command line, have your own server. In this blog post, we will describe the details of this installation with Magento 2.0 fresh and Magento 2.0 with sample data.
This guide is used for window environment only, using wizard to install.
2. Download Magento 2.0
Depend on your demand to choose the package to download via Magento Community Edition 2.0 download

Download Package
III. System requirements
Before you install Magento 2, make sure your system meets or exceeds the following requirements:
- Operating systems : Linux distributions such as RedHat Enterprise Linux (RHEL), CentOS, Ubuntu, Debian, and so on
- Apache 2.2 or later
- PHP 5.5.x or PHP 5.6.x
Note: Magento 2 does not support PHP 5.4. - Required PHP extensions:
- PDO/MySQL
- mbstring
- mcrypt
- mhash
- simplexml
- curl
- gd2, ImageMagick 6.3.7 (or later) or both
- soap
- intl
- bc-math
- openssl
- MySQL 5.6.x
- Mail Transfer Agent (MTA) or an SMTP server
- Optional but recommended:
- php_xdebug2.2.0 or later (development environments only; can have an adverse effect on performance)
- PHPUnit (as a command-line tool) 4.1 or later
IV. Installation Magento 2.0
When you are done with verifying your prerequisites, follow the steps below to install Magento 2.
1. Upload package to your web root

Upload package to your web root
2. Create DataBase
Open PHPmyadmin, then create Database for Magento 2.0

Create Database on PHPmyAdmin
3. Magento installation
Follow the 7 steps below to start your Magento installation
From your browser, navigate to the location of the Magento downloader on your server.
Step 1 : Agree and Setup
The Magento Downloader welcome page appears.
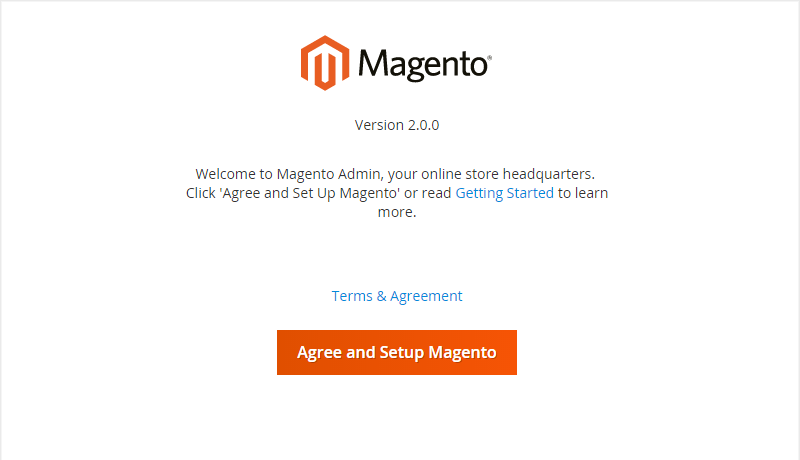
Start setup
Step 2 : Verify System requirements
To validate your server environment, click the Continue button. If error warnings appear, you must correct the errors and validate your environment again
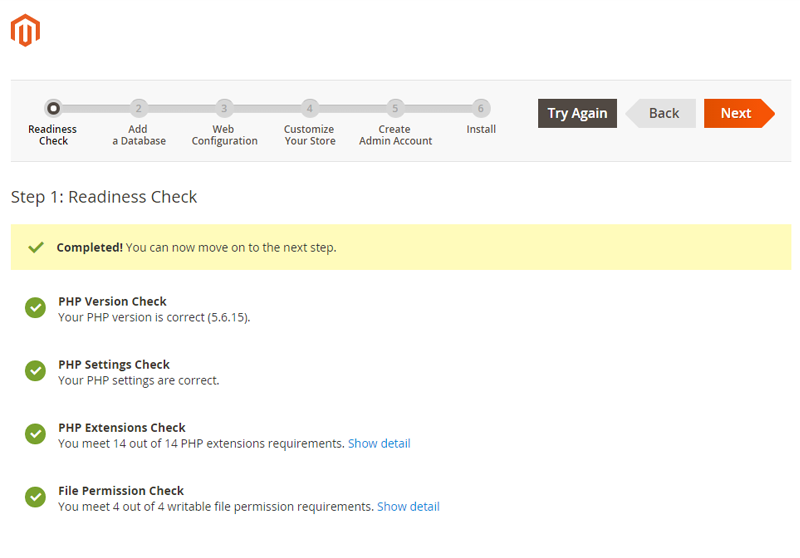
Verify Requirement
Step 3 : Setup the database
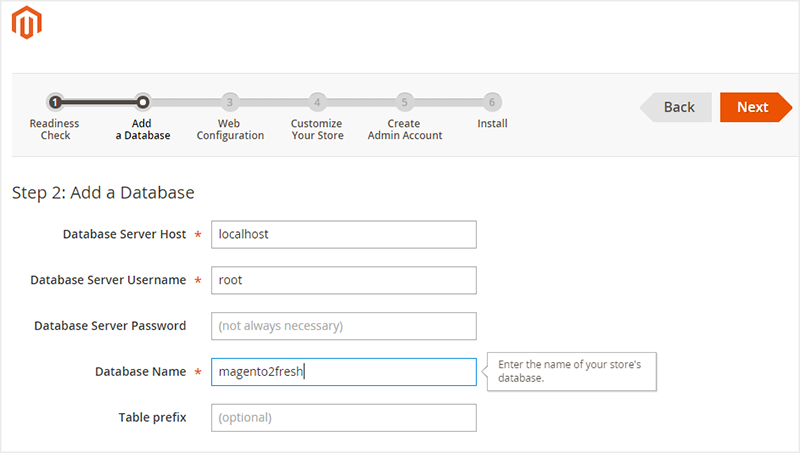
Verify Requirement
- Database Server Host: Enter the server qualified host name or IP address. If your server is on the same host as your web server, enter localhost
- Database Server Username
- Database Server Password
- Database Name: input the database name you have just created at section Create Database
- Table prefix: this field could left blank
Step 4 : Web Configuration
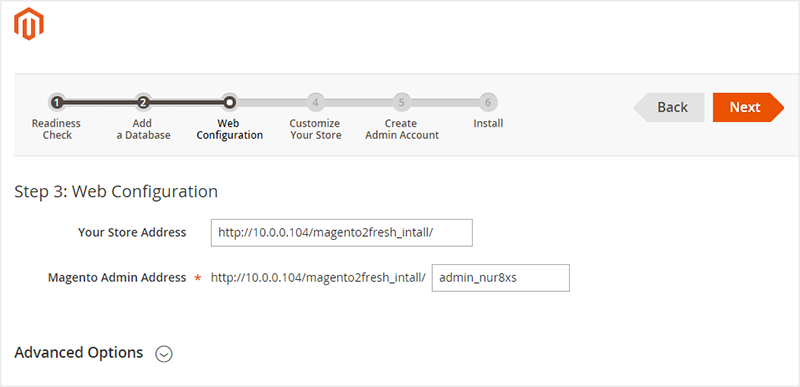
Configure Web
- Your Store Address: enter the base URL for your store
- Magento Admin Access: Enter the base URL for the store’s Admin Panel. The default value is admin
Step 5 : Configure Language, Time Zone and Currency
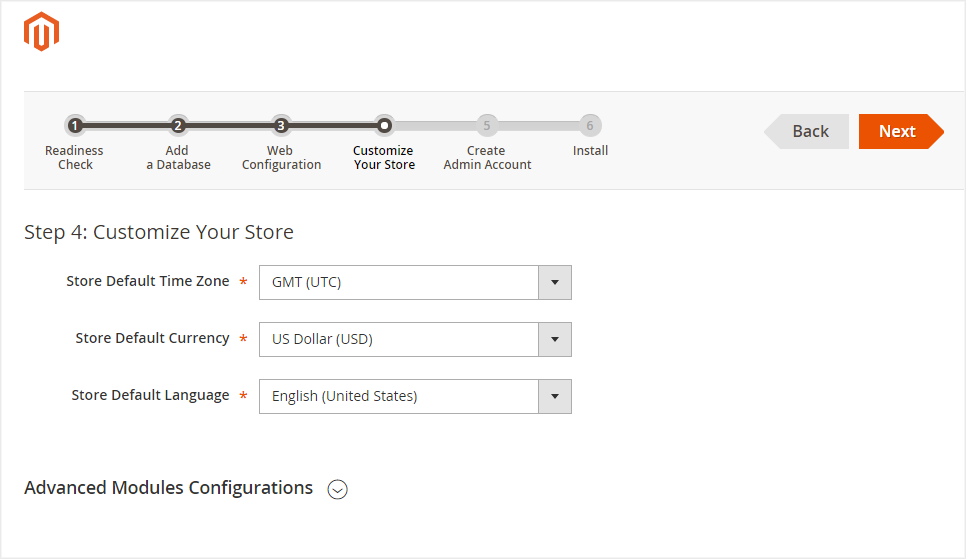
Configure Timezone and Currency
Step 6 : Create Admin Account
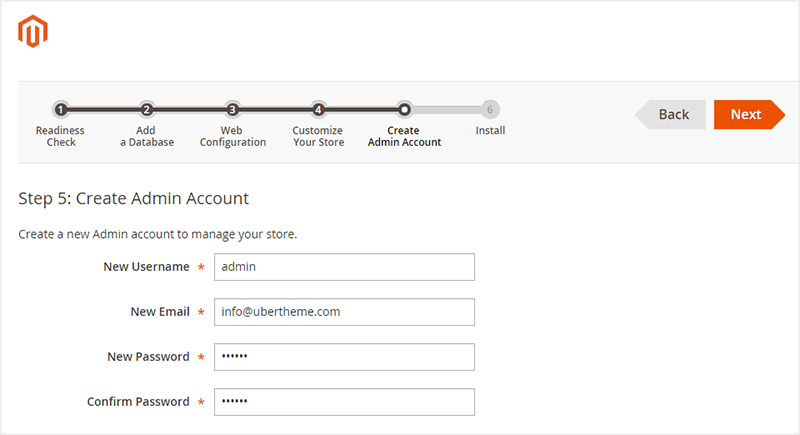
Configure Admin
- New Username: enter the Admin account of the owner of your store
- New Email: enter the Email of the owner of your store
- New Username: enter the Password of the owner of your store
- New Email: Confirm the password
Step 7 : Install & Finish
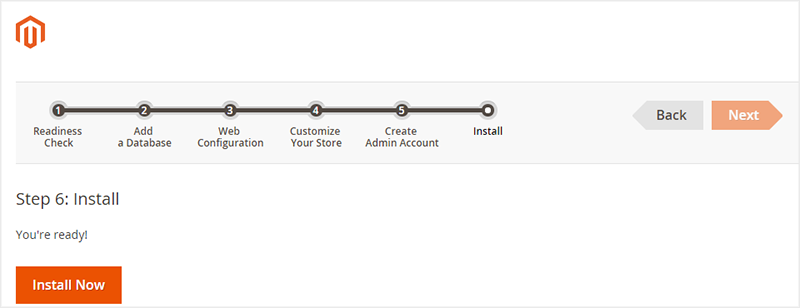
Install