QuickStart Installation (for Magento 2.3.x and older)
QuickStart Installation
We provide Quickstart package for each template which aims to ease the installation for users.
It will help you save much time of installing and configuring if you plan to start your site from the beginning.
1. Upload package to your web root
Upload the folder QuickStart to your server. In QuickStart folder you will see the extracted folder that includes all sample data.

2.Create a database for your Magento store (using phpMyAdmin).

To install, open a browser and navigate to your URL (where the QuickStart package uploaded) to load the default Magento installer.
3. QuickStart installation steps
Follow the 7 steps below to start your QuickStart installation
From your browser, navigate to the location of the QuickStart downloader on your server.
Step 1 : Agree and Setup
The QuickStart Downloader welcome page appears.

Start setup
Step 2 : Verify System requirements
To validate your server environment, click the Continue button. If error warnings appear, you must correct the errors and validate your environment again
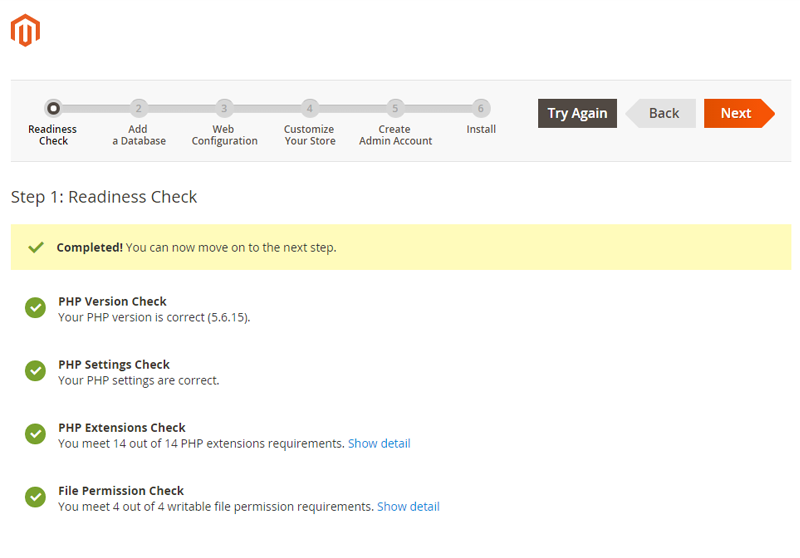
Verify Requirement
Step 3 : Setup the database

Verify Requirement
- Database Server Host: Enter the server qualified host name or IP address. If your server is on the same host as your web server, enter localhost
- Database Server Username
- Database Server Password
- Database Name: input the database name you have just created at section Create Database
- Table prefix: this field could left blank
Note: Do not use “localhost” in URL, otherwise you could not log into your Admin area (you should use your local IP in case of installing on your computer).
Step 4 : Web Configuration

Configure Web
- Your Store Address: enter the base URL for your store
- Magento Admin Access: Enter the base URL for the store’s Admin Panel. The default value is admin
Step 5 : Configure Language, Time Zone and Currency
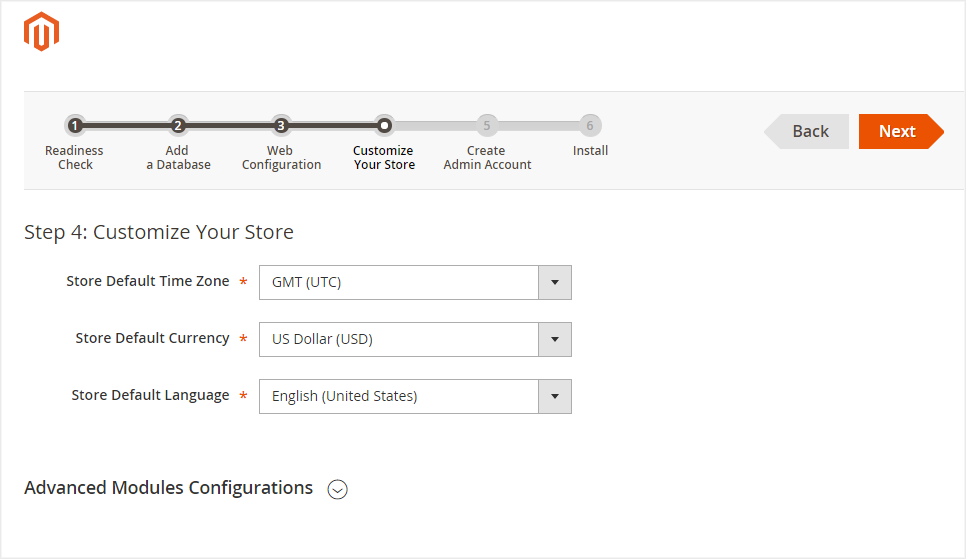
Configure Timezone and Currency
Step 6 : Create Admin Account
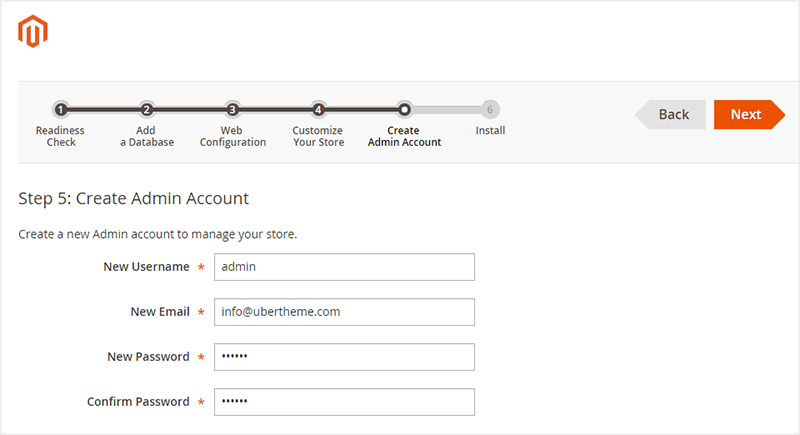
Configure Admin
- New Username: enter the Admin account of the owner of your store
- New Email: enter the Email of the owner of your store
- New Username: enter the Password of the owner of your store
- New Email: Confirm the password
Step 7 : Install & Finish
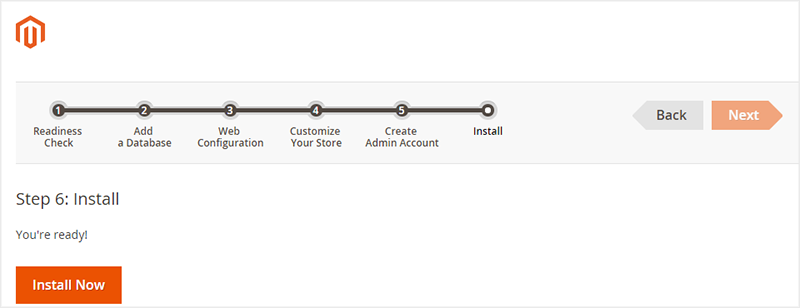
Install
Important notes
After the end of the QuickStart install, you should run the following commands:
- php -f bin/magento setup:static-content:deploy
- php -f bin/magento indexer:reindex
- php -f bin/magento cache:clean
ATTENTION: If you use Magento 2.2.0, please run the following command instead of using the command php -f bin/magento setup:static-content:deploy
- php -f bin/magento setup:static-content:deploy -f