TravelGear
Introduction
Theme Introduction
JM TravelGear is a versatile responsive Magento theme for eCommerce sites. Supporting all the latest versions of Magento CE including Magento 1.9, this eCommerce Magento theme ships with responsive web design, off-canvas menu and offers 5 bonus theme skins. You can read more about JM TravelGear features here.
Supported Magento Extensions
Ubertheme develops complementary Magento extensions for our themes exclusively. Once purchased JM TravelGear, you can download the following complementary extensions, namely:
Mega Menu | BaseTheme | Slideshow | Masshead | Product List | Products Slider | Daily Deal
Layout and Block Positions
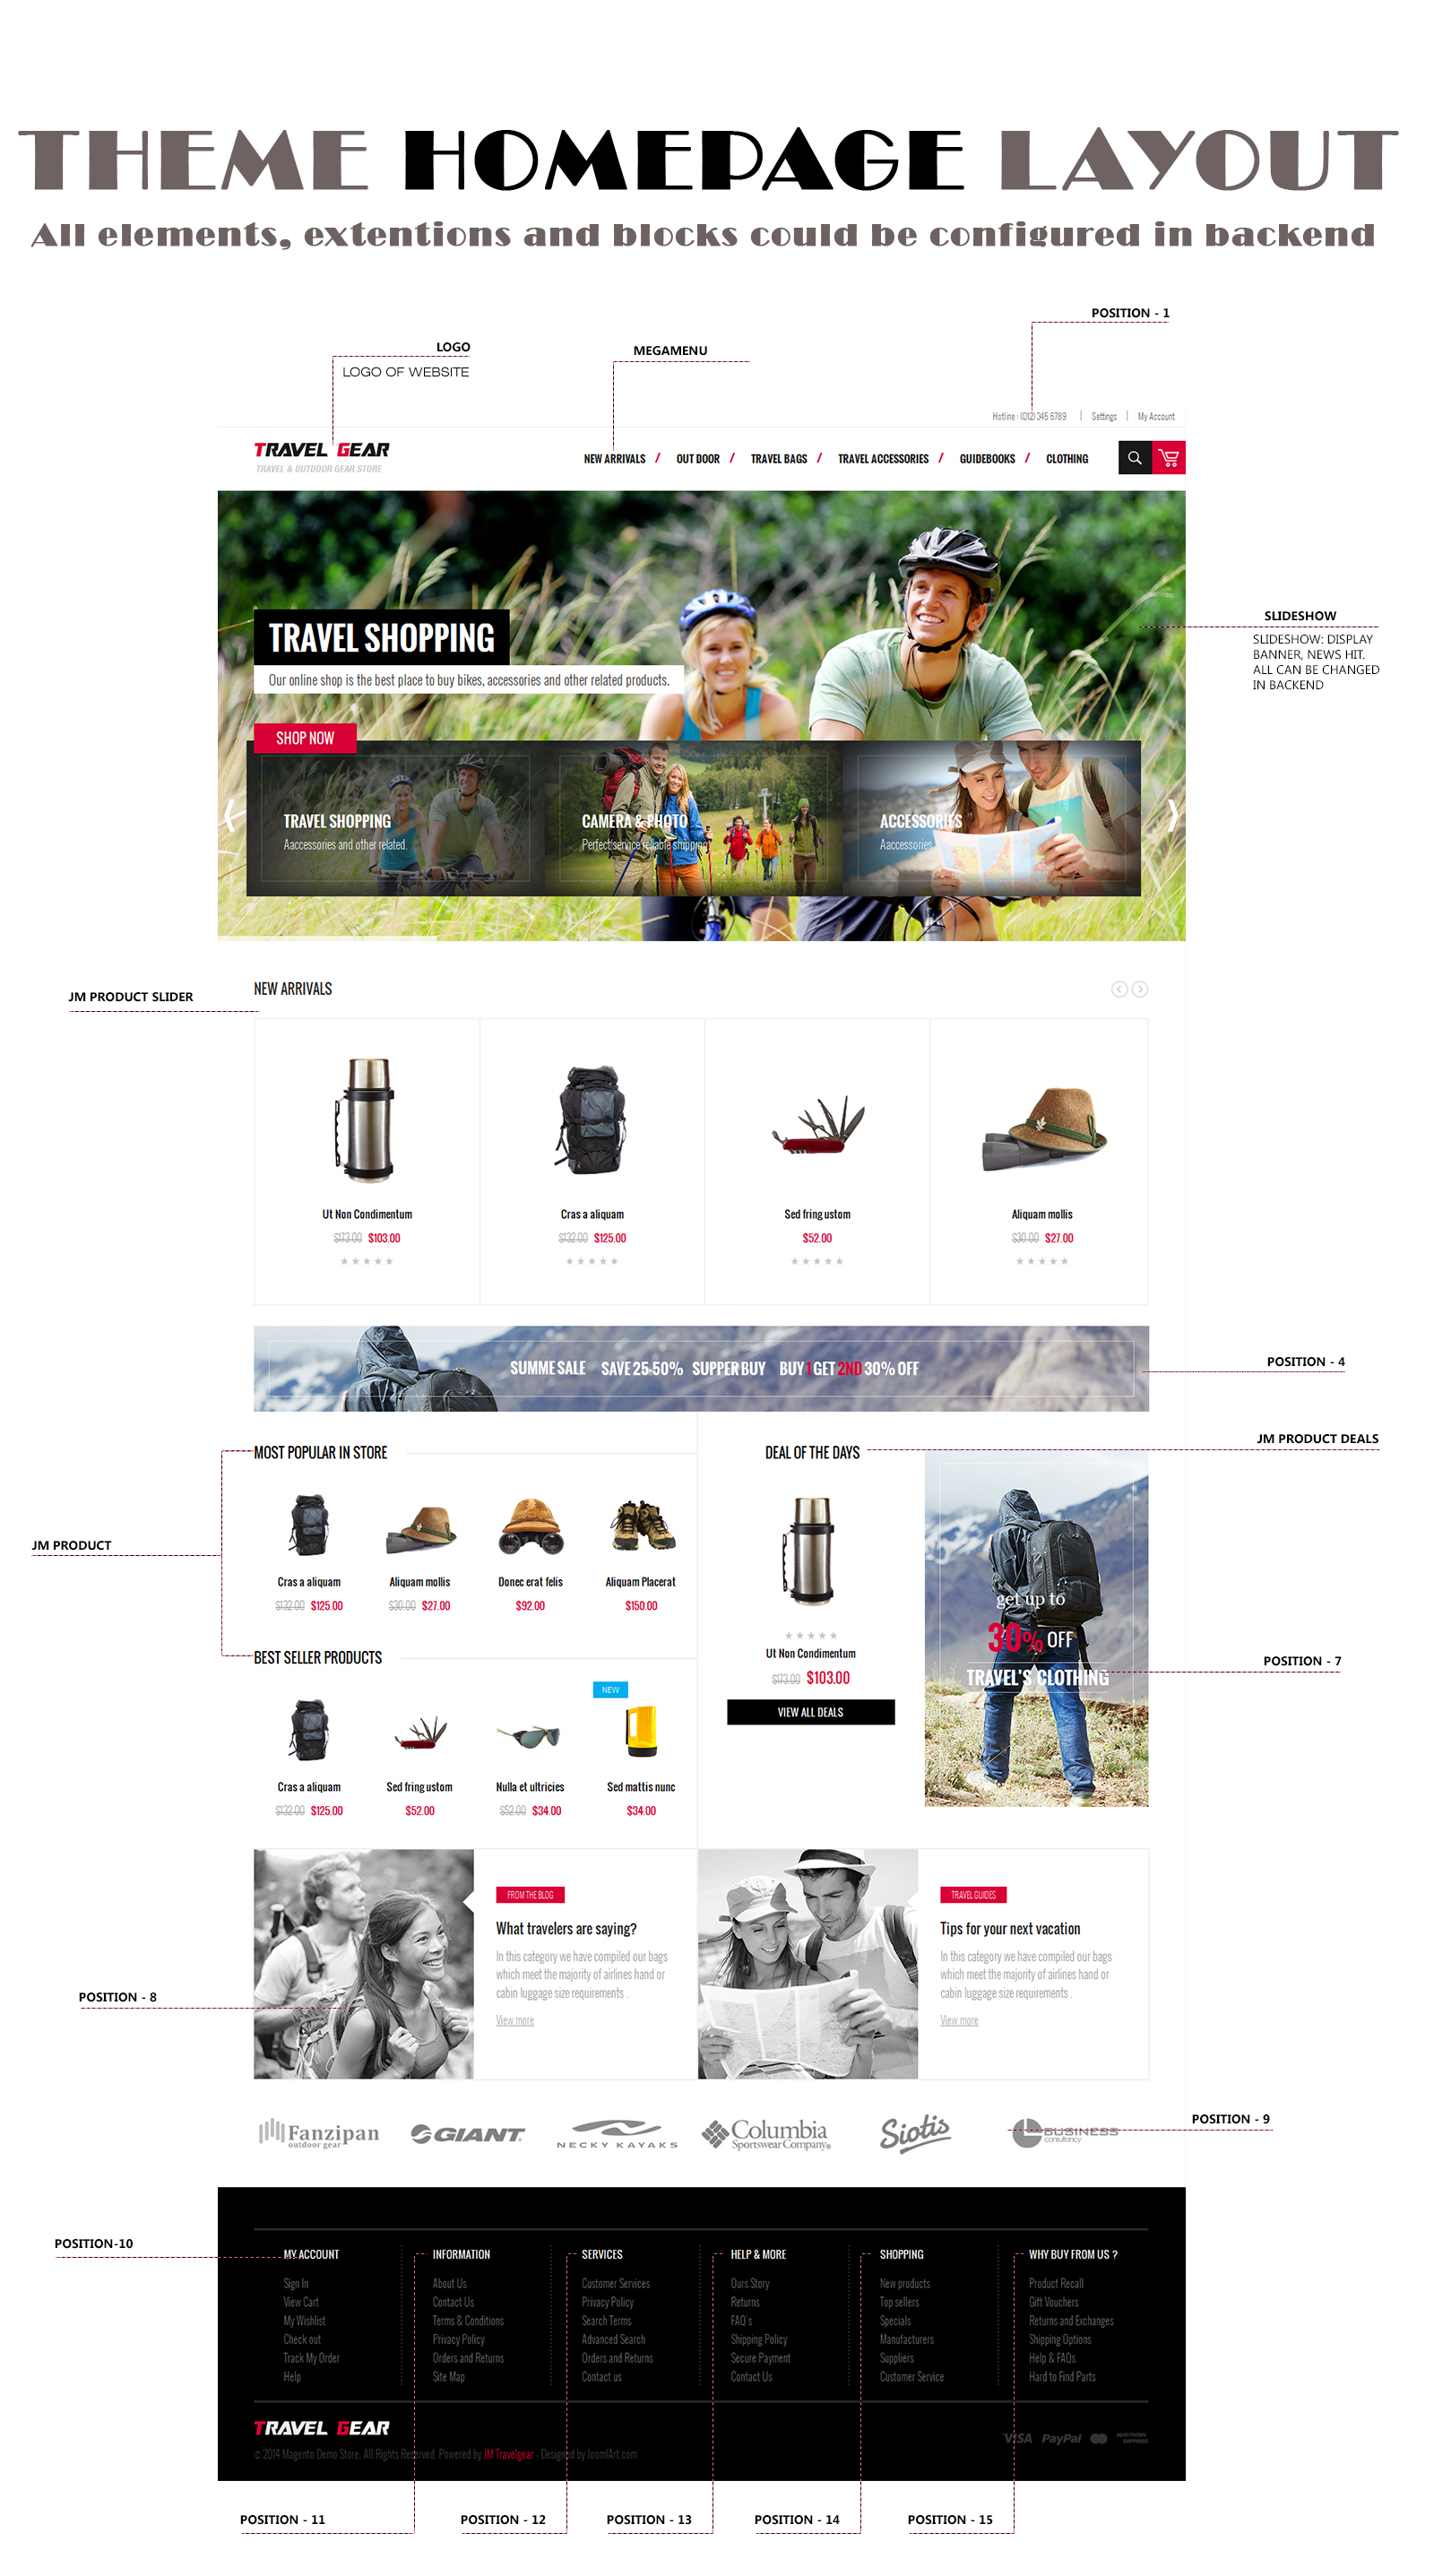
The layout of JM TravelGear Homepage can be illustrated as follows.
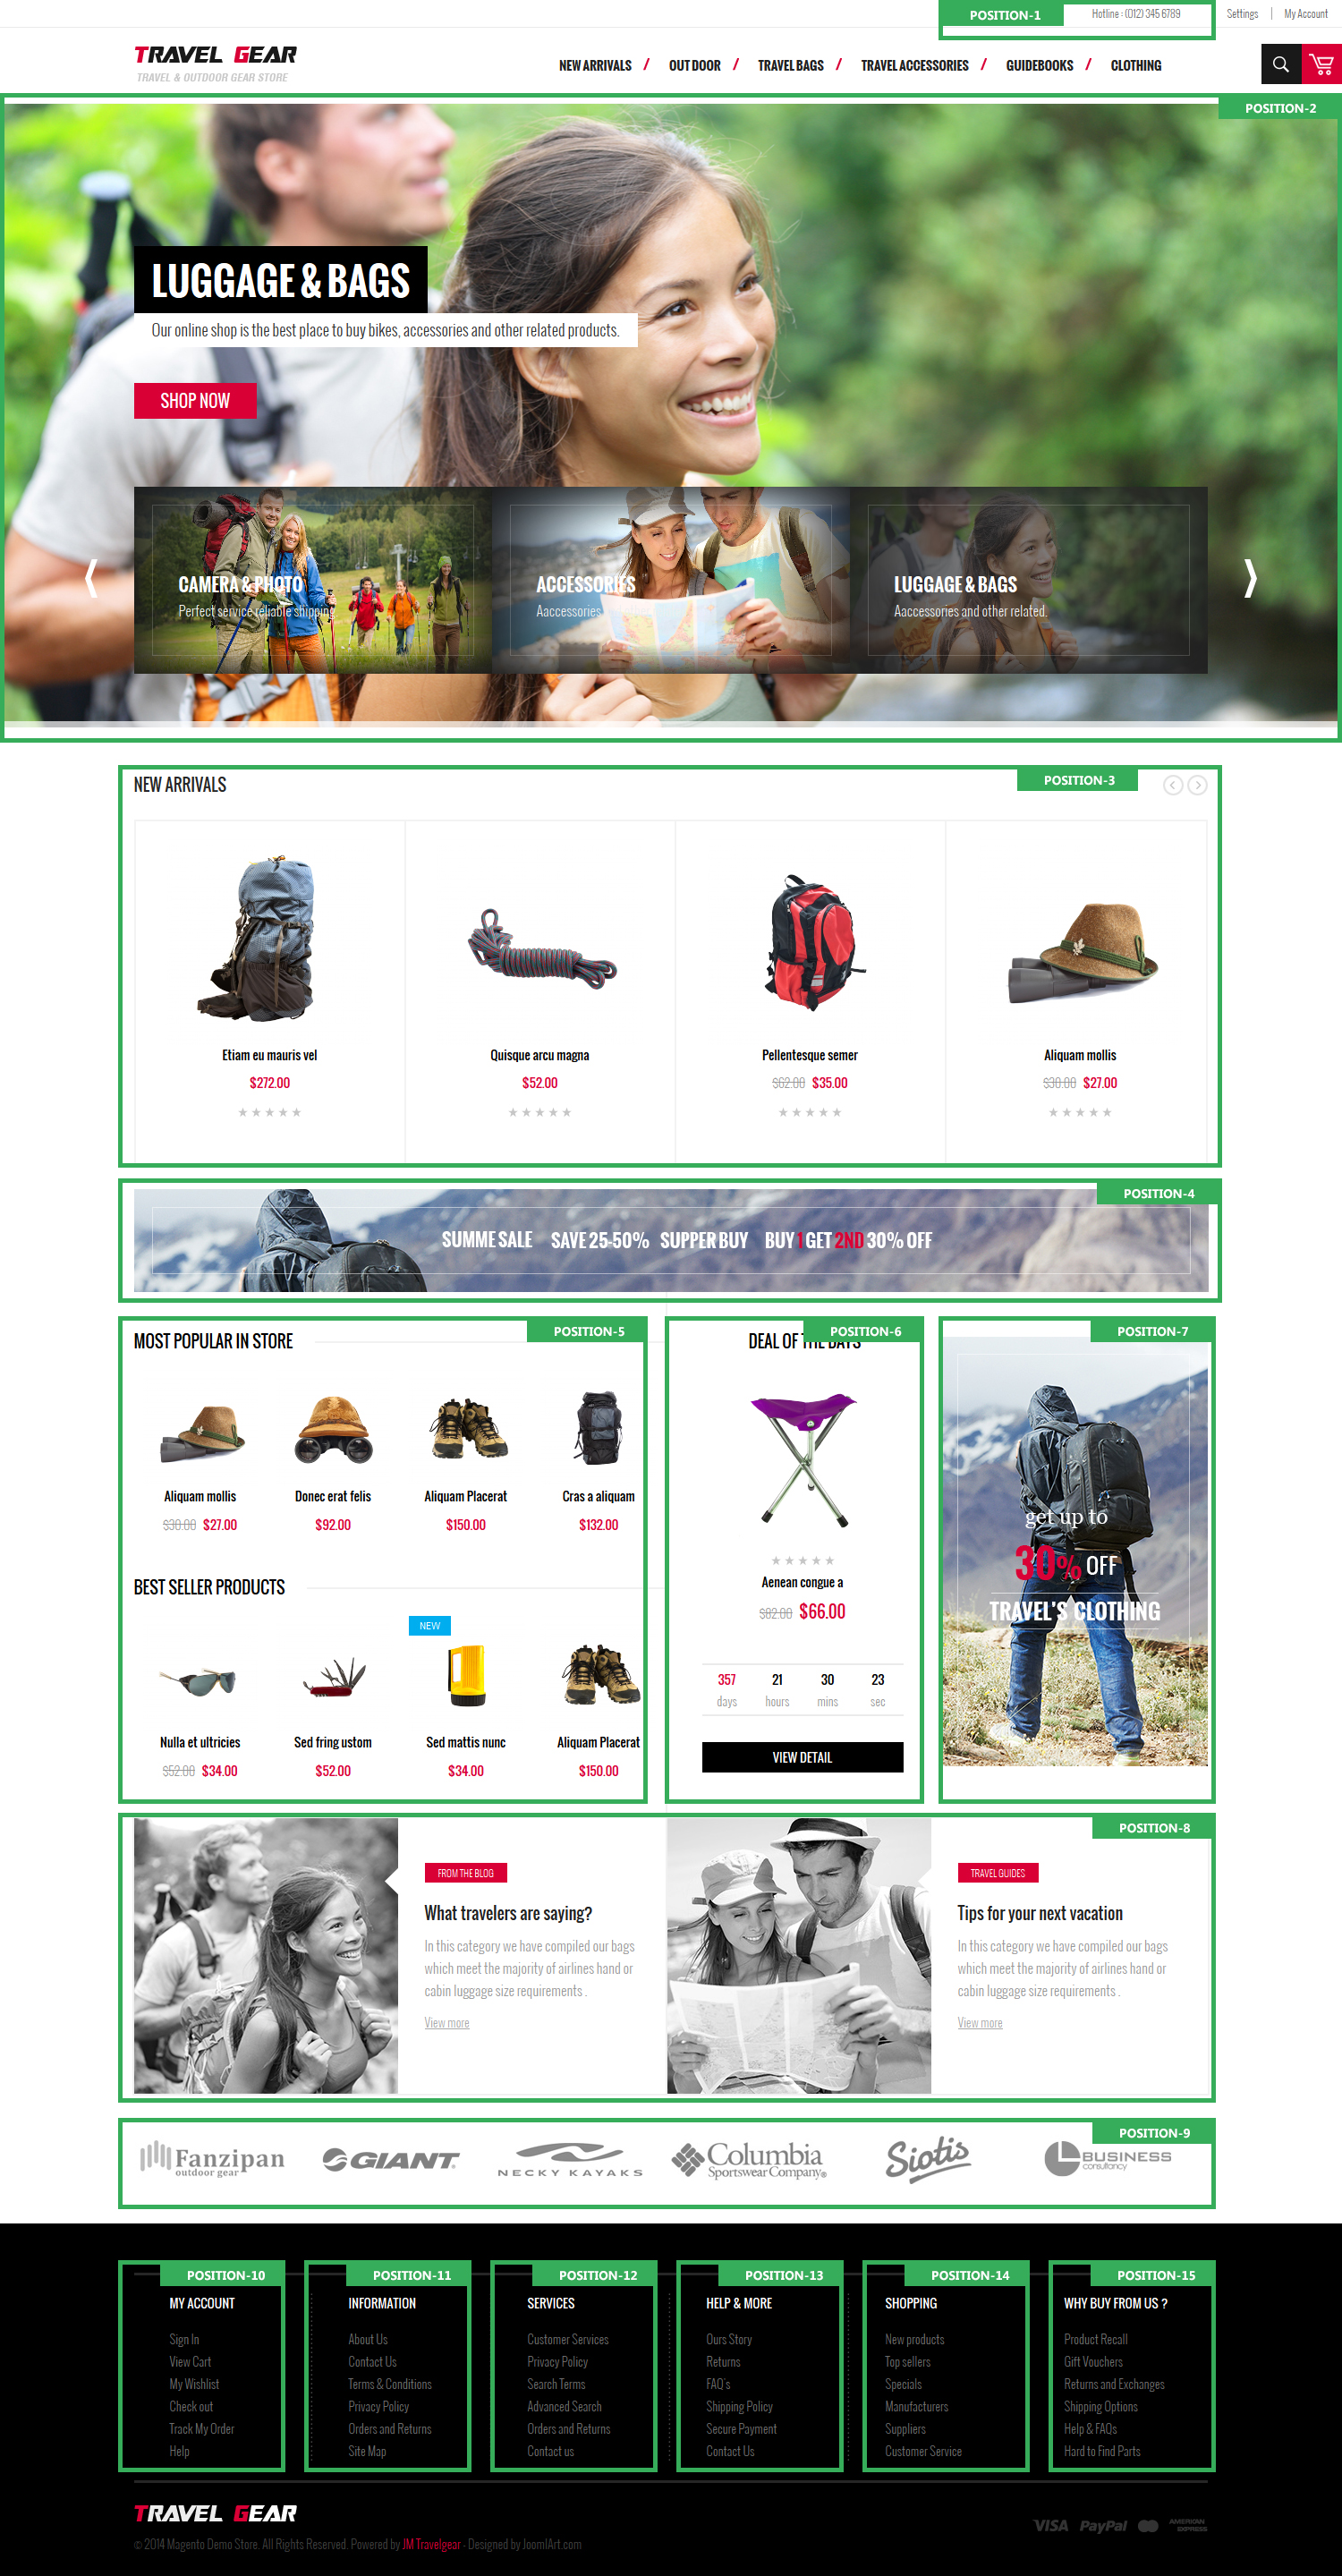
Accordingly, JM TravelGear comes up with these following static blocks:
position-1 | position-2 | position-3 | position-5 | position-6 | position-7 | position-8 | position-9 | position-10 | position-11 | position-12 | position-13 | position-14 | position-15 | mega-banner | contactinfo| mega-products | colors
Note:
To create new static blocks, read on here.
Download Instruction
System requirement
To install JM TravelGear, you have to install the Magento base in advance. You can get it done quickly by following the Magento Installation Guide.
Download packages
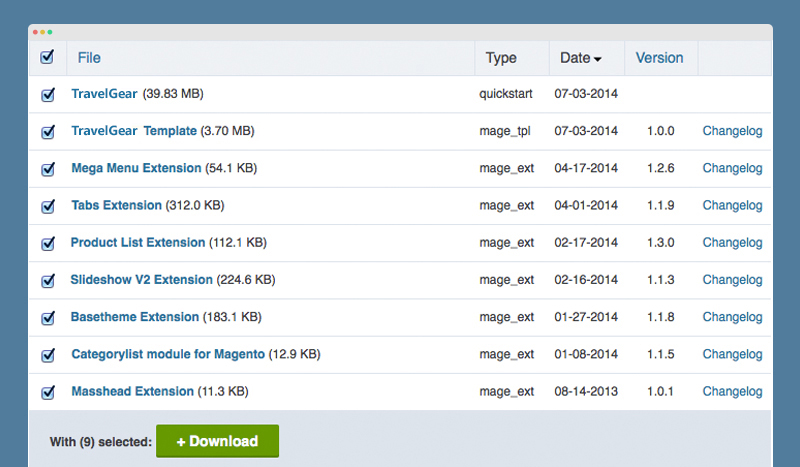 Download Packages
Once downloaded, extract JM TravelGear download package to get these folders:
- mage_ext: contains all built-in extensions of the theme.
- mage_tpl: contains the theme files only.
- quickstart: a full Magento version with JM TravelGear already integrated to match the demo.
- source: contains all source files of the theme.
Installation Instruction
There are two ways to install a Ubertheme Magento theme:
- Manual Installation: Applicable if your store is full with content that you don’t want to overwrite.
- QuickStart Installation: Applicable if you want to get a whole new fresh site as per Demo.
Provided that you have installed the Magento base already, decide which way to install and follow steps as below.
1. Manual Installation
Step 1: BaseTheme Installation
Extension basetheme is required to be installed before installing the other extensions and theme.
To install, copy the BaseTheme folder in the extracted folder mage_ext to your site root folder.
For more about BaseTheme, visit its detailed documentation.
Step 2: Theme Installation
1. Copy the folders skin and app to your site root folder. The overwritten folders should have a directory layout like this:
        {docroot} /magento/app/
        index.php
        js/
        lib/
        LICENSE.txt
        media/
        pear/
        skin/
        var/
2. Log in to your Admin Panel e.g. //localhost/magento/index.php/admin/. Log out and log in back.
3. Navigate to System >> Cache Management, Sellect All the cache types, take Action as Refresh and Submit.

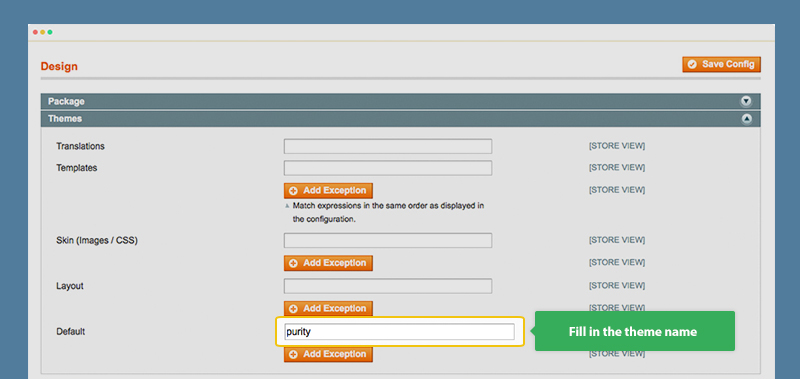
4. Navigate to System >> Configuration >> Design.
5. In Themes tab, input Default field with the actual theme name e.g. “jm_travelgear” instead of “purity”.
6. You can also change the settings for JM TravelGear Header.
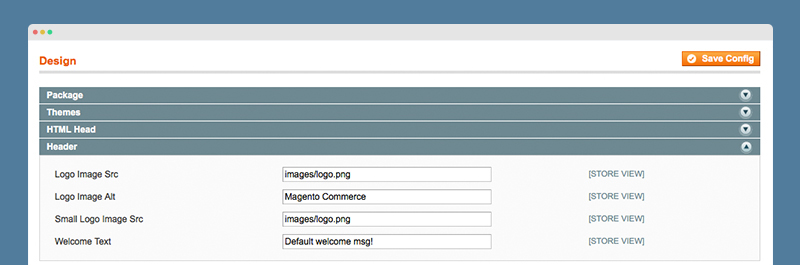
7. Click Save Config button to finish.
Step 3: Extension Installation
1. Copy all the folders of each extension folder in mage_ext to the your site root folder.
2. In your Admin Panel, navigate to System >> Configuration.
3. To enable any extension, enter this one’s tab and set Enable to “Yes”.
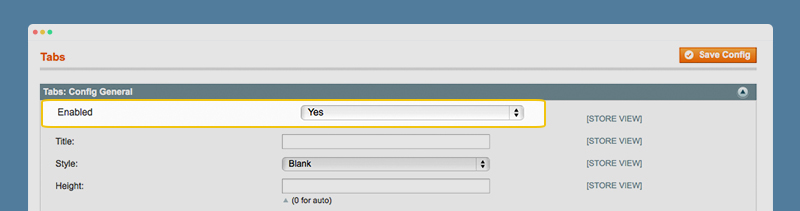
4. Click Save Config button to finish.
2. QuickStart Installation
Quickstart package is to minimize time and effort in installing the theme as per Demo site. Kindly note that, with Quickstart, all your existing data will be overwritten. Thus, we recommend using Quickstart for your first installation or just in case you want to refresh your site to the very beginning.
1. Upload the folder quickstart to your server. In Quickstart folder you will see the extracted folder that includes all sample data.
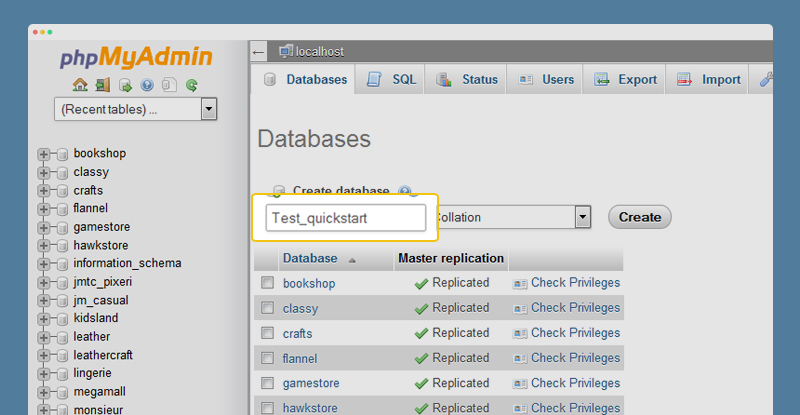
2. Create a database for your Magento store using phpMyAdmin.
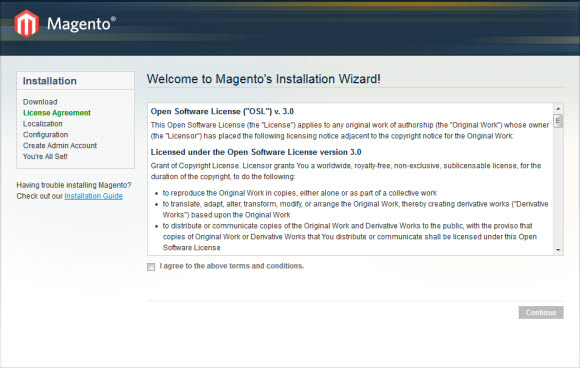
3. To install, open a browser and navigate to your URL (where the Quickstart package uploaded) to load the default Magento installer. Kindly follow each step of the Installer so that the installation process can be set.
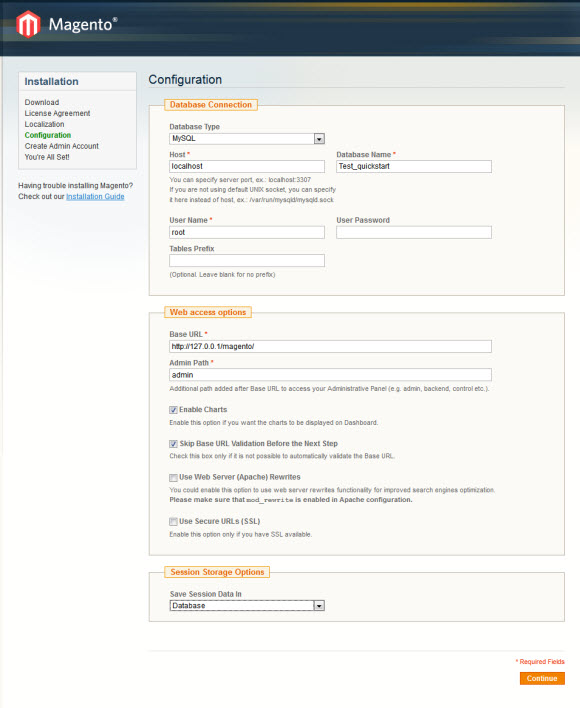
4. In the Configuration step, input the required fields as below.
- Do not use “localhost” in URL, otherwise you could not log in to your Admin area (you should use your local IP in case of installing on your computer).
- Leave Tables prefix field blank.
Upgrade Instruction
Take a full backup
Always make a back-up before proceeding to any of the upgrade process. In case there are any problem, you can always restore from the back-up files.
Upgrade Magento core
In case you need to upgrade Magento core for your eCommerce site e.g. upgrading Magento 1.7 to Magento 1.9, head over our detailed guide about this here.
Page Configuration
This section will guide you to configure your pages just as the Demo of JM TravelGear.
I. Homepage
Detailed layout of JM TravelGear Homepage:
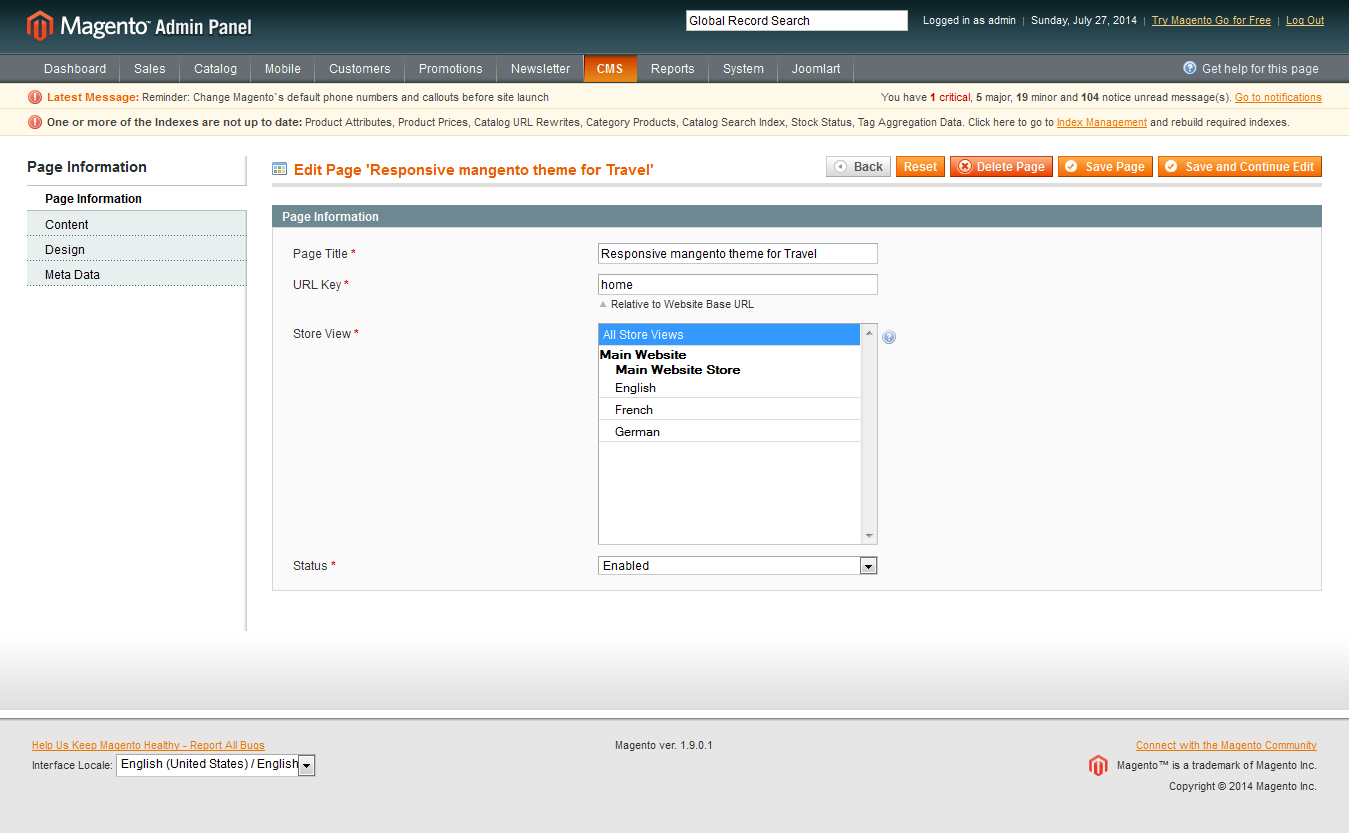
To configure this page, in the Admin Panel, navigate to CMS >> Pages.
Create a new page named {Homepage} in Page Management section.
- Page Information Tab: click to see the Back-end Settings.
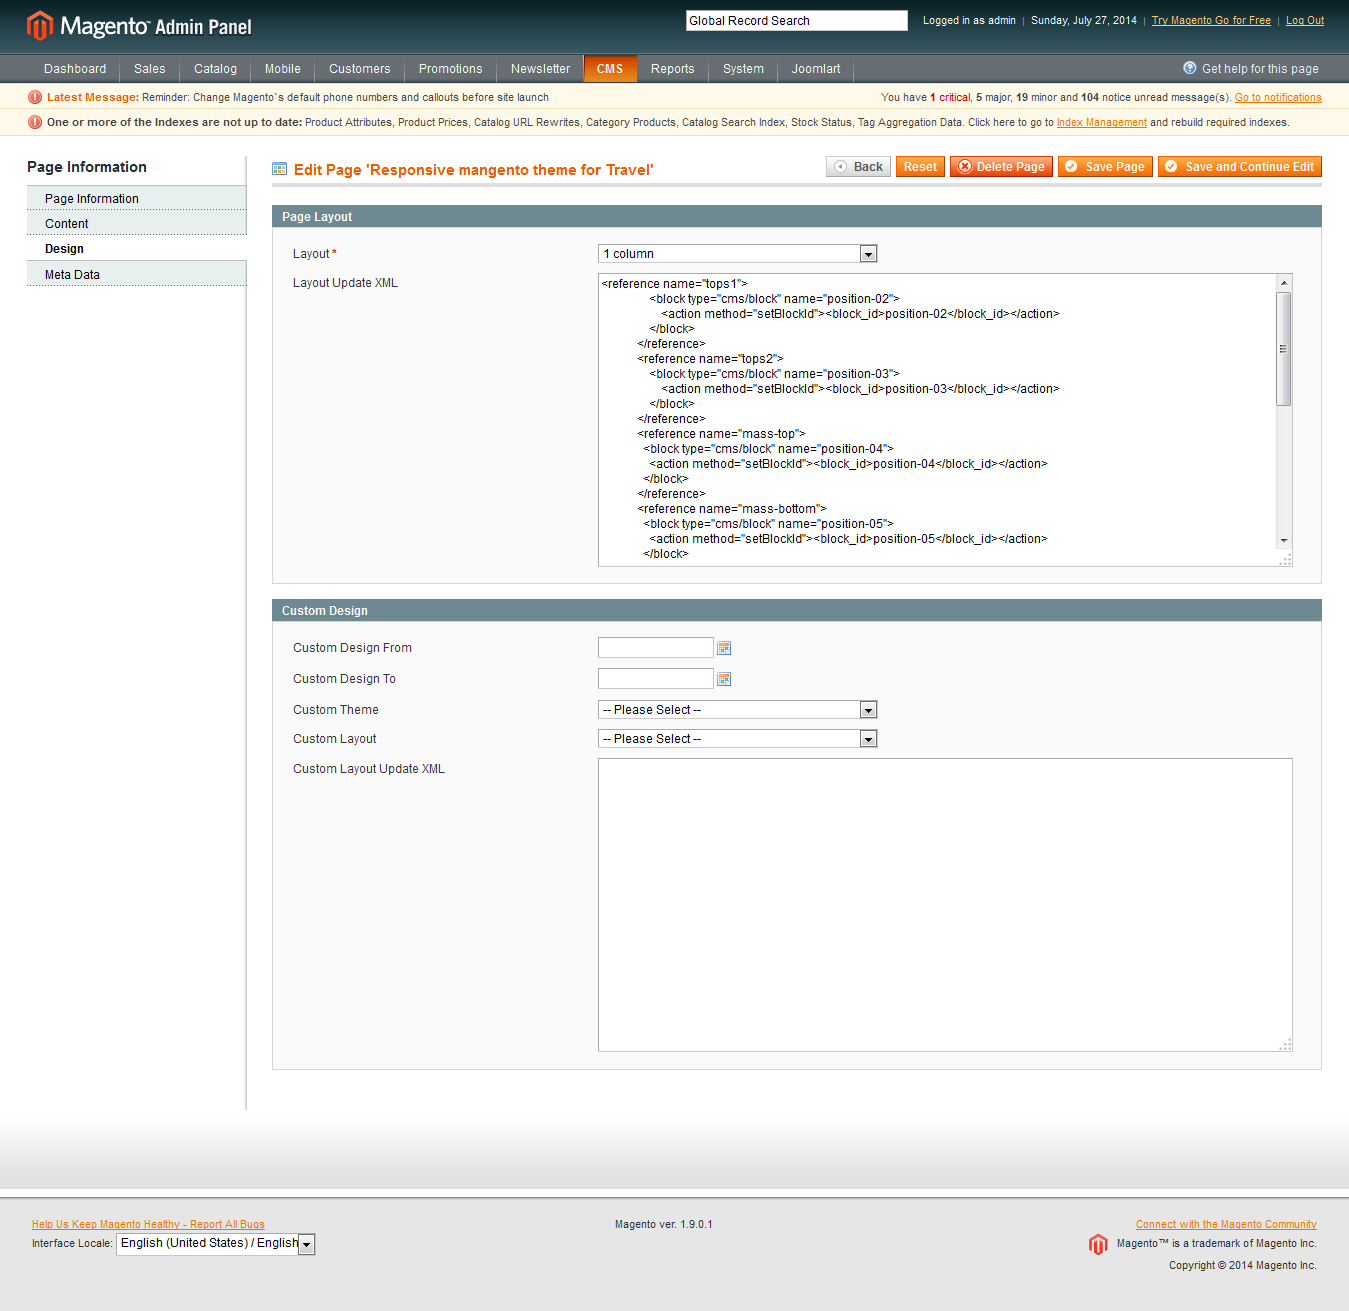
- Design Tab: click to see the Back-end Settings.
Copy and paste the following code into the Design field.
<reference name="tops1">
                <block type="cms/block" name="position-02">
                    <action method="setBlockId"><block_id>position-02</block_id></action>
                </block>
            </reference>
            <reference name="tops2">
                <block type="cms/block" name="position-03">
                    <action method="setBlockId"><block_id>position-03</block_id></action>
                </block>
            </reference>
            <reference name="mass-top">
              <block type="cms/block" name="position-04">
                <action method="setBlockId"><block_id>position-04</block_id></action>
              </block>
            </reference>
            <reference name="mass-bottom">
              <block type="cms/block" name="position-05">
                <action method="setBlockId"><block_id>position-05</block_id></action>
              </block>
              <block type="cms/block" name="position-06">
                <action method="setBlockId"><block_id>position-06</block_id></action>
              </block>
              <block type="cms/block" name="position-07">
                <action method="setBlockId"><block_id>position-07</block_id></action>
              </block>
            </reference>
            <reference name="bots1">
                <block type="cms/block" name="position-08">
                    <action method="setBlockId"><block_id>position-08</block_id></action>
                </block>
            </reference>
<reference name="bots2">
              <block type="cms/block" name="position-09">
                  <action method="setBlockId"><block_id>position-09</block_id></action>
              </block>
            </reference>
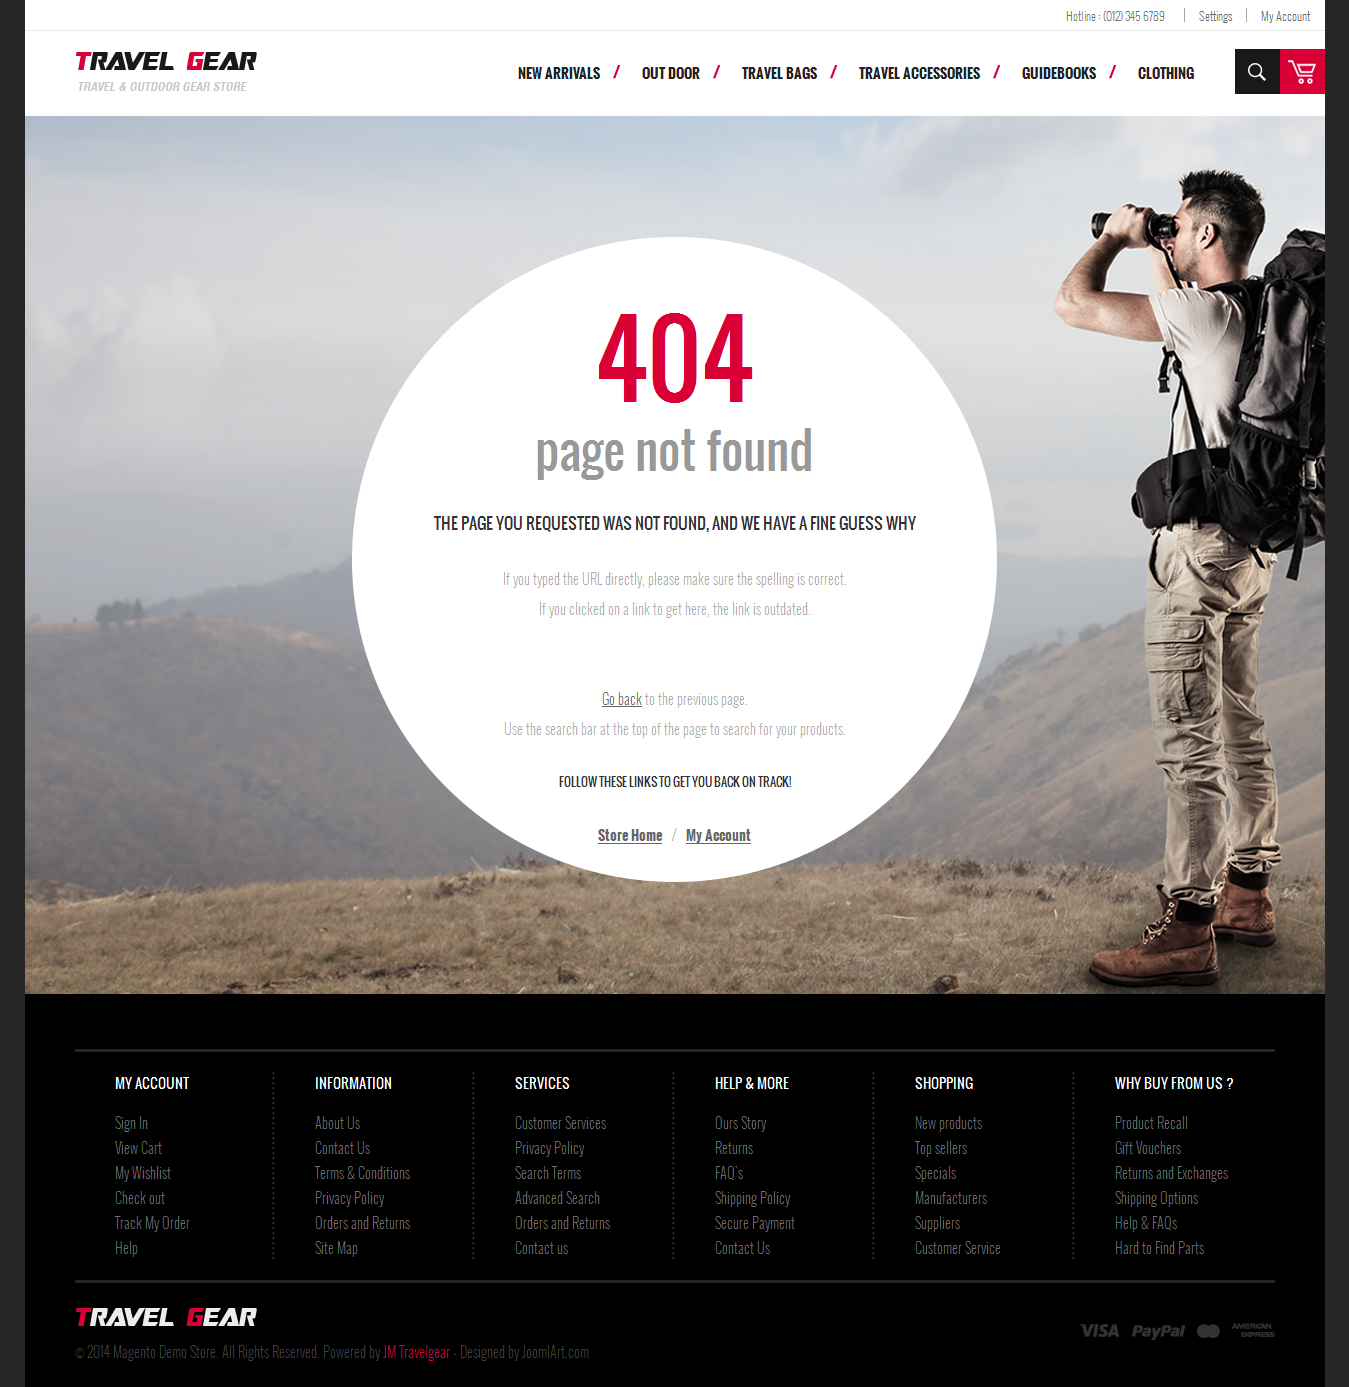
II. 404 Page
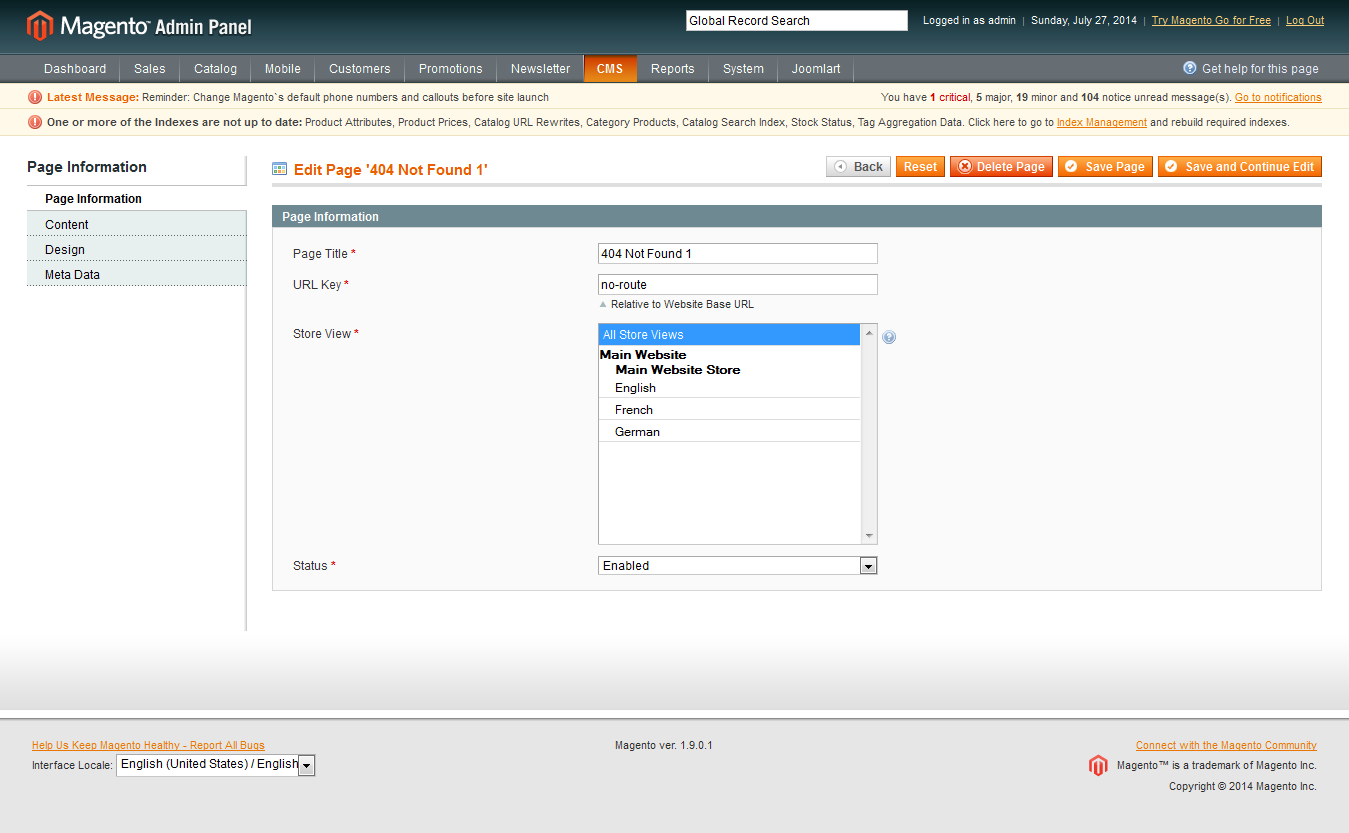
To configure this page, in the Admin Panel, navigate to CMS >> Pages, select 404 Not Found 1 page to edit the following settings.
- Page Information Tab: click to see the Back-end Settings.
- Content Tab: click to see the Back-end Settings.
Copy and paste the following code into the Content field.
<div class="jm-error-page">
<h1>404</h1>
<h2>page not found</h2>
<h3>The page you requested was not found, and we have a fine guess why</h3>
<p>If you typed the URL directly, please make sure the spelling is correct.</p>
<p>If you clicked on a link to get here, the link is outdated.</p>
<p> </p>
<p> </p>
<p><a onclick="history.go(-1);" href="#">Go back</a> to the previous page.</p>
<p>Use the search bar at the top of the page to search for your products.</p>
<h4>Follow these links to get you back on track!</h4>
<p class="links-actions"><a href="{{store url=""}}">Store Home</a>/<a href="{{store url="customer/account"}}">My Account</a></p>
</div>
Front-end Appearance:
Static Block Configuration
1. position-01: Hotline
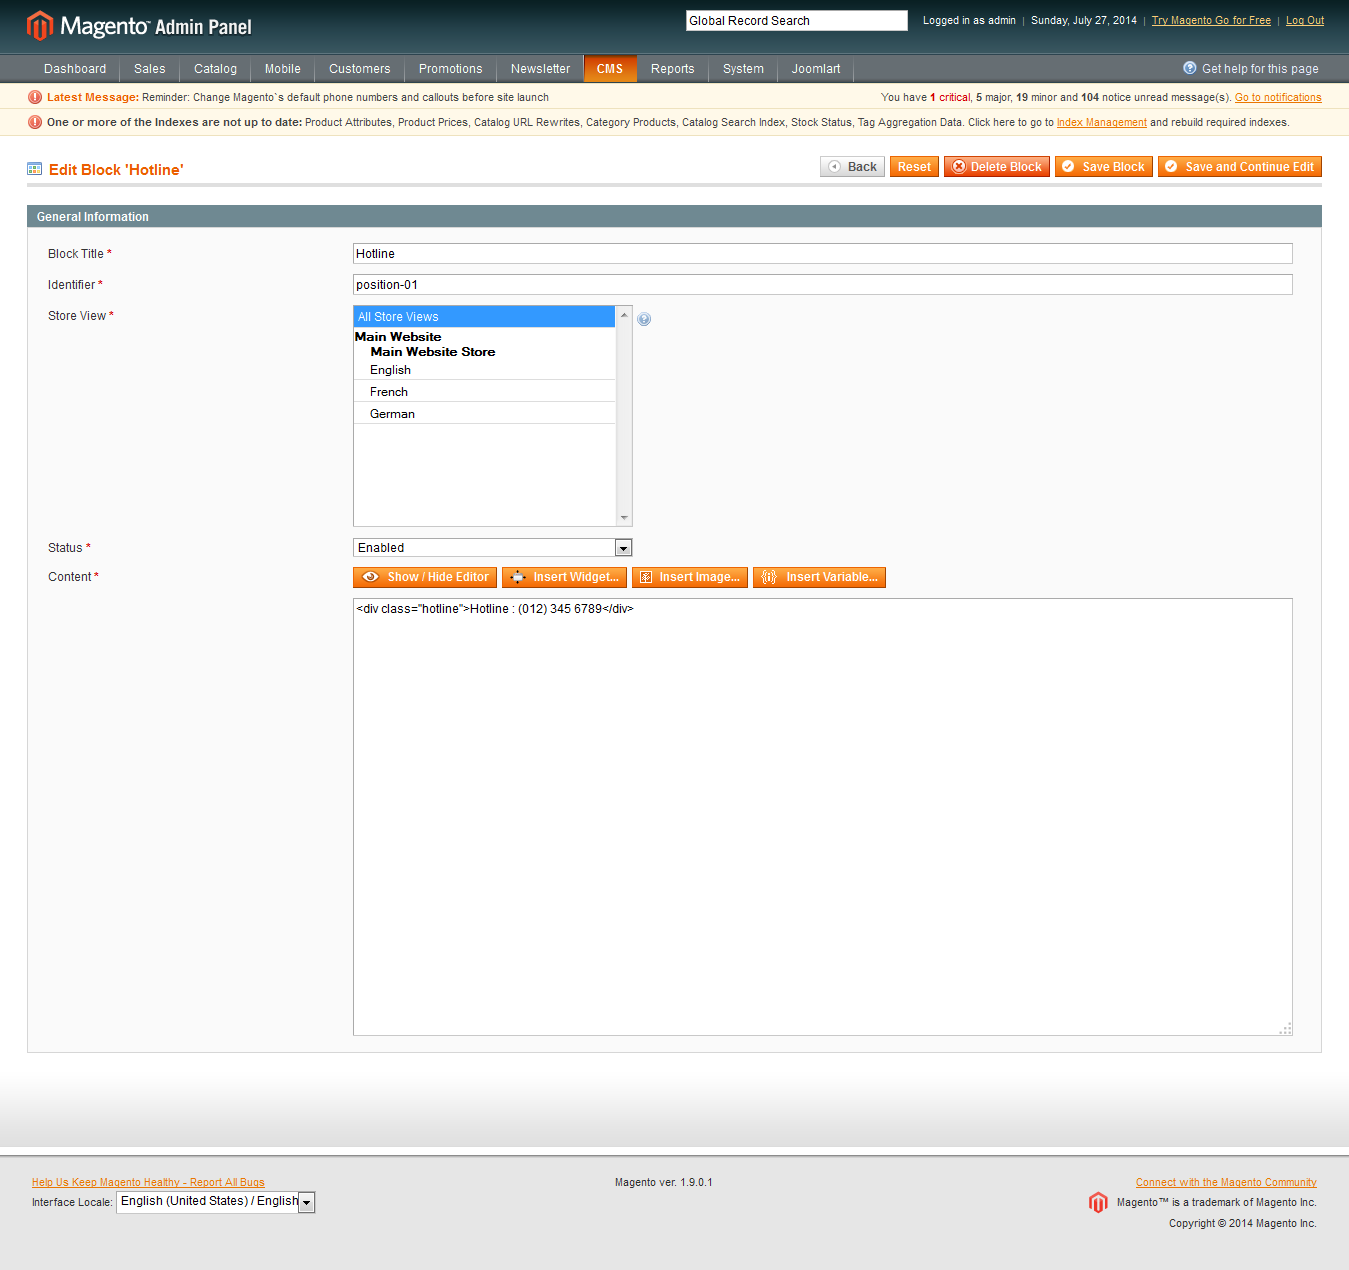
<div class="hotline">Hotline : (012) 345 6789</div>
Front-end Appearance:

2. position-02: JM Slideshow
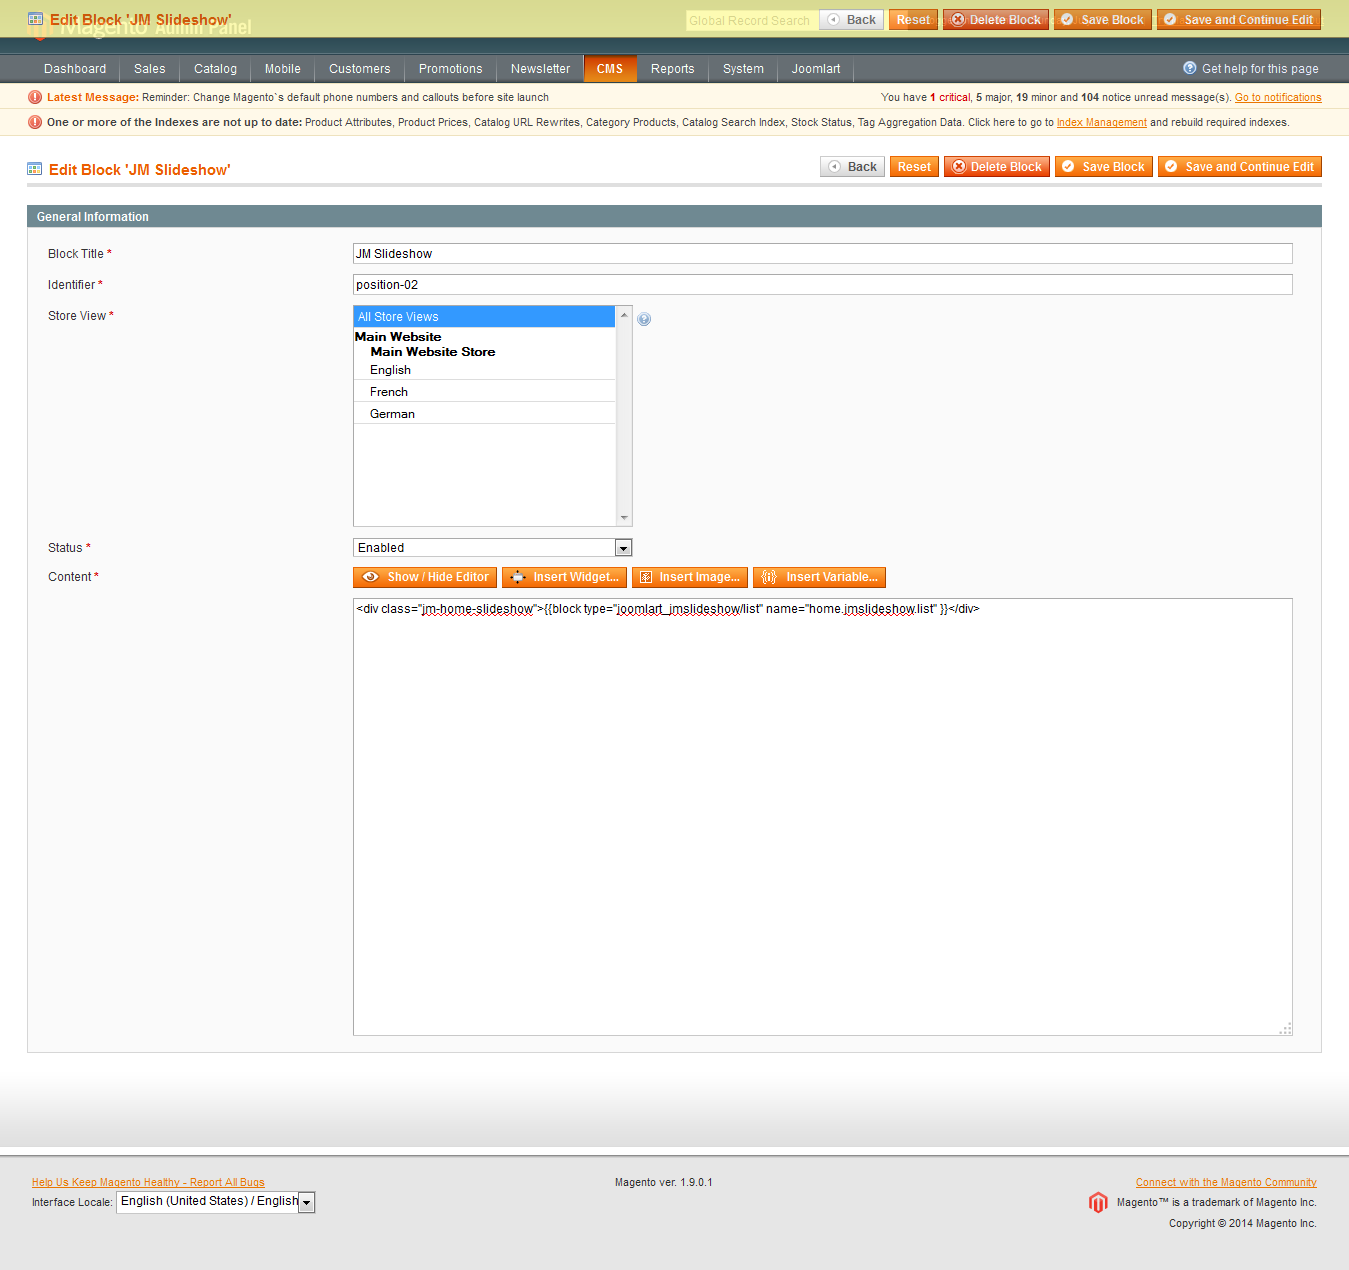
<div class="jm-home-slideshow">{{block type="joomlart_jmslideshow/list" name="home.jmslideshow.list" }}</div>
Front-end Appearance:

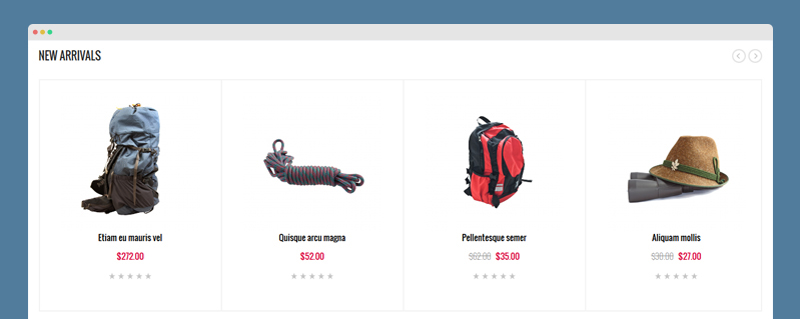
3. position-03: New arrivals
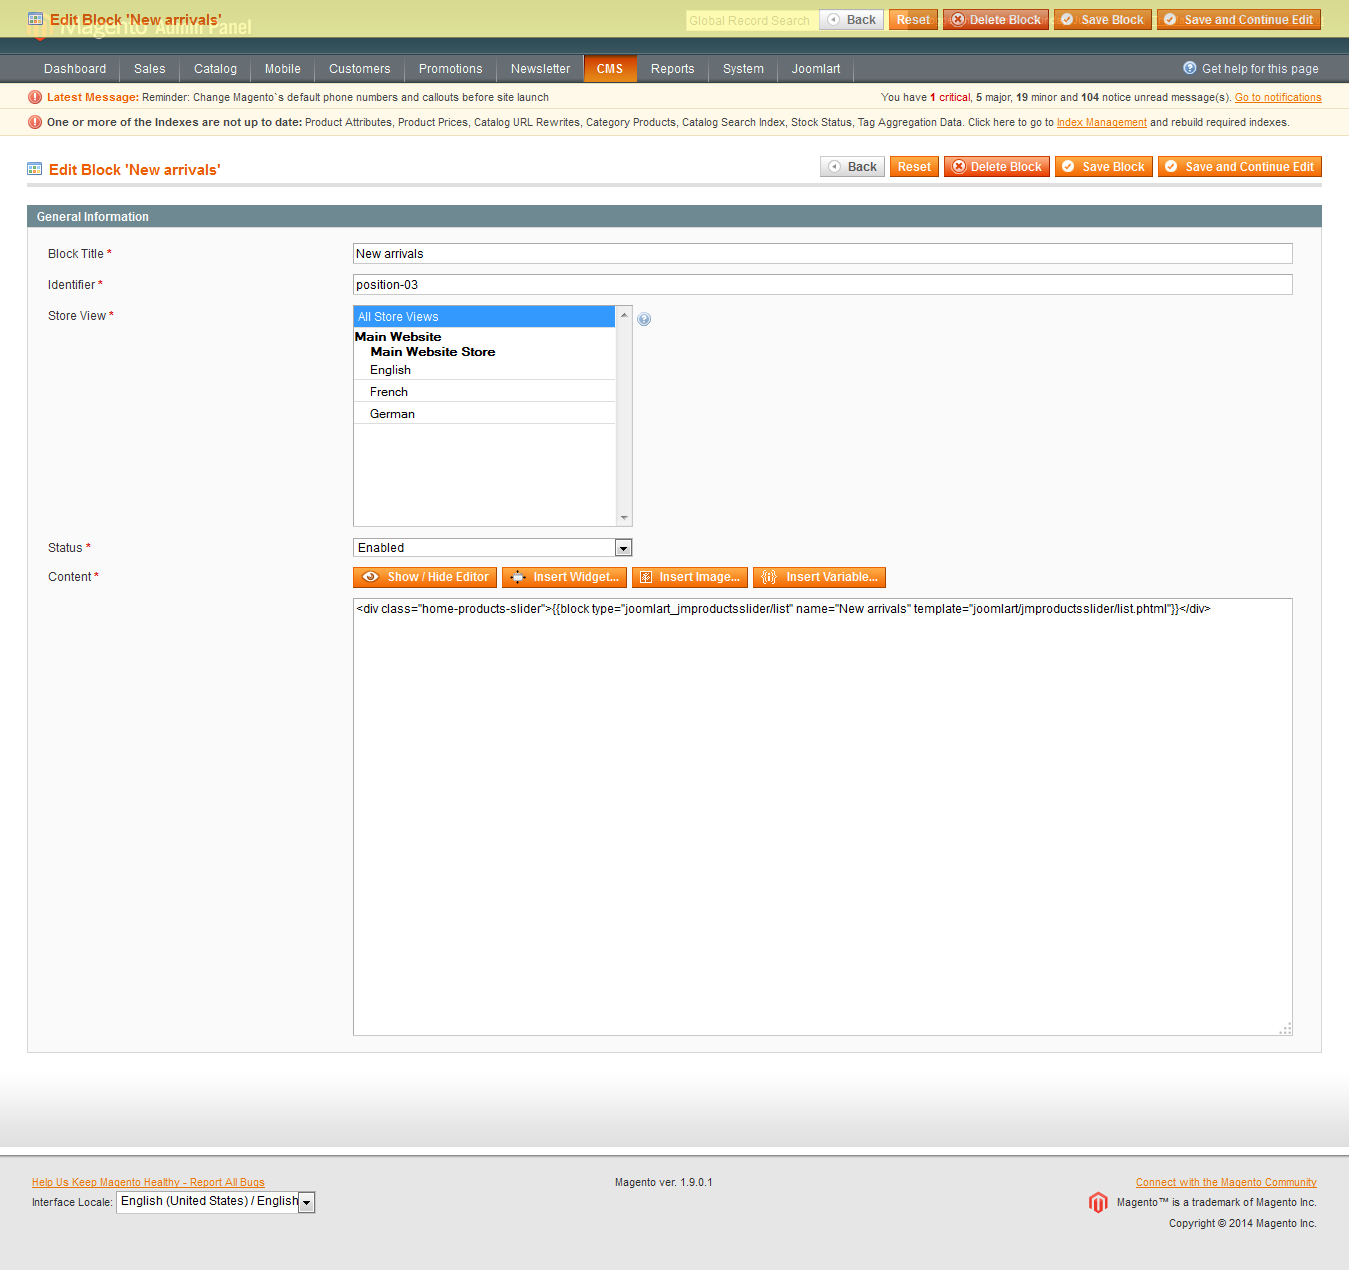
<div class="home-products-slider">{{block type="joomlart_jmproductsslider/list" name="New arrivals" template="joomlart/jmproductsslider/list.phtml"}}</div>
Front-end Appearance:

4. position-04: Save 25-50%
<div class="sale-off-items"><a href="{{store direct_url="all-collecttions.html"}}"><img src="{{media url="wysiwyg/banners/banner01.jpg"}}" alt="Save 25-50%" /></a></div>
Front-end Appearance:

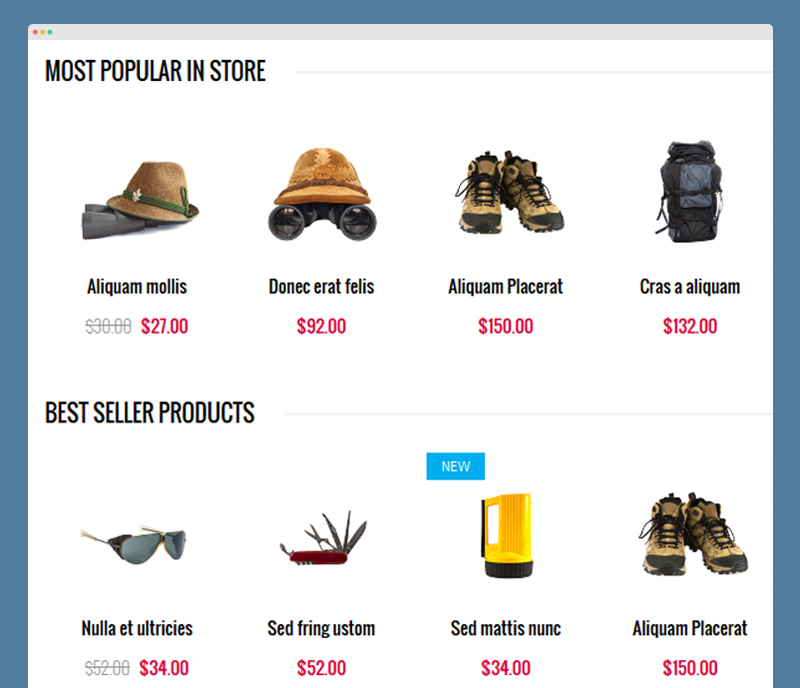
5. position-05: List products
<div class="home-jmproducts-list">
<div class="home-productslist-lastest">{{block type="joomlart_jmproducts/list" title="Most popular in store" name="home.jmproducts.list" catsid="16"}}</div>
<div class="home-best-seller">{{block type="joomlart_jmproducts/list" title="best seller products" name="home.jmproducts.list" catsid="8"}}</div>
</div>
Front-end Appearance:

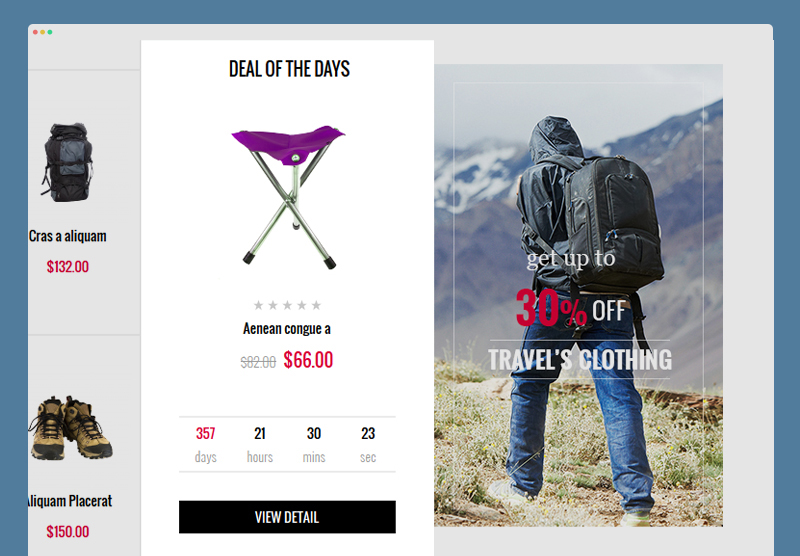
6. position-06: Deal of the days
<div class="home-deal">{{block type="joomlart_jmproductsdeal/list" name="home.jmproductsdeal.list" title="deal of the days" quanlity="1" mode="latest"}}</div>
Front-end Appearance:
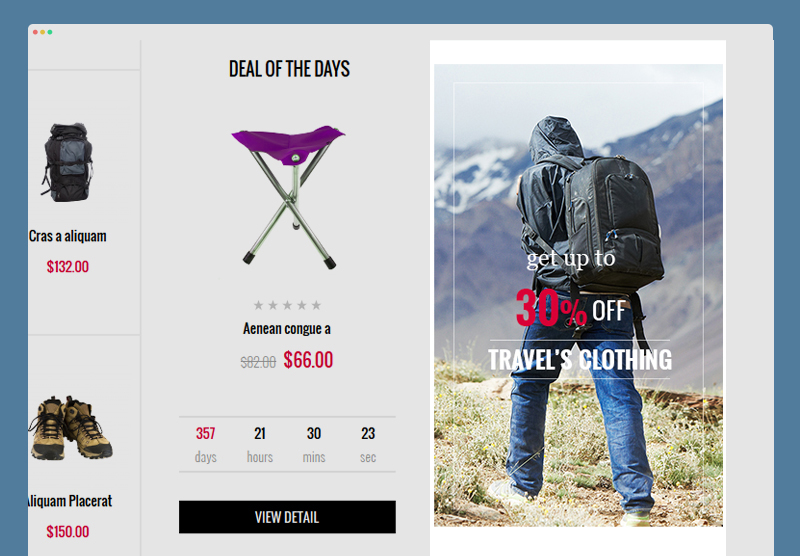
7. position-07: Right Banner Home
<div class="home-banner-right"><a href="{{store direct_url="travel-accessories.html"}}"><img src="{{media url="wysiwyg/banners/banner02.jpg"}}" alt="" /></a></div>
Front-end Appearance:
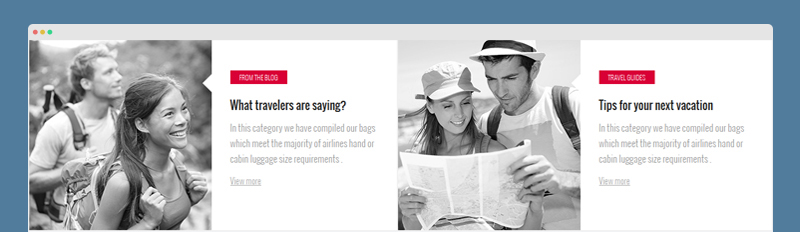
8. position-08: Last News
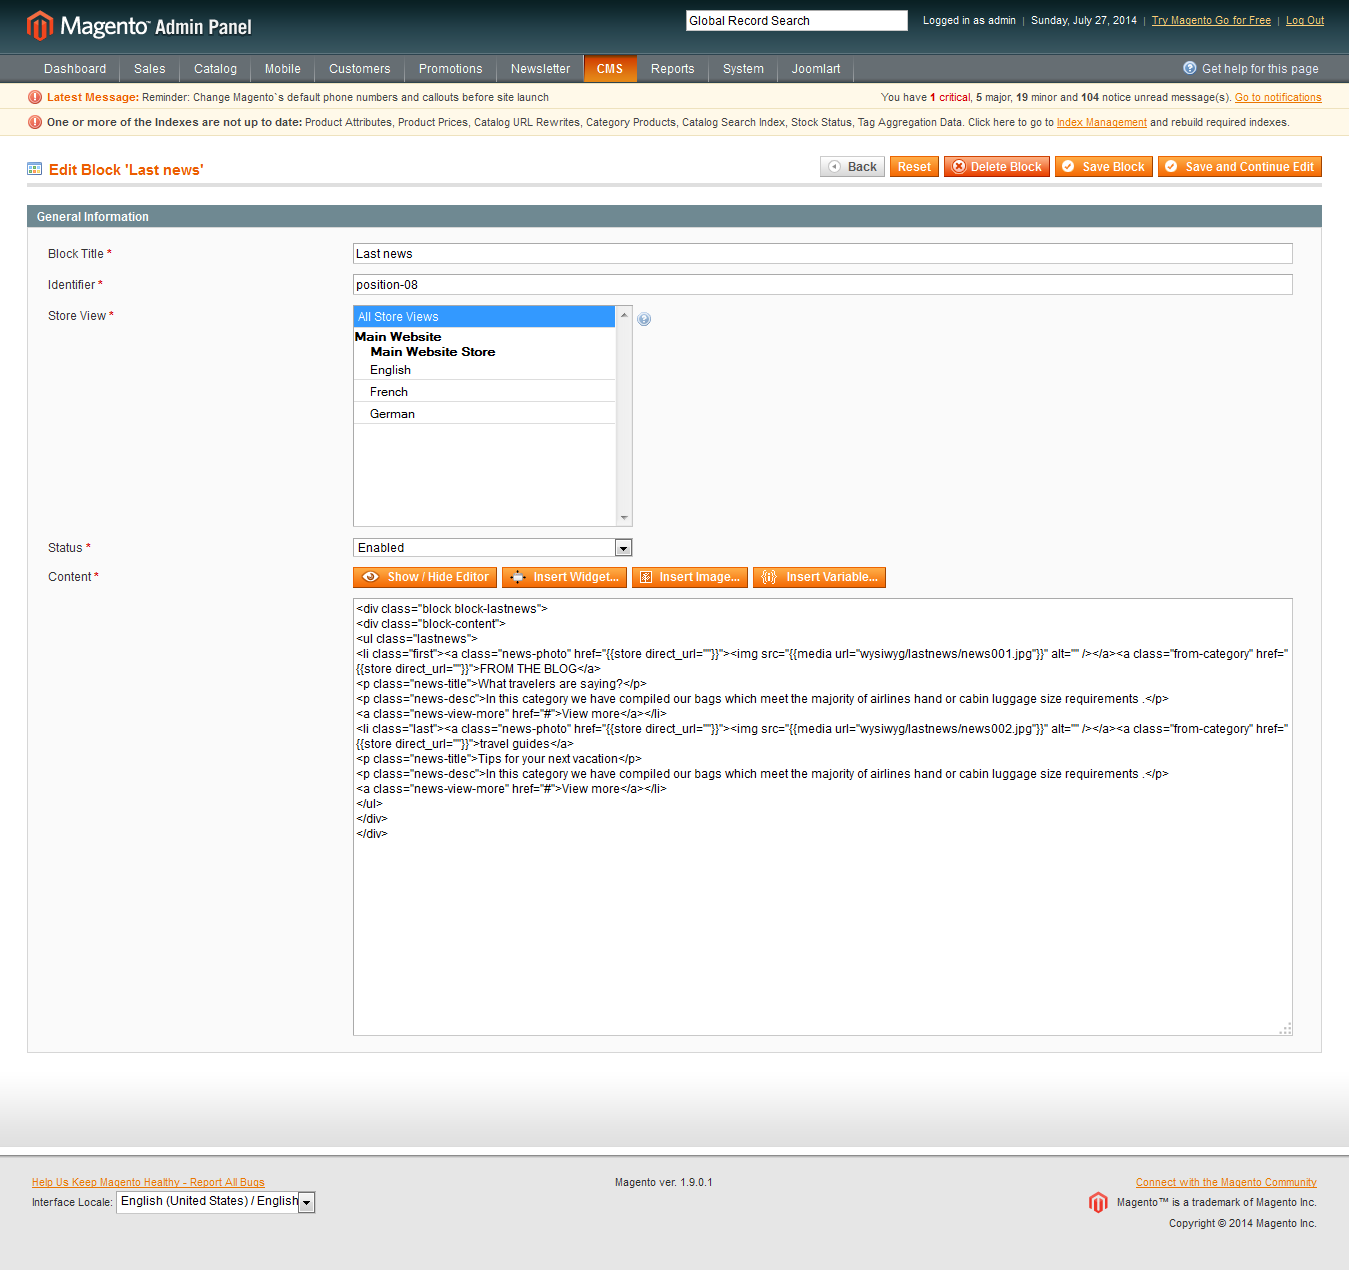
<div class="block block-lastnews">
<div class="block-content">
<ul class="lastnews">
<li class="first"><a class="news-photo" href="{{store direct_url=""}}"><img src="{{media url="wysiwyg/lastnews/news001.jpg"}}" alt="" /></a><a class="from-category" href="{{store direct_url=""}}">FROM THE BLOG</a>
<p class="news-title">What travelers are saying?</p>
<p class="news-desc">In this category we have compiled our bags which meet the majority of airlines hand or cabin luggage size requirements .</p>
<a class="news-view-more" href="#">View more</a></li>
<li class="last"><a class="news-photo" href="{{store direct_url=""}}"><img src="{{media url="wysiwyg/lastnews/news002.jpg"}}" alt="" /></a><a class="from-category" href="{{store direct_url=""}}">travel guides</a>
<p class="news-title">Tips for your next vacation</p>
<p class="news-desc">In this category we have compiled our bags which meet the majority of airlines hand or cabin luggage size requirements .</p>
<a class="news-view-more" href="#">View more</a></li>
</ul>
</div>
</div>
Front-end Appearance:
9. position-09: Logo Brands
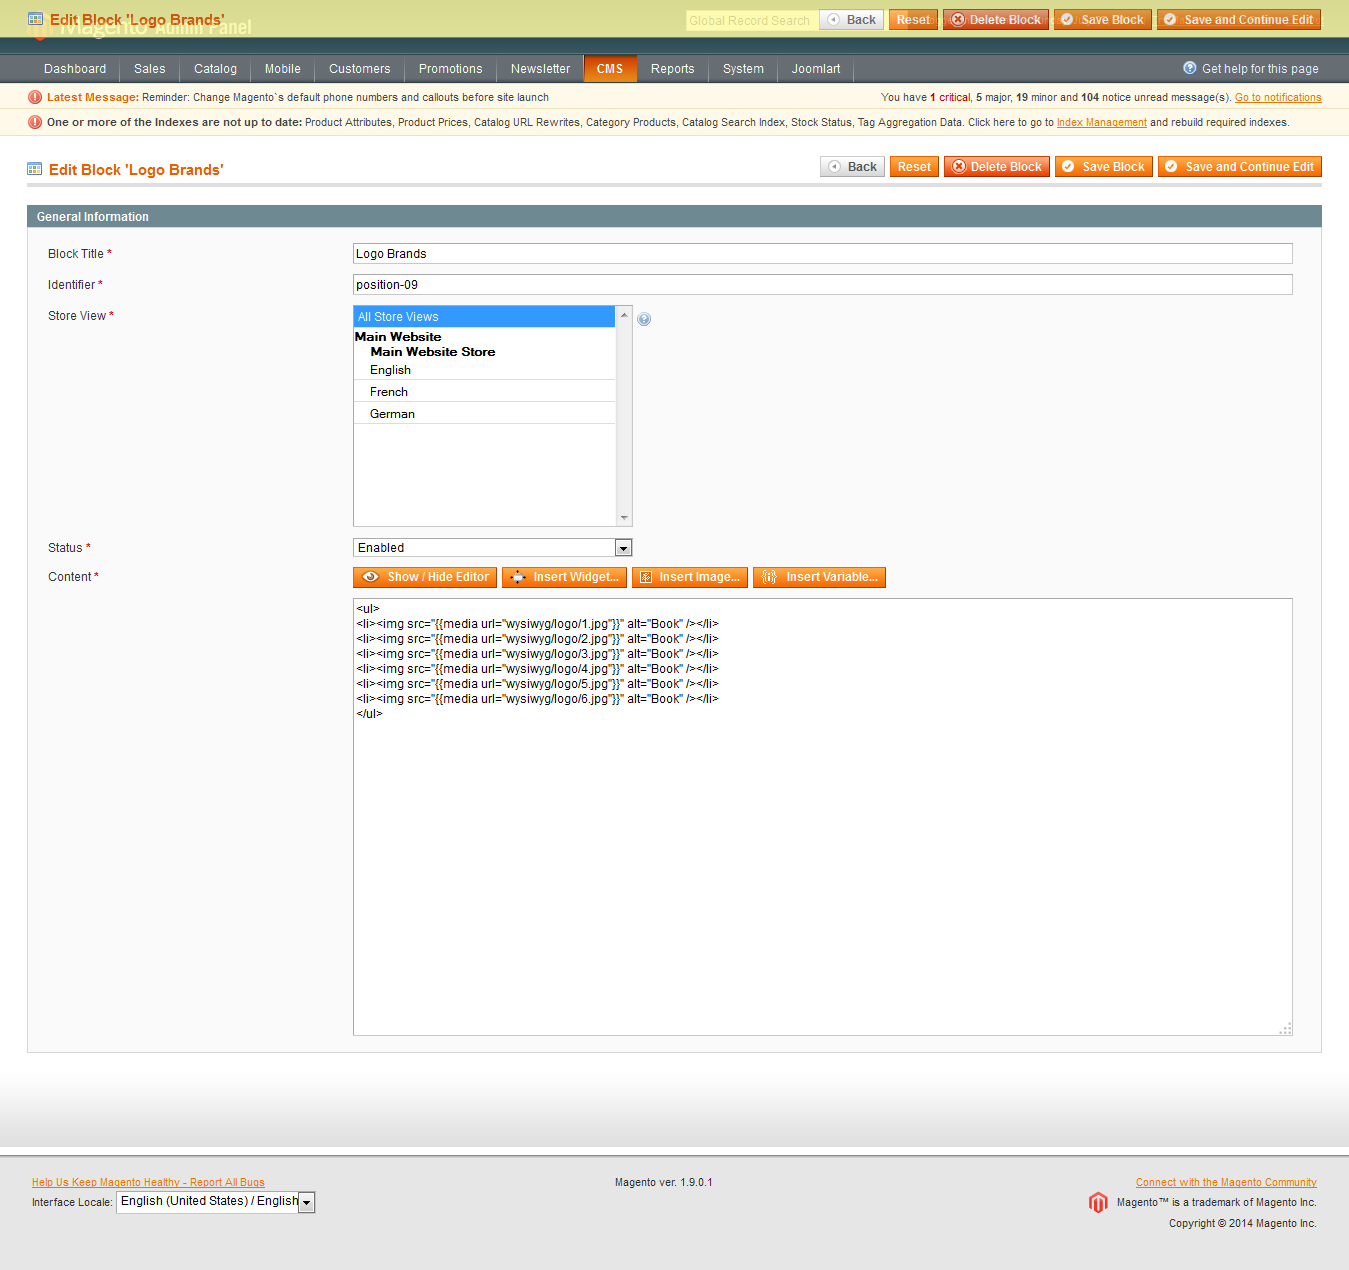
<ul>
<li><img src="{{media url="wysiwyg/logo/1.jpg"}}" alt="Book" /></li>
<li><img src="{{media url="wysiwyg/logo/2.jpg"}}" alt="Book" /></li>
<li><img src="{{media url="wysiwyg/logo/3.jpg"}}" alt="Book" /></li>
<li><img src="{{media url="wysiwyg/logo/4.jpg"}}" alt="Book" /></li>
<li><img src="{{media url="wysiwyg/logo/5.jpg"}}" alt="Book" /></li>
<li><img src="{{media url="wysiwyg/logo/6.jpg"}}" alt="Book" /></li>
</ul>
Front-end Appearance:

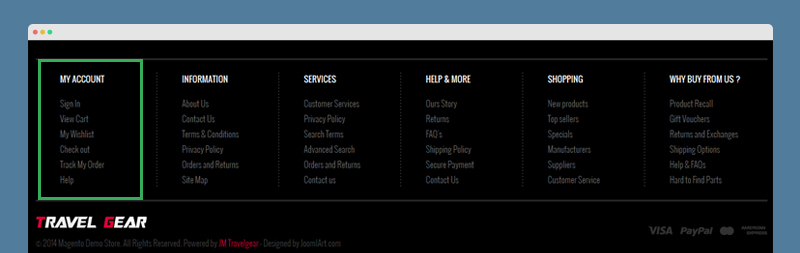
10. position-10: My Account
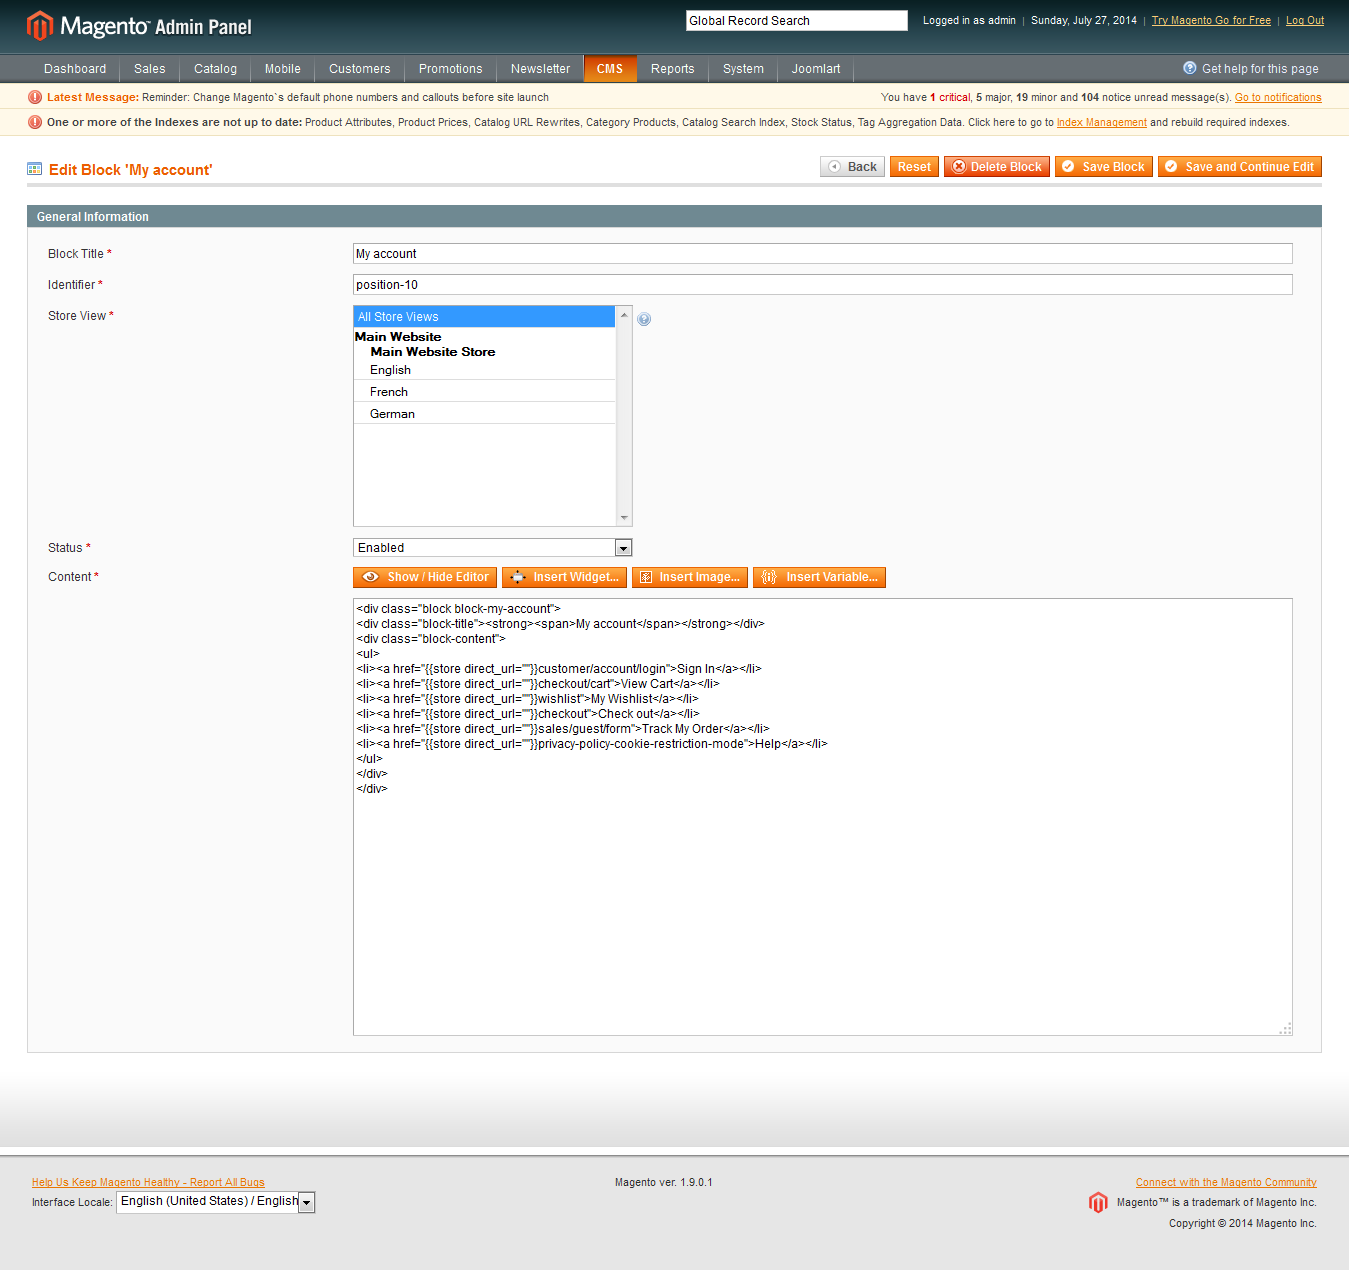
<div class="block block-my-account">
<div class="block-title"><strong><span>My account</span></strong></div>
<div class="block-content">
<ul>
<li><a href="{{store direct_url=""}}customer/account/login">Sign In</a></li>
<li><a href="{{store direct_url=""}}checkout/cart">View Cart</a></li>
<li><a href="{{store direct_url=""}}wishlist">My Wishlist</a></li>
<li><a href="{{store direct_url=""}}checkout">Check out</a></li>
<li><a href="{{store direct_url=""}}sales/guest/form">Track My Order</a></li>
<li><a href="{{store direct_url=""}}privacy-policy-cookie-restriction-mode">Help</a></li>
</ul>
</div>
</div>
Front-end Appearance:
11. position-11: Information
<div class="block block-information">
<div class="block-title"><strong><span>Information</span></strong></div>
<div class="block-content">
<ul>
<li><a href="{{store direct_url=""}}about-us">About Us </a></li>
<li><a href="{{store direct_url=""}}contacts">Contact Us</a></li>
<li><a href="{{store direct_url=""}}privacy-policy">Terms & Conditions</a></li>
<li><a href="{{store direct_url=""}}privacy-policy">Privacy Policy </a></li>
<li><a href="{{store direct_url=""}}sales/guest/form">Orders and Returns</a></li>
<li><a href="{{store direct_url=""}}catalog/seo_sitemap/category">Site Map</a></li>
</ul>
</div>
</div>
Front-end Appearance:

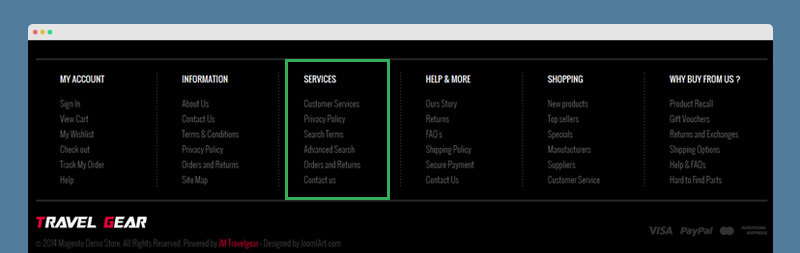
12. position-12: Services
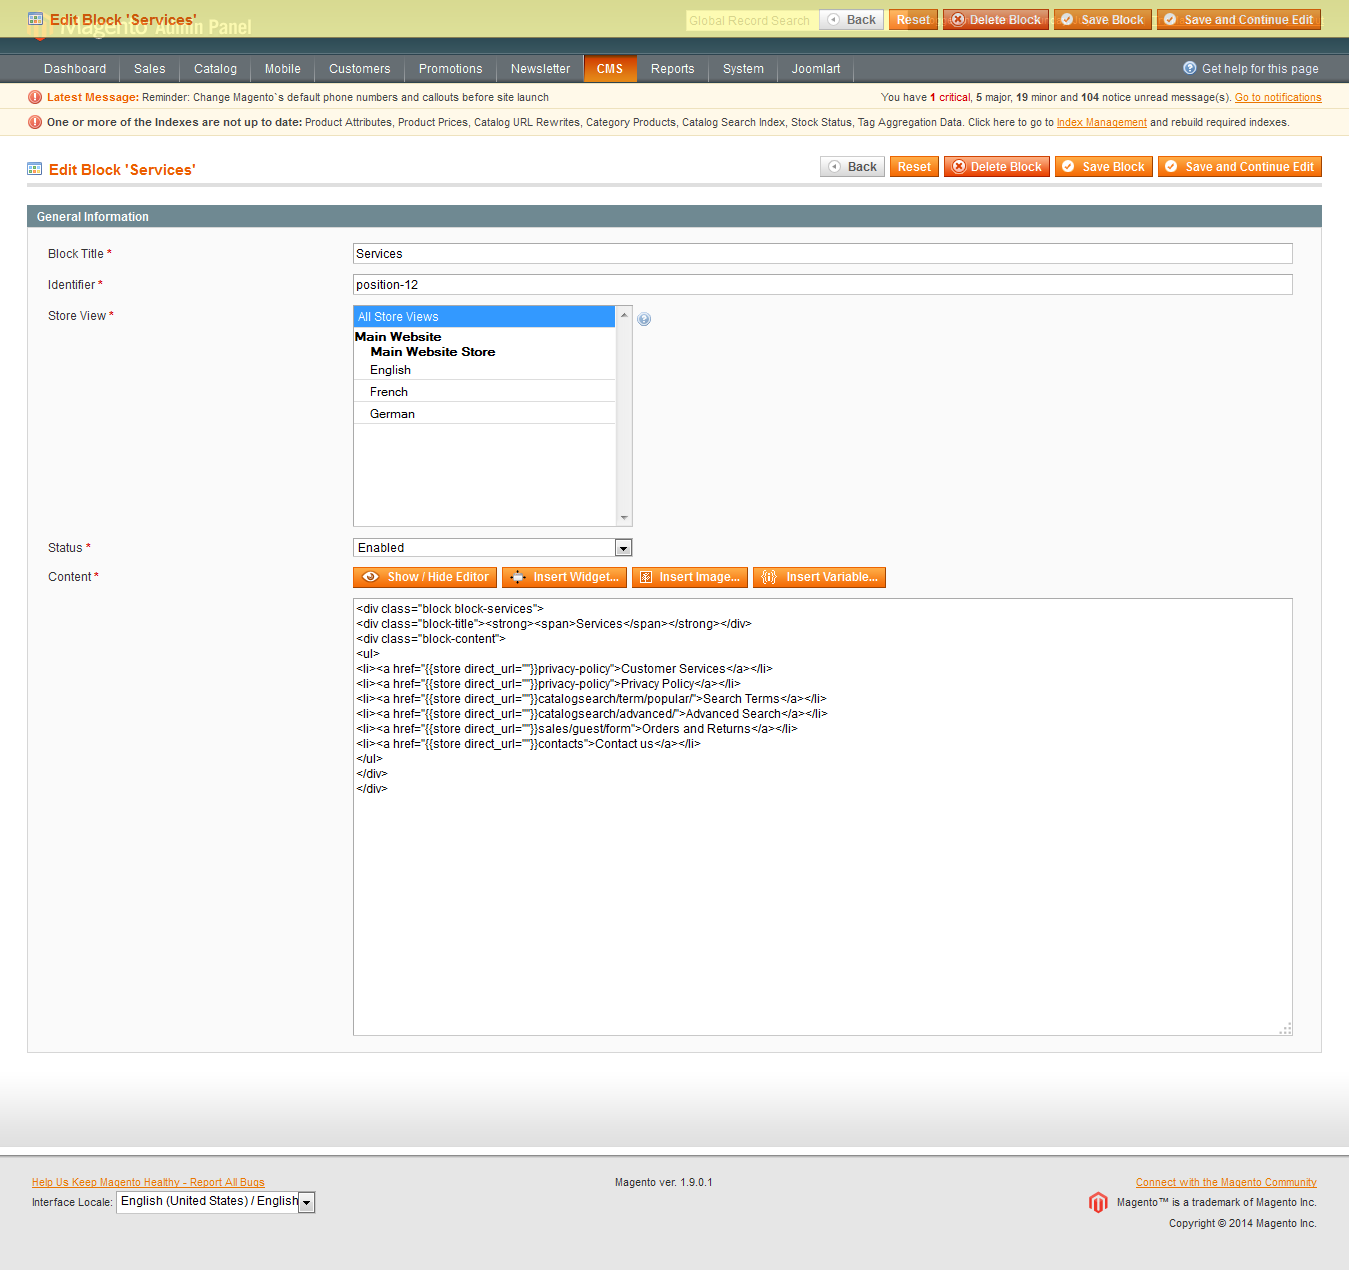
<div class="block block-services">
<div class="block-title"><strong><span>Services</span></strong></div>
<div class="block-content">
<ul>
<li><a href="{{store direct_url=""}}privacy-policy">Customer Services</a></li>
<li><a href="{{store direct_url=""}}privacy-policy">Privacy Policy</a></li>
<li><a href="{{store direct_url=""}}catalogsearch/term/popular/">Search Terms</a></li>
<li><a href="{{store direct_url=""}}catalogsearch/advanced/">Advanced Search</a></li>
<li><a href="{{store direct_url=""}}sales/guest/form">Orders and Returns</a></li>
<li><a href="{{store direct_url=""}}contacts">Contact us</a></li>
</ul>
</div>
</div>
Front-end Appearance:
13. position-13: Help & More
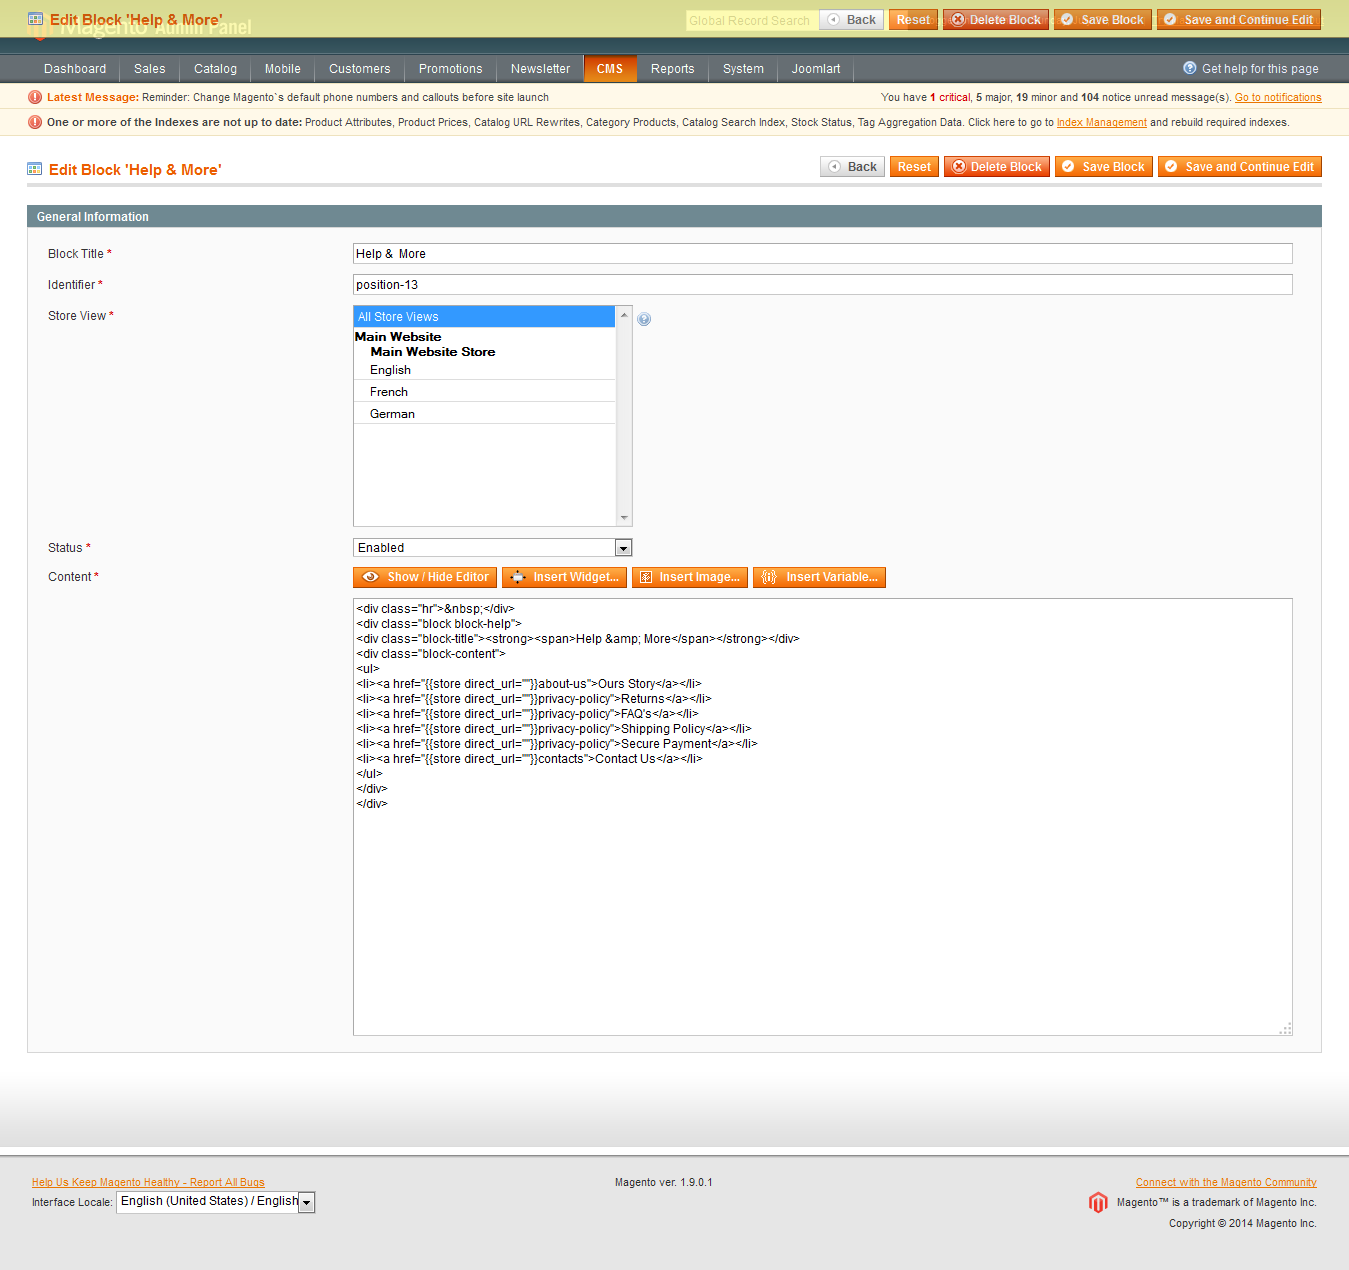
<div class="hr"> </div>
<div class="block block-help">
<div class="block-title"><strong><span>Help & More</span></strong></div>
<div class="block-content">
<ul>
<li><a href="{{store direct_url=""}}about-us">Ours Story</a></li>
<li><a href="{{store direct_url=""}}privacy-policy">Returns</a></li>
<li><a href="{{store direct_url=""}}privacy-policy">FAQ's</a></li>
<li><a href="{{store direct_url=""}}privacy-policy">Shipping Policy</a></li>
<li><a href="{{store direct_url=""}}privacy-policy">Secure Payment</a></li>
<li><a href="{{store direct_url=""}}contacts">Contact Us</a></li>
</ul>
</div>
</div>
Front-end Appearance:
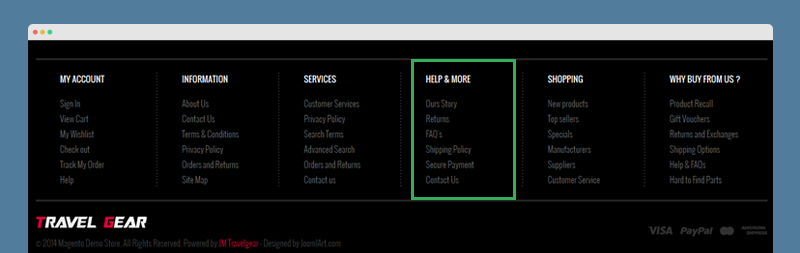
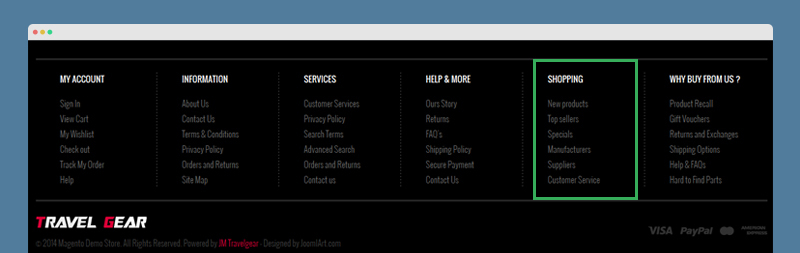
14. position-14: Shopping
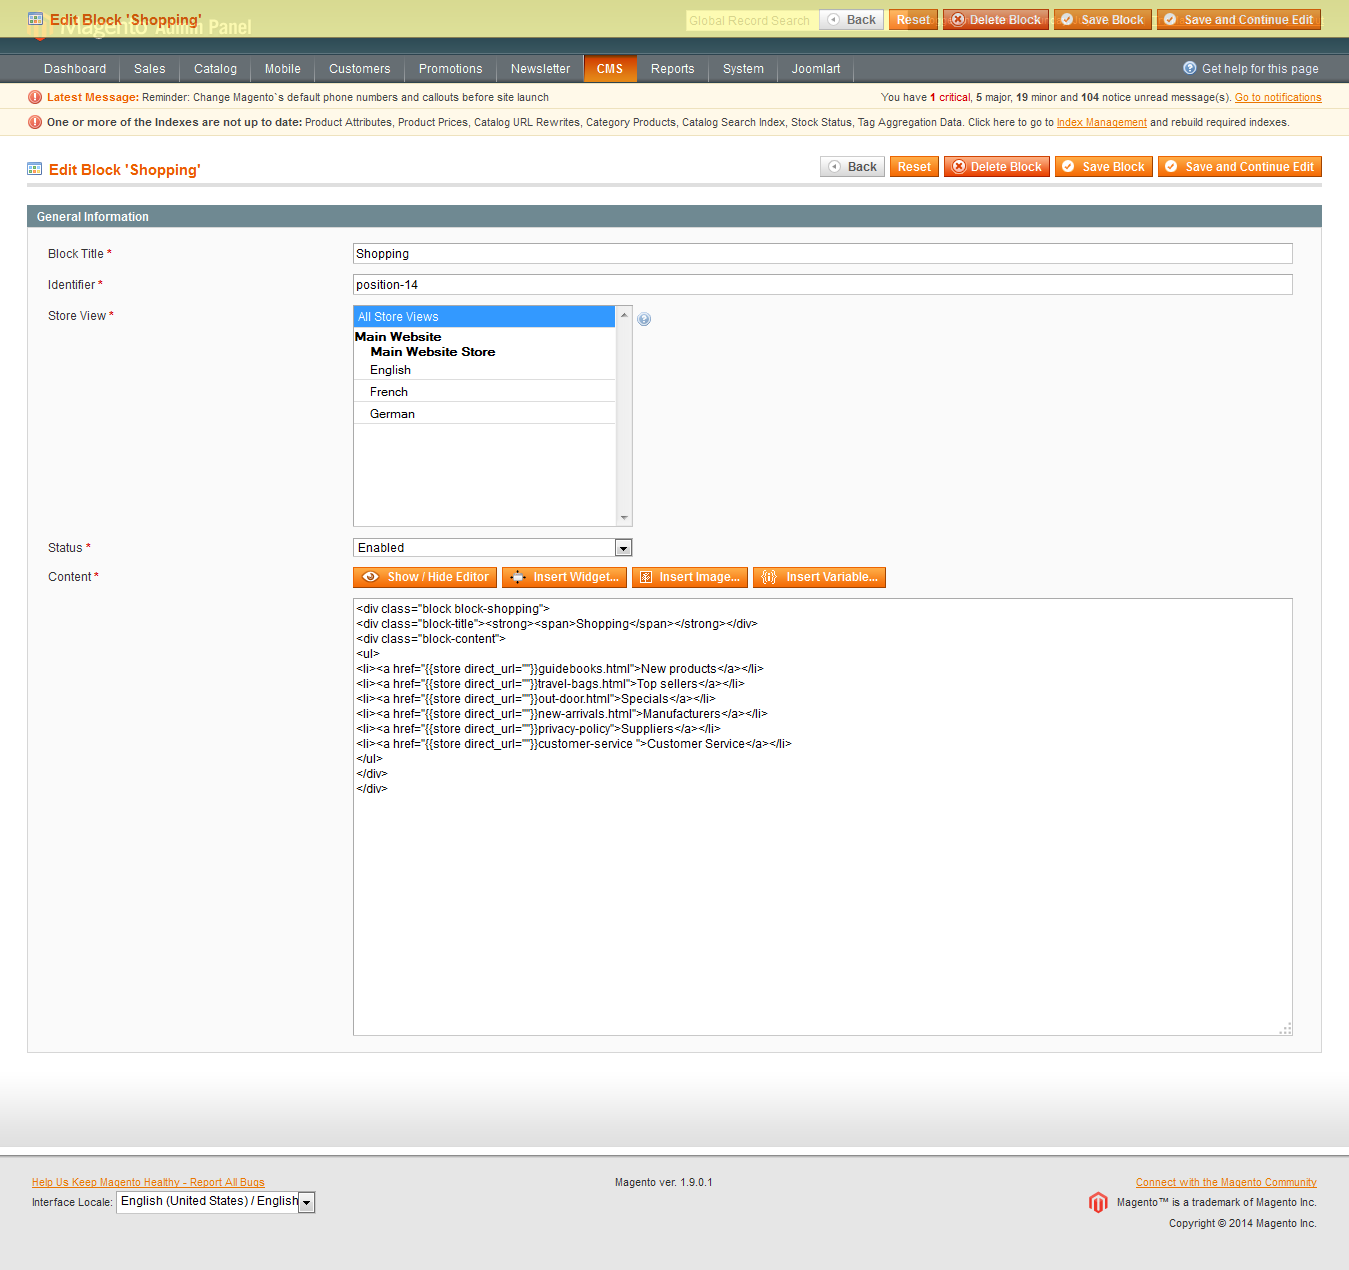
<div class="block block-shopping">
<div class="block-title"><strong><span>Shopping</span></strong></div>
<div class="block-content">
<ul>
<li><a href="{{store direct_url=""}}guidebooks.html">New products</a></li>
<li><a href="{{store direct_url=""}}travel-bags.html">Top sellers</a></li>
<li><a href="{{store direct_url=""}}out-door.html">Specials</a></li>
<li><a href="{{store direct_url=""}}new-arrivals.html">Manufacturers</a></li>
<li><a href="{{store direct_url=""}}privacy-policy">Suppliers</a></li>
<li><a href="{{store direct_url=""}}customer-service ">Customer Service</a></li>
</ul>
</div>
</div>
Front-end Appearance:
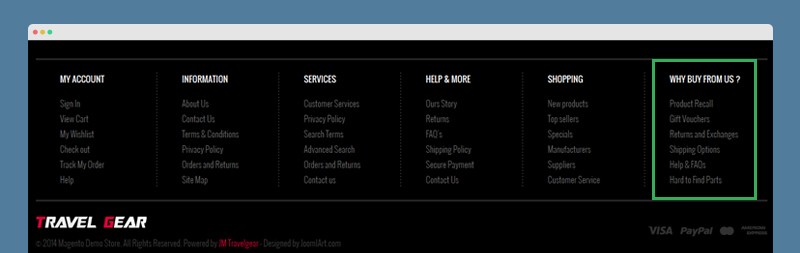
15. position-15: Why buy from us?
<div class="block block-buy-us">
<div class="block-title"><strong><span>Why buy from us ?</span></strong></div>
<div class="block-content">
<ul>
<li><a href="{{store direct_url=""}}contacts">Product Recall</a></li>
<li><a href="{{store direct_url=""}}privacy-policy">Gift Vouchers</a></li>
<li><a href="{{store direct_url=""}}contacts">Returns and Exchanges</a></li>
<li><a href="{{store direct_url=""}}customer-service">Shipping Options</a></li>
<li><a href="{{store direct_url=""}}about-us">Help & FAQs</a></li>
<li><a href="{{store direct_url=""}}privacy-policy">Hard to Find Parts</a></li>
</ul>
</div>
</div>
Front-end Appearance:
16. mega-products: Mega Products
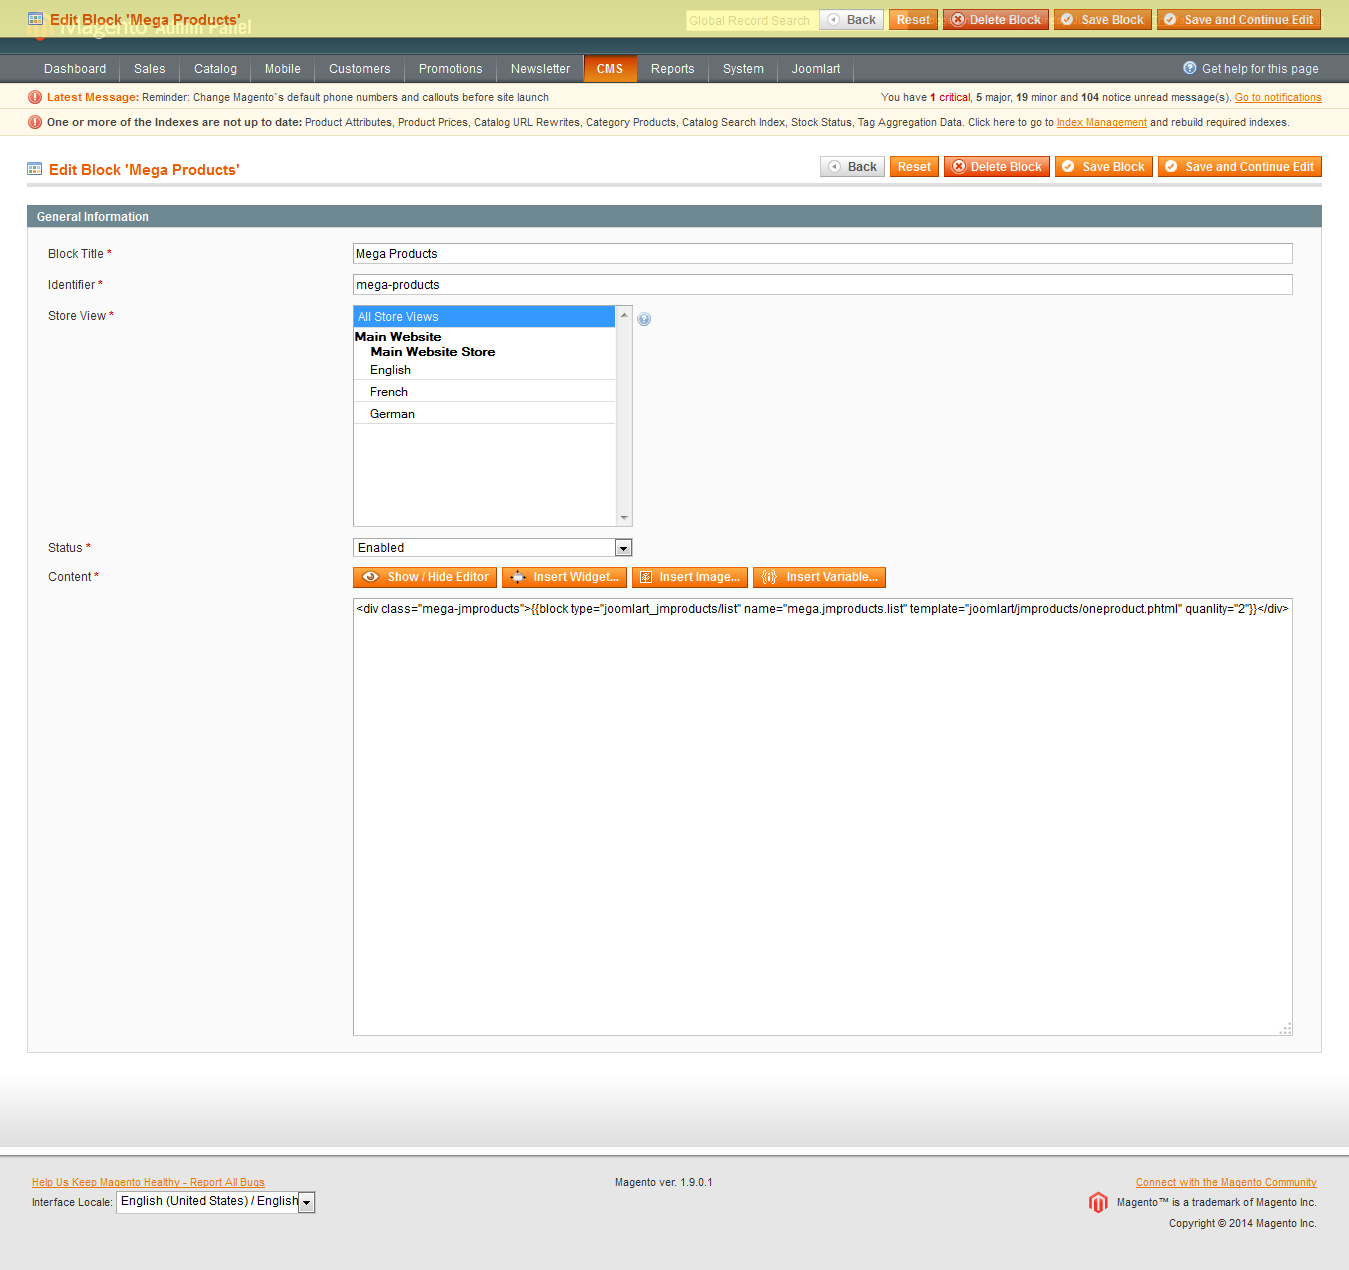
<div class="mega-jmproducts">
    {{block type="joomlart_jmproducts/list" name="mega.jmproducts.list" template="joomlart/jmproducts/oneproduct.phtml" quanlity="2"}}
</div>
Front-end Appearance:
17. mega-banner: Mega Banner
<div class="mega-banner">
    <img src="{{media url="wysiwyg/banners/mega-banner.jpg"}}" alt="Mega Banner" />
</div>
Front-end Appearance:
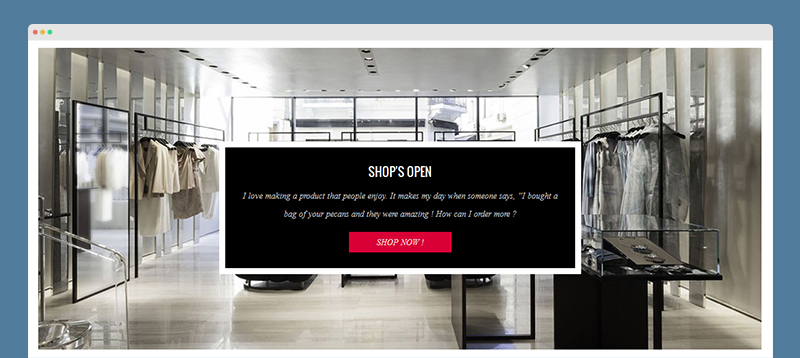
21. contactinfo: Contact Info
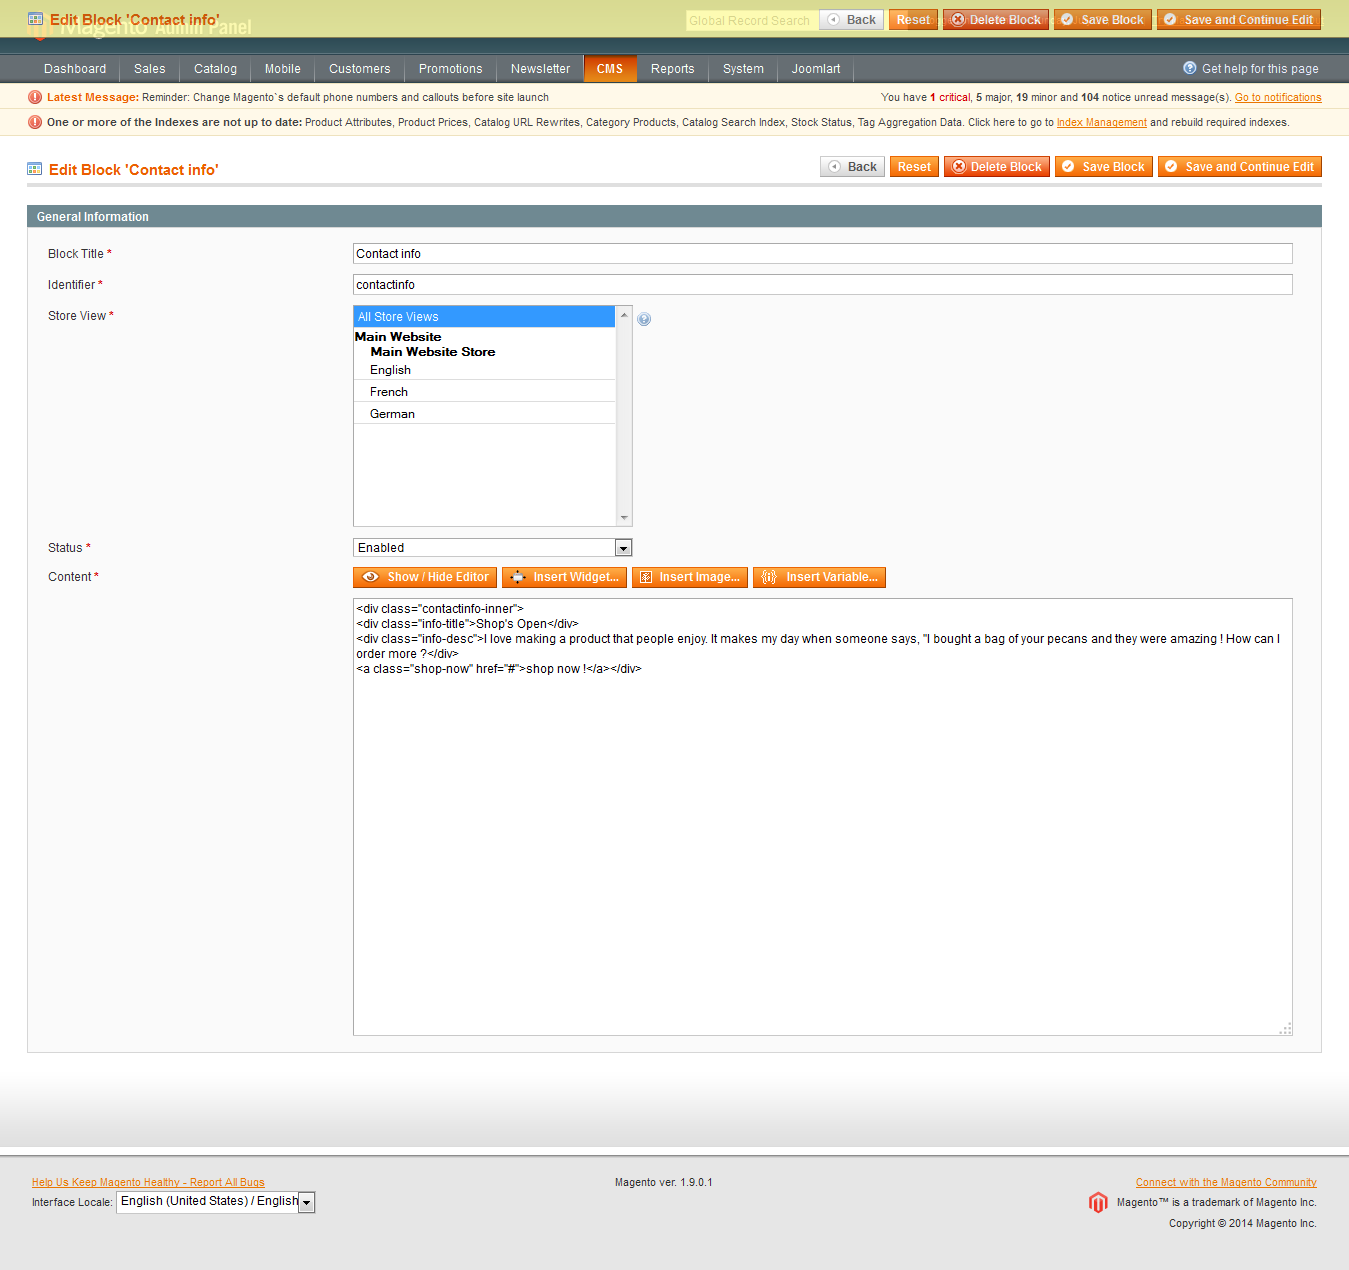
<div class="contactinfo-inner">
    <div class="info-title">Shop's Open</div>

    <div class="info-desc">I love making a product that people enjoy. It makes my day when someone says, "I bought a bag of your pecans and they were amazing ! How can I order more ?
    </div>

    <a class="shop-now" href="#">shop now !</a>
</div>
1. Enter app\design\frontend\default\{jm_themename}\template\contacts\form.phtml.
2. Copy the following code and paste it into the tag class="ct-contacts clearfix".
<form action="<?php echo $this->getFormAction(); ?>" id="contactForm" method="post">
    <?php echo $this->getLayout()->createBlock('cms/block')->setBlockId('contactmap')->toHtml() ?>
        <div class="contact-page">
                <?php echo $this->getLayout()->createBlock('cms/block')->setBlockId('contactinfo')->toHtml() ?>
                <div class="contact-form">
                        <h3><?php echo $this->__('Send Us A Message') ?></h3>
                        <ul class="form-list">
                                <li>
                                        <div class="filed-name">
                                                <label for="name" class="required"><em>*</em><?php echo Mage::helper('contacts')->__('Name') ?></label>
                                                <div class="input-box">
                                                        <input name="name" id="name" title="<?php echo Mage::helper('contacts')->__('Name') ?>" value="<?php echo $this->htmlEscape($this->helper('contacts')->getUserName()) ?>" class="input-text required-entry" type="text" />
                                                </div>
                                        </div>
                                        <div class="filed-email">
                                                <label for="email" class="required"><em>*</em><?php echo Mage::helper('contacts')->__('Email') ?></label>
                                                <div class="input-box">
                                                        <input name="email" id="email" title="<?php echo Mage::helper('contacts')->__('Email') ?>" value="<?php echo $this->htmlEscape($this->helper('contacts')->getUserEmail()) ?>" class="input-text required-entry validate-email" type="text" />
                                                </div>
                                        </div>
                                        <div class="filed-telephone">
                                                <label for="telephone"><?php echo Mage::helper('contacts')->__('Telephone') ?></label>
                                                <div class="input-box">
                                                        <input name="telephone" id="telephone" title="<?php echo Mage::helper('contacts')->__('Telephone') ?>" value="" class="input-text" type="text" />
                                                </div>
                                        </div>
                                </li>
                                <li>
                                        <label for="comment" class="required"><em>*</em><?php echo Mage::helper('contacts')->__('Comment') ?></label>
                                        <div class="input-box">
                                                <textarea name="comment" id="comment" title="<?php echo Mage::helper('contacts')->__('Comment') ?>" class="required-entry input-text" cols="5" rows="3"></textarea>
                                        </div>
                                </li>
                        </ul>
                <div class="buttons-set">
                        <p class="required"><?php echo Mage::helper('contacts')->__('* Required Fields') ?></p>
                        <button type="submit" title="<?php echo Mage::helper('contacts')->__('Send message') ?>" class="button"><span><span><?php echo Mage::helper('contacts')->__('Send message') ?></span></span></button>
                        <input type="text" name="hideit" id="hideit" value="" style="display:none !important;" />
                </div>
        </div>
</div>
</form>
Front-end Appearance:
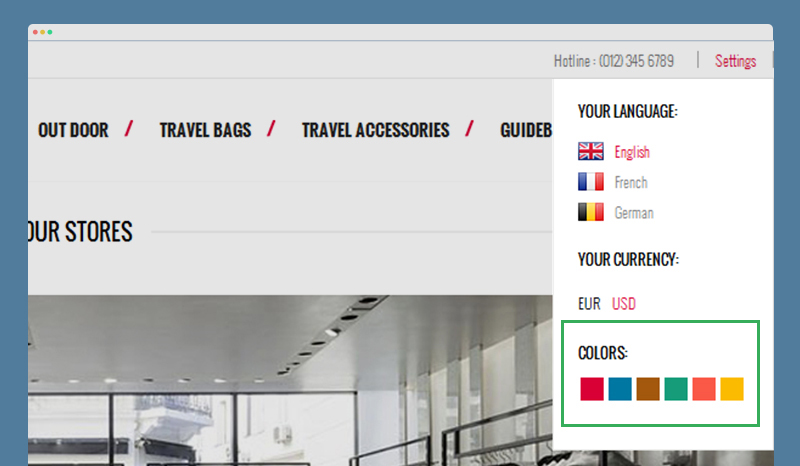
22. colors: Colors
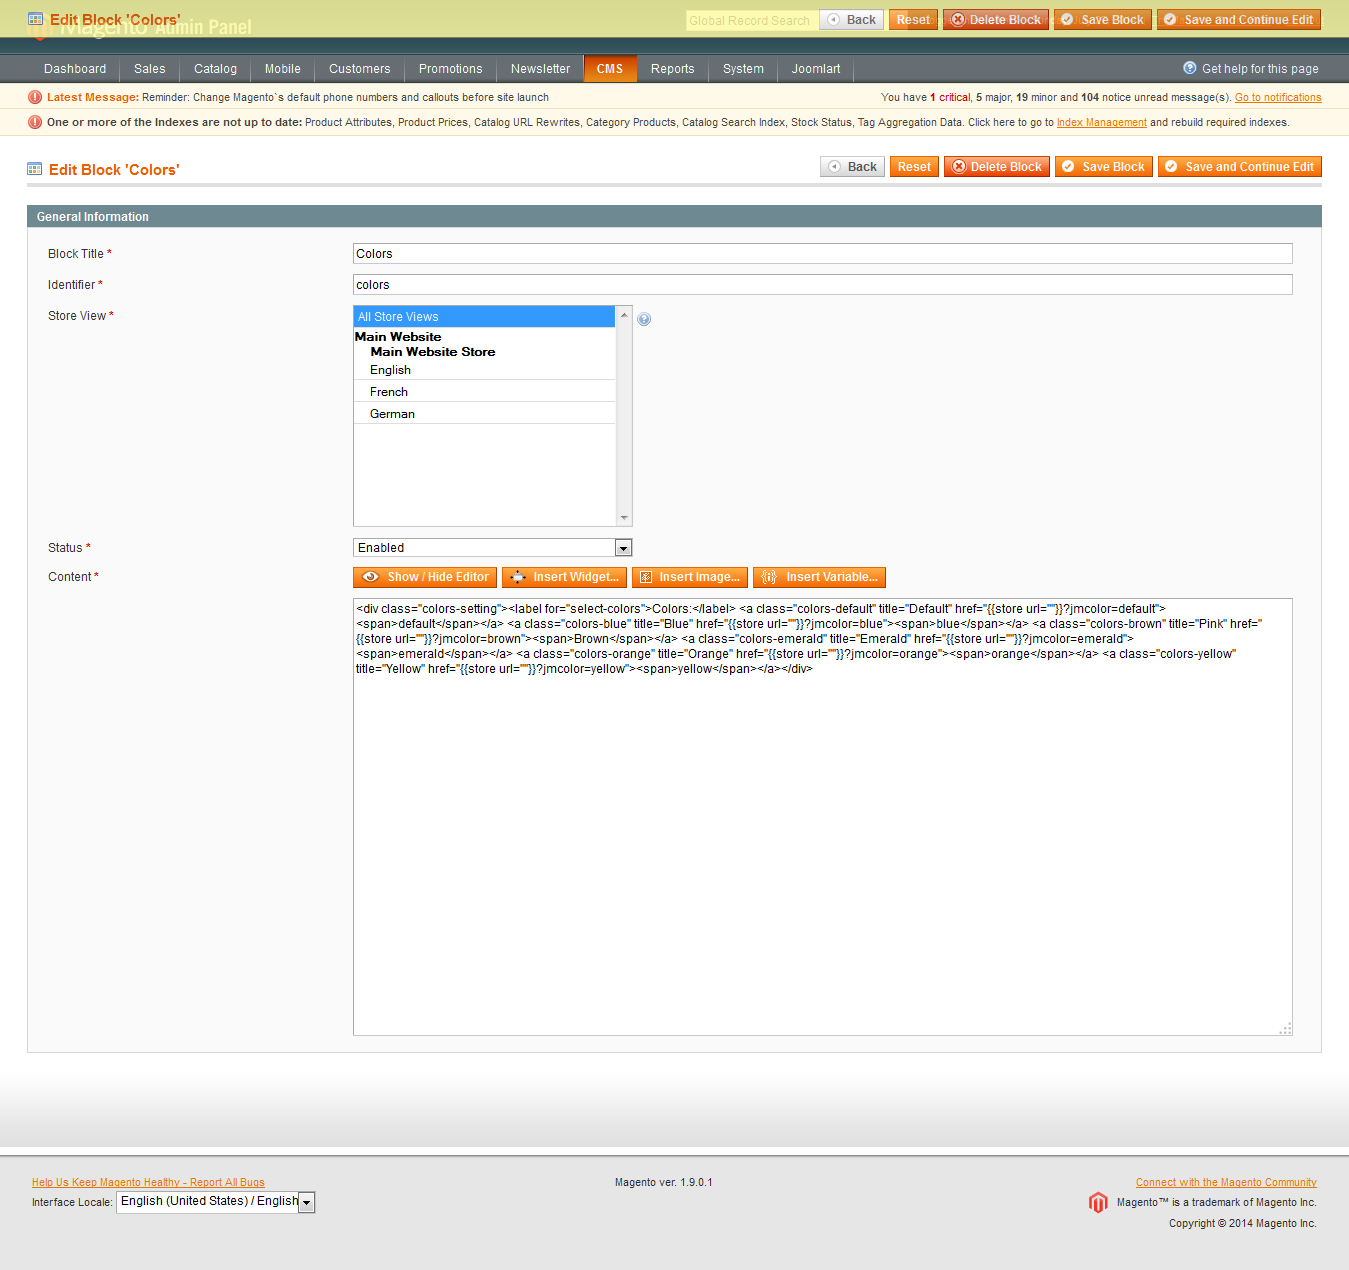
<div class="colors-setting"><label for="select-colors">Colors:</label> <a class="colors-default" title="Default" href="{{store url=""}}?jmcolor=default"><span>default</span></a> <a class="colors-blue" title="Blue" href="{{store url=""}}?jmcolor=blue"><span>blue</span></a> <a class="colors-brown" title="Pink" href="{{store url=""}}?jmcolor=brown"><span>Brown</span></a> <a class="colors-emerald" title="Emerald" href="{{store url=""}}?jmcolor=emerald"><span>emerald</span></a> <a class="colors-orange" title="Orange" href="{{store url=""}}?jmcolor=orange"><span>orange</span></a> <a class="colors-yellow" title="Yellow" href="{{store url=""}}?jmcolor=yellow"><span>yellow</span></a></div>
Front-end Appearance:
Extension Configuration
For more details about any extension configuration, check the documentation of this actual one here.
1. Masshead
Magento extension Masshead can be displayed at any position. In JM TravelGear Demo site, this extension is being used at the header of the category pages.
In the Magento Admin Panel, navigate to JoomlArt >> Masshead and configure the default settings as the Back-end Settings.
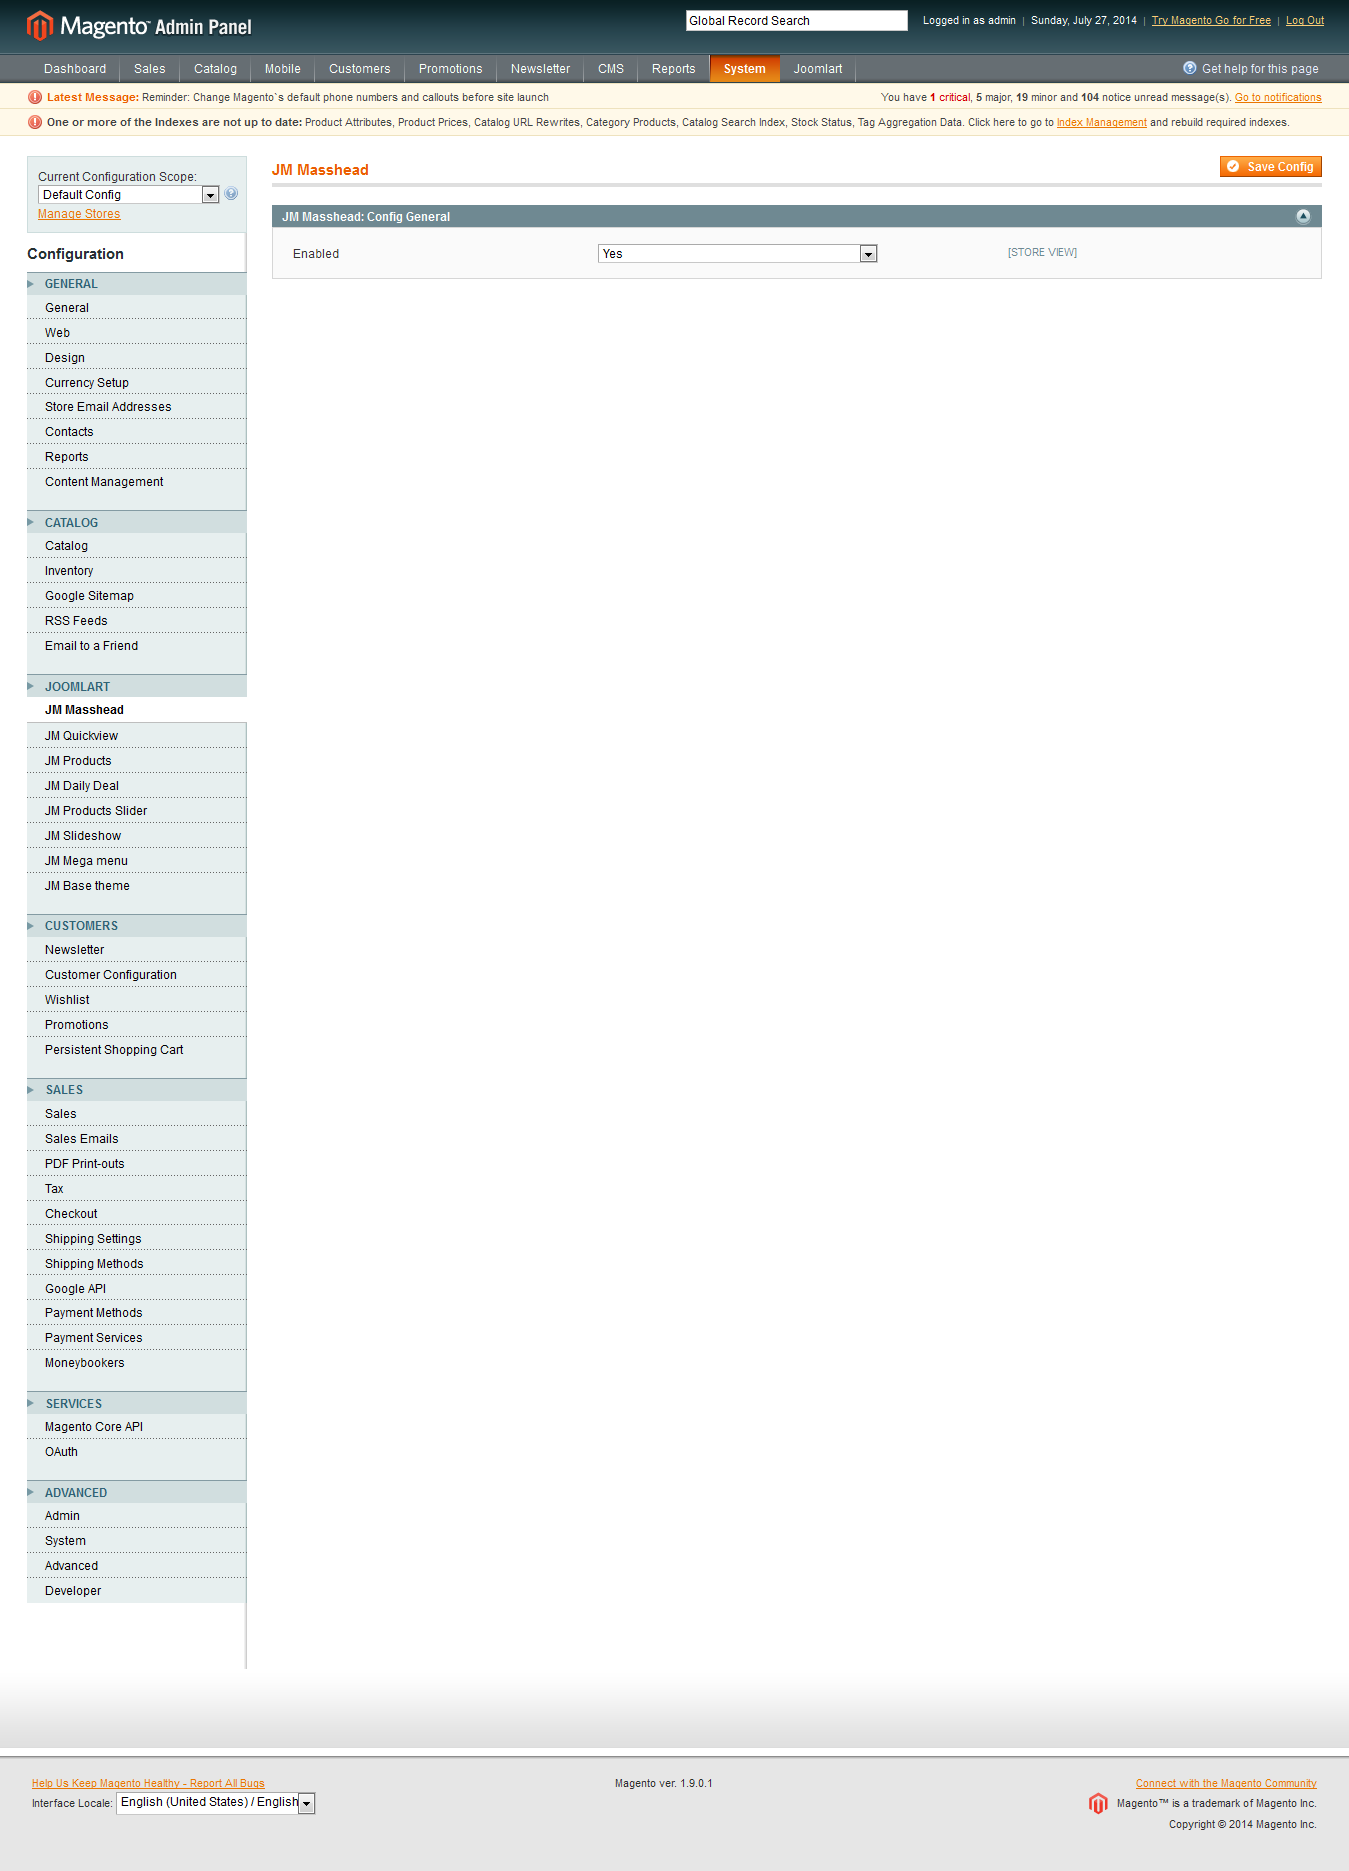
To get this extension for any categories, navigate to Catalog >> Manage Categories >> select the actual category as shown in Back-end Settings.
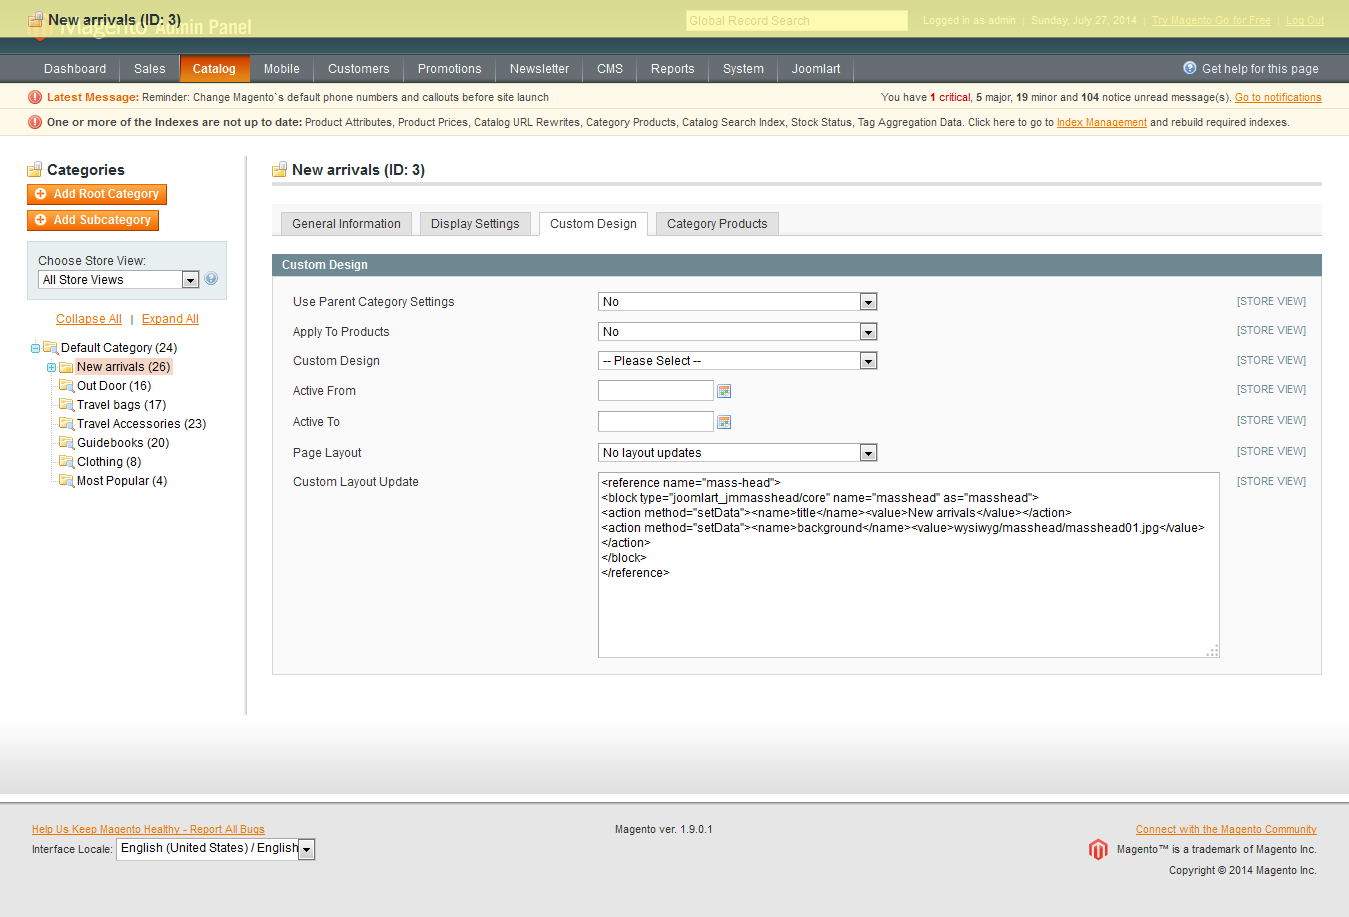
Copy and paste the following code into the Custom Layout Update tab.
<reference name="mass-head">
<block type="joomlart_jmmasshead/core" name="masshead" as="masshead">
<action method="setData"><name>title</name><value>New arrivals</value></action>
<action method="setData"><name>background</name><value>wysiwyg/masshead/masshead01.jpg</value></action>
</block>
</reference>
Front-end Appearance:
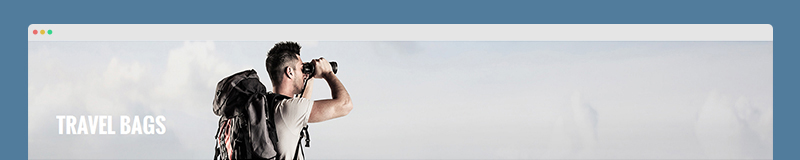
For more detail, please check the documentation of the module.
2. BaseTheme
2.1. BaseTheme Configuration
In the Magento Admin Panel, navigate to JoomlArt >> BaseTheme and configure the default settings as the Back-end Settings.
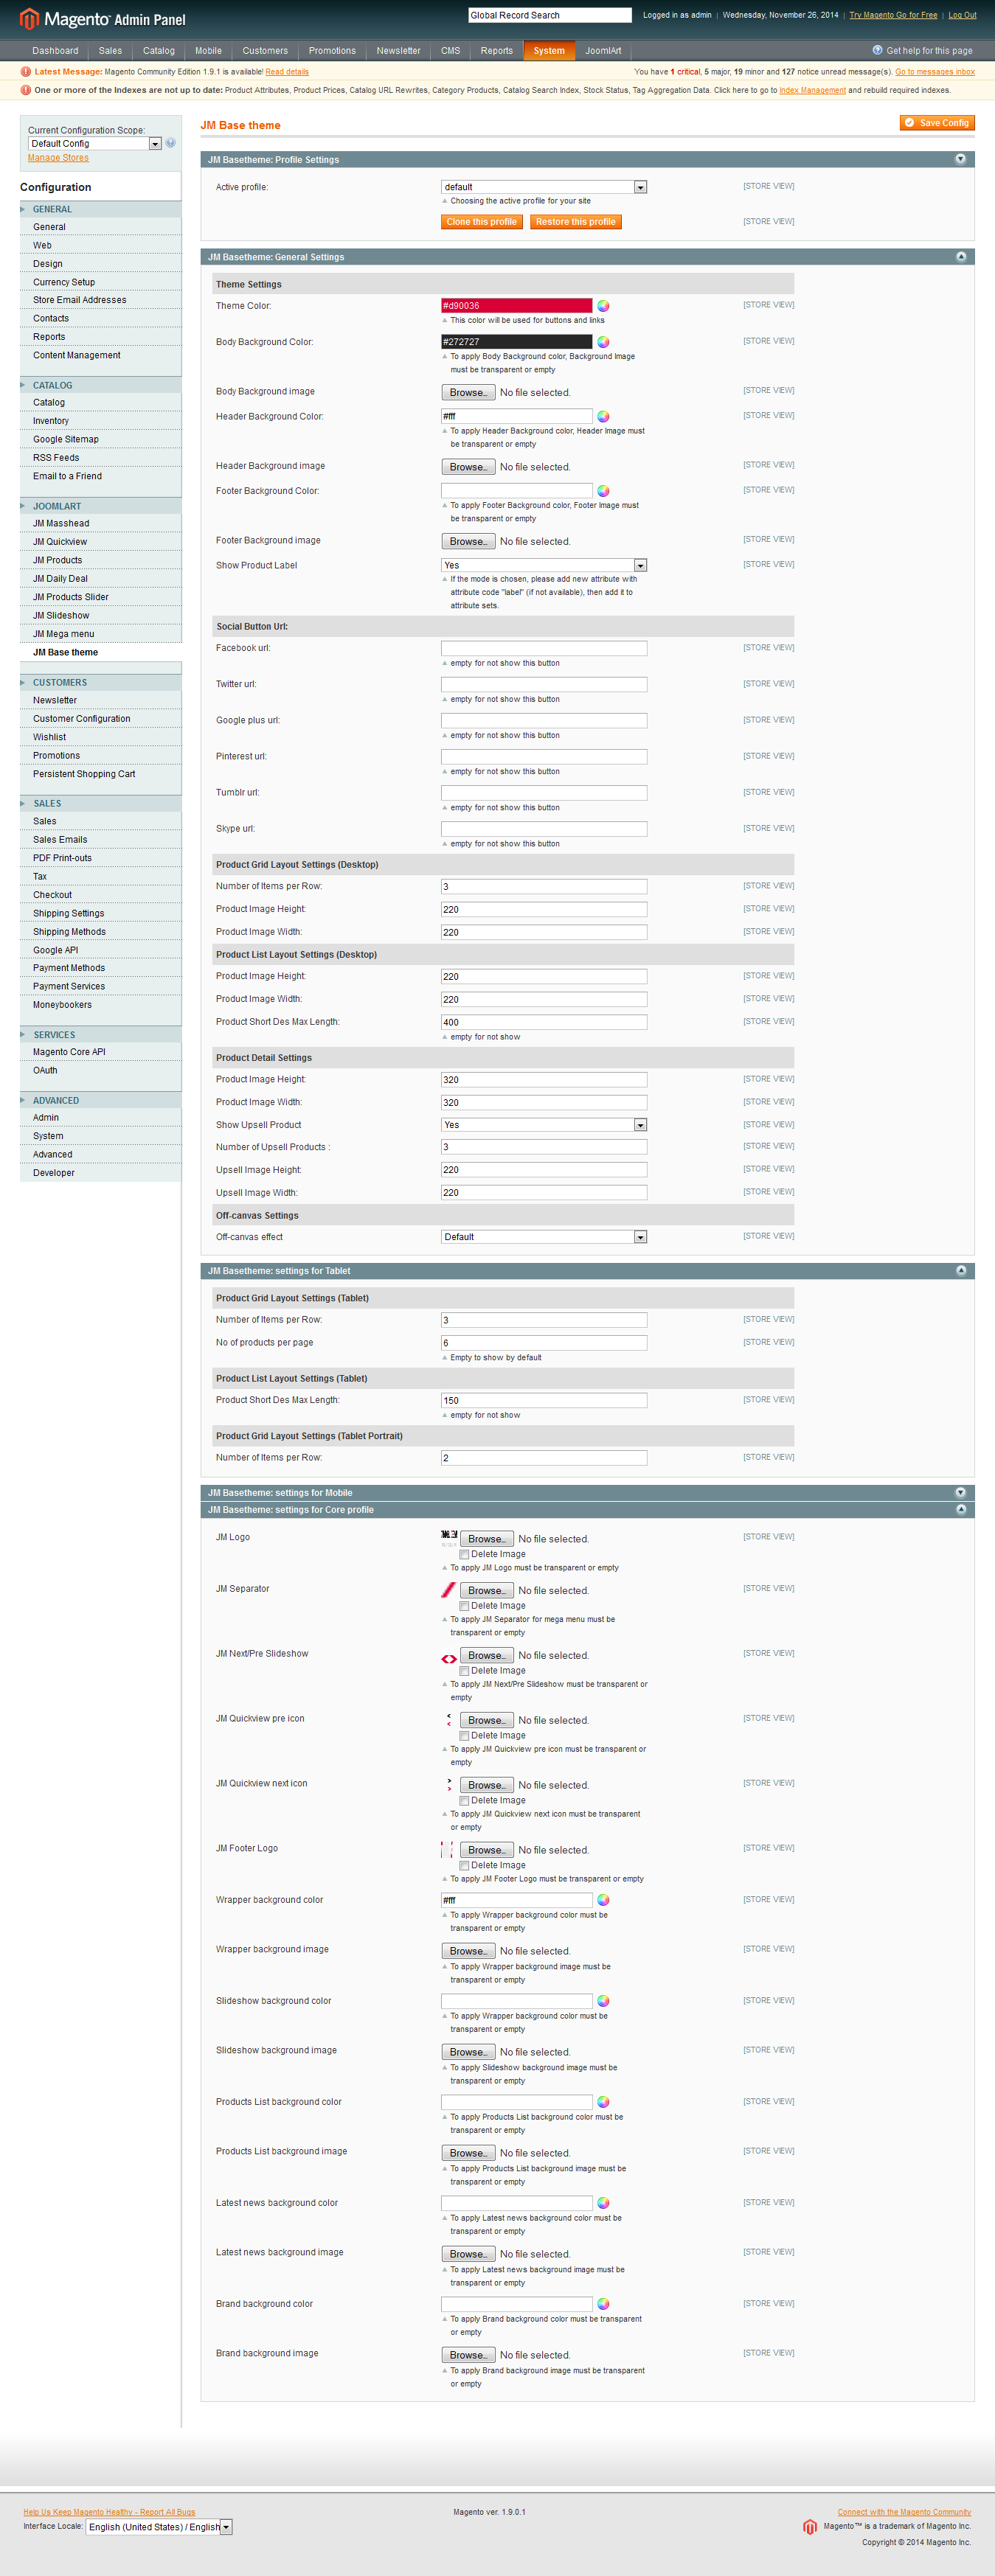
Front-end Appearance:
2.2. Label Configuration
To label any products, follow these steps.
Step 1: At Theme Settings, select “Yes” value to enable Labelling function.

Step 2: Navigate to Catalog >> Attributes >> Manage Attributes and create a new attribute named Label.
- Properties -- Back-end Settings
- Manage Label/ Options -- Back-end Settings
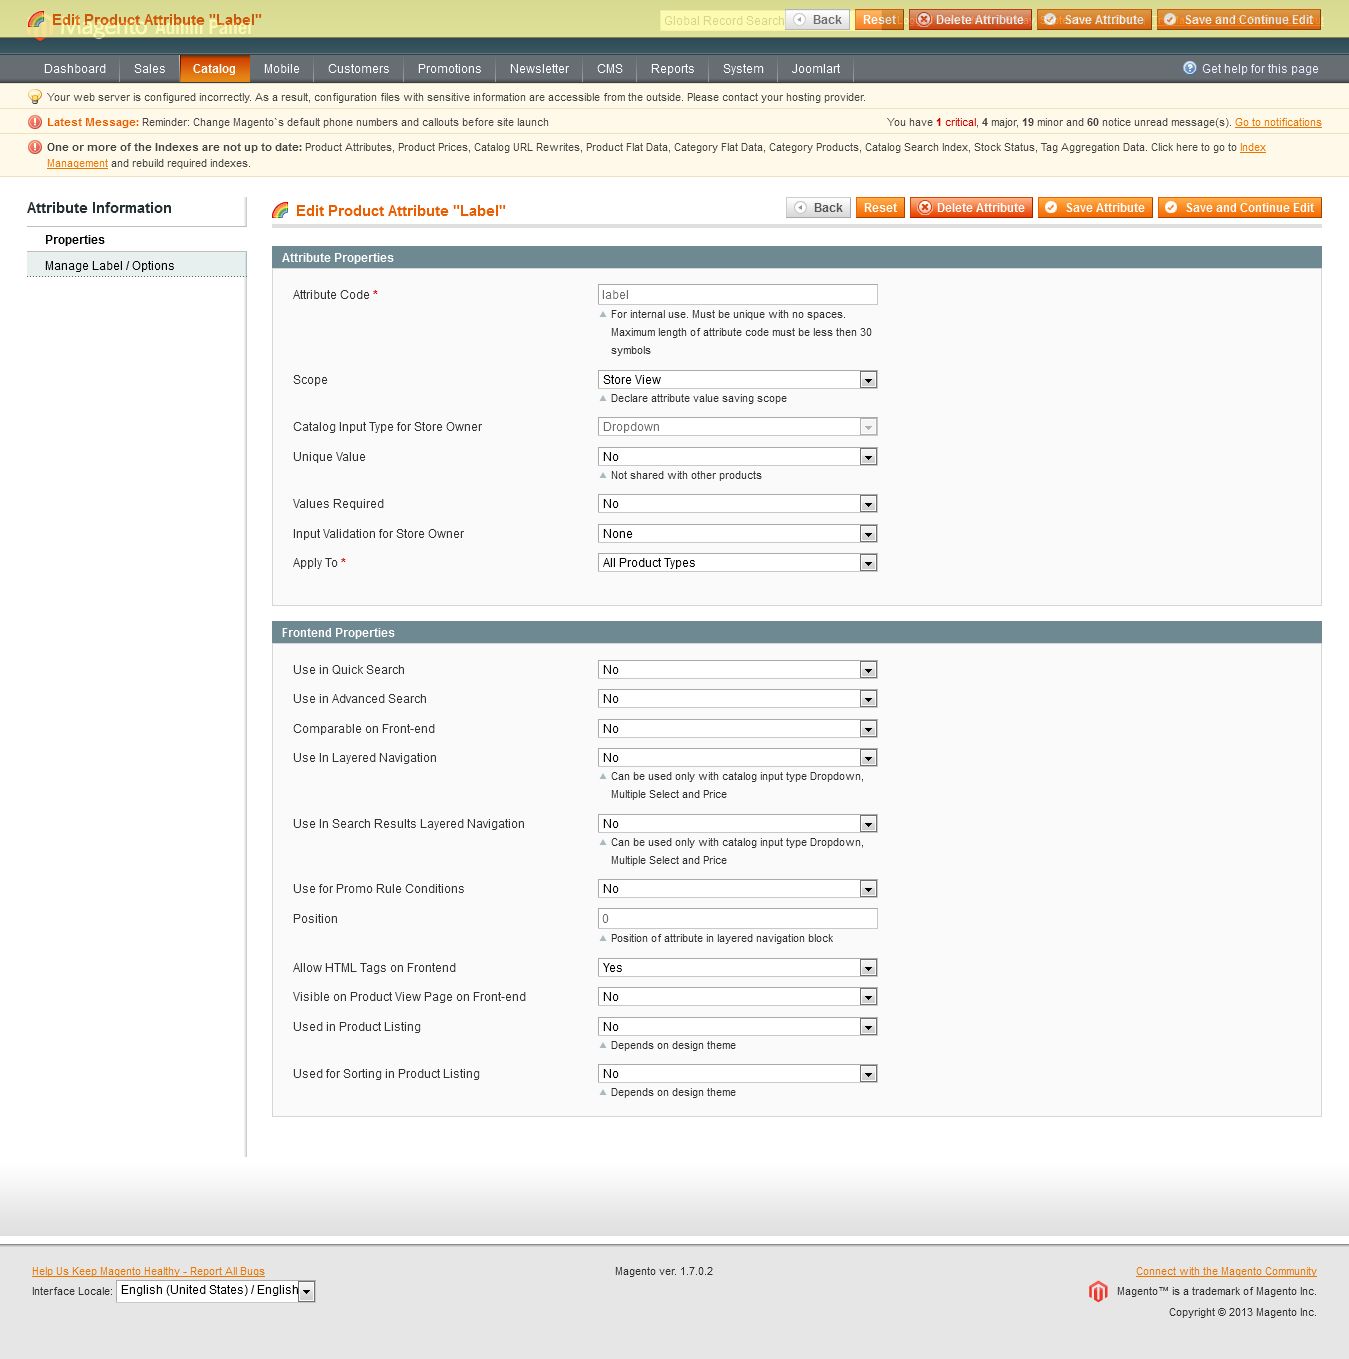
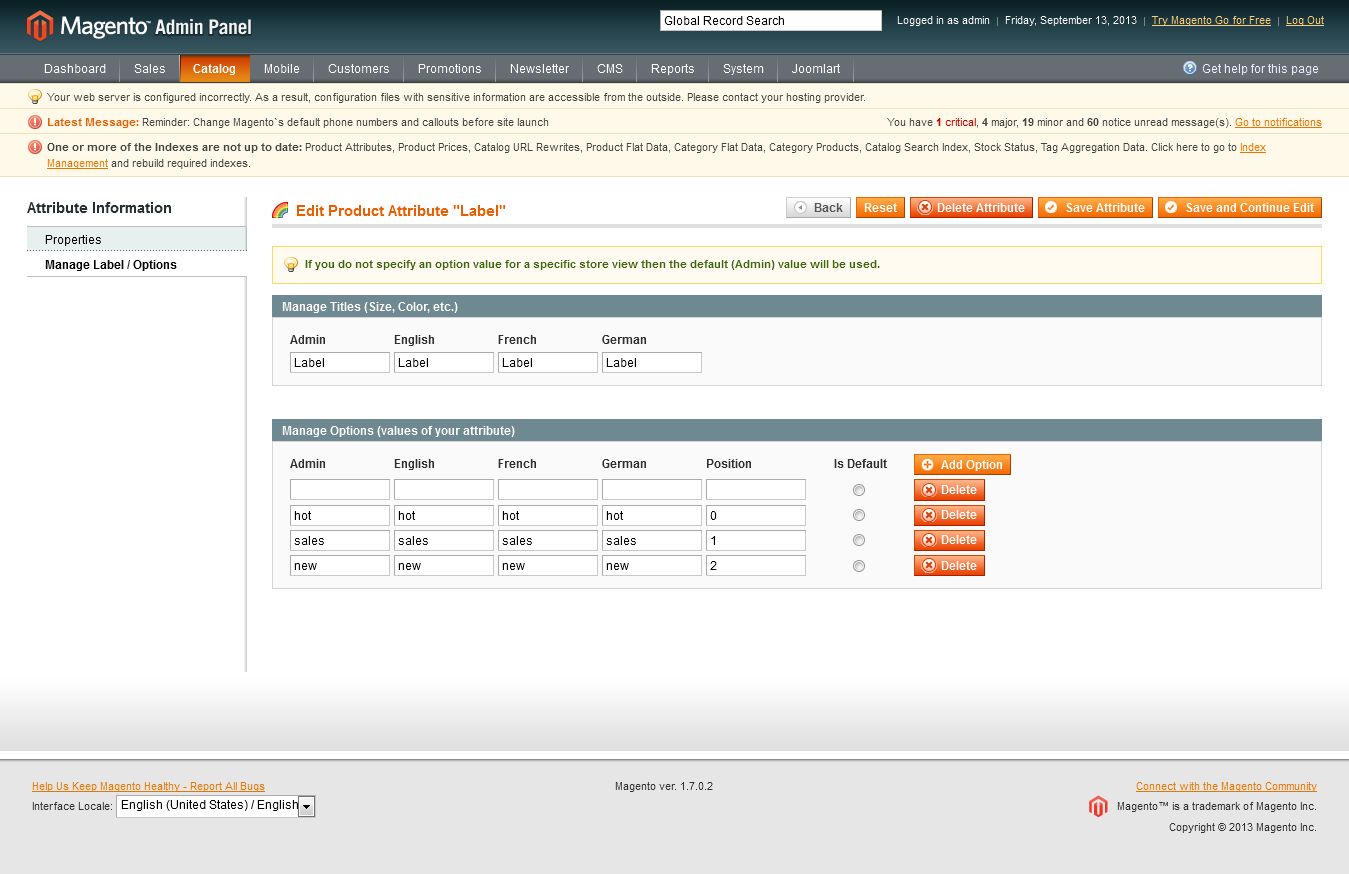
Step 3: Navigate to Catalog >> Attributes >> Manage Attribute Sets to add the “Label” attribute into “Default Attribute Set”.
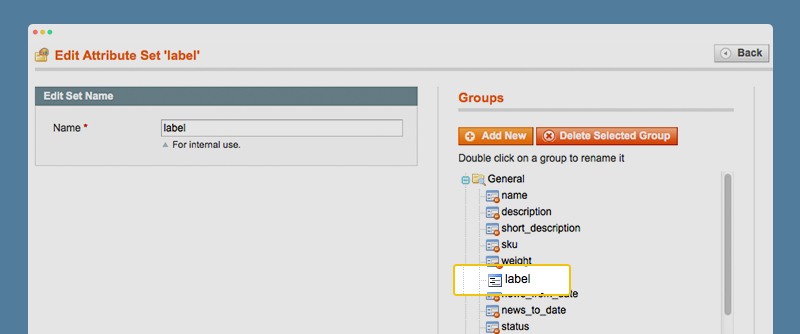
Step 4: Simply choose the label you want for each product as Back-end Settings.
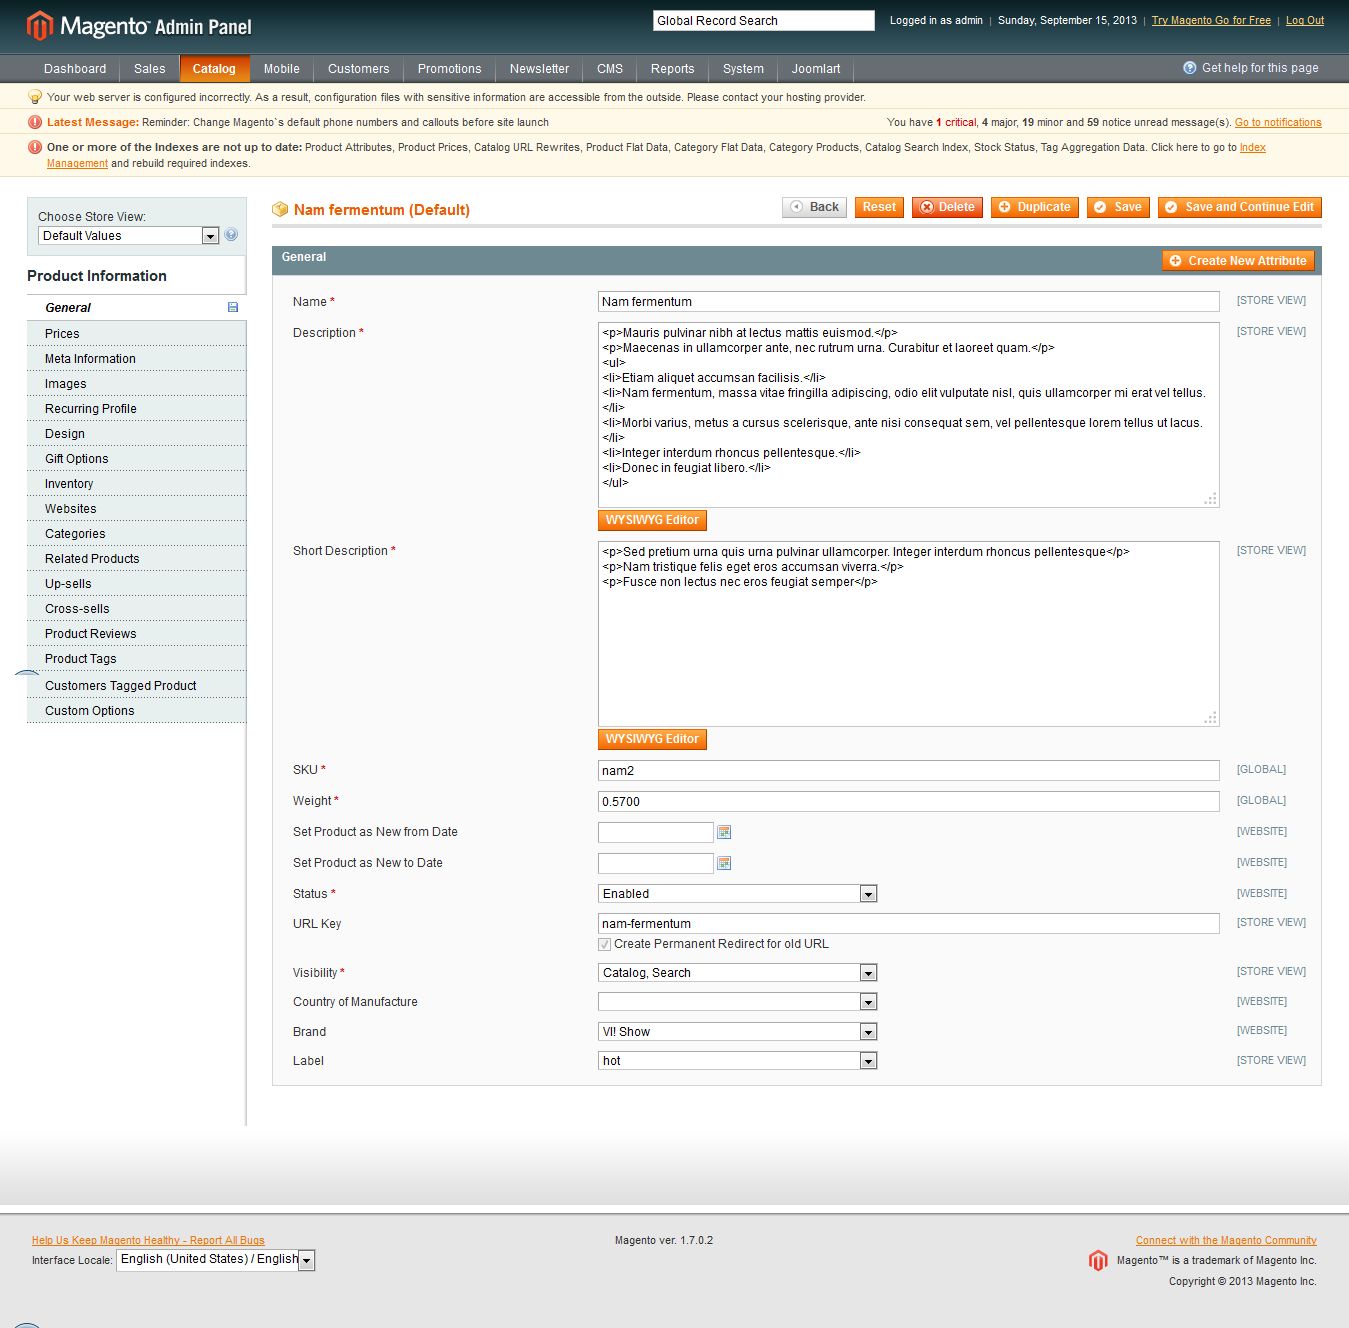
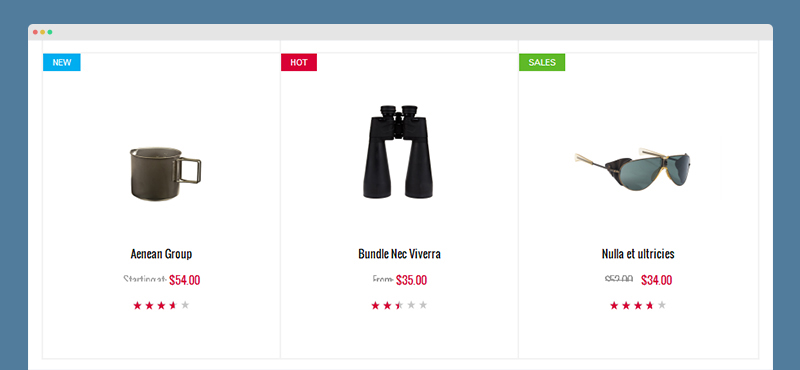
Front-end Appearance:
For more detail, please check the documentation of the module.
3. Mega Menu
Navigate to JoomlArt >> Mega Menu, enable and choose the animation effect for your menu as the Back-end Settings. For detailed configuration of each menu item, refer to the Menu Configuration.
Front-end Appearance:

For more detail, please check the documentation of the module.
4. Products
Navigate to JoomlArt >> Products and configure the default settings as Back-end Settings.
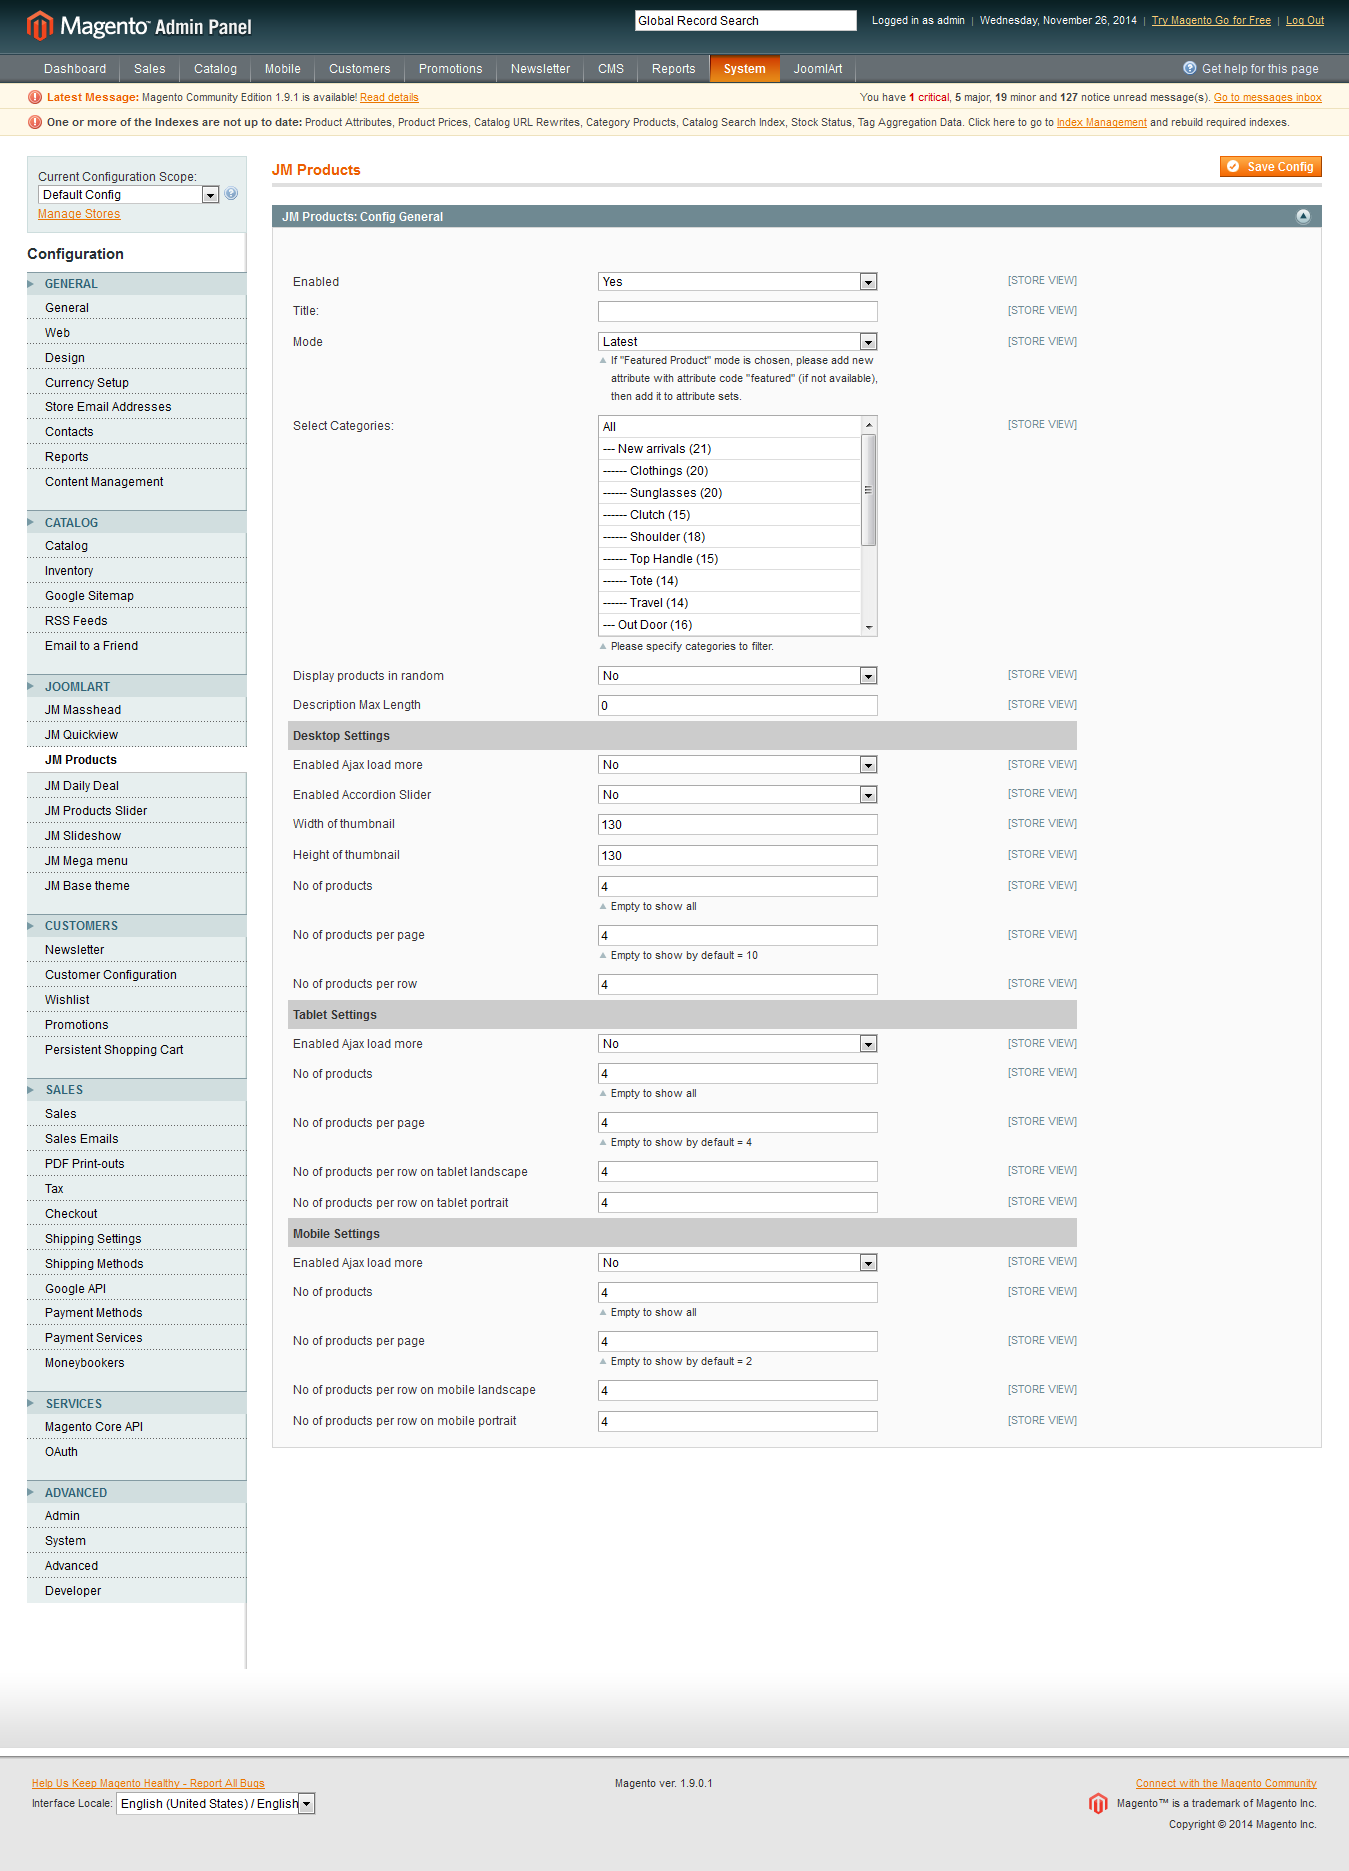
Front-end Appearance:
For more detail, please check the documentation of the module.
5. Product Deals
Navigate to JoomlArt >> Product Deals and configure the default settings as Back-end Settings.
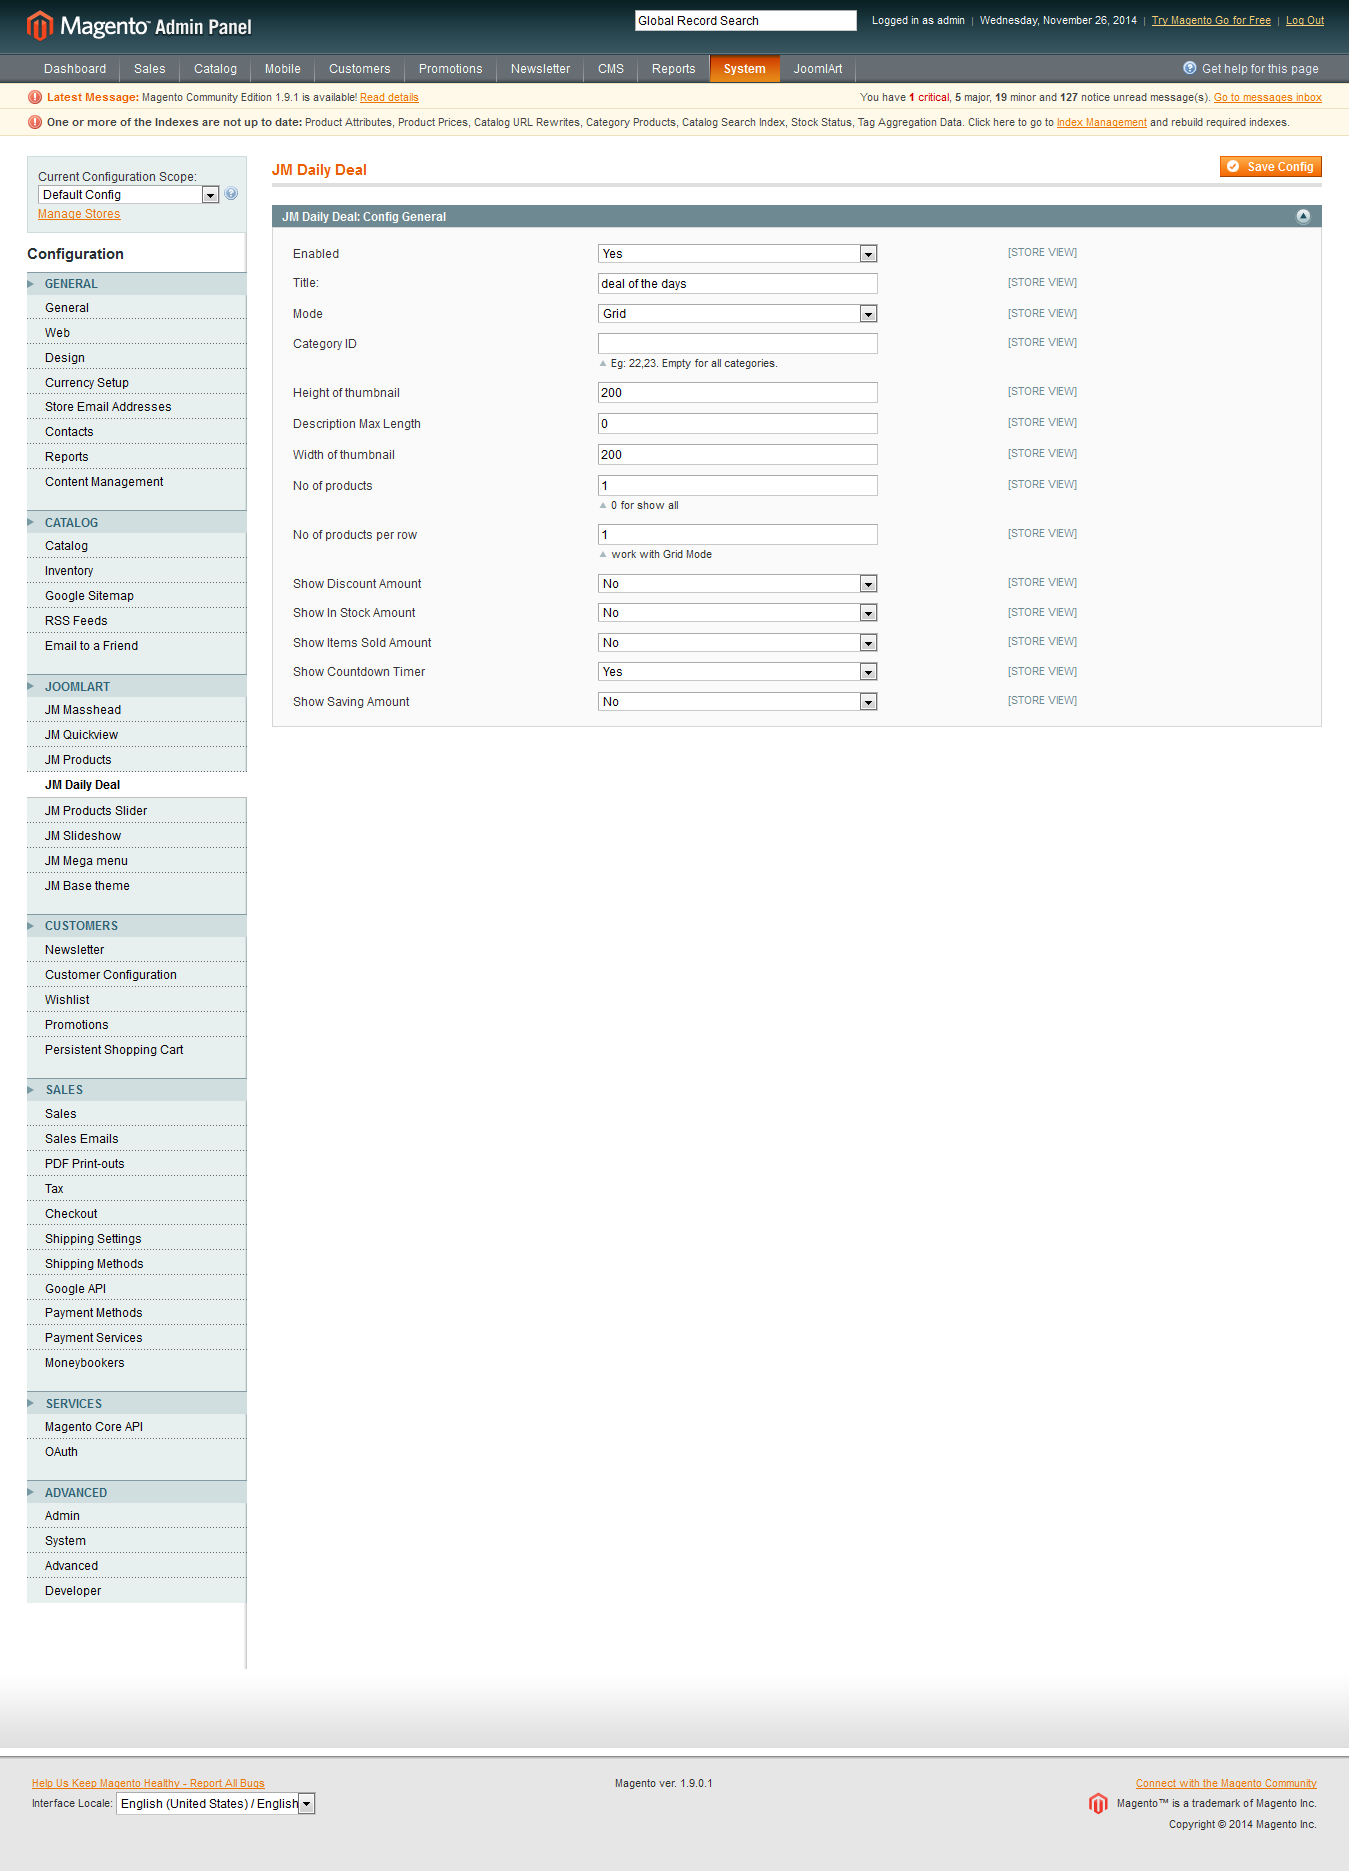
Front-end Appearance:

6. Slideshow
Navigate to JoomlArt >> Slideshow and configure the default settings as Back-end Settings.
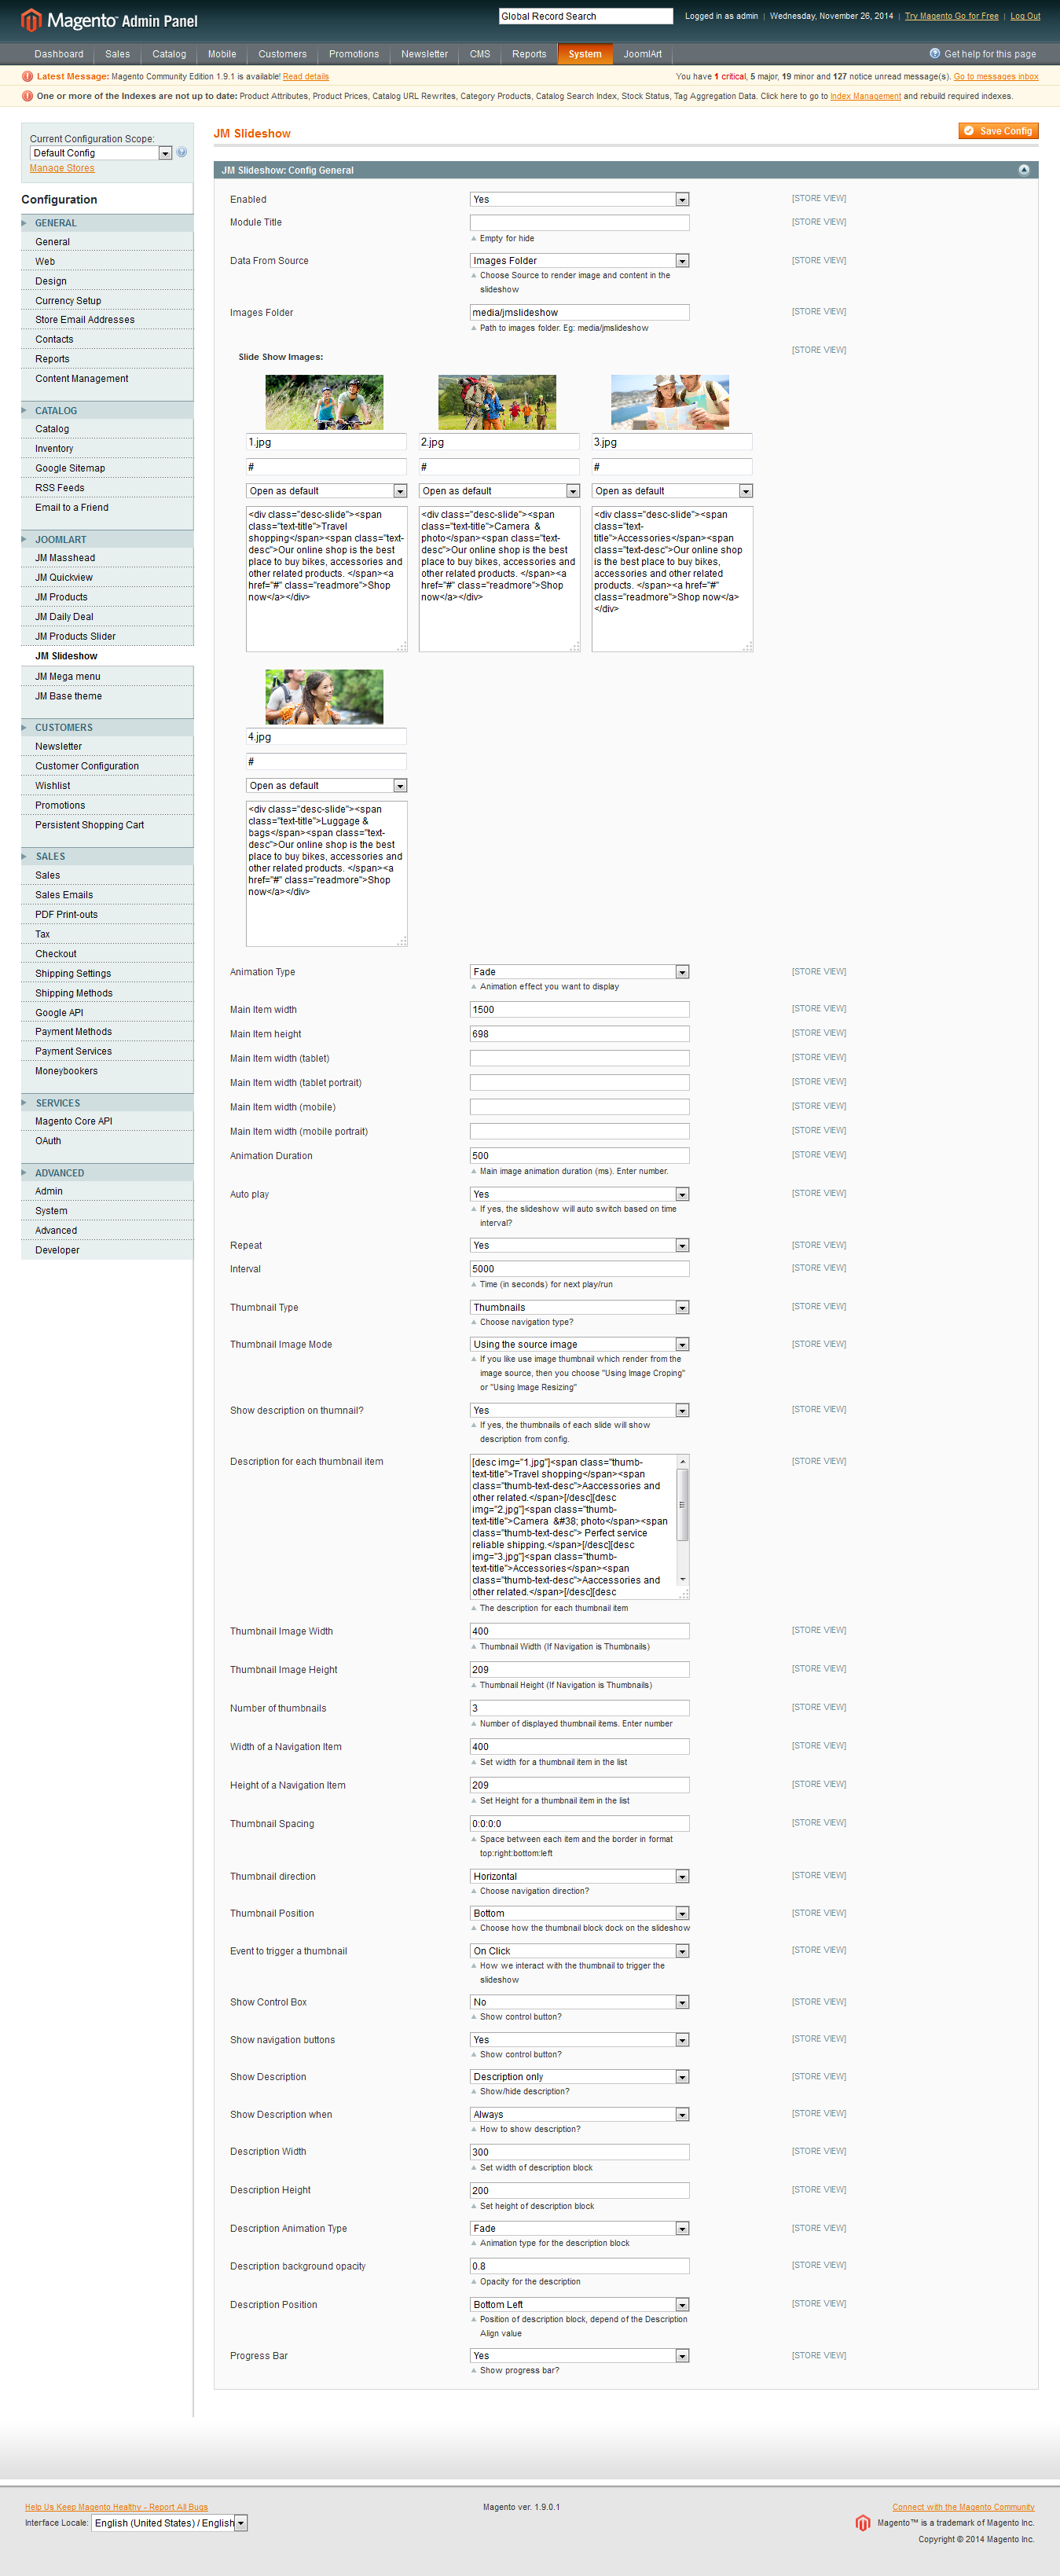
Front-end Appearance:

For more detail, please check the documentation of the module.
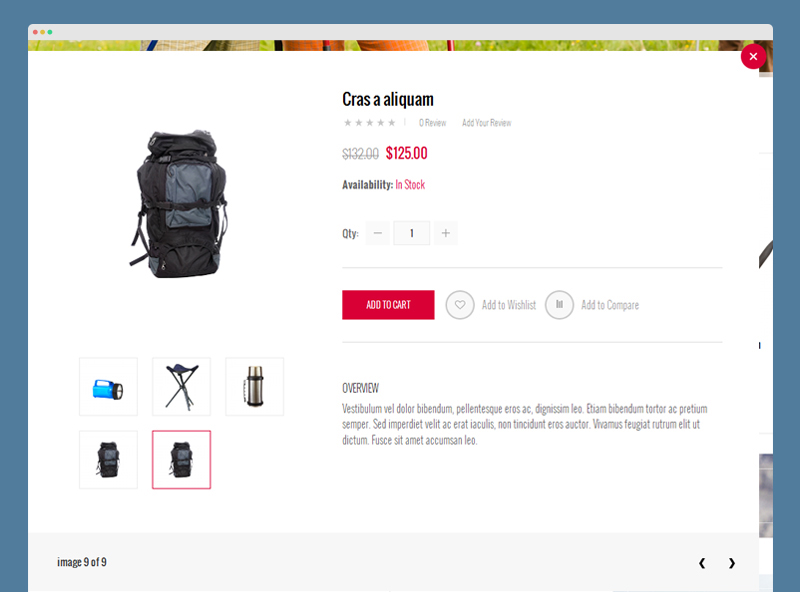
7. Quickview
Navigate to JoomlArt >> Quickview and configure the default settings as Back-end Settings.
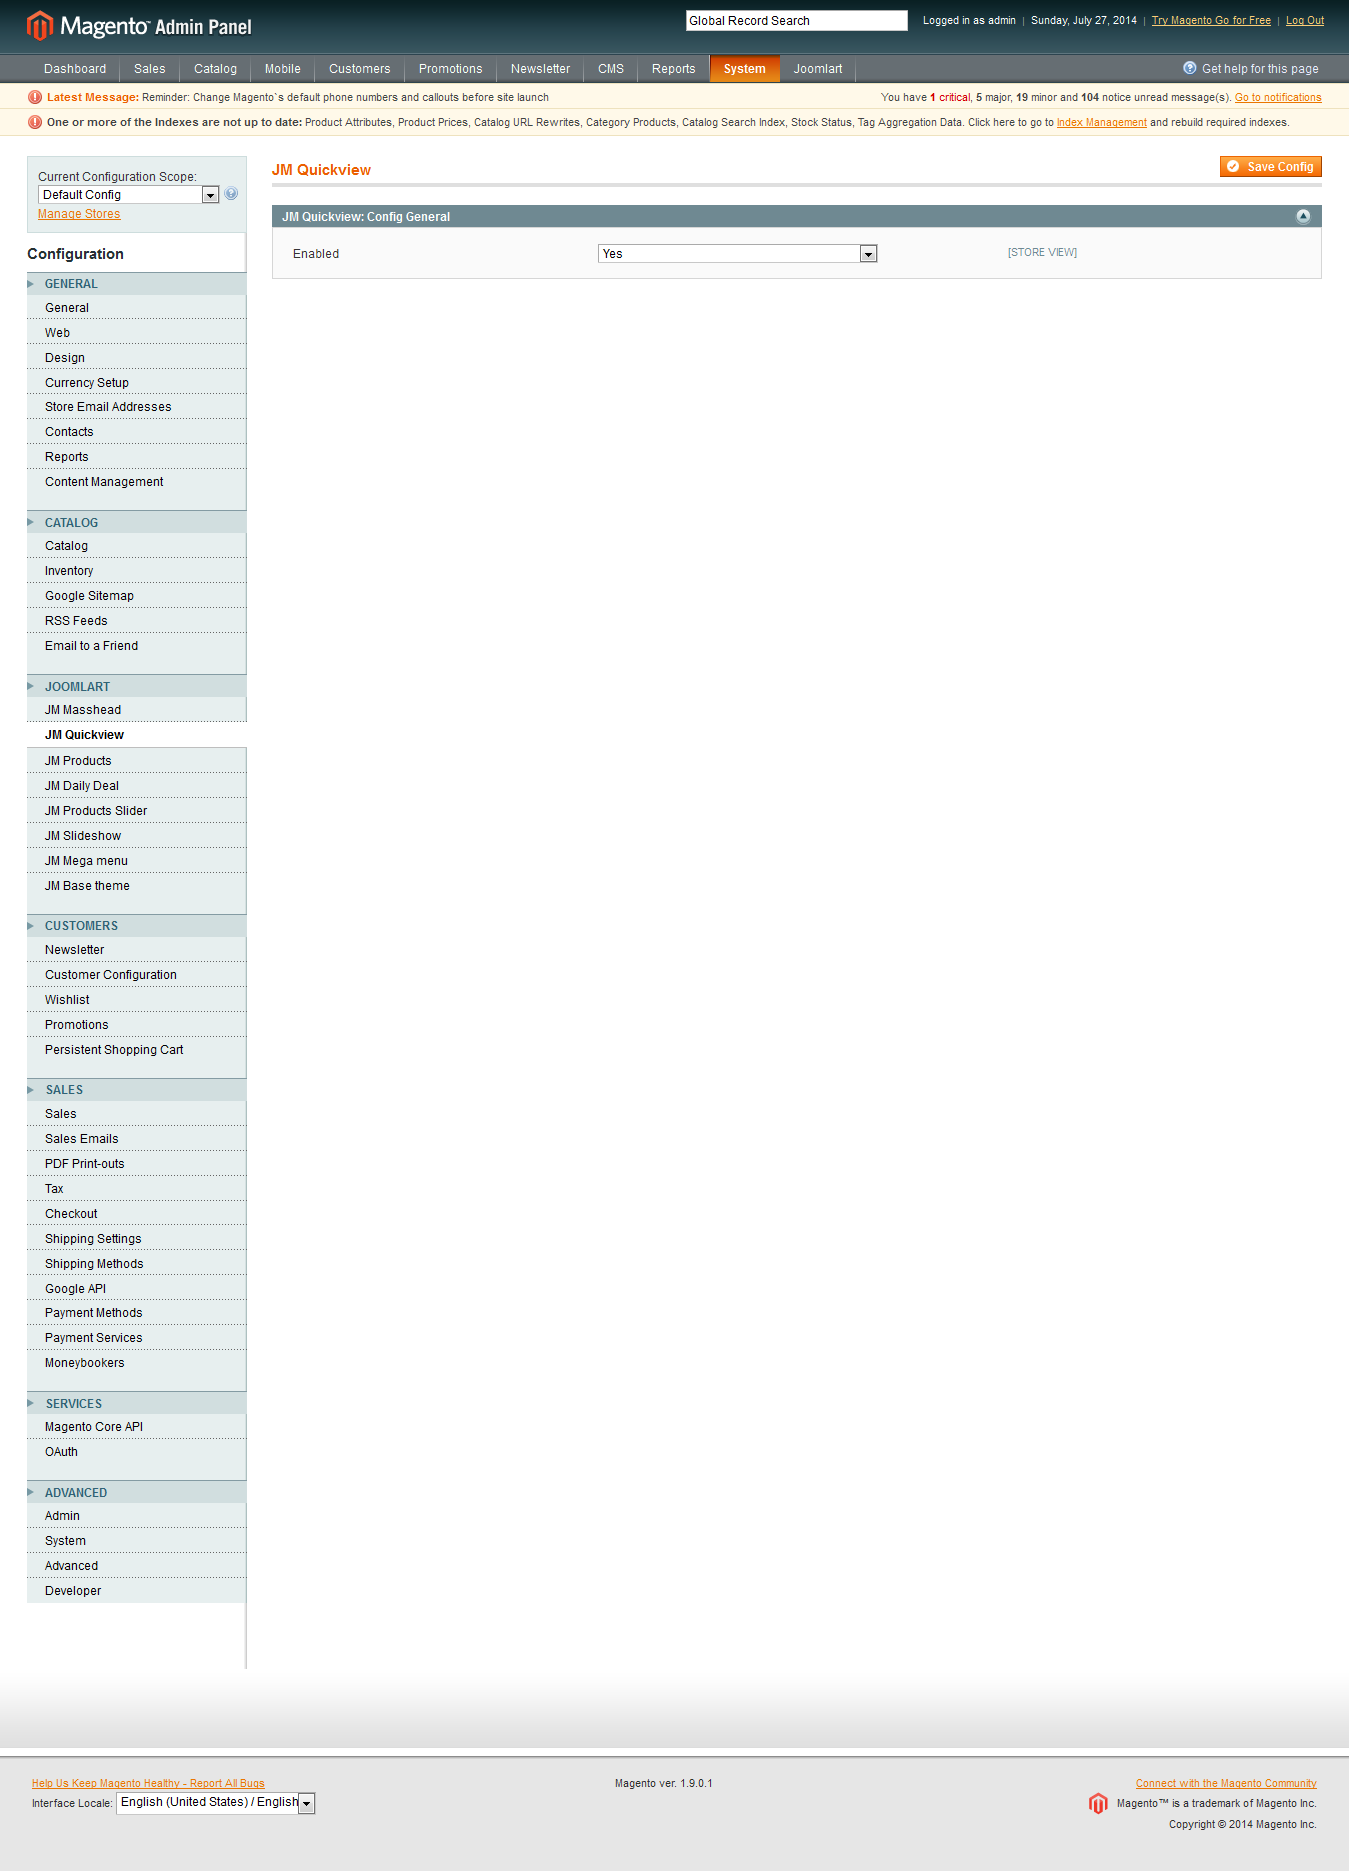
Front-end Appearance:
For more detail, please check the documentation of the module.
8. Product Slider
Navigate to JoomlArt >> Quickview and configure the default settings as Back-end Settings.
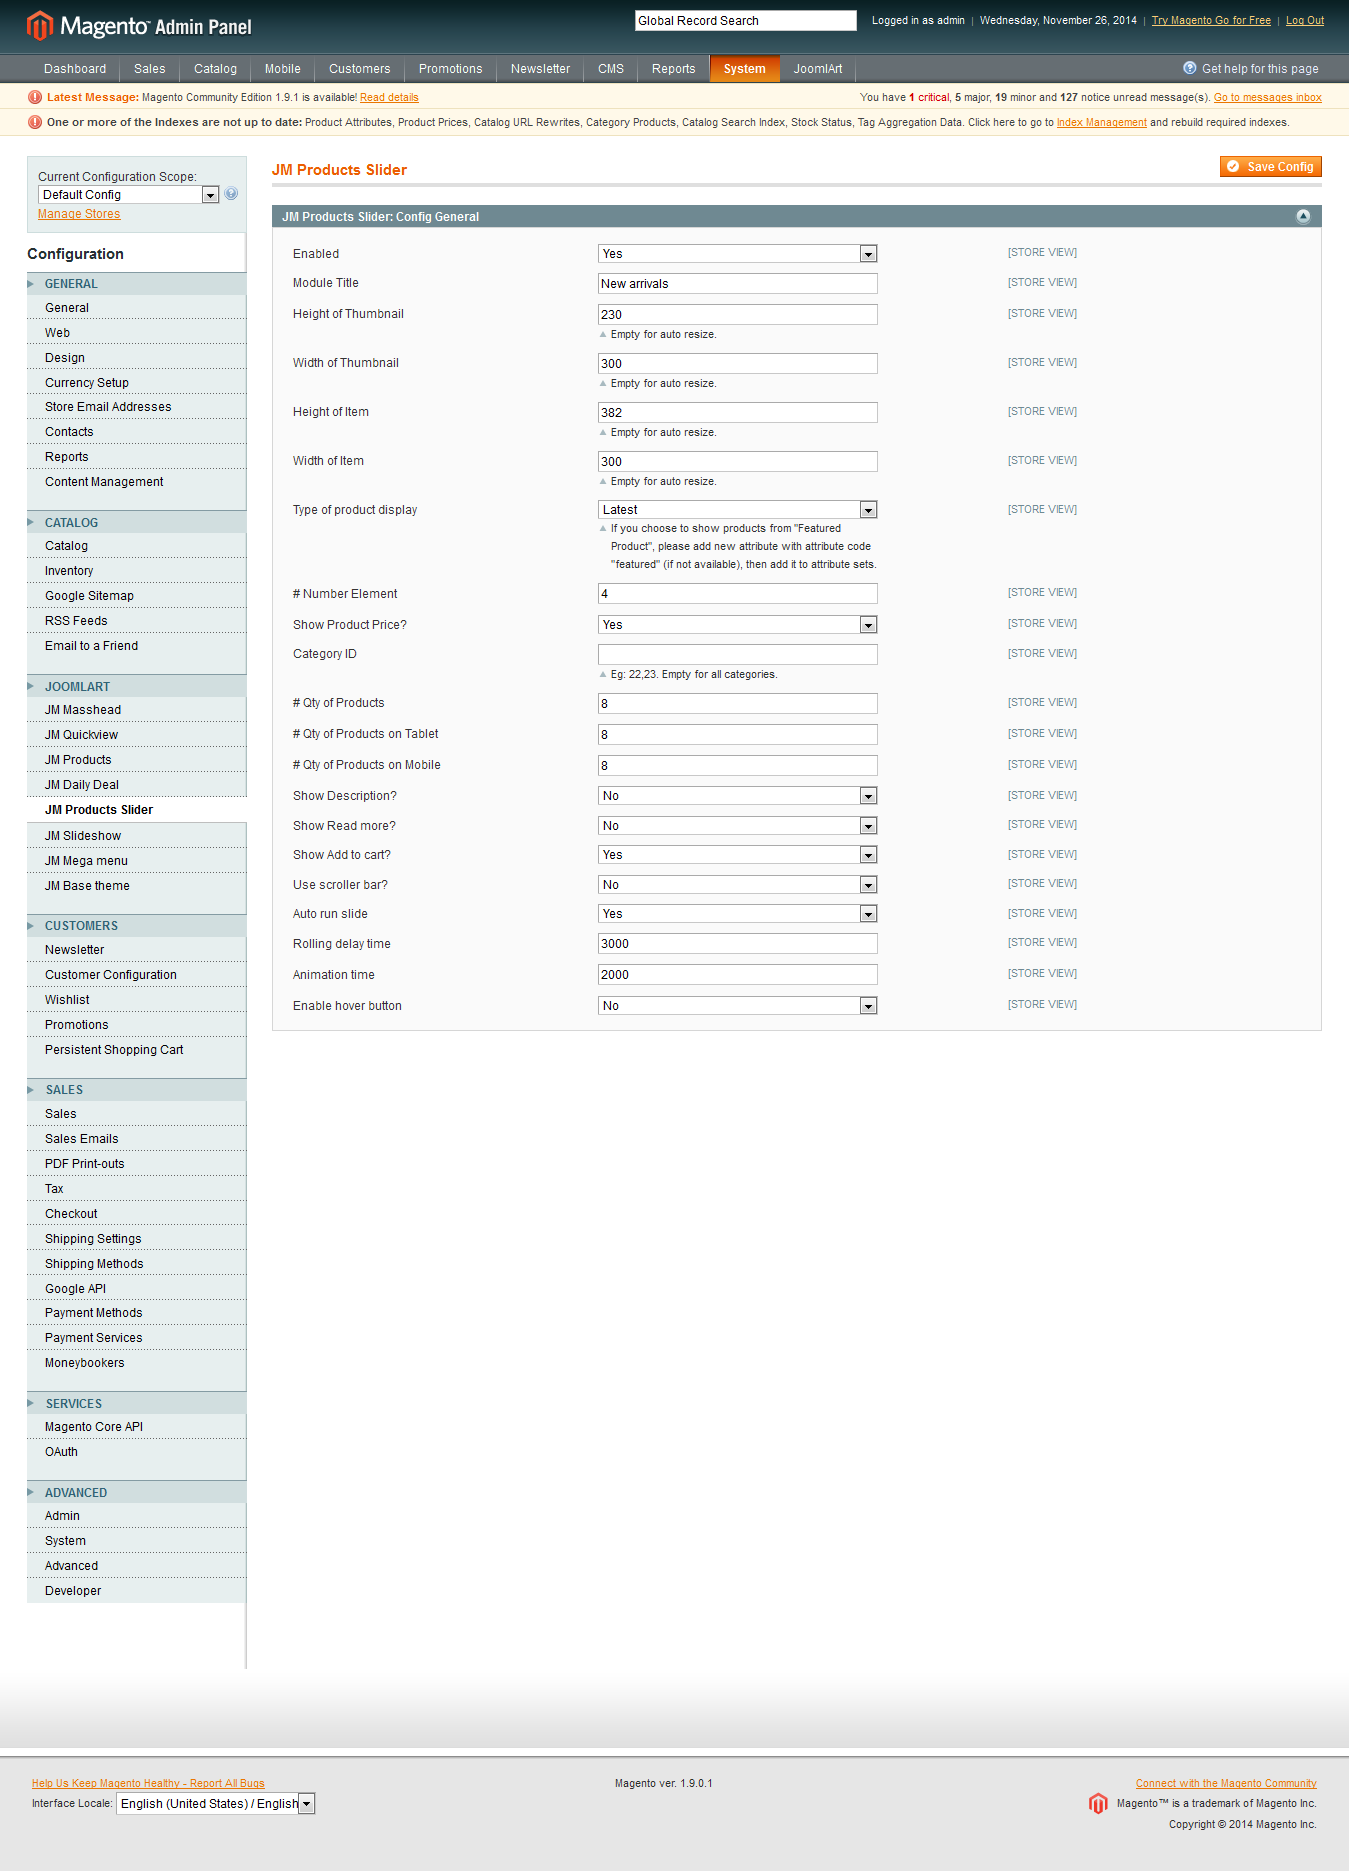
Front-end Appearance:
For more detail, please check the documentation of the module.
Mega Menu Configuration
JM TravelGear supports Magento extenstion Mega Menu. Follow the guide below to get it configured properly.
In the Magento Admin Panel, navigate Mega Menu >> Manage Menu Groups.
You need to create a Menu group first, each for one store language view. Once done, select the store language view that you want to create a menu and click “Add Menu Item” button to define the menu items. The default settings belong to English group. Other language groups have similar settings for menu items.
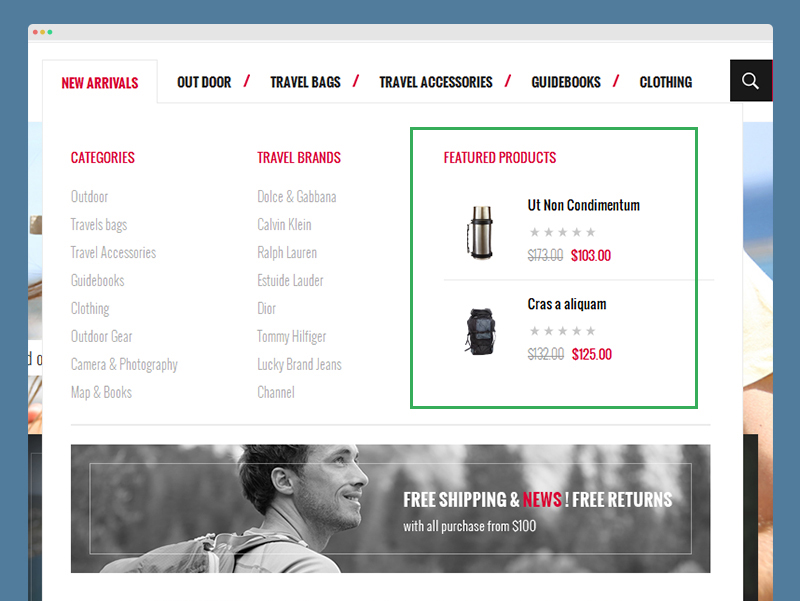
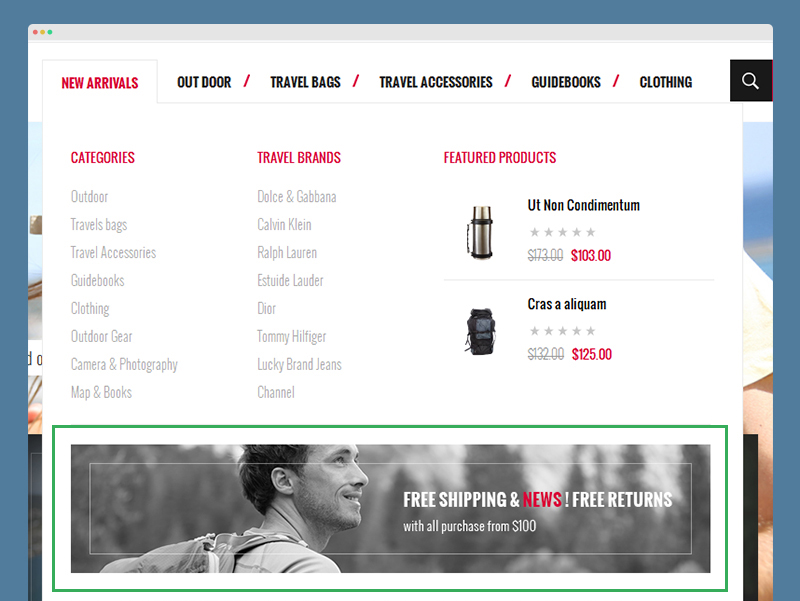
New Arrivals Menu
Front-end Appearance:
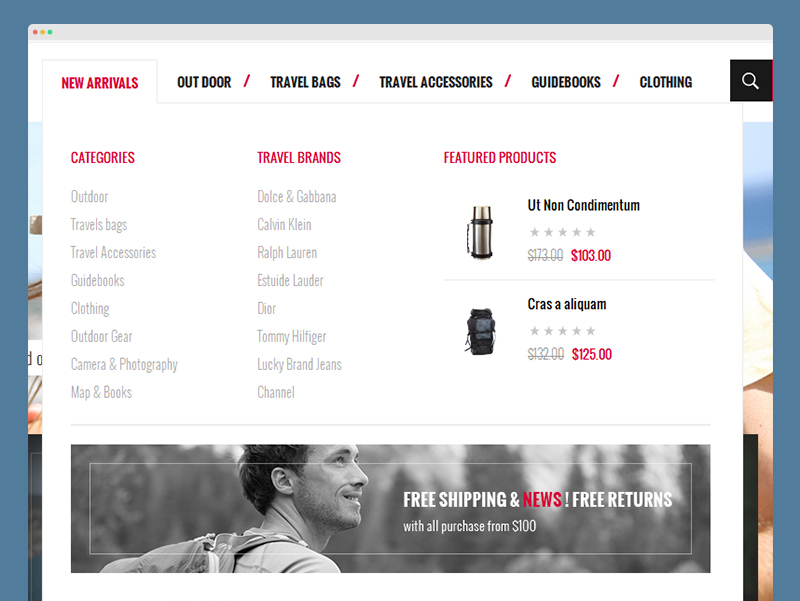
- Item : New Arrivals Item -- Menu Back-end Settings
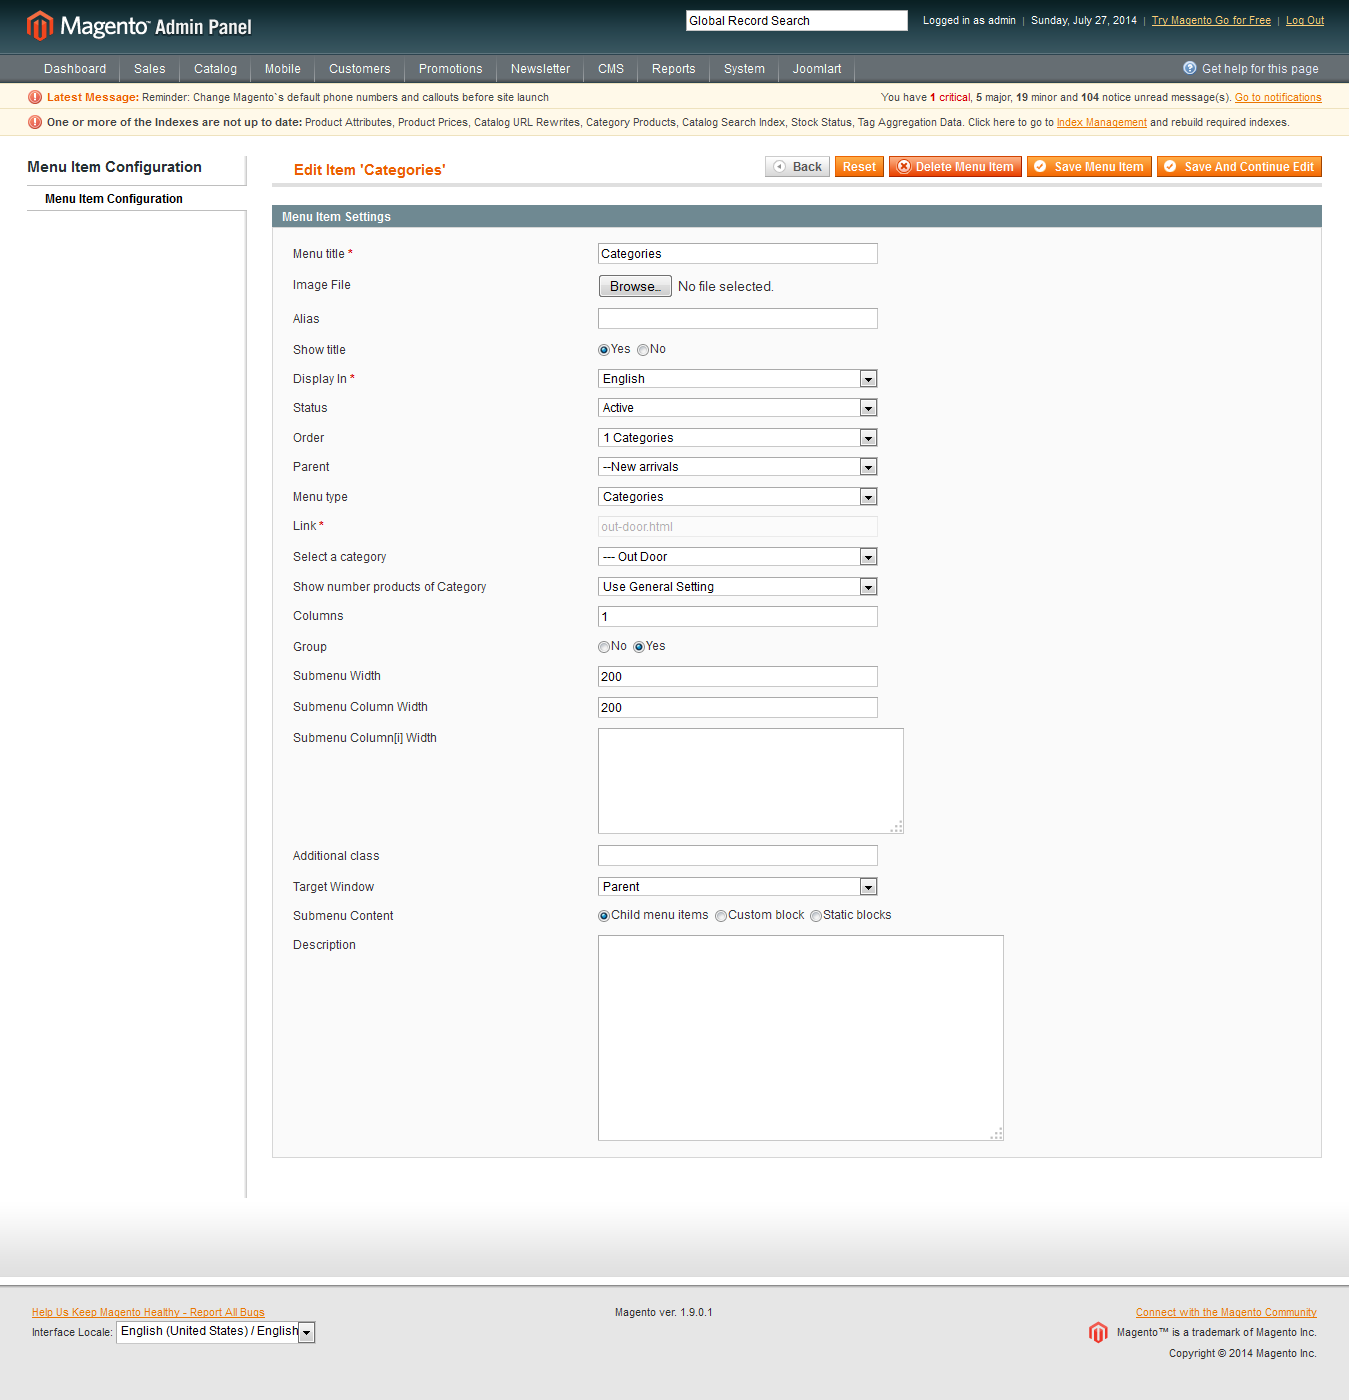
- Item : Categories Item -- Menu Back-end Settings
- Item : Outdoor Item -- Menu Back-end Settings
- Item : Featured Product Item -- Menu Back-end Settings
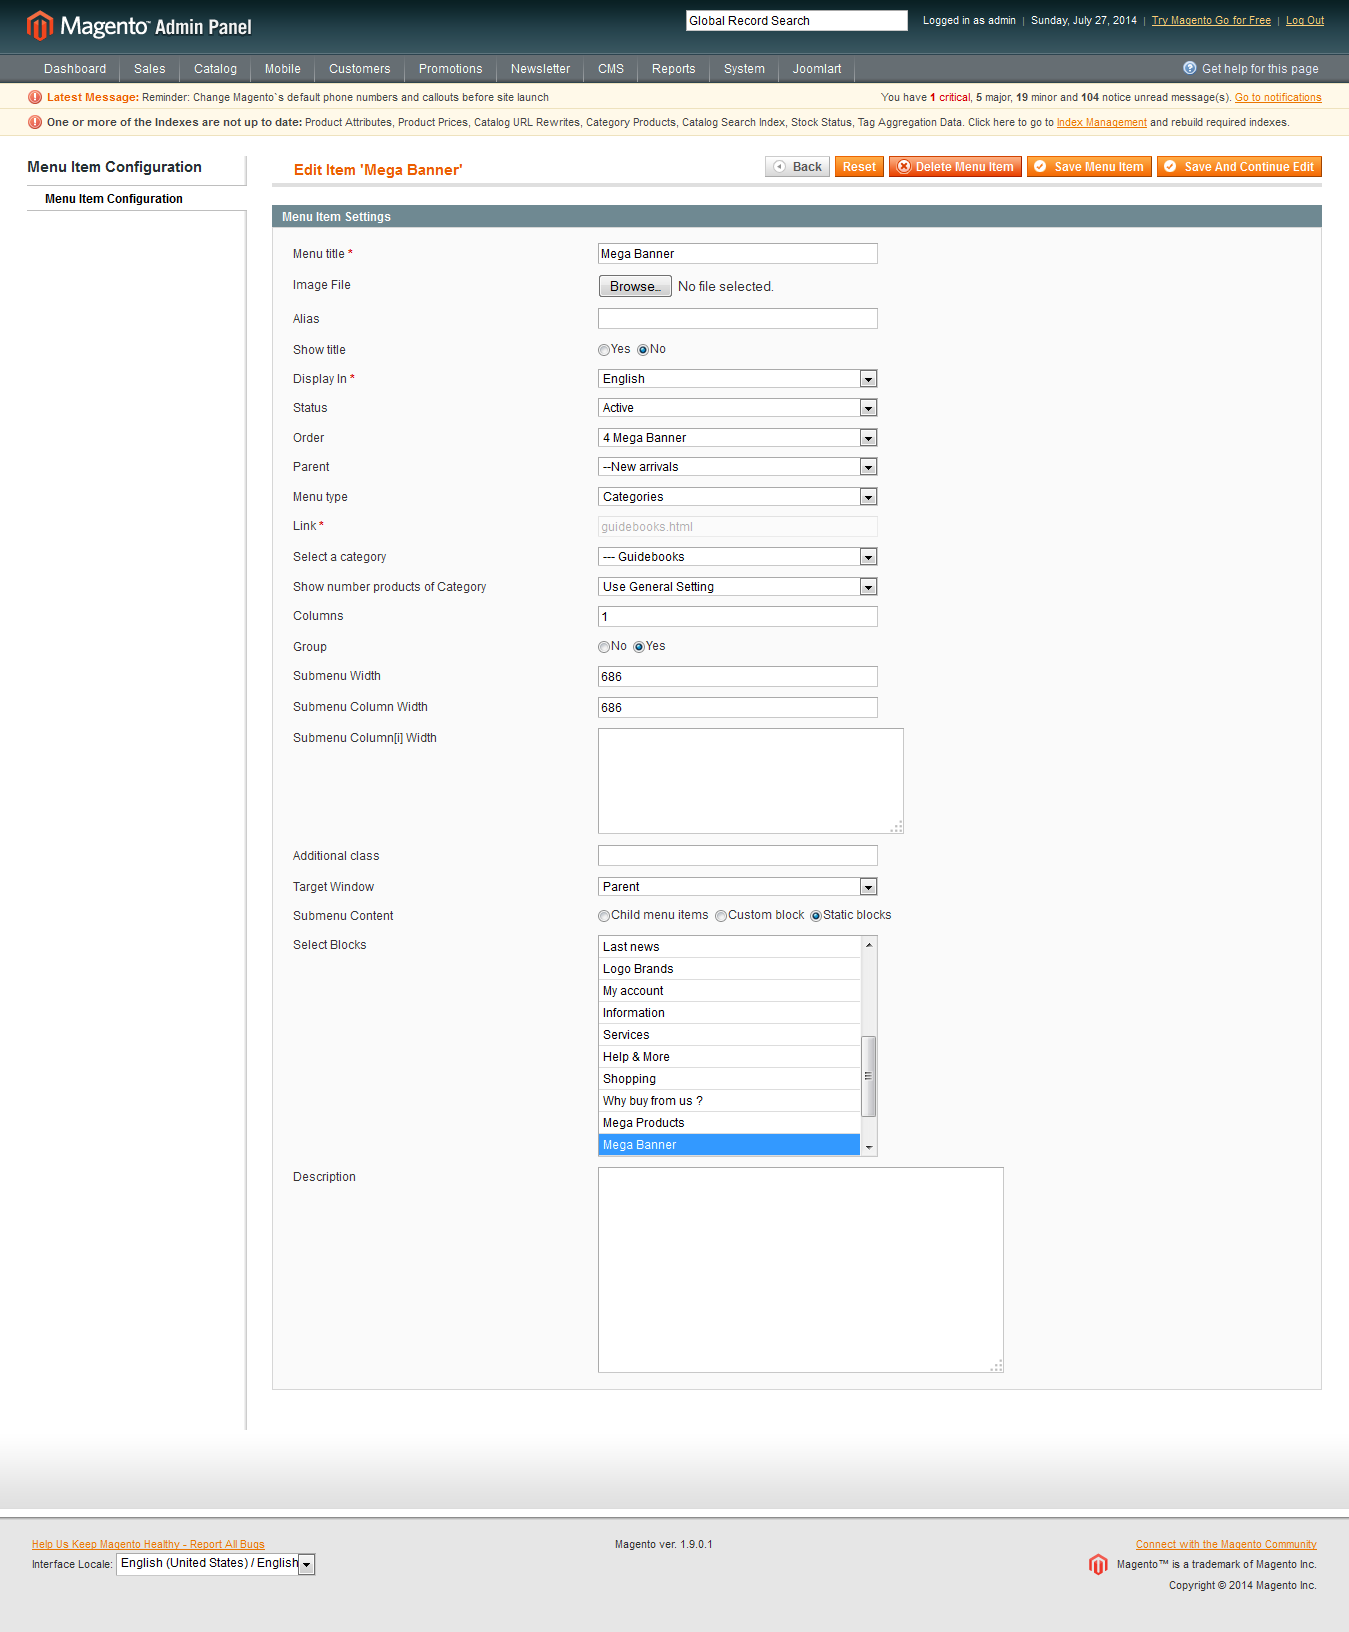
- Item : Mega Banner Item -- Menu Back-end Settings
Note:
Other menu items do have the same settings with the items above.
Responsive Layout Configuration
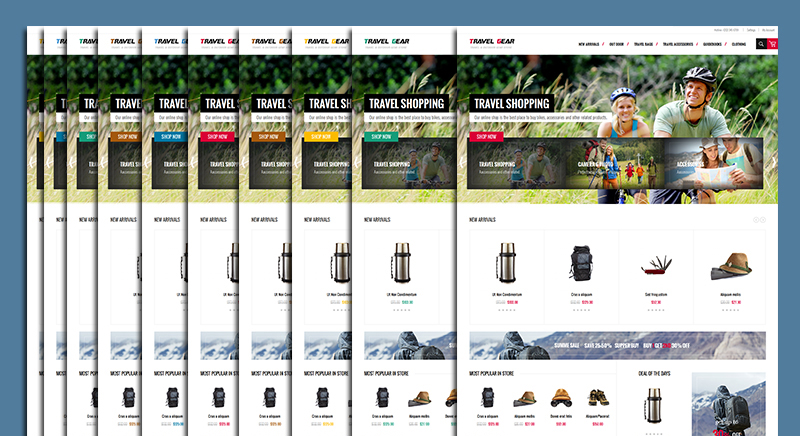
As a responsive Magento theme, JM TravelGear supports responsive layouts for various screen sizes and Off-Canvas menu for collapsed screens of mobiles and tablets.
Screenshot of JM TravelGear layout in various devices:

Screenshot of Off-Canvas layout for JM TravelGear:

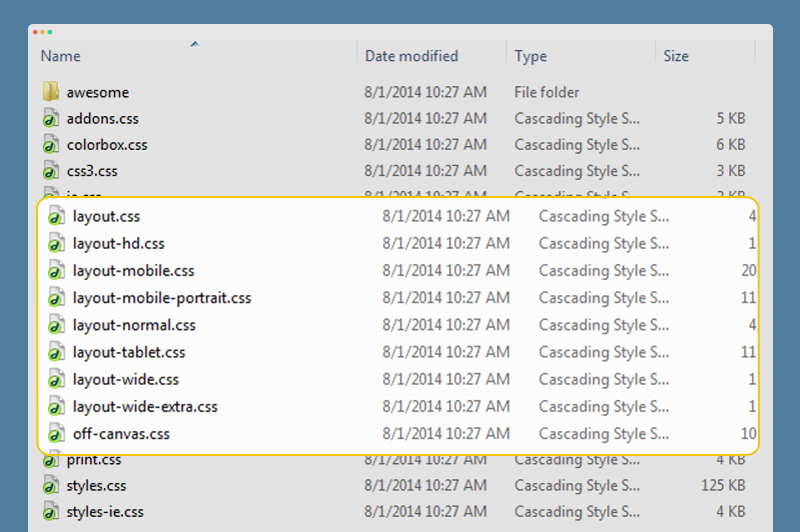
Where to customize?
All the style files for responsive web design are located in the folder: skin/frontend/default/jm_Travelgear/css. In this particular theme, we support 3 layout styles for desktop, tablet and mobile.
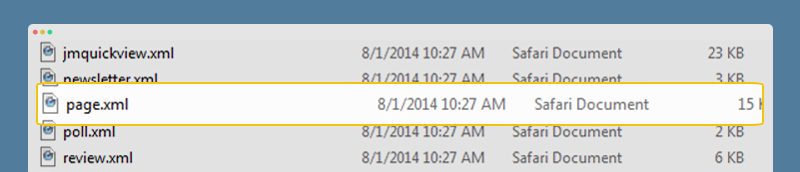
Once modified the style files, call your customization onto fron-end by updating the page.xml file located in: app/design/frontend/default/jm_travelgear/layout.
Note:
The default settings of responsive Magento theme JM TravelGear support any eCommerce Magento site to work at its best performance. Any modification may not be supported by us.