UB Instant Layered Navigation
I. Installation Prerequisites
UB Instant Layered Navigation is a native Magento 2 layered navigation extension. Please make sure your system meets the Magento 2 System requirements: here.
II. Download Packages
Download our Magento 2 layered navigation extension via your profile:
III. Manual Installation
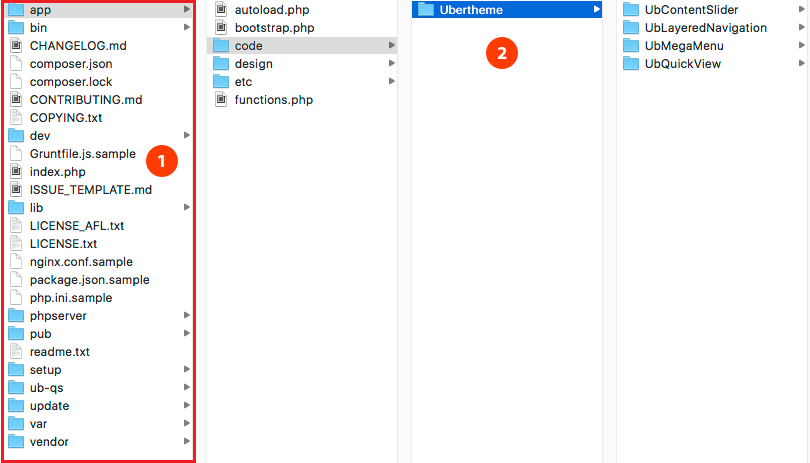
- Step 1. Unzip the download package somewhere on your local PC. You should see the app folder structure as follows.
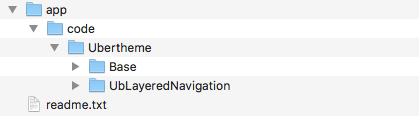
- Step 2. Copy and paste the folder app of the package you have unzipped to your web root. Once done, you should see the path ..app/code/Ubertheme/UbLayeredNavigation as the following screenshot.
Attention for Mac OS users: When you copy the extensions files using Finder into a local directory, make sure you *merge*, not *replace* the existing folder contents, as otherwise your app folder will be gone.
- Step 3. Open your terminal and go to the Magento directory. In this directory, run the following commands:
NOTE: If your Magento 2 site is in `production` mode, before having our extension enabled, make sure you switch to `developer` mode by using the command: php -f bin/magento deploy:mode:set developer
- php -f bin/magento module:enable -c Ubertheme_Base
- php -f bin/magento module:enable -c Ubertheme_UbLayeredNavigation
- php -f bin/magento setup:upgrade
Once done, you should have UB Instant Layered Navigation installed and ready for your use.
IV. How to use (Instant Layered Navigation)
This How-to section will walk you through:
- How to export Product data (required step)
- (Optional) How to Enable Amazon S3
- (Required) How to Export Data
- How to manage Product attributes
- How to enable Cron Jobs to update JSON data automatically
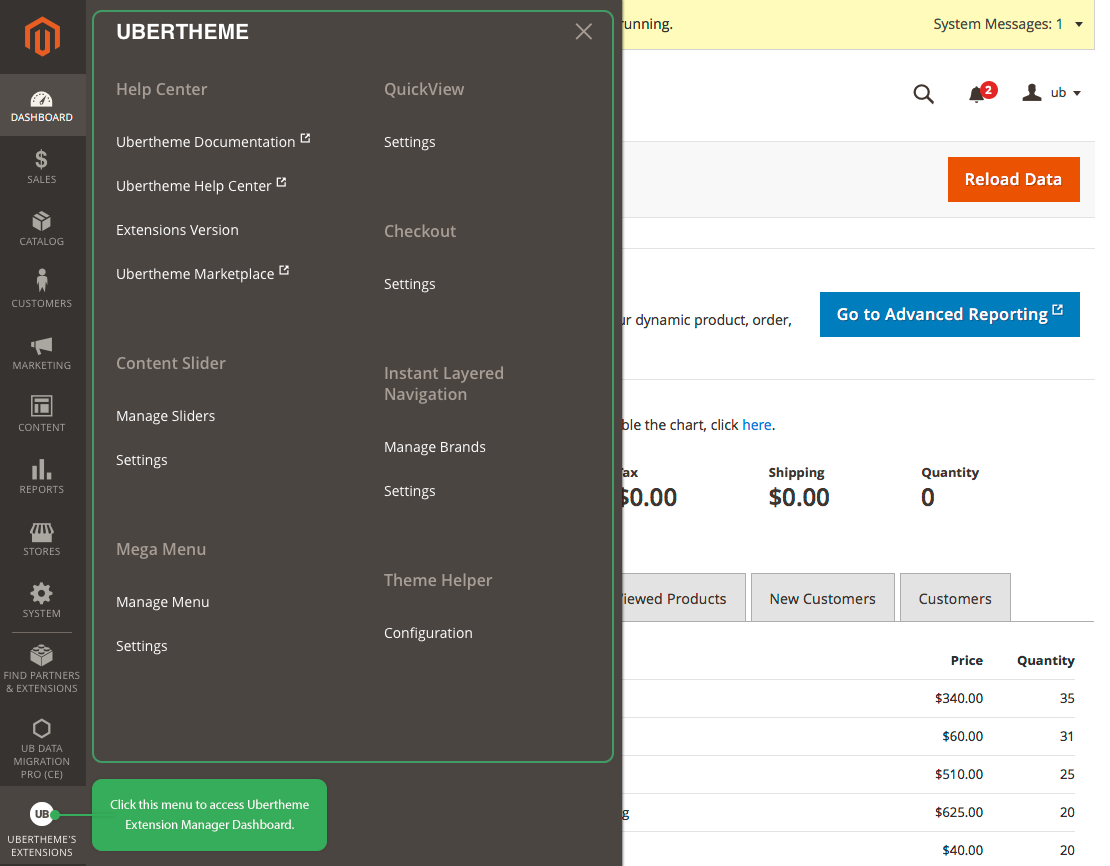
NOTE: Since UB Instant Layered Navigation version 1.0.6 and above for Magento 2.3.1+, we implement a new Ubertheme Extension Manager Dashboard as shown in the screenshot below:
4.1. How to export Product Data
In order to optimize storefront performance, and especially to ensure instant product filtering, UB Instant Layered Navigation extension performs an indexing mechanism which uses an extra JSON database to store product data. So, after installing our extension, the first step you need to do is to export your products data to JSON data. This is an extremely important step.
UB Instant Layered Navigation supports two options to store your exported product data:
- If Amazon S3 is disabled: product data will be exported and stored in your Magento instance at PATH_TO_YOUR_MAGENTO_2/pub/ub-layered-navigation folder
- If Amazon S3 is enabled: product data will be exported and stored in your AWS S3 buckets. All changes of your exported data will be automatically synced to AWS S3.
If you do not choose to use Amazon, you can discard the section 4.1.1 Enable Amazon S3 below and jump over to the section 4.1.2 Export Data.
4.1.1 (Optional) Enable Amazon S3 storage

There’re a few required steps to enable Amazon S3 feature in UB Instant Layered Navigation:
- Step 1: Install AWS Resource APIs (required step)
- Step 2: Fill in Access key ID and secret access key
- Step 3: Set up buckets
- Step 4: Select Regions
Step 1: (Required) Install AWS Resource APIs
You must install the AWS Resource APIs using Composer by requiring the aws/aws-sdk-php-resources package in your project. You can check out How to install AWS Resource APIs here.
Step 2: Set up access for Amazon S3 usage:
2.1 Fill in Access key ID and Secret access Key
Log into AWS management console (which is available at Https://aws.amazon.com/console), under the user menu, click on My Security Credentials as shown in the following screenshot:

Navigate to Access keys (access key ID and secret access key) section:

Click Create New Access Key, you should see like the following one:

Here, you can click on Show Access Key to view both access key and secret key.
If you do not download the key file, you will not be able to retrieve your secret access key again. You also need to store both keys securely and do not share it.
2.2. Bucket Name
S3 consists of buckets. We can think of a bucket as the first level directory within our S3 account. You then can create your own bucket and new folders to store your product data; and set the permissions and other options on that directory (bucket).
To create a new bucket, you start by logging in to the AWS management console.
Under the Storage group, click on S3. You should see a screen similar to the following:
For the purpose of this guide, we create a sample bucket called ‘ubertheme-data’ with a sub folder ‘pub/ub-layered-navigation’:

2.3. Select Region:
AWS S3’s data centers are organized by geographical region around the world. For best performance, you can choose any AWS Region that is geographically close to you to reduce latency, minimize costs, or address regulatory requirements.
Now that you’ve completed all steps to enable Amazon S3 storage, simply move to the next step 4.1.2 How to export data. Once you run the CLI command to export data, your product data will automatically be exported and synced into the S3 bucket you’ve created above. All changes in your exported product data later on will be auto-synced to S3 as well.
4.1.2. How to export data (required step)
For UB Instant Layered Navigation version 1.0.4 and later: simply run the CLI command below to export data:
php -f bin/magento ub-layerednav:export:run
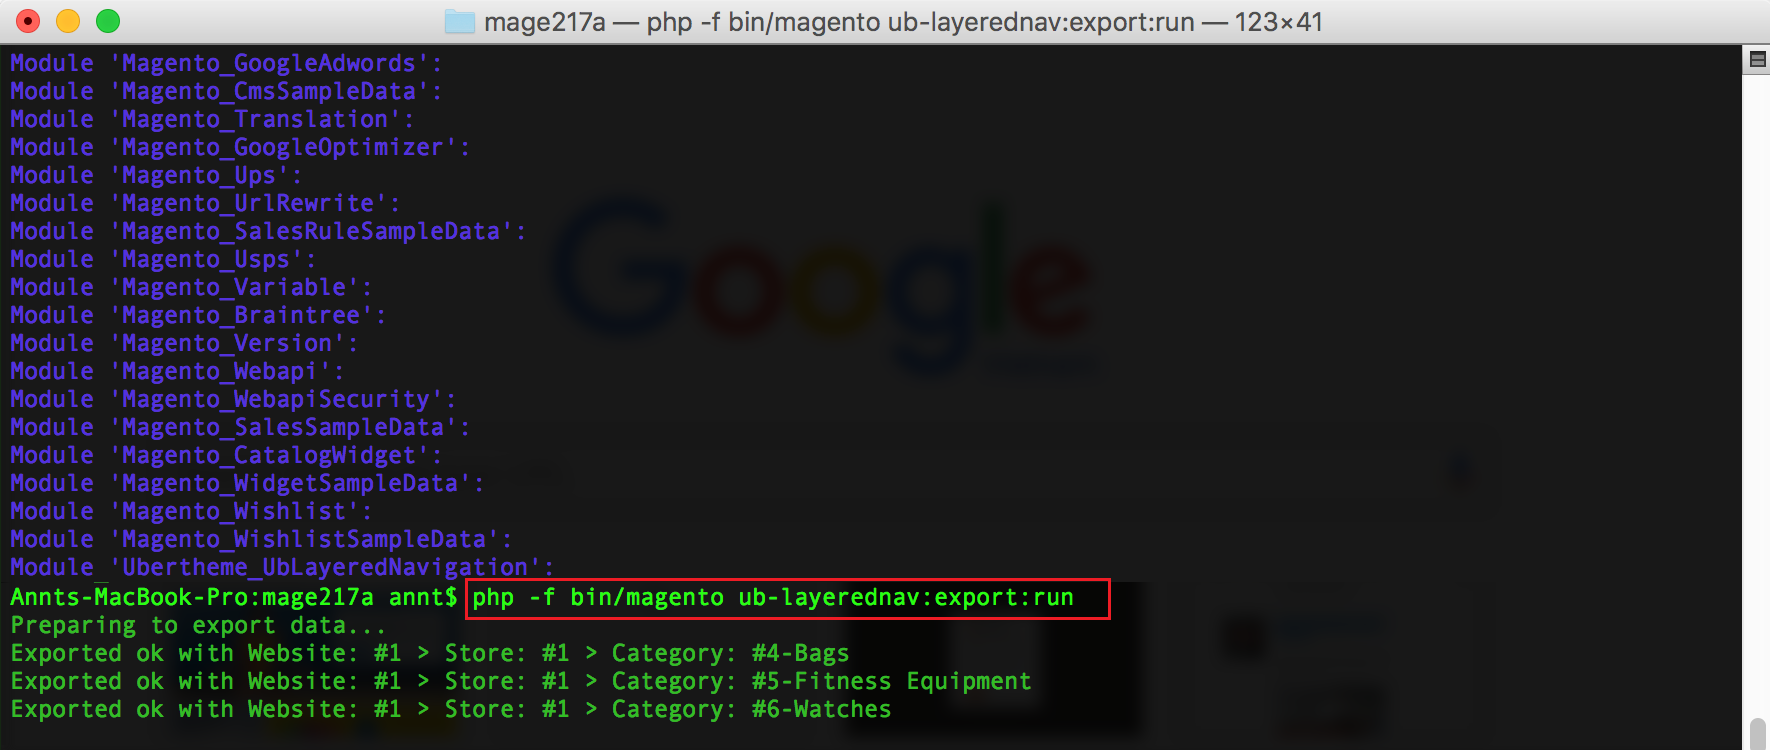
Once done, you should see the successful notice as Done!
4.2. How to manage Product attributes
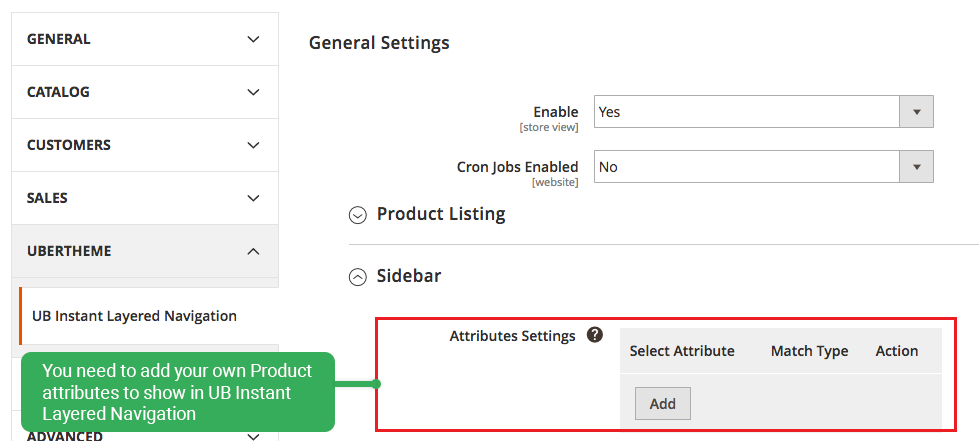
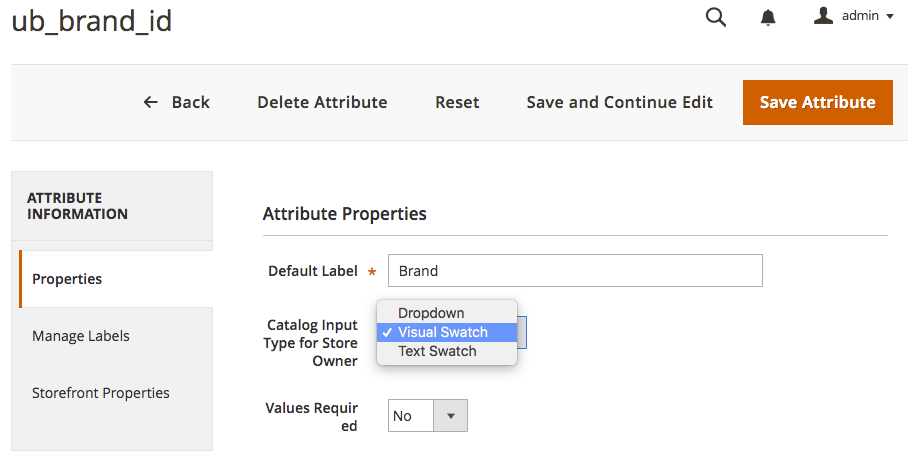
You need to add your own Product attributes to fit with your Magento store.Let’s see an example -- Adding a new ‘Color’ attribute. You just need follow the same steps to add other product attributes.Step 1: On the Admin sidebar, tap Stores | (Under Attributes) choose Product. Then click on the Color attribute.You should see the Catalog Input Type for Store Owner setting with 3 types -- Dropdown, Visual Swatch, Text Swatch.
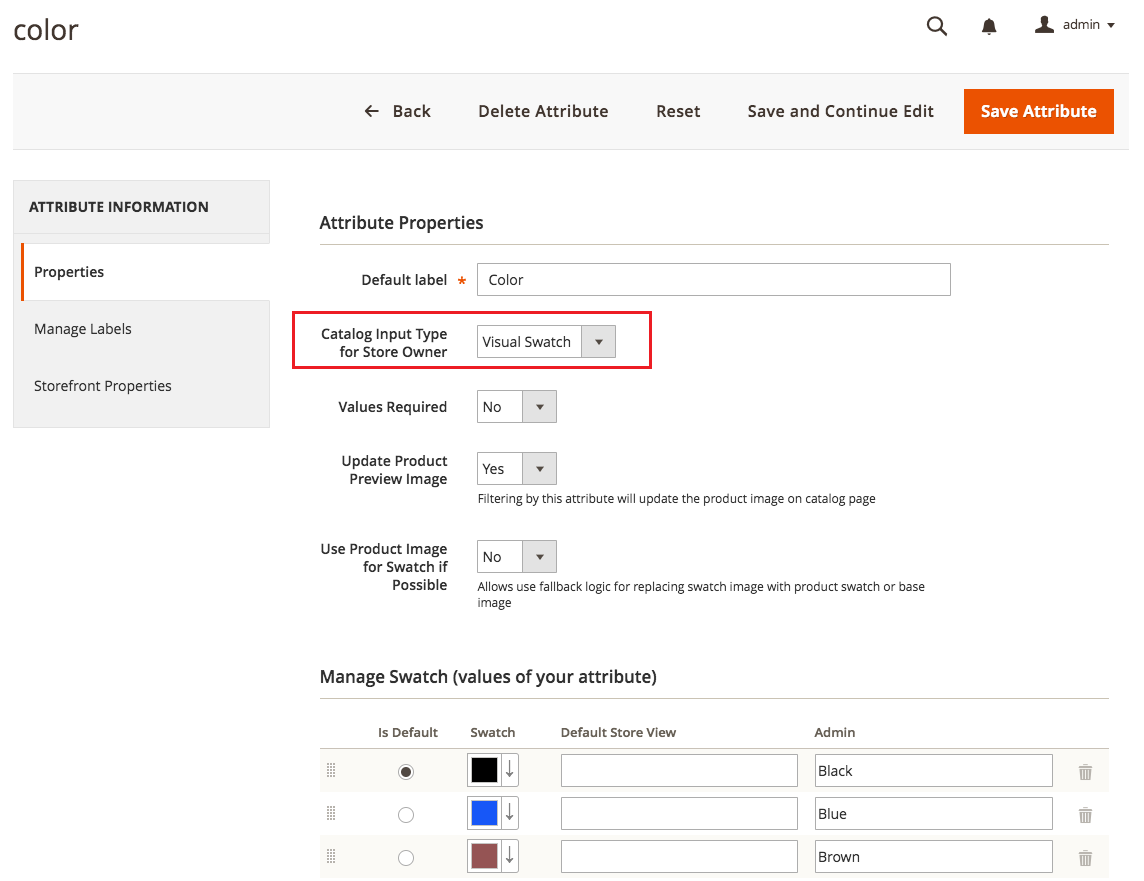
Set Catalog Input Type for Store Owner with a value you wish:
- Dropdown: Dropdown allows listing all values for the field at the same time and accepts only one value.
- Visual Swatch: The visual swatches can describe the true color, texture, or pattern with a hexadecimal color value, or an image.
- Text Swatch: A text swatch is like a button that is used for an attribute value as size.
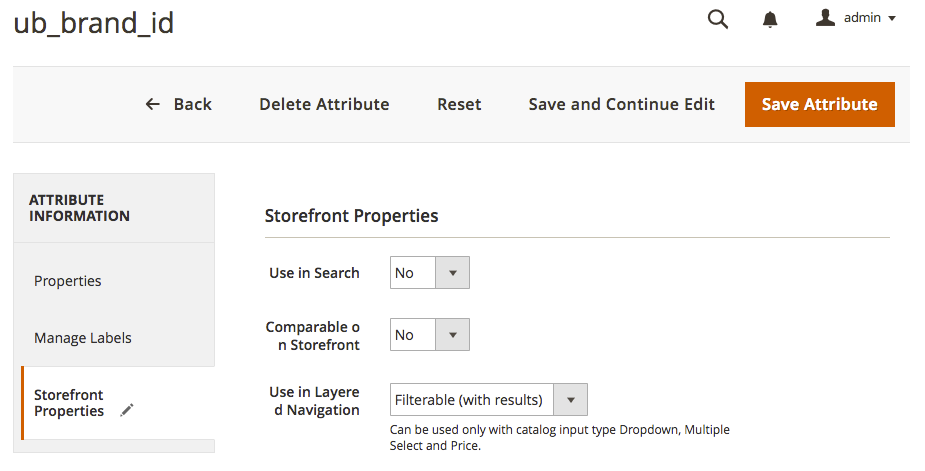
Step 2: In the same Color attribute configuration panel, move to the Storefront Properties tab, In the Use in Layered Navigation, choose to Filterable(with results). Once done, make sure you clear Cache.

Now the Color attribute should be added into UB Instant Layered Navigation extension.
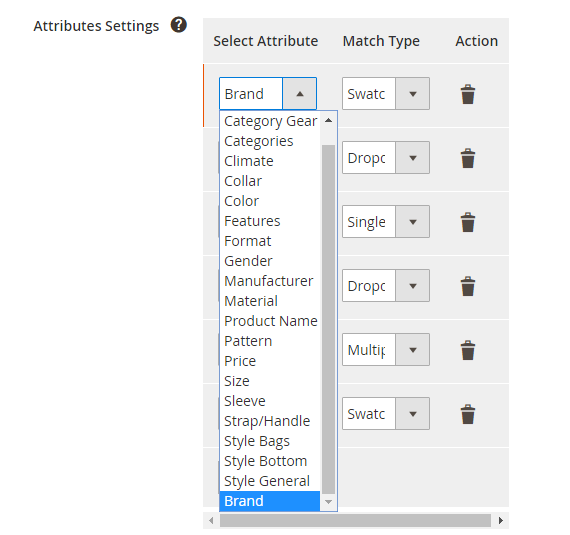
To check the newly added Color attribute, in the UB Instant Layered Navigation setting panel | General Settings | Sidebar, click Add button (in the Attribute Settings field), then click ‘Select Attribute’ dropdown list, you should see the Color attribute as follows:
4.2.2 How to enable a Product Attribute to display in the store frontend.
Now let’s start enabling the Color attribute added in the previous step to show in your frontend (You apply the same for other attributes)
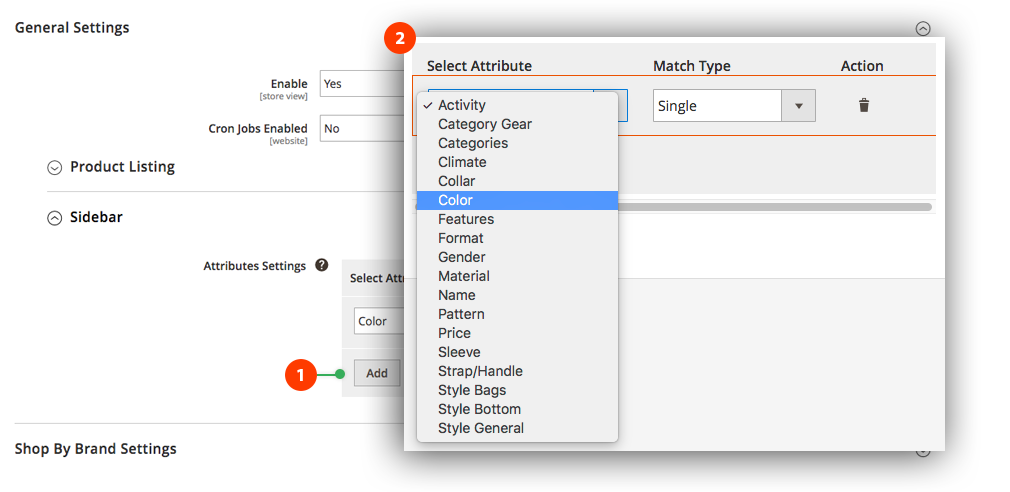
Step 1: In the Admin Panel, navigate to UB Instant Layered Navigation setting panel | General Settings | Sidebar, click Add button (1):

Then you select Color attribute in the Select Attribute dropdown list (2) and define its Match Type with Swatch value accordingly (3). Depending on specific product attributes, UB Instant Layered Navigation automatically list available types in accordance with such product attribute. For instance, you will see Price attribute with type ‘Range Values’; Categories with types: Single, Dropdown or Multiple and so on.
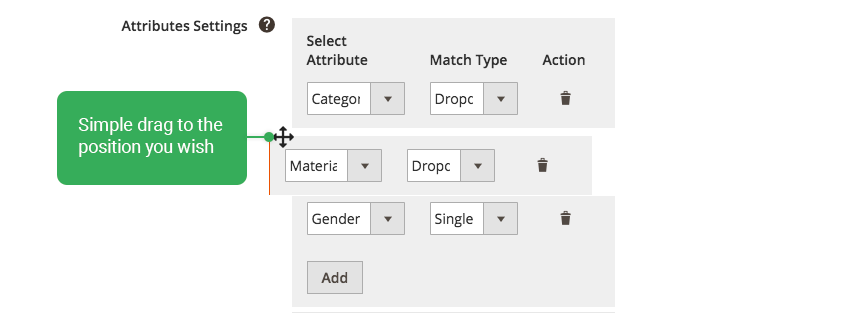
It’s possible to add one or multiple product attributes at your choice. Simply edit or remove any product attribute as you wish.
To change the order of product attributes shown in the frontend, just drag and drop each product attribute to define your own priority order.
Step 2: After you’re finished, click “Save config” button (4). Make sure you clear cache as well.
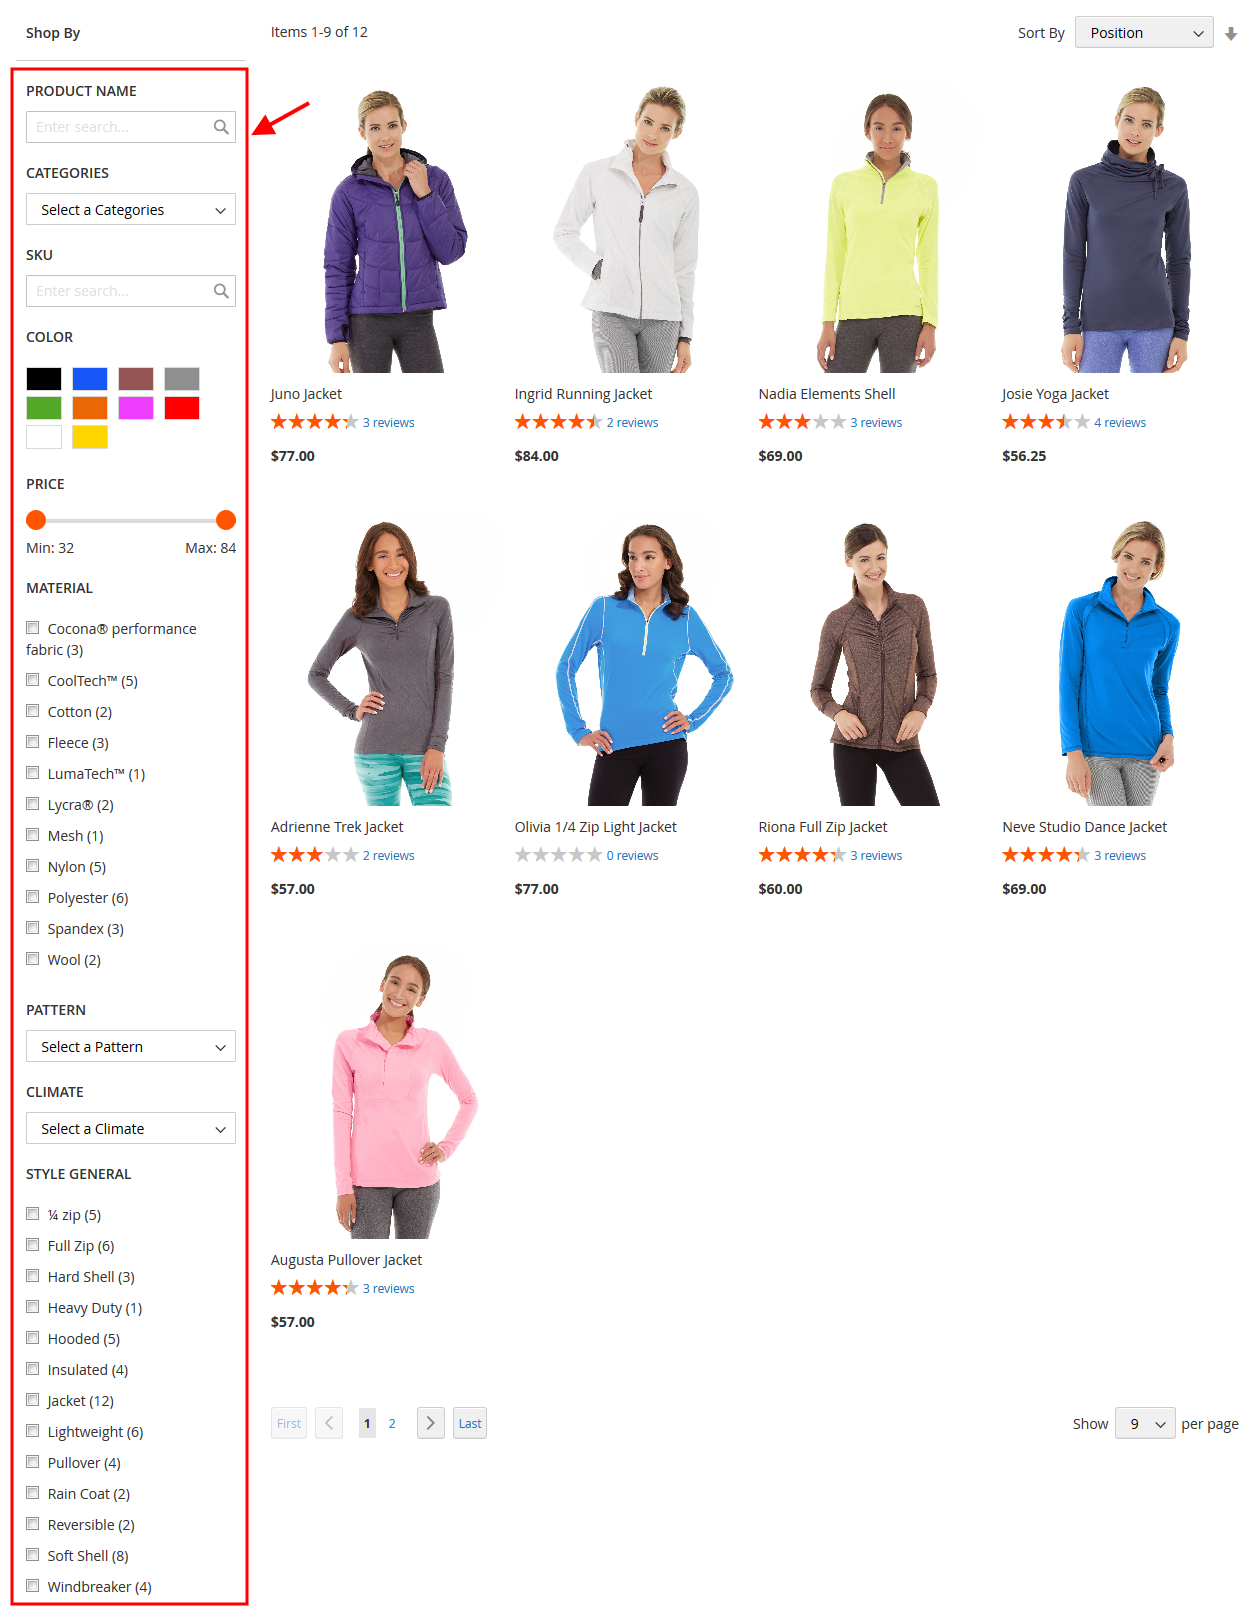
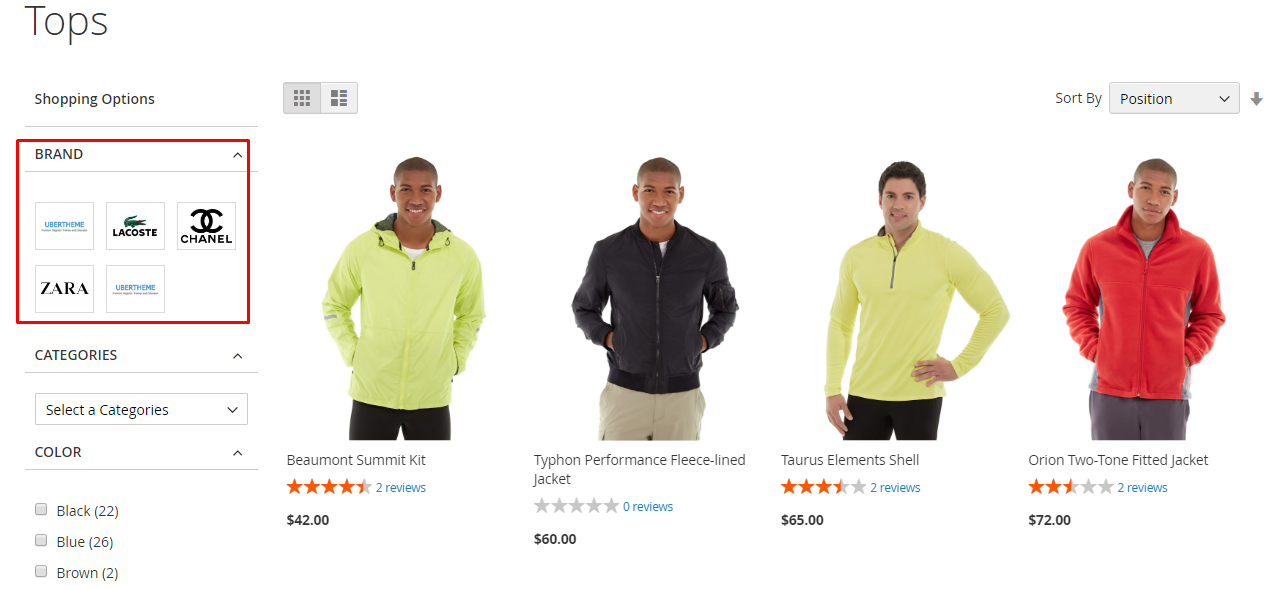
Now open up an anchor category on your frontend, you should see the UB Instant Layered Navigation in place:
4.3. How to enable Cron Jobs to update JSON data automatically

Second, you activate Magento cron job in the background. If you’re new to this step, learn more on how to set Magento cron jobs in the background follwing this guideline.
V. How to use (Shop By Brand)
Now let’s see how to manage Shop By Brand feature which is included by default in UB Instant Layered Navigation. Shop By Brand is a great complementary add-on for your Magento 2 layered navigation.
This How-to section will walk you through:
- Prerequisites (required)
- Create a new Brand / Import Brands
- Configure Shop By Brand
- Configure All-brands page
- Configure Featured Brand Widget
- Show Brand on Magento 2 Layered Navigation sidebar
5.1. How to Create a new Brand
5.1.1. Add a new brand
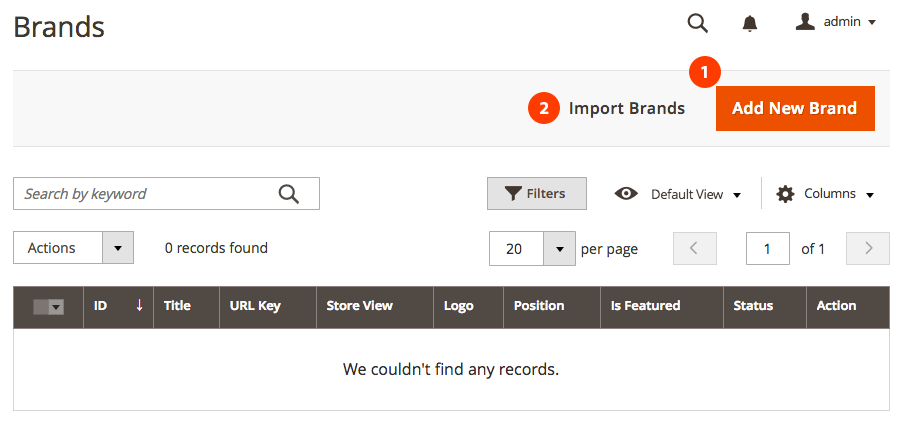
In the Admin Panel, navigate to Content | (UB Instant Layered Navigation) Manage Brands| Click Add New Brand buttona. Basic information
Tap to open Basic Information:
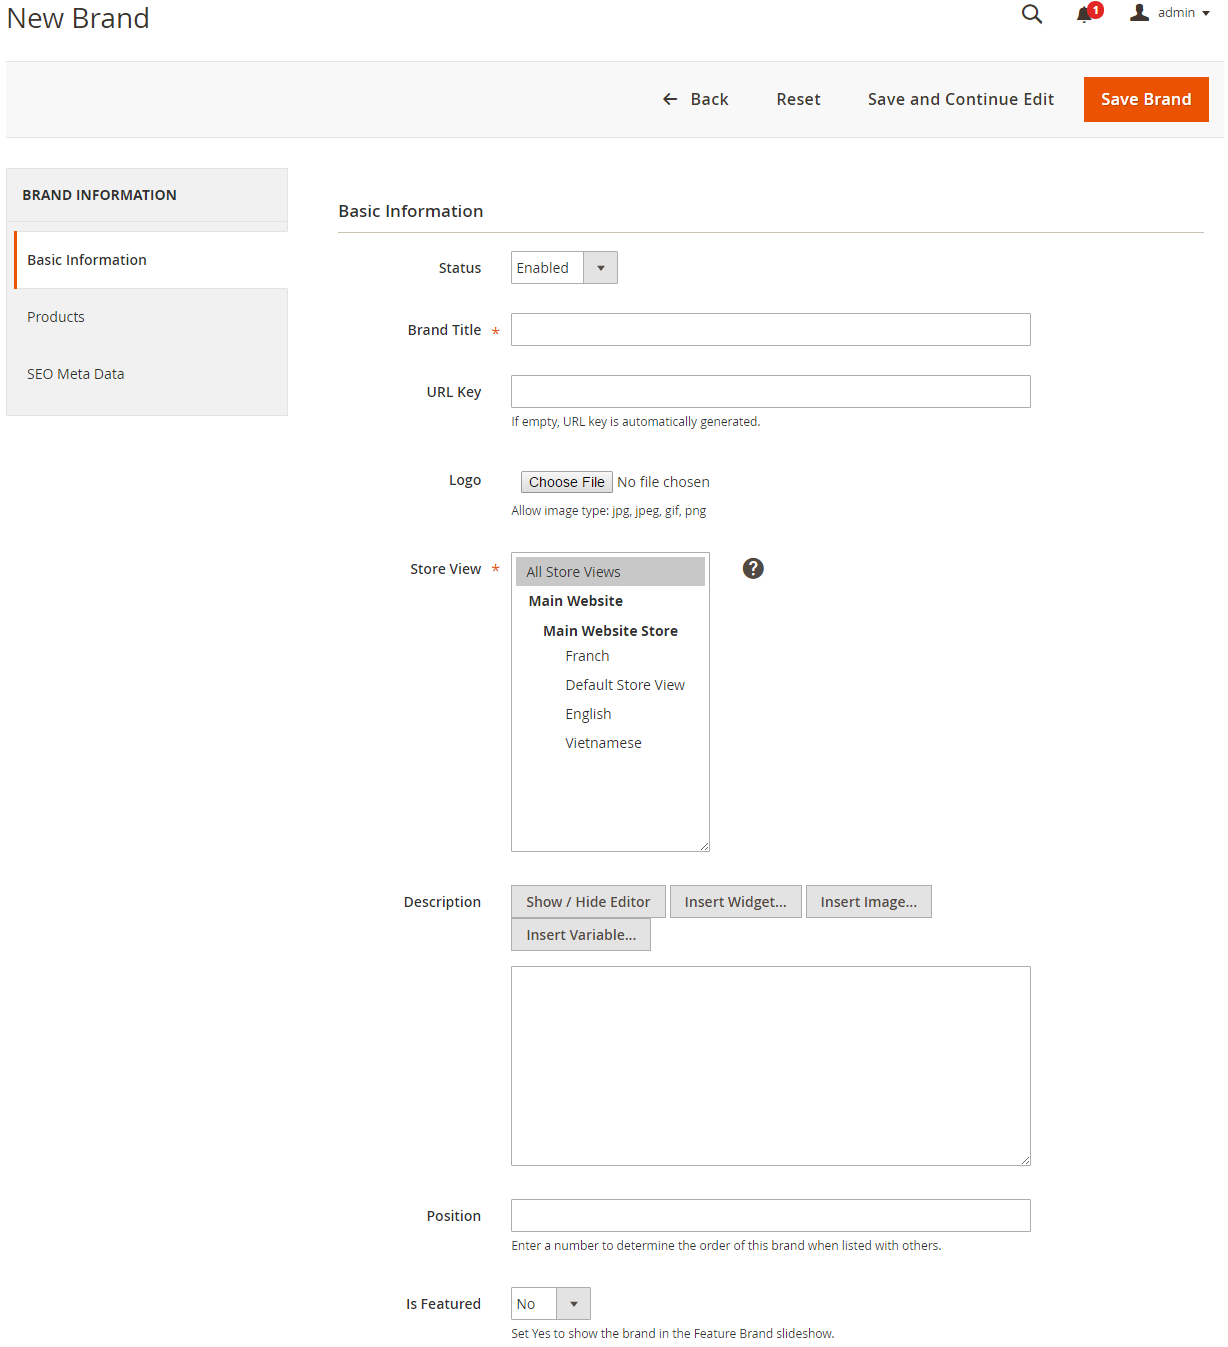
- Status: To enable/disable the brand
- Brand Title: Enter your brand name here
- URL key: If empty, an initial URL key is automatically generated, based on the brand name.
- Logo: Upload your brand logo here. Allow image types: jpg, jpeg, gif, png. If empty, a default placeholder logo is used. To delete a logo, simply check the “Delete image’ checkbox, and click Save Config.
- Store View: Determine scope of store view to display the brand
- Description: Enter brief introduction of the brand
- Position: Enter a number to determine the order of this brand when being listed with other brands.
- Is Featured: set “Yes” to show the brand in the Feature Brand slideshow. Default option is “No”.
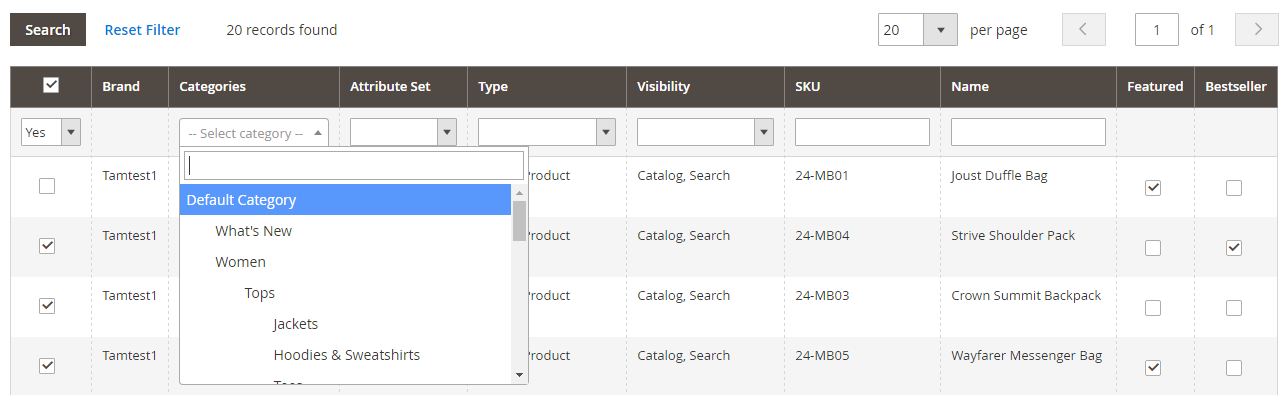
b. Products tab:
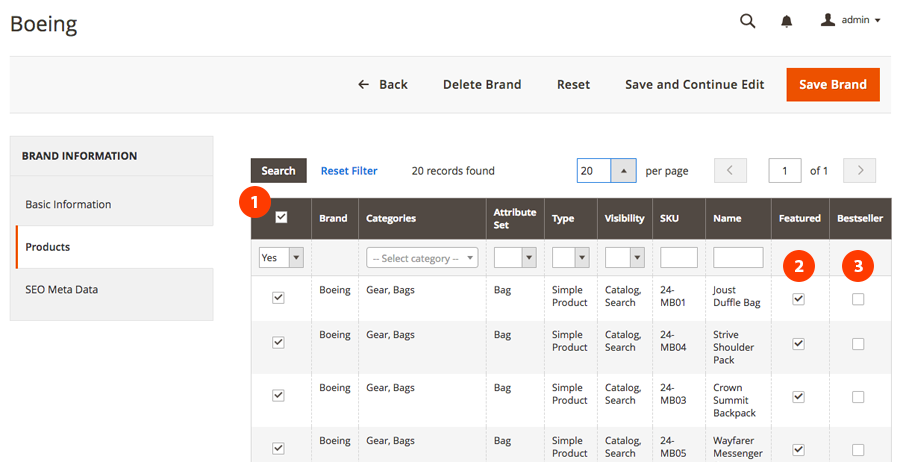
The Products tab lets you assign multiple products to a brand in one go.
- (1) Select multiple products to assign to the brand
- (2) Check the Featured option, if you want to list the product(s) in the featured products section.
- (3) Check the Bestseller option, if you want the product to be listed on the sidebar Bestseller widget.
Beside, you can also narrow down the products by different criteria, including Categories, Attribute Set, Product Type, Visibility, SKU, Name.
NOTE: There’s another way to manually assign a product to a brand, following steps below:
In your Admin sidebar, tap Products | (Under Inventory) choose Catalog. Then click on the Edit the product:
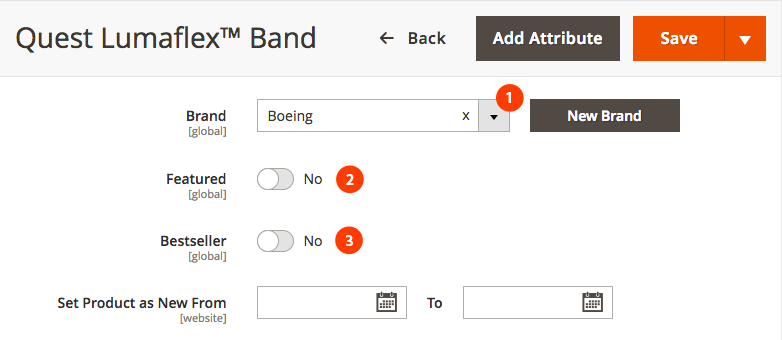
- Select a brand available in the dropdown list. Or you can create a new Brand at your choice, by clicking the ‘New Brand’ button.
- Set Featured to Yes, if you want to list the product(s) in the featured products section.
- Switch the Bestseller option to Yes, if you want the product to be listed on the sidebar Bestseller widget.
Click Save to save your configurations.
c. SEO Meta Data
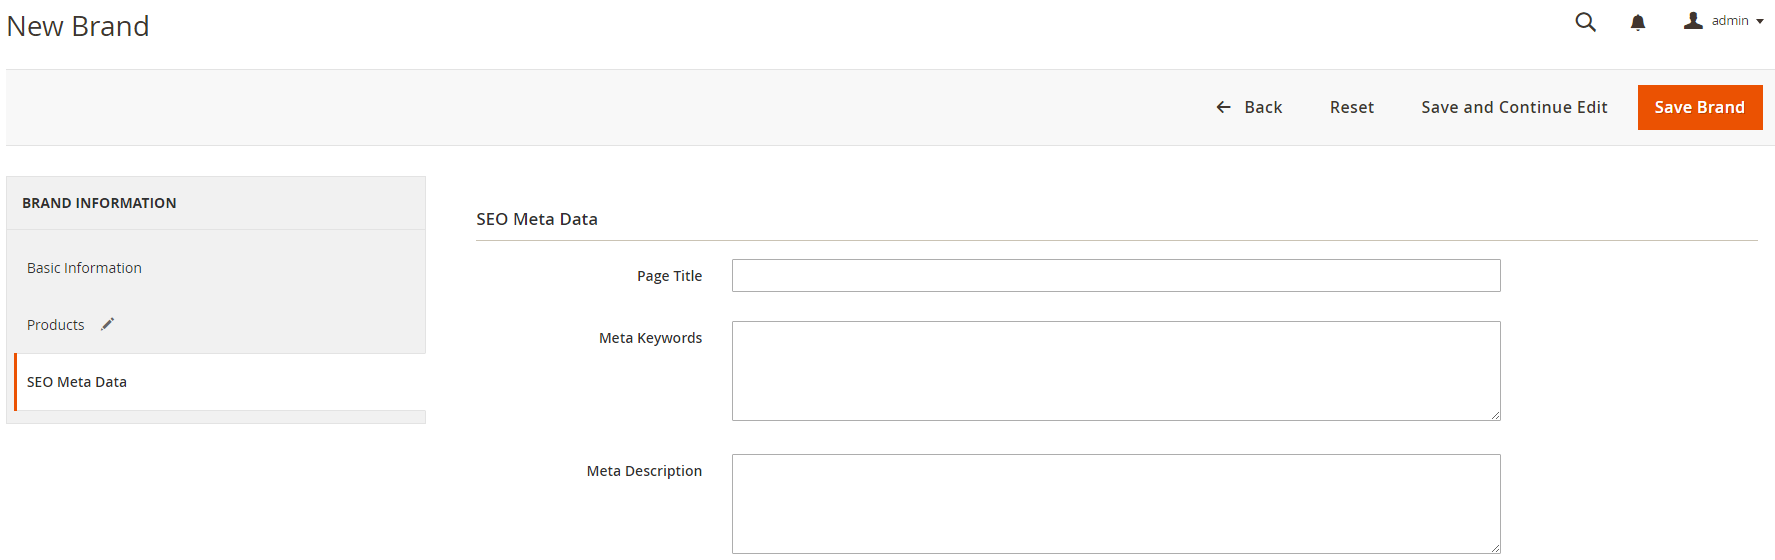
- Meta Title: The title appears in the title bar and tab of your browser, and is also used as the title on a search engine results page.
- Meta Keywords: lists the keywords related to the brand. But it is necessary to consider which keywords are relevant for customers to find the brand.
- Meta Description: is a brief overview of the page for search results listings.
Then you click Save Brand, or Save and Continue Edit button if you want to continue edit value. One done, you should go to Cache Management and clean cache.
In the Admin Panel, navigate to Content | (UB Instant Layered Navigation) Manage Brands| Click Import Brands button.

Then you choose your CSV file to import (At present, only CSV file is supported). You can download sample file CSV here. Once done, go to Cache Management and clean cache.
Supposed you add a few more brands and assign related products to such brands, on the frontend, you should see the all-brand page as per our demo.
Frontend appearance:

5.2. Shop By Brand Configuration
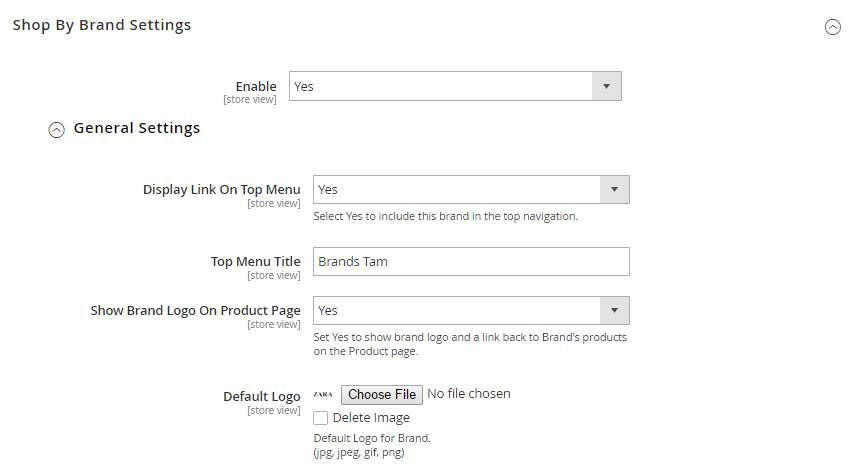
- Enable: Enable / disable Shop By Brand functionality
- Display link On Top Menu: Enable / disable the All-brand menu in the top navigation
- Top Menu Title: Enter the title for the All-brand menu item
- Show Brand Logo on Product Page: Set Yes, if you want to show the brand logo on Product detail page that links to all products under such brand.
- Default Logo: Allowed file types: png, gif, ipg, jpeg, svg. To delete a logo image, check the “Delete image’ checkbox, and click Save Config.
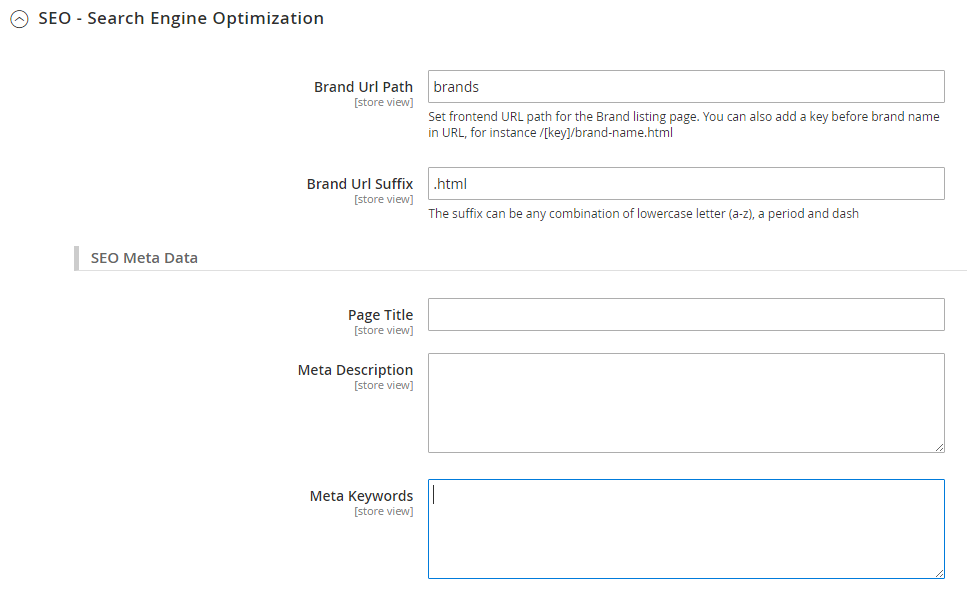
- Brand Url Path: Set the frontend URL path for the Brand listing page. You can also add a key before brand name in URL, for instance /[key]/brand-name.html
- Brand URL Suffix: The suffix can be any combination of lowercase letter (a-z), a period and dash
- Page Title: Enter the brand page title that appears in the title bar and tab of your browser.
- Meta Keywords: lists the keywords related to the listing page. But it is necessary to consider which keywords are relevant for customers to find the brands.
- Meta Description: is a brief overview of the page for search results listings.
This section refers to the settings of the all-brand page.a. General settings:
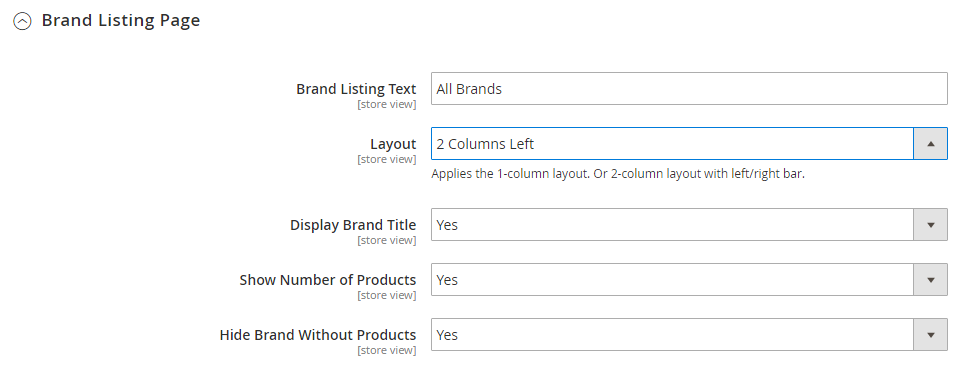
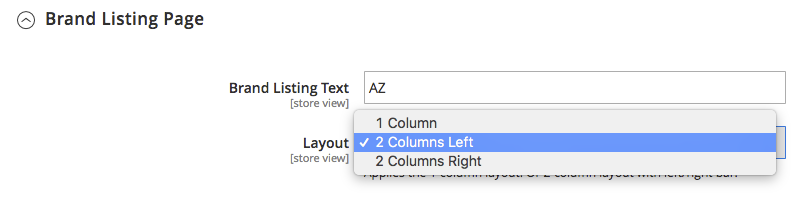
- Brand Listing Text: Enter title of brand listing
- Layout: supports 3 layout options for your choice: Layout -- 1 Column; Layout -- 2 Columns; Layout -- 3 Columns:
- Display Brand Title: Set ”Yes” to show title on brand listing page
- Show Number of products: Set “Yes” to show number of products
- Hide Brand Without Product: Set “Yes” to hide brand without product.
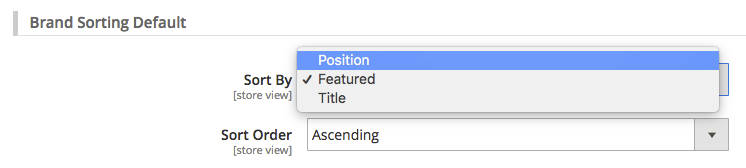
b. Default Brand Sorting:
This setting refers to default sorting criteria that Brands will be displayed on the frontpage: by Brand position, Brand title or Featured Brands; and in ascending / descending order. Users can switch easily among these criteria.

Frontend Appearance:
c. Featured Brands
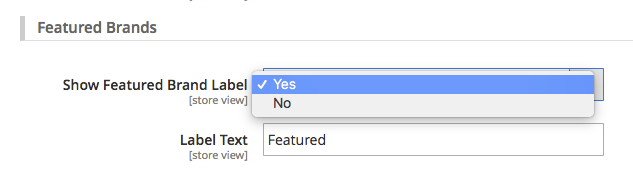
- Show Featured Brand Label: Set “Yes” to show Featured Label on brands.
- Label Text: Enter your own custom Featured Label.
Frontend Appearance:

Once user clicks a specific brand from the all-brand page, they will be directed to a brand detail page that lists all available products under such brand.a. General settings
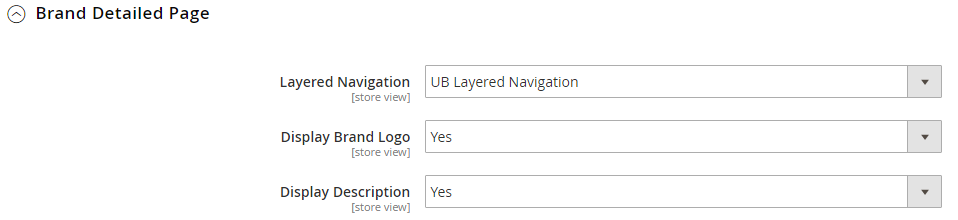
- Layered Navigation: Determine whether you want to use UB Layered Navigation or default Magento layered navigation functionality. If you use Default Layered Navigation, you will see two layout options for your choice: Layout — 2 Columns Left and Layout-- 2 Columns right
- Display Brand Logo: Set “Yes” to show Brand logo on the Brand detail page
- Display Description: Set “Yes” to show Brand’s brief introduction on the Brand detail page
b. Featured products
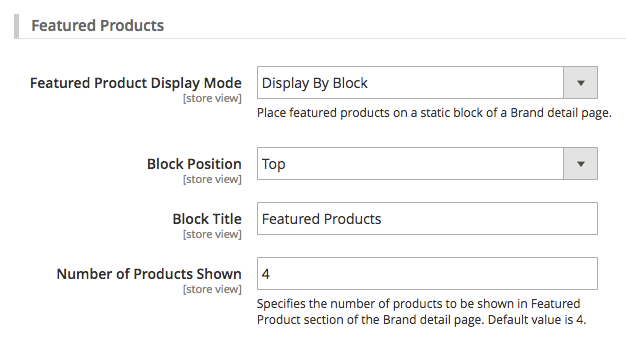
Featured Product Display Mode:
- Display By Block: Place featured products on a static block of Brand detail page, beyond the regular product listing.
- Block Position: Set the position of the block that shows featured products, either at the top or bottom position of the brand detail page.
- Block Title: Enter the title to show on the Featured product’s section
- Number of product shown: Specifies the number of products to be shown in featured products section of the Brand detail page. Default value is 4.
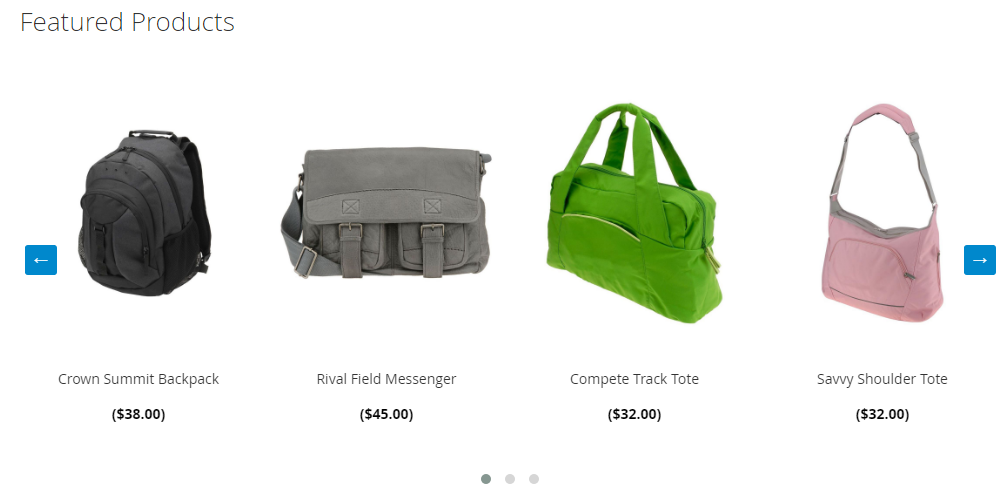
Frontend appearance:
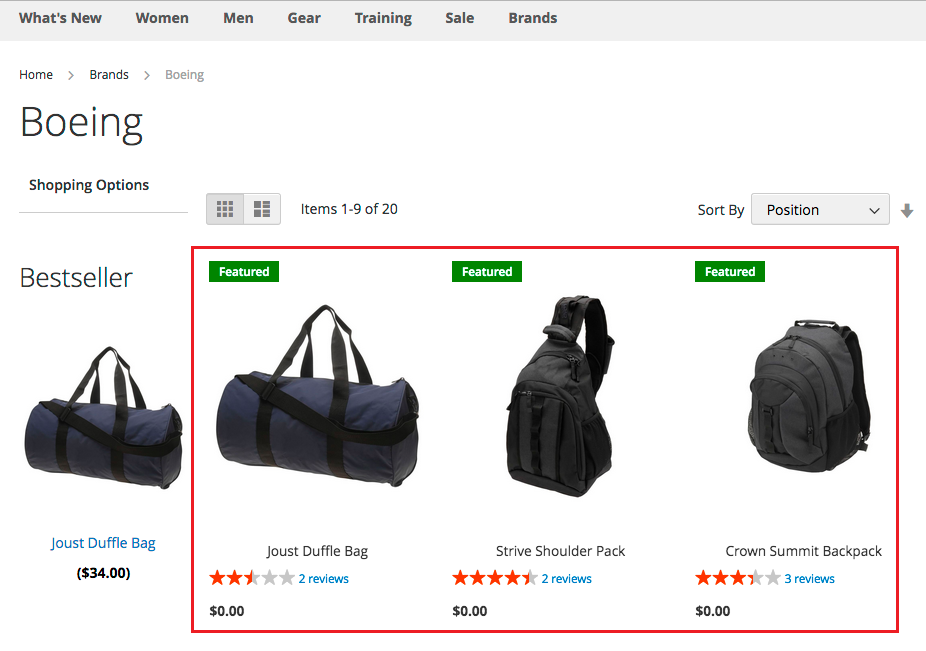
- Display Featured Label: Show your custom Featured product label only.
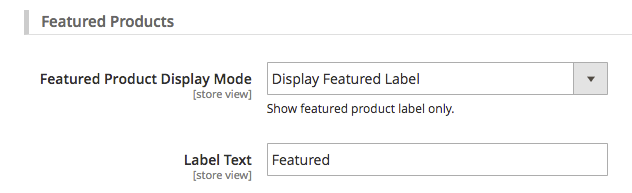
Label text: Enter the text label you want to show on each featured productFront-end Appearance:
c. Bestseller Products
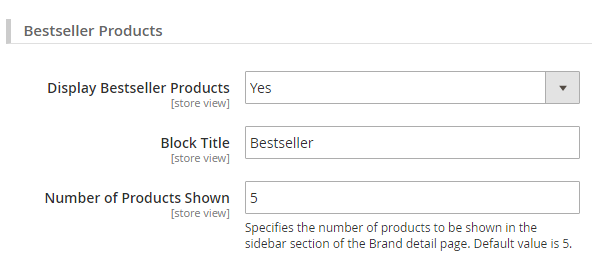
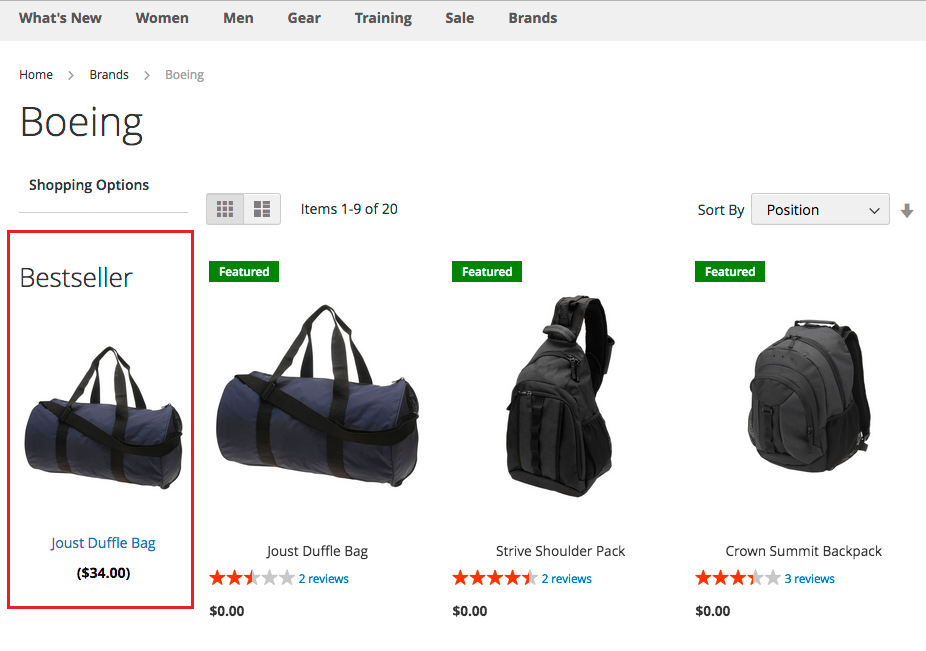
- Display Bestseller Products: Set “Yes” to show the bestseller widget on the sidebar of the Brand detail page.
- Block Title: Enter Title of the bestseller widget
- Number of Products Shown: Specifies the number of products to be shown in the sidebar section of the Brand detail page. Default value is 5.
Front-end Appearance:

Open the Brand attribute, you set the Catalog Input Type for Store Owner setting with either Visual Swatch or Text Swatch.
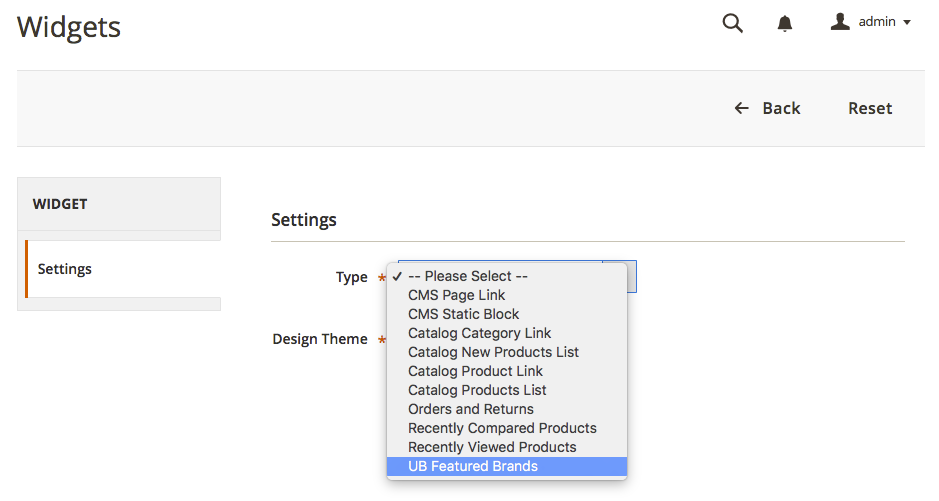
- Step 1. In the admin panel of your store, navigate to Content | Widgets | Add Widget. Then select UB Featured Brands type.
- Step 2. In the Storefront Properties tab, fill in the widget configuration.
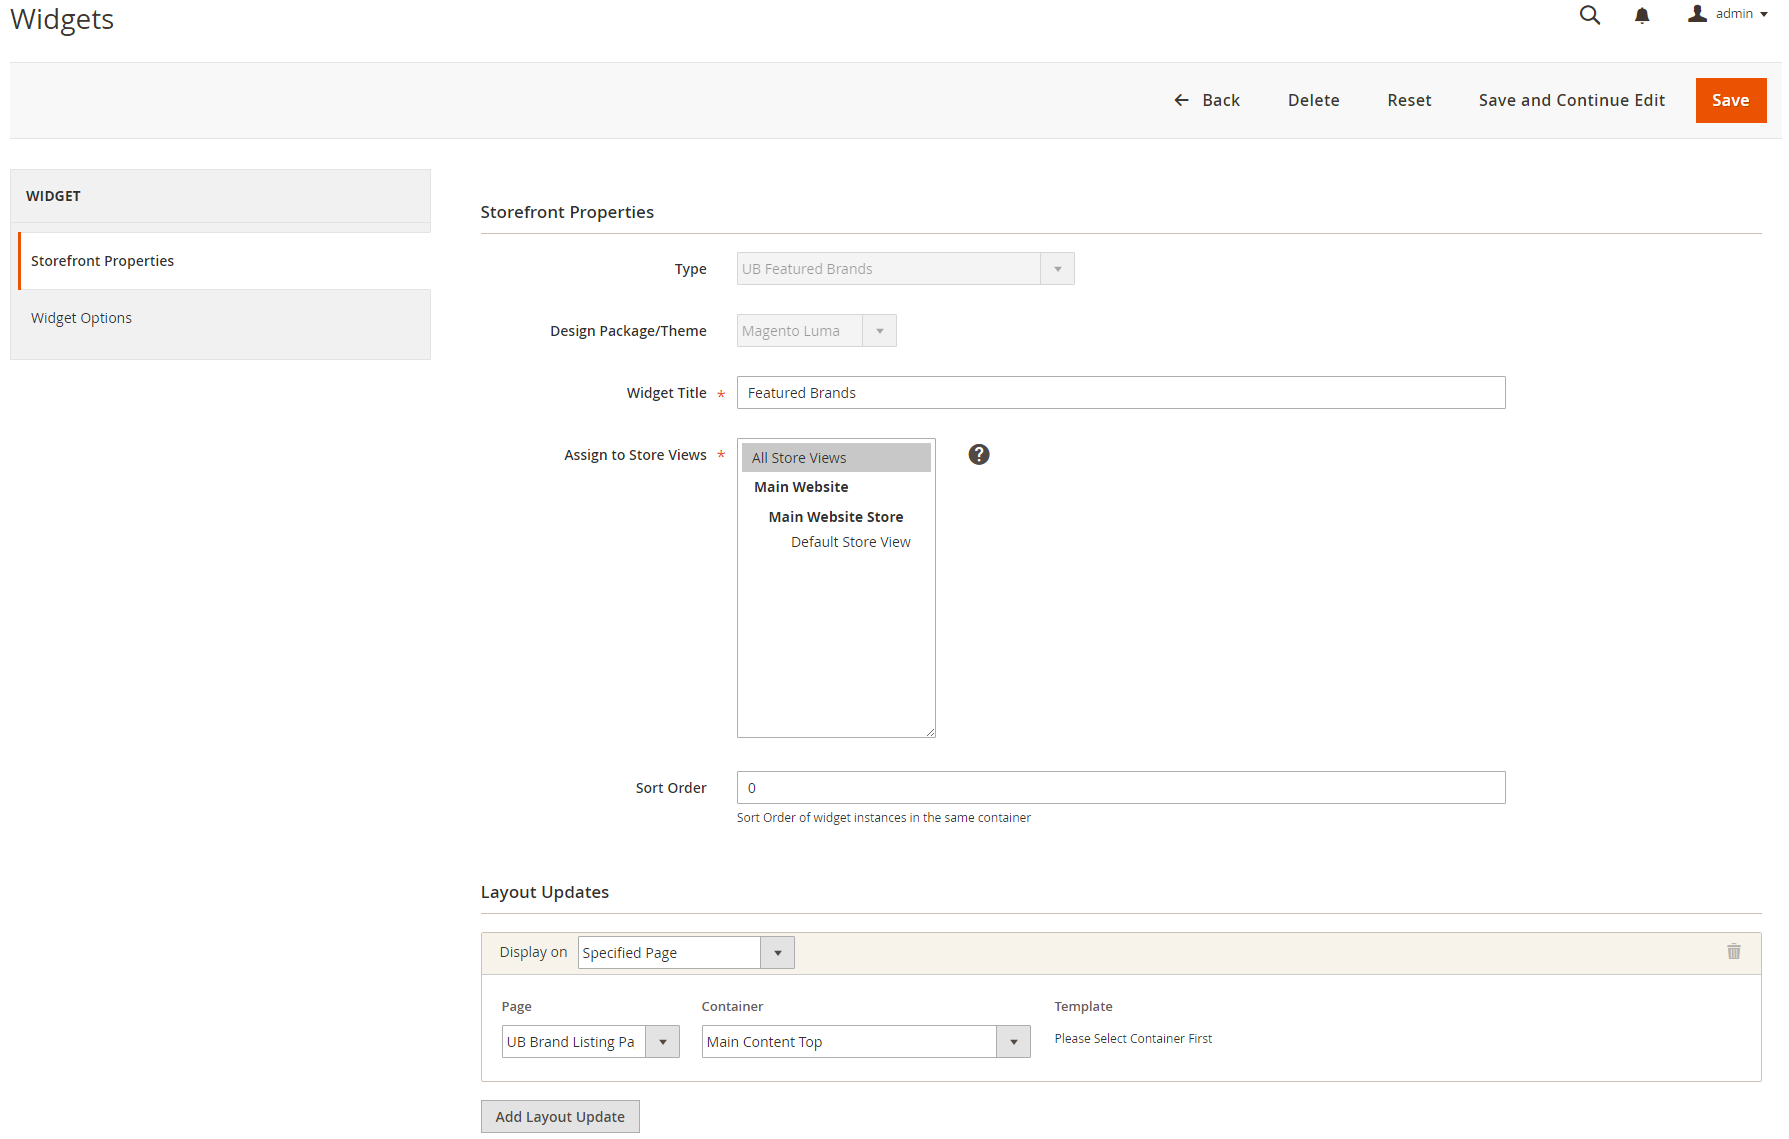
- Type: refers to Default type UB Featured Brands
- Design Package/Theme: the Name of the theme you selected when creating this widget
- Widget Title: Enter the title of featured brand widget.
- Assign to Store Views: Default is All Store View
- Sort order: Sort Order of widget instances in the same container.
- Add Layout Update: This section to set up the display of featured brand block. You can configure to show Featured Brand on sidebar page or any position at your choice. In this sample, we set Display on ‘Specified Page’, with Page ‘UB Brand Listing Page’ and Container “Main Content Top”
- Step 3. In the Widget Options tab, define with your own settings:
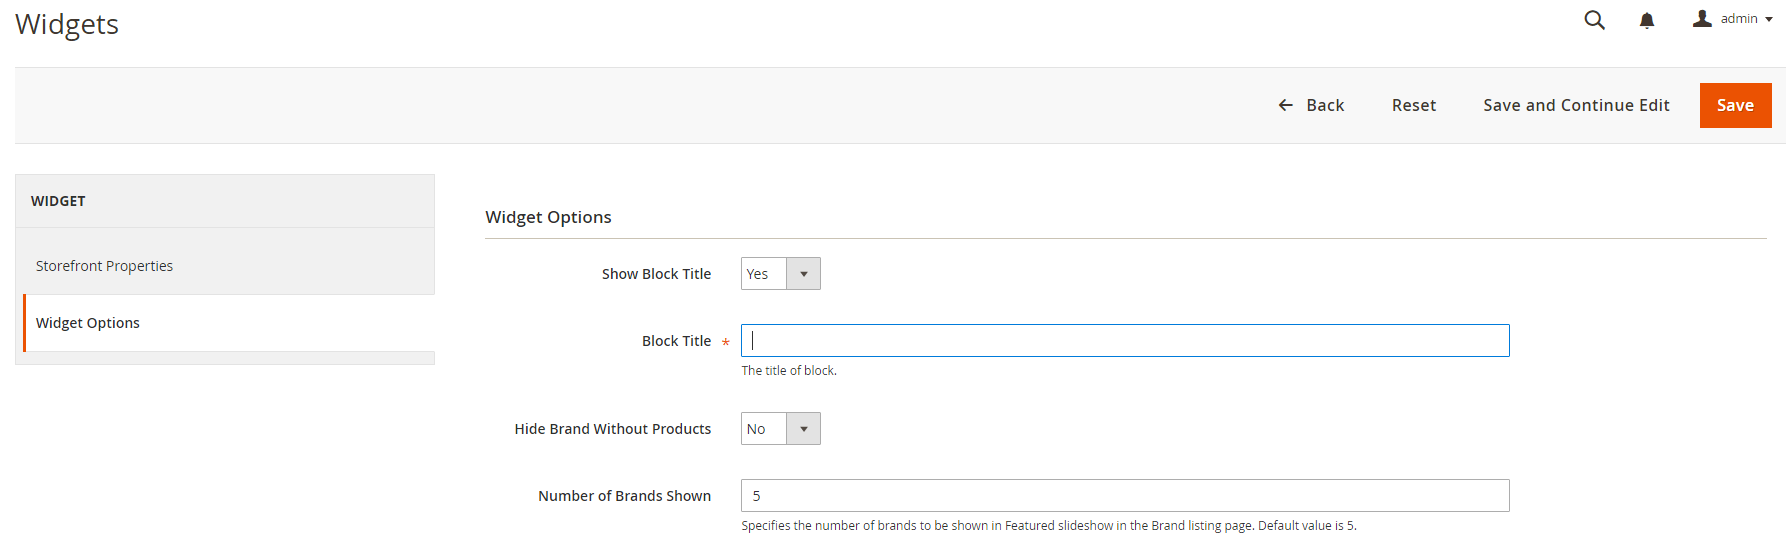
- Show Block Title: To enable/disable of block title
- Block Title: Enter the title of featured brand widget to show on frontend.
- Hide Brand Without Products: Set No, if you want to hide brand that has no associated products.
- Number of Brand Shown: Specifies the number of brands to be shown in Featured slideshow in the Brand listing page. Default value is 5.
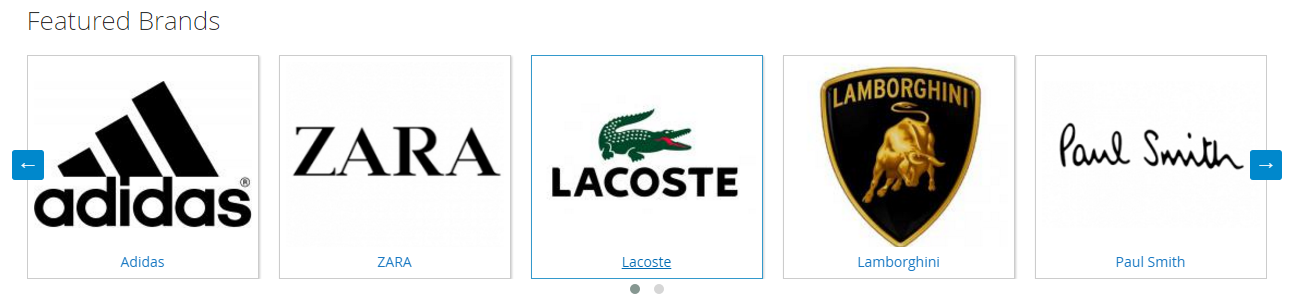
Frontend appearance:
V. Manual Un-Installation
If you want to have UB Instant Layered Navigation extension uninstalled, please follow steps below:
- Step 1: [Important] Remove related widgets if they were created
Go to your Backend | Content | Widget, delete all created widgets with Widget Type UB Featured Brands
- Step 2: Disable UB Instant Layered Navigation module and clean associated database tables
-- Open your terminal, go to your Magento2 folder <your magento install path> and run the following CLI commands:
php -f bin/magento maintenance:enable

php -f bin/magento deploy:mode:set developer

php -f bin/magento module:disable -c Ubertheme_UbLayeredNavigation

rm -rf app/code/Ubertheme/UbLayeredNavigation
-- Open your Mysql cpanel (eg. PHPMyAdmin), and run the following SQL syntax:
NOTE: Make sure you replace with your own <table_prefix>:
DELETE FROM '<table_prefix>setup_module` WHERE `module`= 'Ubertheme_UbLayeredNavigation'

DROP TABLE `<table_prefix>ub_brand_store`;

DROPDROP TABLE `<table_prefix>ub_brand`;

DELETE FROM `<table_prefix>eav_attribute` WHERE `attribute_code` = 'ub_brand_id';

DELETE FROM `<table_prefix>eav_attribute` WHERE `attribute_code` = 'ub_featured';

DELETE FROM `<table_prefix>eav_attribute` WHERE `attribute_code` = 'ub_bestseller';
Step 3:
- Once done, run the following commands:
NOTE: You can still keep the developer mode if you continue development process. Otherwise, run the following commands to switch to production mode:
php bin/magento deploy:mode:set production

php bin/magento maintenance:disable