Jun 2, 2020 Note: We have tested this tutorial with the latest PWA Studio 6.0.1 and everything worked fine.
Feb 12, 2020 Note: At the time of writing this tutorial, the Magento PWA Studio version was 5.0.0. We’ve just tested the tutorial with the latest PWA Studio v5.0.1 as well.
As you might know, Magento PWA Studio v5.0.0 officially introduced a new handy command -- @magento/create-pwa -- that allows for getting a new PWA Studio project up and running way easier. Actually, our team noticed that this command was in place before and we did try this command successfully with PWA Studio 4.0.0 for an experimental setup.
This tutorial will walk you through all steps to use this command to set up an initial project structure using the Venia storefront as a template.
So what is Magento PWA Studio then?
For those who are new about Magento PWA Studio, you might wonder why is PWA growing in popularity? Will it soon dominate the Magento 2 landscape? And where can you learn more about the Magento PWAs? This article will shed some light on those questions.
In general, Magento PWA Studio launched in 2018 is a new front-end architecture implemented in Magento 2. Magento PWA Studio provides the following set of developer tools that allow for the development of a PWA Storefront on top of Magento 2:
- PWA Module
- Pwa-buildpack
- Peregrine
- Venia storefront
- UPWARD
To get familiar with all utilities above, you can take a look at Magento’s official documentation.
In the meantime, we recommend you dive into the setup tutorial below to try Magento PWA Studio for yourself. This helps you interact directly with the PWA Studio technology stack.
How to create a custom PWA project
Now let’s start to create a custom PWA project using the ‘create-pwa’ tool in Magento PWA Studio. At the end of this tutorial, you will have a working copy of the Venia storefront installed and running on top of Magento 2.
Before you get started, there are a set of minimum requirements:
Prerequisites:
- NodeJS >=10.14.1 LTS
- Yarn >=1.13.0
- Python 2.7 and build tools, see the Installation instructions on node-gyp for your platform.
- A running instance of Magento 2.3.1 or above (you can check out this documentation that lists PWA Studio versions and their compatible Magento core version). For the purpose of this tutorial, to keep things simple for you, you can discard this requirement. We will instruct you in the Step 3 below to use our existing Magento 2.3.3 backend with Venia’s sample data.
Once you have all mentioned-above technology stack in place, open your terminal and navigate to a directory you want in your machine and do the following steps:
Step 1: Pull the specific version from Magento Studio PWA git repository you want by running the command (for example we will pull the ‘v5.0.1’ version):
git clone --branch v5.0.1 https://github.com/magento/pwa-studio.git
Note: If you already have an existing pwa-studio folder in the working directory where you pull the Magento PWA Studio code, the output of the preceding command will basically overwrite & merge into such folder.
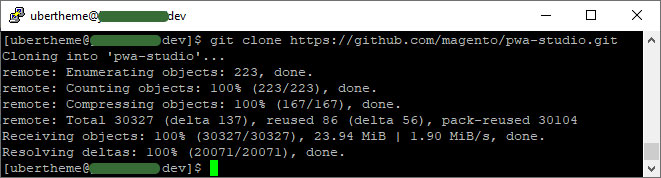
Pull the code from Magento Studio git repository
After executing the command, you should see all the source code files of Magento PWA Studio located in the folder named pwa-studio as follows:
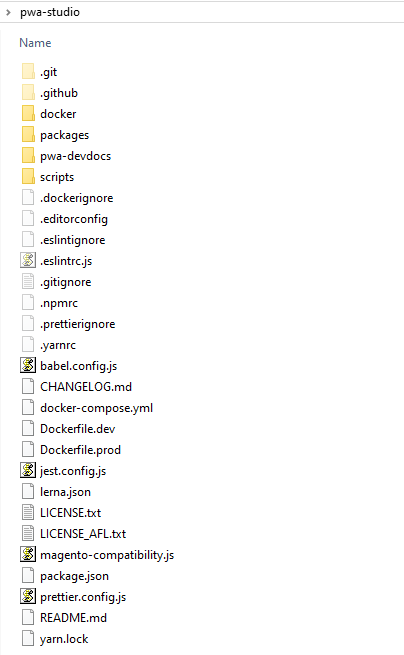
The source code files of Magento PWA Studio
Step 2: Now we move on to installing dependencies of the Magento PWA Studio.
First, make sure you navigate to the pwa-studio folder you’ve just pulled in Step 1:
cd pwa-studio
Then, install PWA Studio dependencies by running this command:
yarn install
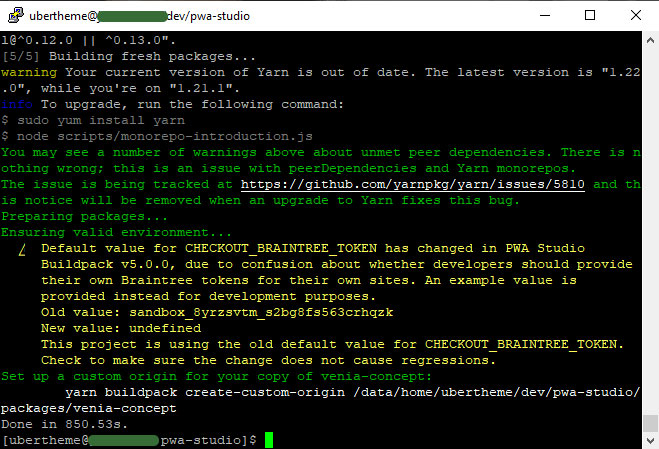
The output after installing dependencies of Magento PWA Studio
You might see the warning associated with the change of the default value of Braintree token, you can discard this warning for now.
Step 3: Executing the @magento/create-pwa command to create a new custom PWA Studio project.
Within the pwa-studio directory created in Step 2, you need to run the following console command (Please note that you need to specify the parameter values highlighted below before you execute the command):
yarn buildpack create-project ./packages/pwa-sample --template "venia-concept" --name "pwa-sample" --author "ubertheme<[email protected]>" --backend-url "https://pwabackend.demo.ubertheme.com/" --braintree-token "sandbox_rzknz7v7_dbw5pyvbpn4bwhw9" --npm-client "yarn"
Parameters’ explanation:
- ./packages/pwa-sample: referring to the directory where stores all new source code files of PWA after running the command above (A single dot (.) symbol represents the current directory which refers to the pwa-studio directory).
- Template: “venia-concept”: you should keep the venia-concept value unchanged.
- --name “pwa-sample”: you can specify your own name to replace the default value pwa-sample.
IMPORTANT NOTE: If you use your own --name value, you need to update that value in all commands instructed in Step 4 & 5 respectively. - --author “ubertheme
- --backend-url “https://pwabackend.demo.ubertheme.com/”: referring to your own Magento 2 backend url which the Venia storefront will be built on top of. For a quick exploration, you can use our existing Magento 2.3.3 backend: --backend-url “https://pwabackend.demo.ubertheme.com/”. If you do not specify the --backend-url value, default Magento 2 backend provided by Magento will be used.
- --braintree-token “sandbox_rzknz7v7_dbw5pyvbpn4bwhw9”: specifying a Braintree API token to direct the Venia storefront to communicate with your Braintree instance. You can find this value in Braintree’s Control Panel under Settings > API Keys > Tokenization Keys. For a quick exploration, you can use our sample token sandbox_rzknz7v7_dbw5pyvbpn4bwhw9.
- --npm-client “yarn”: please check the prerequisites mentioned earlier in this tutorial.
After running the above-mentioned command, it results in an output as follows:
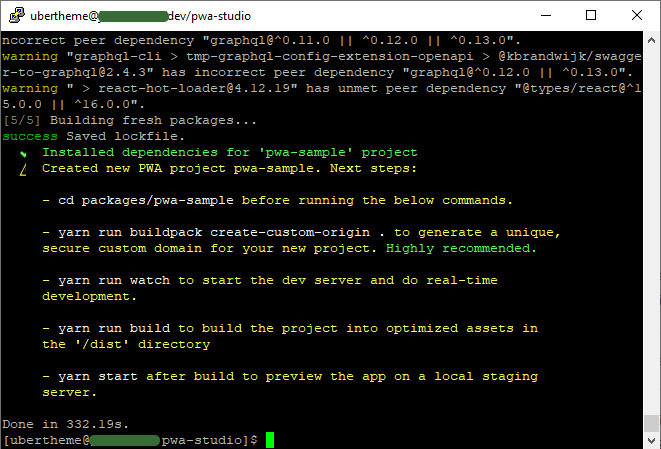
Create a new custom PWA project
(Note: you can discard the Next steps instructions highlighted in the console, as shown in the screenshot above).
Looking into the pwa-studio/packages/pwa-sample directory, you will see the following structure:

The source code files in the pwa-studio/packages/pwa-sample directory
Step 4: Build and run the PWA project you have just created.
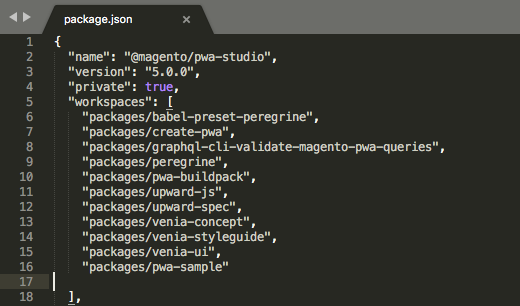
4.1. First, you need to declare a new workspace named pwa-sample for your PWA project by opening the file pwa-studio/package.json and find the lines:
"packages/venia-ui"
and replace it with:
"packages/venia-ui",
"packages/pwa-sample"
Declare a new workspace named ‘pwa-sample’ for your PWA project
The next step is to add a new run script for your custom PWA project in the same package.json file:
Find:
"venia": "node ./packages/pwa-buildpack/bin/buildpack load-env ./packages/venia-concept && yarn workspace @magento/venia-concept",
Replace it with:
"venia": "node ./packages/pwa-buildpack/bin/buildpack load-env ./packages/venia-concept && yarn workspace @magento/venia-concept",
"pwa-sample": "node ./packages/pwa-buildpack/bin/buildpack load-env ./packages/pwa-sample && yarn workspace pwa-sample",
4.2. Generate a unique, secure custom domain for your new project by running the command below (You need to run the following command by a user with administrative permission. This step requires administrative access, so it may prompt you for an administrative password at the command line):
yarn run buildpack create-custom-origin packages/pwa-sample/
This results in an output as follows:
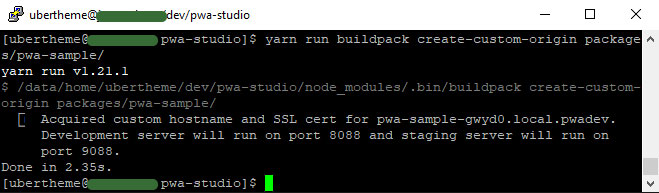
Generate a unique, secure custom domain for your new project
4.3. Build your project by executing the following command (this step helps to create a new /dist directory in your project’s root directory with optimized assets):
yarn pwa-sample build
This results in an output as follows:
Create a new ‘/dist’ directory in your project’s root directory with optimized assets
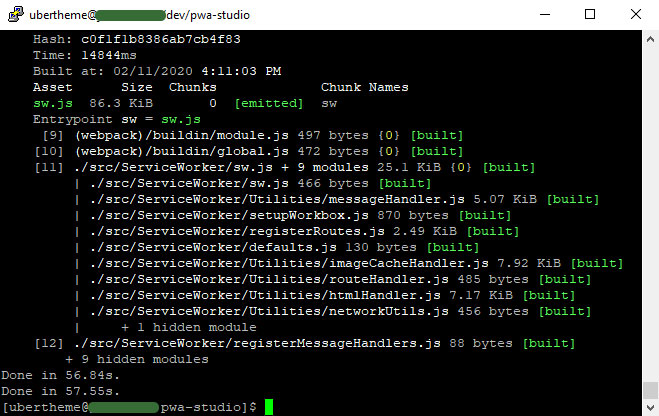
4.4. Run your project in the developer mode by running the following command (this step helps to start the dev server where you start with your Venia storefront development environment):
yarn pwa-sample watch
This results in an output as follows:
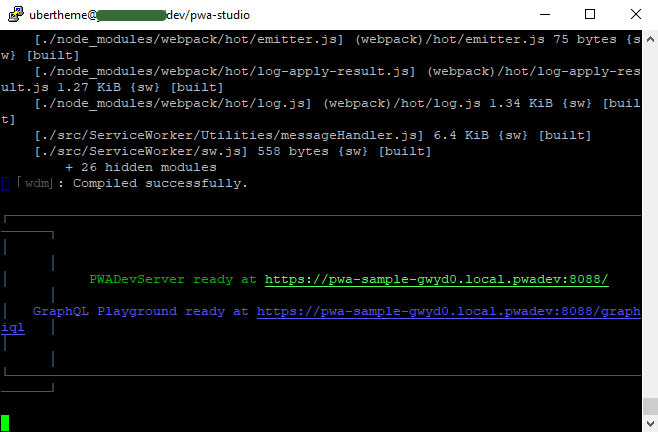
Run your project in the developer mode
As shown in the screenshot above, you should see the address for your PWA frontend. You can still use the old address to access the Admin section of Magento, but for PWA development on the frontend, use this new address.
If you have made this thus far, congratulations! You have set up your development environment for the Venia storefront project. You can start working on your customization with the Venia on top of Magento 2 now.
4.5. Run your project in the stage mode using the following command (Once you complete your development, you can move on to this step to preview the app on a local staging server where you can see the full features in the production mode like offline mode etc.,):
yarn pwa-sample start
This results in an output as follows:
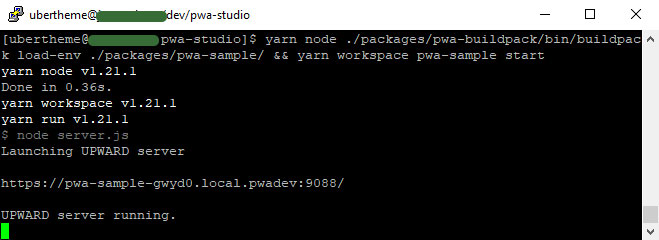
Run your project in the staging environment
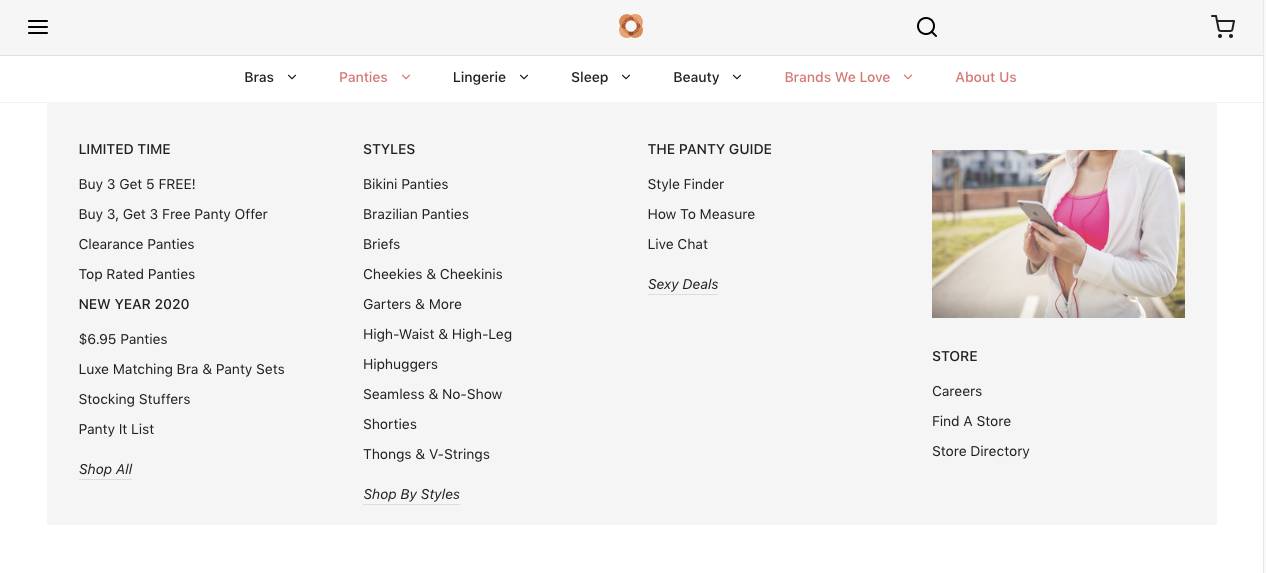
A Quick glance of Magento PWA Storefront
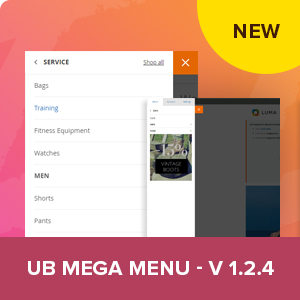
If you want to dig a little deeper into advanced functionality of the actual Magento PWA project, have a look at our work-in-progress demo of UB PWA Mega Menu below and try it for yourself:
Demo of UB PWA Mega Menu built on top of Magento PWA Studio
We hope you like the preview!
Conclusion
As you have gone the installation steps above, you have seen how easy it is to set up and get started with Magento PWA Studio on your machine.
We hope this tutorial was a good learning experience for you! If you have any suggestions or feedback, drop us a line in the comments section.
PS. In the next tutorial, we will walk you through steps to merge our UB PWA Mega Menu module into your existing Magento PWA Studio project (supposed that you already set up a custom PWA project following our tutorial above)