In the previous article on Magento PWA Studio tutorial, we walked you through how to have a working copy of the Venia storefront installed and running on top of Magento 2 using @magento/create-pwa command. In this second article on setting up a Magento PWA project, we’ll give you step-by-step instructions for merging our UB Mega Menu storefront into your existing Magento PWA Studio project, so you can get started with your PWA project as quickly as possible.
Before you get started…
If you’re new to UB Mega Menu module and new to Magento PWA Studio in general, get yourself familiar with the following terms first.
The anatomy of our PWA mega menu module
The UB Mega Menu – the paid version – is the “core version” that adds all the PWA functionality. So, PWA Mega Menu is an add-on that tacks on new functionality to the paid core version.
Once you download the module from your profile at Ubertheme, you should see the following parts:
- Core mega menu:
- UbMegaMenu
- MegaMenuGraphQl (helps to handle declarative retrieval of menu data from GraphQL queries right within a single back-end of UB Mega Menu module)
- UBMegaMenu-PWA (the source code for PWA mega menu’s storefront)
And a Magento PWA Studio project with our mega menu solution
When it comes to installing UB PWA Mega Menu on top of your existing Magento PWA Studio project, the following main building parts will be needed:
- Magento PWA Studio with the Venia storefront installed
- Magento 2 Backend with the UB Mega Menu module installed
- UB PWA Mega Menu storefront
In this tutorial, we suppose that you already set up a Magento PWA Studio project with the Venia store installed following our tutorial here. This step also helps you have an existing Magento 2 backend with the UB Mega Menu installed.
As such, this tutorial will be focusing only on setting up PWA Mega Menu storefront.
Now, let’s begin!
How to install PWA Mega Menu on top of your existing Magento Studio instance
Once you have a Magento PWA Studio instance to work with and have installed Venia on it as explained earlier, you’ll be good to go for the rest of this tutorial.
Compatibility
The UB Mega Menu storefront (UBMegaMenu-PWA_v1.0.0.zip) for Magento PWA Studio is compatible with:
- Storefront: Magento PWA Studio v.4.0.0, v.5.0.0
- Backend modules: UBMegaMenu ~1.1.8, MegaMenuGraphQl ~1.0.0
Installing PWA Mega Menu storefront
Step 1: Go to your profile at Ubertheme to download and unzip the UBMegaMenu-PWA_v1.0.0.zip package.
Step 2: Merge all the folders/files in the ‘src’ directory you’ve extracted into the ‘src’ directory in your custom PWA project (Supposed that you already set up your Magento PWA instance following our guide here, then the ‘src’ directory is located at: ../pwa-studio/packages/pwa-sample/src)
Step 3:
3.1. Open the webpack configuration file (webpack.config.js) in your custom PWA project:
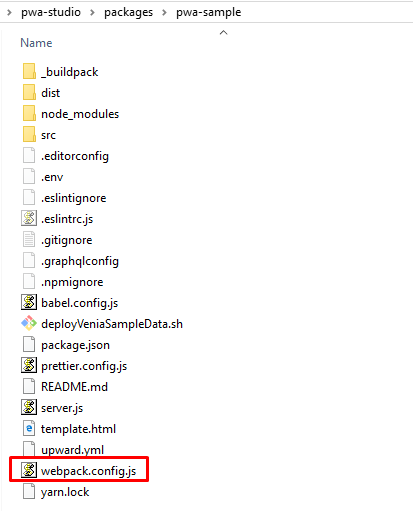
The webpack.config.js file
And find the code line:
const HTMLWebpackPlugin = require('html-webpack-plugin');
then replace it with:
const HTMLWebpackPlugin = require('html-webpack-plugin');

   	 const path = require('path');
   	 // Plugin to override modules
   	 const NormalModuleOverridePlugin = require('./src/plugins/normalModuleOverrideWebpackPlugin');
   	 const parentPackagePath = path.resolve(
   	 	process.cwd() + '/../venia-ui'
   	 );
   	 const componentOverrideMapping = {
   	 	[`${parentPackagePath}/lib/components/Main`]: 'src/lib/components/Main',
   	 	[`${parentPackagePath}/lib/components/Navigation`]: 'src/lib/components/Navigation'
   	 };
   	 // Aliases to parent package
   	 const veniaUi = path.resolve(__dirname + '/../venia-ui');
   	 const veniaConcept = path.resolve(__dirname + '/../venia-concept');
This results in an output like:
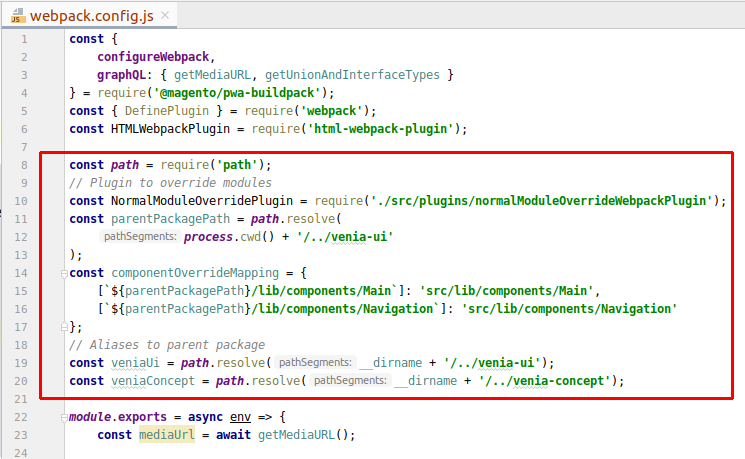
Update the webpack.config.js file
3.2. In the same configuration file (webpack.config.js), find the code line:
return [clientConfig, serviceWorkerConfig];
and replace it with:
    	//custom aliases
    	clientConfig.resolve.alias = Object.assign(clientConfig.resolve.alias, {
        	'~veniaUi': veniaUi,
        	'~veniaConcept': `${veniaConcept}/src`
    	});
    	clientConfig.resolve.modules.push(veniaUi, veniaConcept);
    	clientConfig.plugins.push(
        	new NormalModuleOverridePlugin(componentOverrideMapping)
    	);

    	return [clientConfig, serviceWorkerConfig];
This results in an output like:
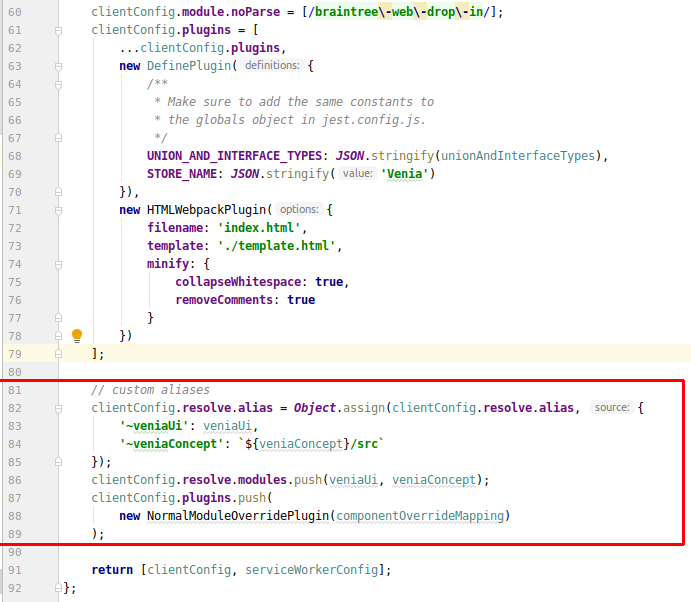
Update the webpack.config.js file
Step 4: Re-install the dependencies and rebuild your custom PWA project by running the following commands:
yarn install
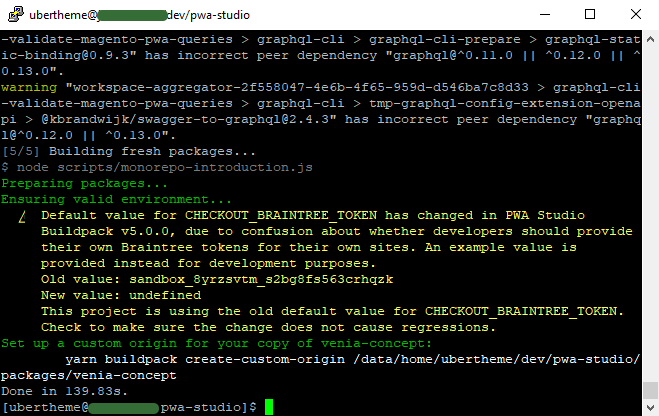
Reinstall the dependencies for your custom PWA project
yarn pwa-sample build
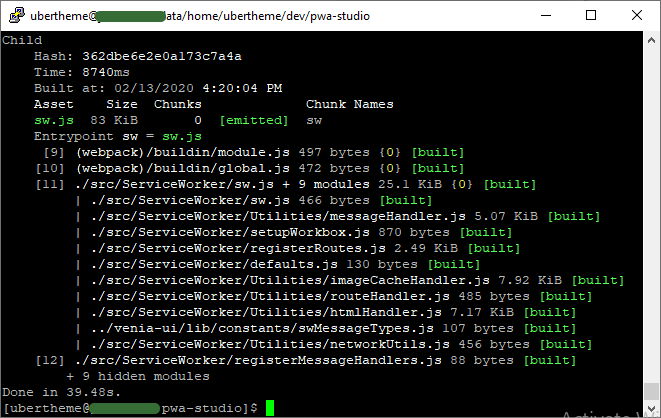
Rebuild your custom PWA project
Please note that the command yarn pwa-sample build is only applicable when you did follow our step-by-step guide here to create your custom PWA Project.
Once done, your storefront should now show this newly installed PWA Mega Menu, and should look like this:
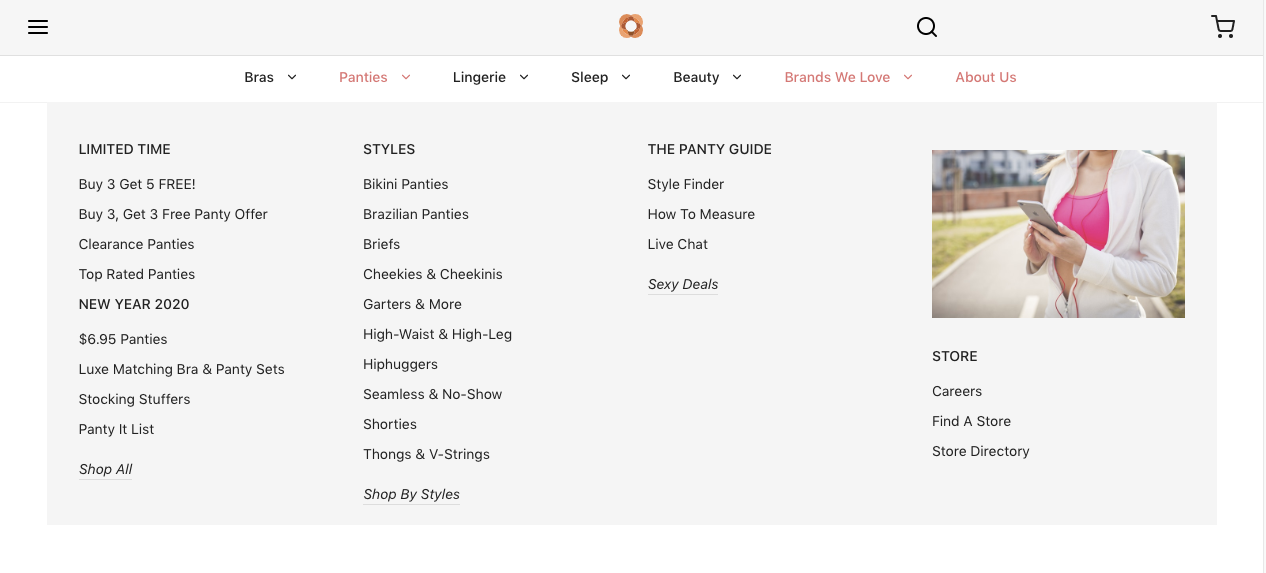
The PWA Mega Menu on your PWA storefront
We hope we were able to help you with this tutorial! If you have more concerns or have encountered other issues, let us know in the comments section!
Useful links
- [Tutorial] How to create a custom PWA project on top of Magento PWA Studio
- [Tutorial] How to override/extend a Venia component to show any custom content on a Magento PWA Studio site
- [Magento PWA Menu] The Hamburger Menus vs. Tab Bars on mobile design
- Live demo and features of UB Mega Menu for Magento PWA Studio
- Need technical support, submit a ticket via here.