Purity
Introduction
Responsive Magento theme Purity is a professional makeover for any eCommerce Magento sites for digital, games and entertainment. Purity features up to 8 complementary Magento extensions including Basetheme, Masshead, Mega Menu, Product, Product Slider, Slideshow, Tabs and Quick View. Also this Mangento theme is fully responsive and supports Off-canvas navigation.
This documentation is to guide you about how to install and configure the responsive Magento theme Purity to your own website.
- General Installation: Applicable if you have installed a Magento base on your server before.
- Quickstart Installation: Applicable if you want to get a whole new site as per Demo.
Decide which way to follow. Once downloaded, unzip the package to get the following folders:
- mage_ext: contains all built-in extensions of the theme.
- mage_tpl: contains the theme files only.
- quickstart: a full Magento CMS version with the theme already integrated to match the demo.
- source: contains all source files of the theme.
Provided that you have installed the Magento base already, General Installation will help you adapt the theme and its extensions with your current site.
Note: Your store must be ready before the installation. If not, get it done quickly by following the Magento Installation Guide. See also the following docs for general installations and configurations.
For more details, please check the documentation of the specific extension here.
General Installation
In case you have installed the Magento base already, this way of installation will help you to adapt the theme and extensions of Purity to fit your current site. Let’s see how to install the theme and its extensions respectively.
1. Theme Installation
Please make sure your Magento store is ready before you integrate Purity. If your site has not been available yet, get it done quickly by following the Magento Installation Guide.
The installation of Purity is quite simple with several following steps:
1. Upload the folders skin and app from our download package to your Web server’s document root (from here on, referenced as {docroot}.
2. Unzip “Purity” package. Next, copy the two folders skin and app to the root of your Magento site folder on the server. Accordingly, the folders will be overwritten and you should see a directory layout like this:
{docroot} /magento/app/
index.php
js/
lib/
LICENSE.txt
media/
pear/
skin/
var/.
3. Open the Admin Panel of your site, and access Magento Admin area on a stage localhost: //localhost/magento/index.php/admin/, then log in your Magento Admin area.
4. Navigate to System >> Configuration >> Design. Simply replace the original name e.g. jm_purity with jm_Purity.

5. Fill “jm_Purity” into the Themes folder.

6. You can also change the settings for Purity Header.

7. Click the button “Save Config” to save your configuration.
You are done! Purity is now ready to go!
2. Extension Installation
To install the built-in extensions of Purity, please follow steps as below.
- Upload folders skin and app from our download package to your Web server’s document root (from here on, referenced as {docroot}). These files will overwrite default folders skin and app in your Magento folder. Thus, you should see a directory layout like this: {docroot} /magento/app/
index.php
js/
lib/
LICENSE.txt
media/
pear/
skin/
var/. - Log into your Magento Admin area (i.e. access Magento Admin area on localhost: //localhost/magento/index.php/admin/).
- Navigate to System >> Configuration.
- The installed extensions will show off. To enter the extension configuration page, click the extension’s name tab.
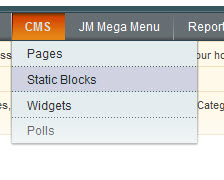
3. Create Static Blocks
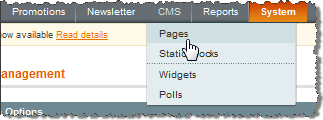
- Go to Magento Admin Panel >> CMS >> Static Blocks.
- Click “Add new Block” button.
- Fill in all fields as below then click “Save Block” button:
- Title: Right module
- Identifier: right_block
- Store View: All Store Views
- Status: Enable
- Content: fill in all syntax quoted as you would like.
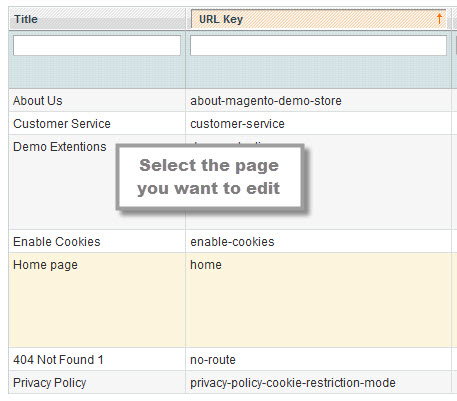
- To edit the existing static blocks, go to CMS >> Pages and then select the page in which blocks you want to edit.
- In General Information tab, fill in the Content field with syntax quoted.
- To display a new static block, copy and paste the following code in the “Layout Update XML” field in “Design” tab.
<html>
<reference name="right">
<block type="cms/block" name="jmtabs" before="-">
<action method="staticblock">
<title><strong><COLOR=Red>New block</COLOR></strong></title>
<identifier><strong><COLOR=Red>new_block</COLOR></strong></identifier>
</action>
</block>
</reference>
</html>

Clear cache if needed (in System >> Cache Management >> Save cache settings). Refresh your Homepage to see the change applied.
Quickstart Installation
Quickstart package is to minimize time and effort in installing your eCommercial sites with the contents just like the Demo sites. Please be kindly noted that, with Quickstart, all your existing data will be overwritten. Thus, we recommend using Quickstart for your first installation with our Magento theme or just in case you want to refresh your own site to the very beginning.
Please follow steps as below.
- Download the Quickstart package.
- Extract and Upload the whole Quickstart package to your server. In Quickstart folder you will see the extracted folder that includes all sample data.
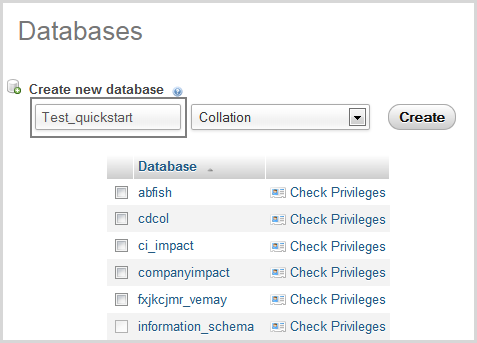
- Create a database for your Magento store (using phpMyAdmin).
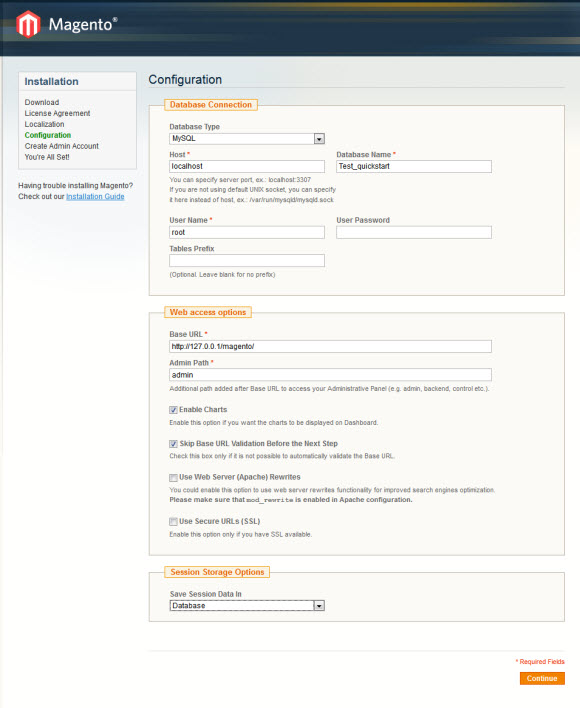
- Start the installation process by opening a browser and navigate to your URL (where the Quickstart package uploaded) to load the default Magento installer.
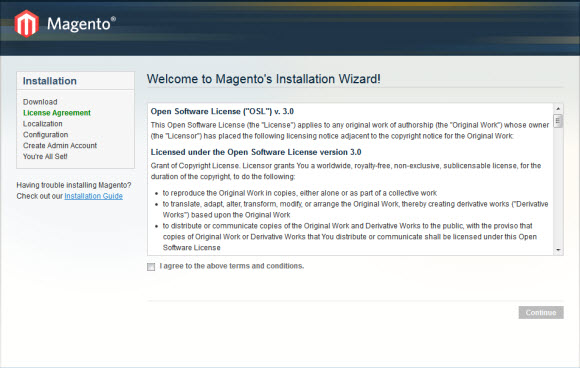
- Kindly follow each step of the Installer so that the installation process can be set.


Note:
- Do not use “localhost” in URL, otherwise you could not log into your Admin area (you should use your local IP in case of installing on your computer).
- Leave “Tables prefix” field blank.
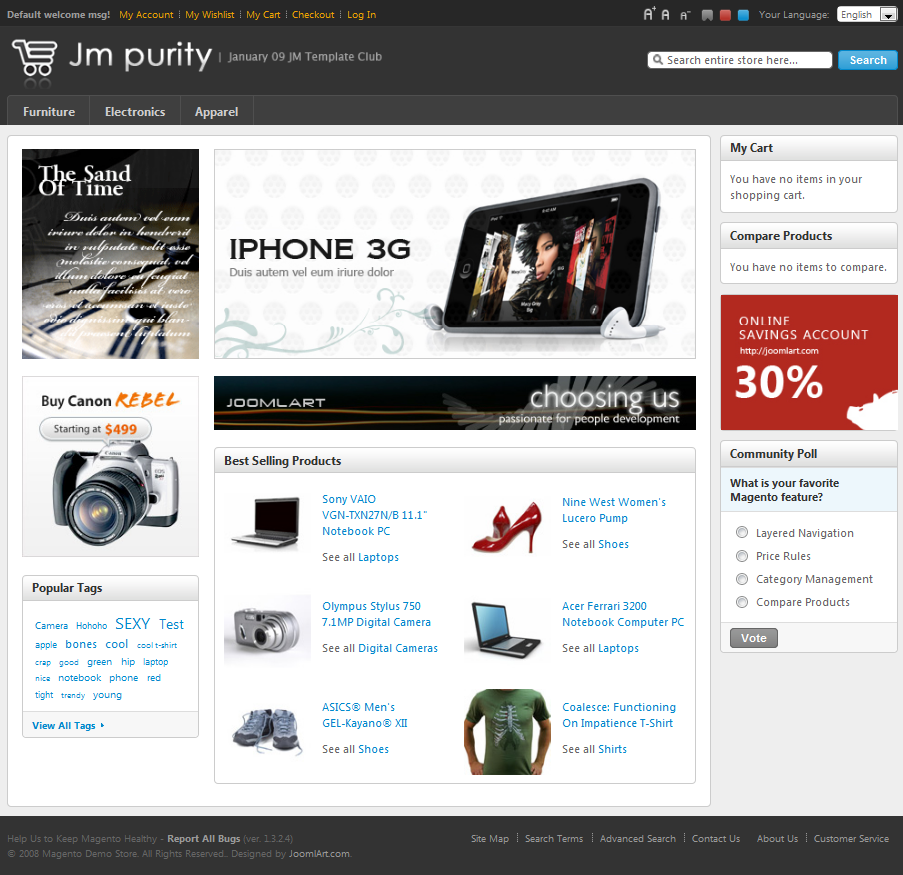
Layout and Block Positions
The layout of Purity Homepage can be illustrated as below.
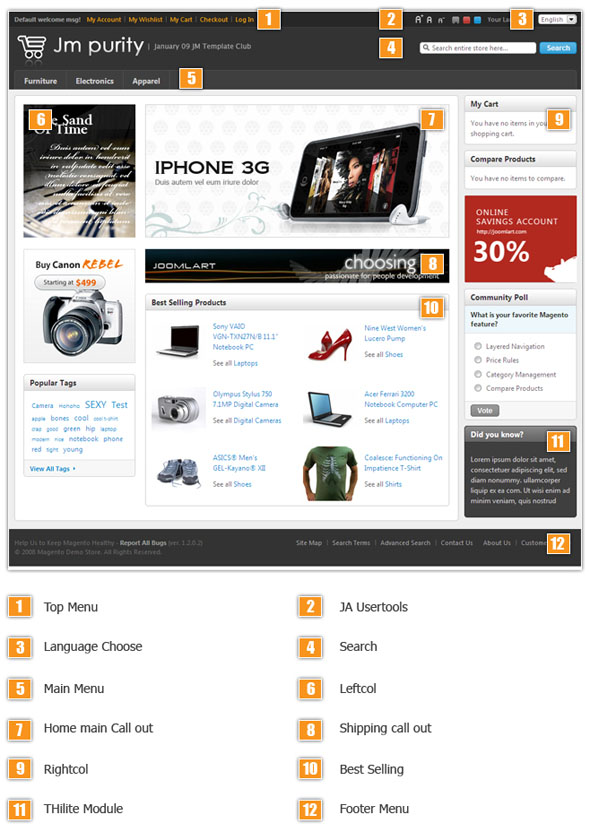
To create a new block, refer to the above guide for details.
II. Pages Configuration
This user-guide instructs you throughout steps to create template Purity as per our Demo site.
Now the Purity has already been integrated to your Magento. Please follow steps below to create a Homepage like our demo:
Create block: E.g create “Did you know?” block
-- Navigate to “CMS->Static Blocks”
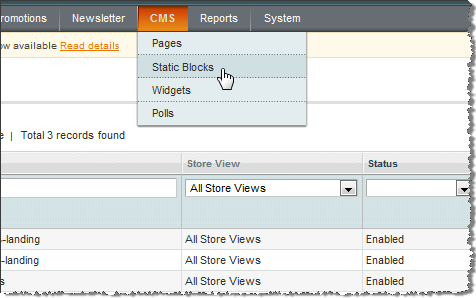
-- Click “Add new Block”
-- Fill the form and configure with text in italic below and click “Save Block” button:
- Title: Right module
- Identifier: right_block
- Store View: All Store Views
- Status: Enable
- Content: fill in all syntax quoted below
Did you know?
Our customer service is available 24/7. Call us at (555) 555-0123.
Modify Homepage
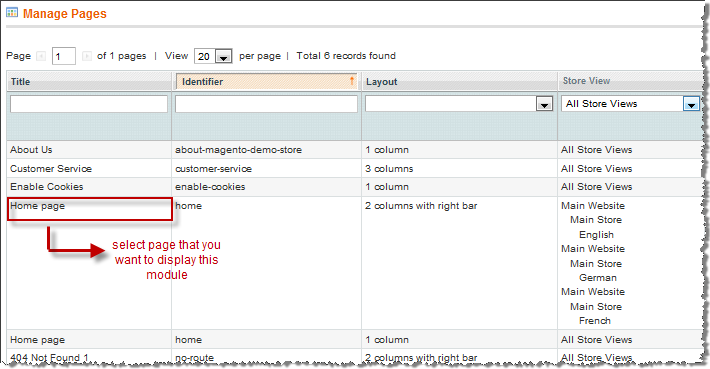
-- Navigate to “CMS->Manage Pages”
-- Click on the Homepage (home) row to edit the current Homepage.
-- In “General Information” tab, fill “Content” field with syntax quoted below:
{{block type="tag/popular" template="tag/popular.phtml"}}
-- In “Custom Design” tab,
Change layout : 2 columns
Fill in “Layout Update XML” field with syntax quoted below:
<!--<reference name="content">

<block type="catalog/product_new" name="home.catalog.product.new" alias="product_new" template="catalog/product/new.phtml" after="cms_page"><action method="addPriceBlockType"><type>bundle</type><block>bundle/catalog_product_price</block><template>bundle/catalog/product/price.phtml</template></action></block>

<block type="reports/product_viewed" name="home.reports.product.viewed" alias="product_viewed" template="reports/home_product_viewed.phtml" after="product_new"><action method="addPriceBlockType"><type>bundle</type><block>bundle/catalog_product_price</block><template>bundle/catalog/product/price.phtml</template></action></block>

<block type="reports/product_compared" name="home.reports.product.compared" template="reports/home_product_compared.phtml" after="product_viewed"><action method="addPriceBlockType"><type>bundle</type><block>bundle/catalog_product_price</block><template>bundle/catalog/product/price.phtml</template></action></block>

</reference><reference name="right">

<action method="unsetChild"><alias>right.reports.product.viewed</alias></action>

<action method="unsetChild"><alias>right.reports.product.compared</alias></action>

</reference>-->
Refresh your cache if needed (in System > Cache Management > Save cache settings). Refresh your Homepage to see the change applied.
III. Menu Configuration
Purity uses Mega Menu. Follow the guide below to get it configured properly.
To enable Mega Menu, please navigate Back-end >> System >> Configuration >> Mega Menu

Enable Mega Menu
To add menu items, please navigate Back-end >> Mega Menu >> Manage Menu Item you must create add new Menu Group.The settings below belong to English group. Other language groups have similar settings menu item.
3.1 Home Menu

Back-end Settings
3.2 Categories Menu
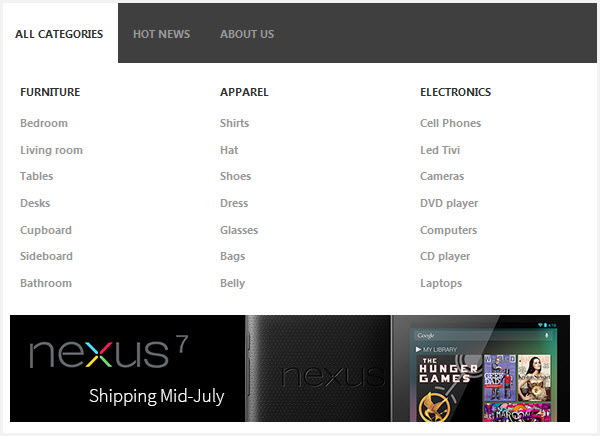
Back-end Settings
3.3 Hot News Menu
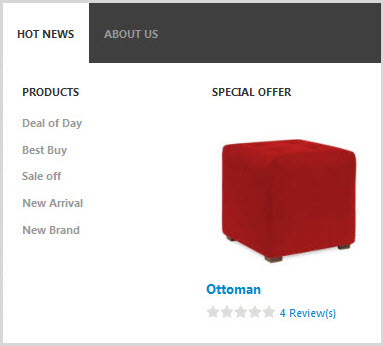
Back-end Settings
3.4 About Us Menu
Back-end Settings