Natris
Introduction
There are two ways to install a UberTheme Magento theme:
- General Installation: Applicable if you have installed a Magento base on your server before.
- Quickstart Installation: Applicable if you want to get a whole new site as per Demo.
Decide which way to follow. Once downloaded, unzip the package to get the following folders:
- mage_ext: contains all built-in extensions of the theme.
- mage_tpl: contains the theme files only.
- quickstart: a full Magento CMS version with the theme already integrated to match the demo.
- source: contains all source files of the theme.
Provided that you have installed the Magento base already, General Installation will help you adapt the theme and its extensions with your current site.
Note: Your store must be ready before the installation. If not, get it done quickly by following the Magento Installation Guide. See also the following docs for general installations and configurations.
For more details, please check the documentation of the specific extension here.
Custom Extension
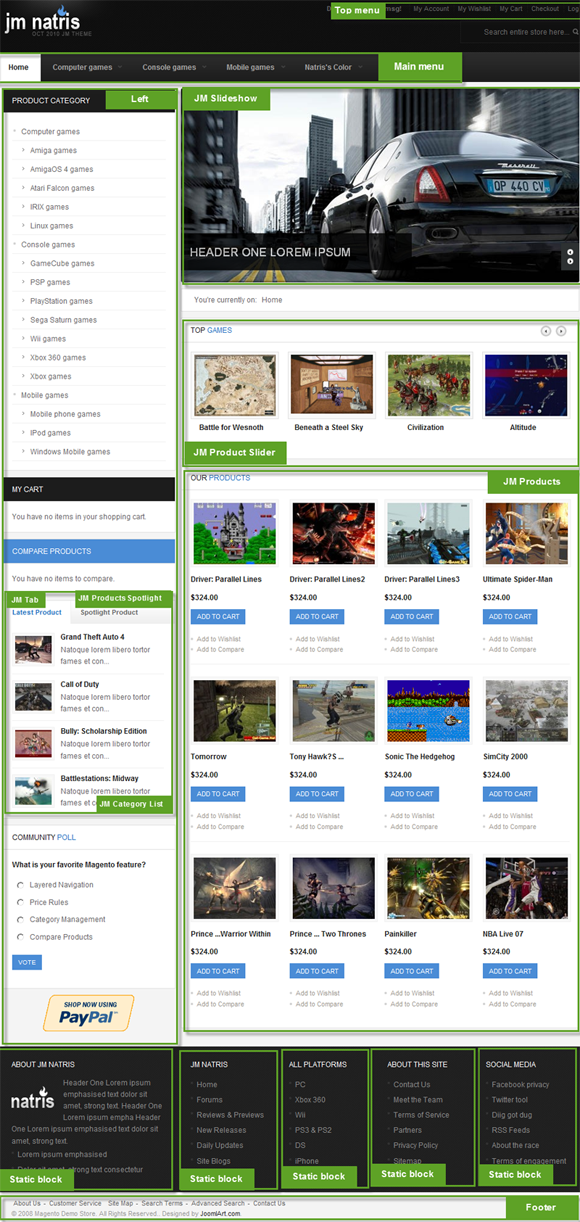
Having integrated Natris template and extensions to your Magento, then you have a homepage like our demo.
Create Static Blocks:
The Natris front-page uses 6 custom extensions
To create these extensions, go to CMS > Static Block > and select page that you want to display this extension on (e.g: Home page).
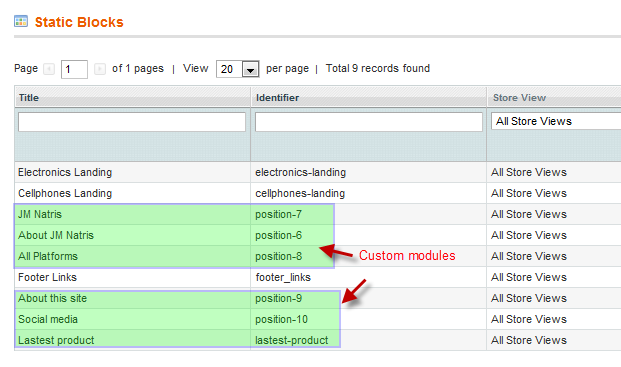
You can add a new block by click on Add New Block button to create new block and input the content of this block as you need. Please see How to create New Static Block.
For example: MultiMenu:
Configure default parameters as below:
Parameters explanation:
- Block title: Title of Block
- Identifier: define ID of Block
- Store View: choose view option for block
- Status: Enable/Disable to public to Front-page.
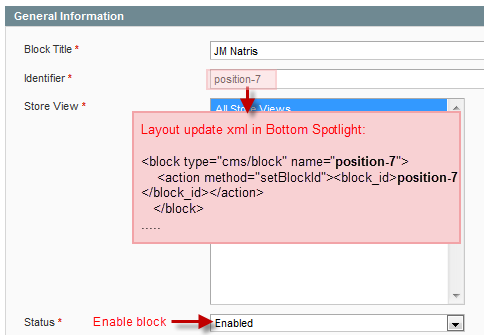
- Content: This is content of block. You can add image or text content to custom extension as you would like.
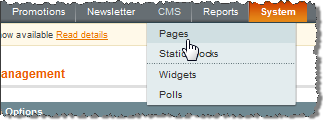
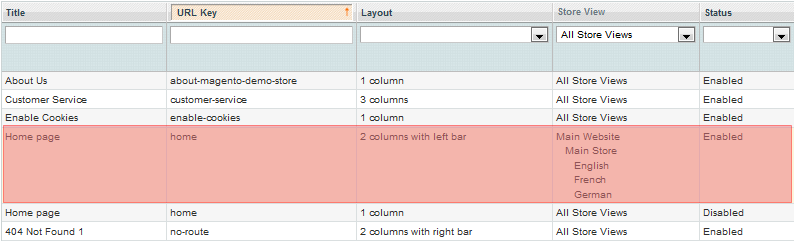
To push this extension onto front page like our demo site, go to CMS > Pages
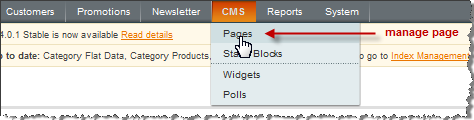
Then click on Homepage:
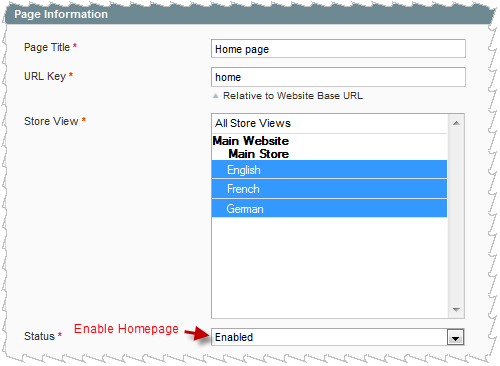
Homepage Information:
Open page.xml file, please fill HTML code as below :
- Bottom Spotlight:
PHP Code
<!-- Bottom Spotlight - botsl -->

  <reference name="botsl">

   <block type="cms/block" name="position-6">

    <action method="setBlockId"><block_id>position-6</block_id></action>

   </block>

   <block type="cms/block" name="position-7">

    <action method="setBlockId"><block_id>position-7</block_id></action>

   </block>

   <block type="cms/block" name="position-8">

    <action method="setBlockId"><block_id>position-8</block_id></action>

   </block>

   <block type="cms/block" name="position-9">

    <action method="setBlockId"><block_id>position-9</block_id></action>

   </block>

   <block type="cms/block" name="position-10">

    <action method="setBlockId"><block_id>position-10</block_id></action>

   </block>

  </reference>

  <!-- Bottom Spotlight - botsl -->
Refresh your front-page to see how it works:

Product Extension
To push this extension into front page like our demo site, go to CMS >> Pages:
Then click on Homepage >> Content Tab
Product List:
Please fill in Content parameter with syntax below:
PHP Code:
{{block type="joomlart_jmproducts/list" name="home.jmproducts.list" }}
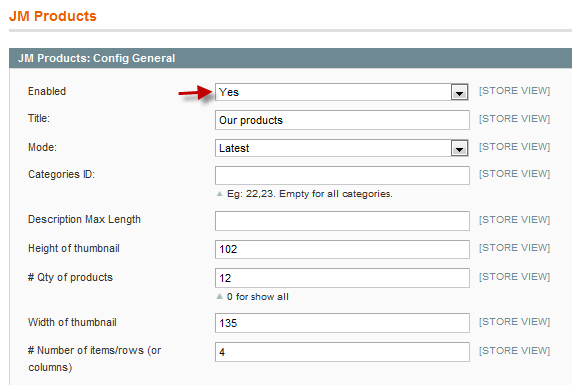
Navigate to System>Configuration>Products and configure default criteria as per screen-short below for Product List:
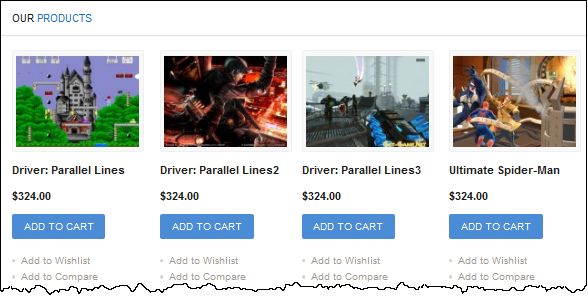
Then, see how it works on front-page:
You can configure the Number Of Products or Number Of Items/Row as you need.
Product Slider Extension
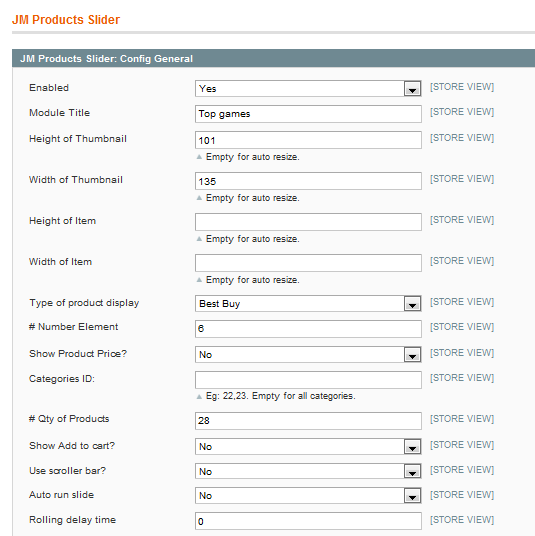
On our Natris demo, Products Slider extension is set on jm-productsslider position.
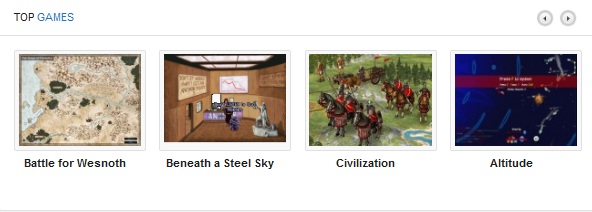
Navigate to System>Configuration>Products Slider and configure default criteria as per screen-short below:

To push this extension onto front page on top, go to CMS > Pages >> Homepage >> In Design tab , please fill in Layout Update XML parameter as below :
PHP Code
 <reference name="content-top">

    <block type="joomlart_jmproductsslider/list" name="jmproductsslider" />

</reference>
Front-end Appearance
SlideShow Extension
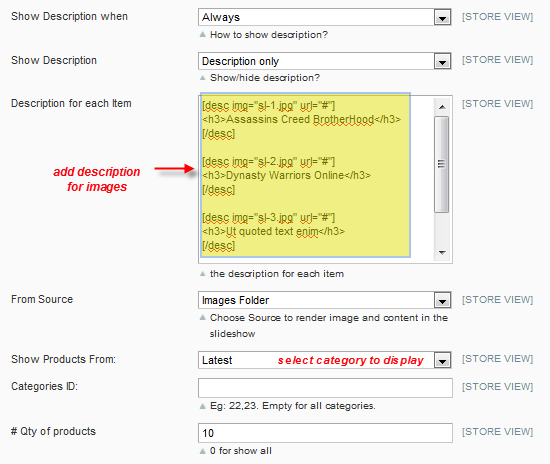
Navigate to System>Configuration>SlideShow and configure default criteria as per screen-short below:
Extension Settings:
Thumbnail Settings::

Control Settings: :
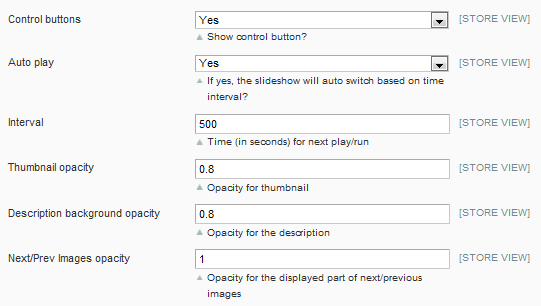
Description and Products Settings: :
To push this extension onto front page like our demo site, go to CMS > Pages
Then click on Homepage:
And fill in Layout Update XML parameter as below:
PHP Code:
<reference name="mass-top">

    <block type="joomlart_jmslideshow/list" name="jmslideshow" />

</reference>
See how it works in demo site:

Product Spotlight Extension
Natris used Product Spotlightextension, displayed on Tab extension.
Navigate to System>Configuration>Products Spotlight strong>and configure default criteria as per screen-short below:
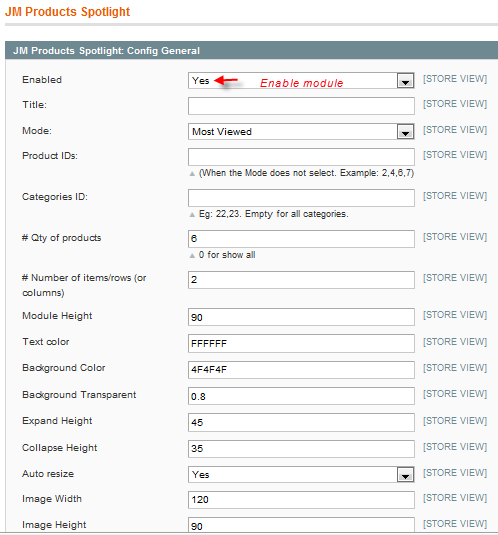
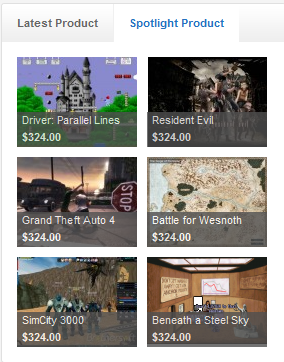
Then, see how it works on front-page:
Tabs Extension
Navigate to System>Configuration>Products Spotlight and configure default criteria as per screen-short below:
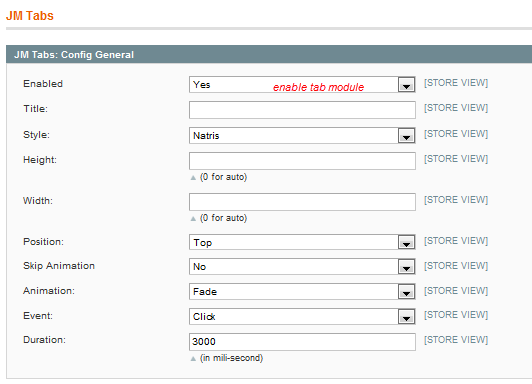
To push the extension onto front page, go to CMS > Manage page >and select page that you want to display this extension on (e.g: Home page)
Navigate to CMS/ Manage Page/ Custom Design. Fill in Layout Update XML parameter with syntax below:
PHP Code
<reference name="left">

    <block type="joomlart_jmtab/core" name="jmtabs" />

</reference>
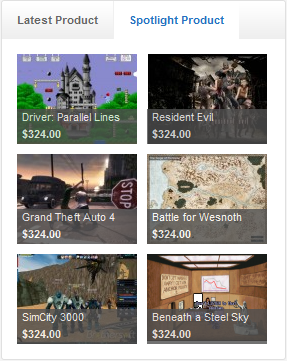
Then, see how it works on front-page:
Category List
To push this extension onto front page like our demo site, go to CMS > Pages:
Then, see how it works on front-page:
Please fill in Content parameter with syntax below:
PHP Code
{{block type="joomlart_jmcategorylist/list" name="home.jmcategorylist.list" }}
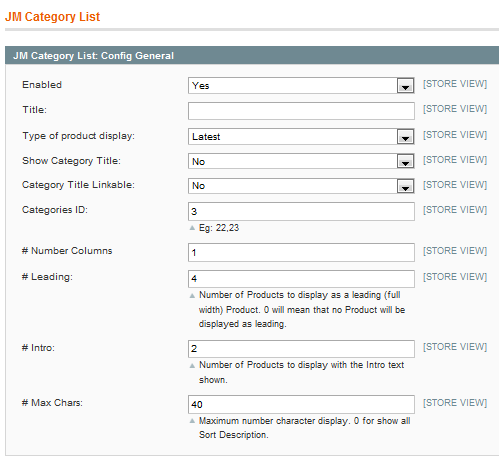
Navigate to System>Configuration>Category List and configure default criteria as per screen-short below for:
Then, see how it works on front-page: