Mega Menu
NOTE: We’ve developed a native UB Mega Menu extension for Magento 2. Check out the userguide for UB Mega Menu here.
I. Overview
Mega menus are the latest trend for site navigation, we have been using it for Joomla templates for quite some time now. Mega menu overcome some of the usability drawbacks of traditional style drop-downs. Primarily, mega menus have two advantages:
- The information architecture of your navigation is more clear clearer and is visible all at once
- The amount of clicking, searching, and navigation is reduced.
II. Module Installation
1. Download Module
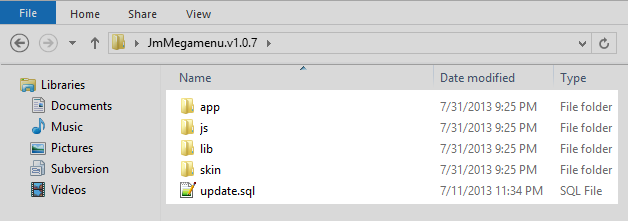
Download package file and unzip this file, you will see a directory layout like this:
2. Upload to your site
Upload folders skin and app from our download package to your Web server’s document root (from here on, referenced as {docroot}). These files will overwrite default folders skin and app in your Magento folder
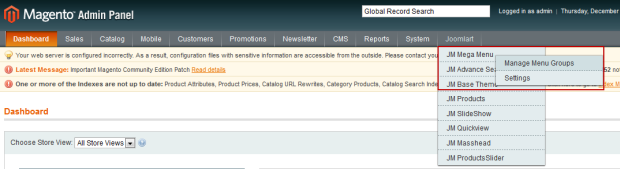
Login to your Magento Admin area and see MegaMenu item in Main menu as shown in following image :
3. Enable Module
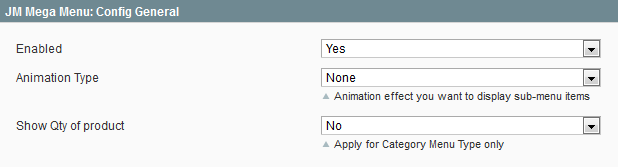
Navigate to Mega Menu >> Settings to enable mega menu on frontend
Note :
If you cant find block catalog.topnav on file page.xml on path:{docroot}\app\design\frontend\default\{your theme}\layout, please paste the code on position where you want Mega Menu displayed
<block type="page/html_topmenu" name="catalog.topnav" template="page/html/topmenu.phtml"/>
III. Module Configuration
1. Add New Menu Group
To add menu group, navigate to Mega Menu >> Manage Menu Groups and then click on Add Menu Group button.
Add Menu Group form is displayed as below:
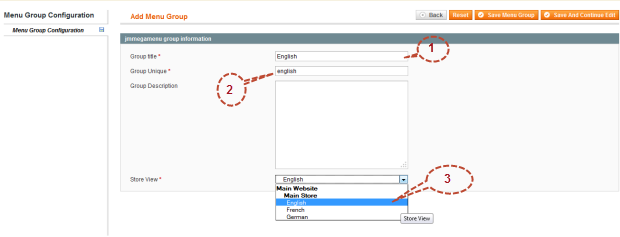
Next, config parameters
- Group Title: to identify group name.
- Group Unique: identify as ID of Group and it’s unique
- Group Description: contains group description
- Store View: to identify store for menu group to display in frontend.
Finally, click on “Save” button to save config parameters
You can see menu group following “Store View” in frontend

2. Add New Menu item
To add menu, navigate to Mega Menu >> Manage Menu Groups and select a group that you want to add menu item then click on Add Menu Item button.
Menu backend settings with parameters as below:
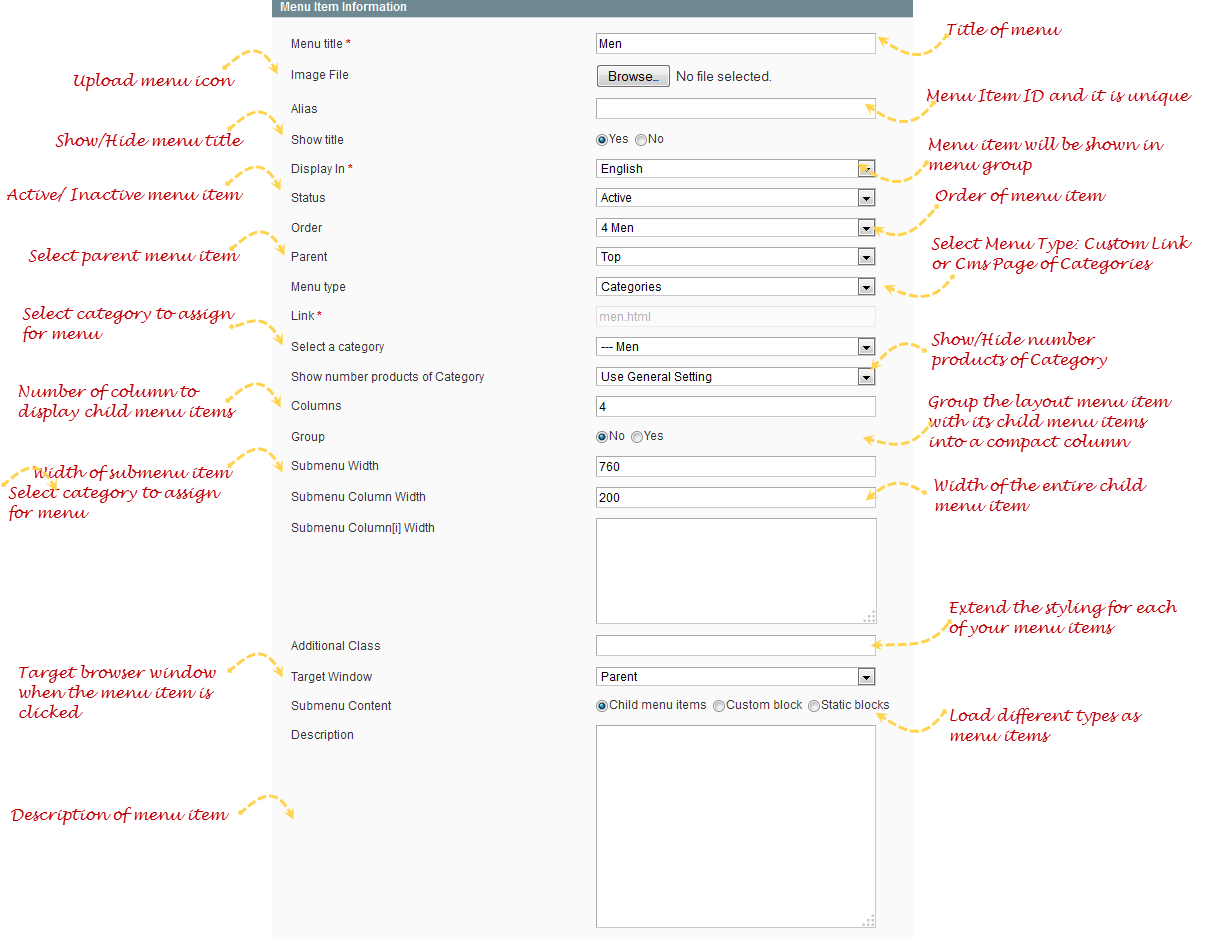
To view higher resolution click here
Note
- Image File: to upload file favicon to display image of menu item in frontend. Size of icon depends on icon size in design.
- Show title: Show/hide title of menu
An example for uploading image
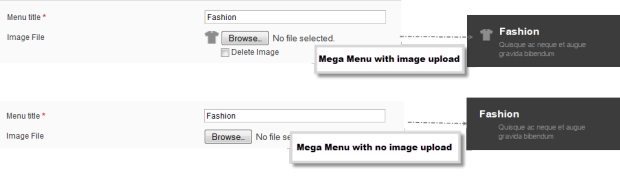
An example for showing/ hiding title
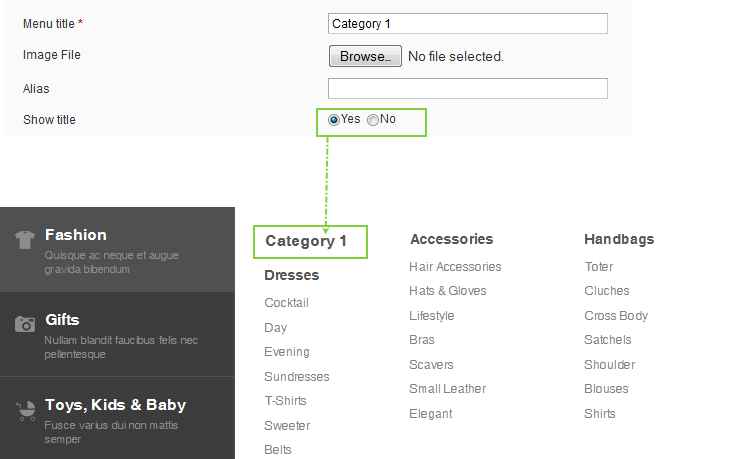
Default value for this parameter is Yes. If setting this parameter is No, menu item title will be hidden on frontend. So, for menu items from the second level or above, you might want to hide the menu title
This parameter is useful for menu items you don’t want to show up in frontend, but Item ID of menu item must be unique to be used by child content pages.
- Display In: this field to select “Menu Group” that menu item will be displayed in frontend
- Menu type: defines which menu type will be displayed on frontend. There are 3 types of menu: Custom Link, Cms Page and Categories
1. Menu Type is Custom Link

And on frontend, Menu will redirect to link that you add to field Link
2. Menu Type is Cms Page
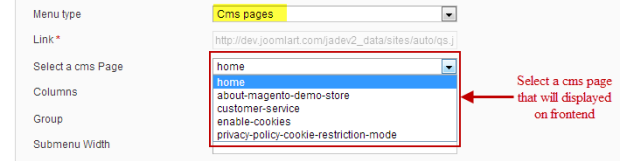
And on frontend, Menu will show a cms page.
3. Menu Type is Categories
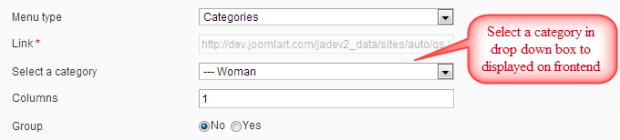
Note:
To work with this menu type, you must navigate to Catalog >> Manage Categories to add magento categories that will be selected to displayed for menu on frontend.
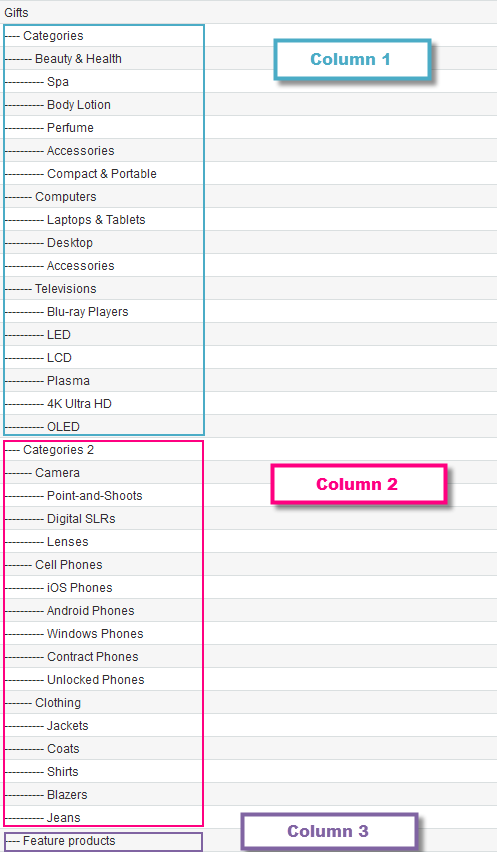
- Columns: This parameter defines the number of columns needed to display child menu items of a parent menu item.
- The default value of this parameter is 1
- If you have for instance 4 child menu items, you will have to set this parameter to 4 columns for the parent item of these menu items.
When set Column is 1 => Frontend will displayed like this :
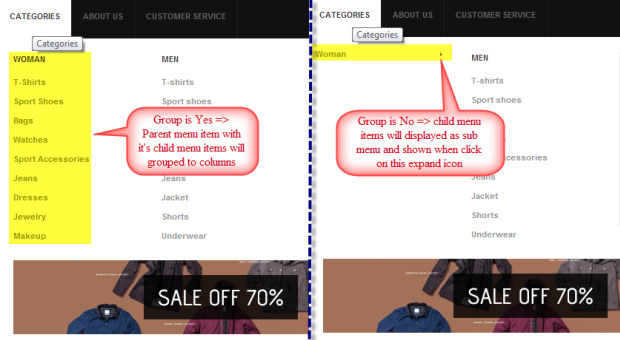
- Group: This parameter will group the parent menu item with it’s child menu items or content items to form compact columns.
- The default value of this parameter is No.
- It will only groups the parent item with it’s direct child items (EG: parent from level 1 with child1, child2, … child from level 2);
- Submenu Width: Width of Sub menu item
- This parameter has no default value;
- This parameter must be used for parent menu items and applies to child content area, no matter the number of columns;
- This parameter is useful for a single column of child items, especially for special advertising or different types modules having a higher width value than the default 200 pixels column width;
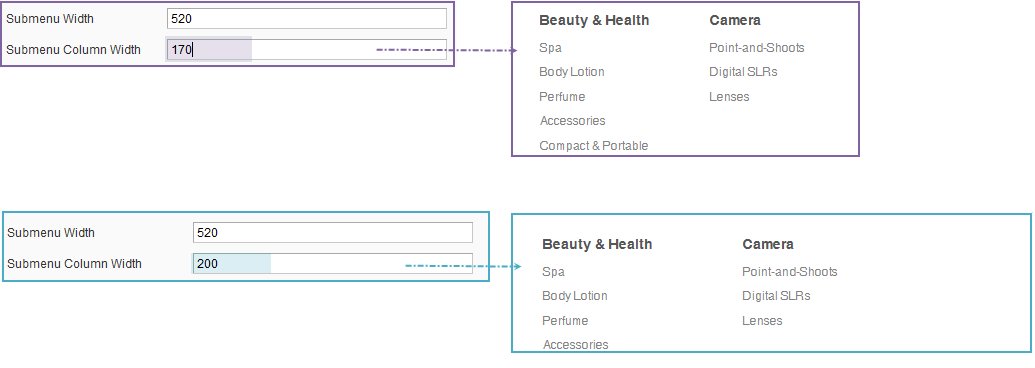
- Submenu Column Width: Width for all sub menu column
- This parameter has no default value;
- This parameter is used for parent menu items, and applies to all direct child items columns;
- This parameter might be useful when you have relatively long menu item titles or you just want to add a distinctive look to your navigation;
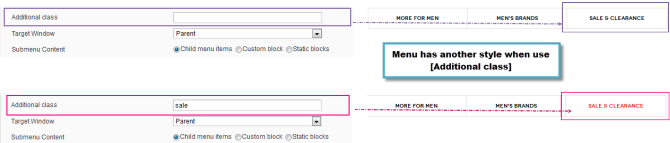
- Additional class: Additional Styling class
- This parameter has no default value;
- Using this parameter you can override/extend the styling of each menu item, just by creating a special styling class, and use it as a value for this parameter;
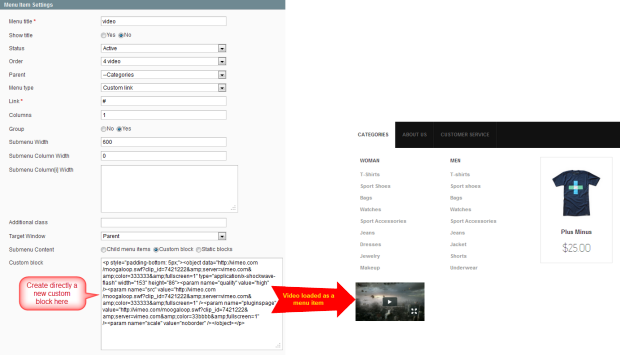
- Submenu Content: Allow to load different types as menu items. Basically you have three options
- Child menu item
- Custom block: embedded videos, external content, advertising (Google Ads or any other affiliated adds service), community links, etc;
- To show a video player as a menu item, first let’s create a new Custom block:
Example :
This parameter will override the width of the entire child content area. Some info about this parameter:
This parameter will override the default column width of 200 pixels for all columns. So:
Example :
This parameter will allow you to extend the styling for each of your menu items :
Example :
For example:
<p style="padding-bottom: 5px;"><object data="//vimeo.com/moogaloop.swf?clip_id=7421222&server=vimeo.com&color=333333&fullscreen=1" type="application/x-shockwave-flash" width="153" height="86"><param name="quality" value="high" /><param name="src" value="//vimeo.com/moogaloop.swf?clip_id=7421222&server=vimeo.com&color=333333&fullscreen=1" /><param name="pluginspage" value="//vimeo.com/moogaloop.swf?clip_id=7421222&server=vimeo.com&color=33bbbb&fullscreen=1" /><param name="scale" value="noborder" /></object></p>
Config backend as shown in the image below and see the video load as menu item on frontend
An example for config submenu content with static block:
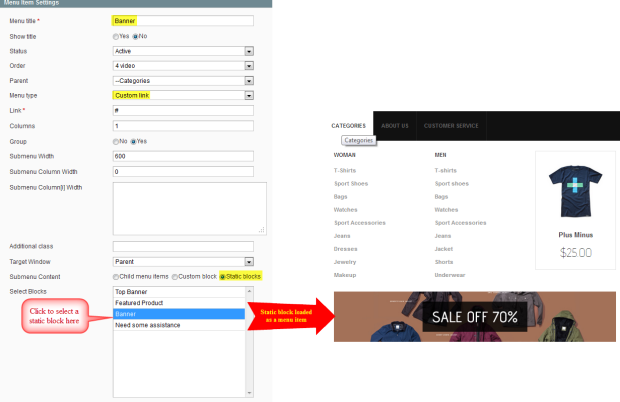
An example for config submenu content with static block:
Next, config parameters and click on “Save” button
3. Edit/Delete Menu item
To Edit a menu item, you need to follow similar steps :
- Navigate to Mega Menu >> Manage Menu Item
- Then click on item that you want to edit
- Change parameters and click on “Save” button
To Delete a menu item, you need to select menu item that want to delete. Then, Click on “Delete” button to remove
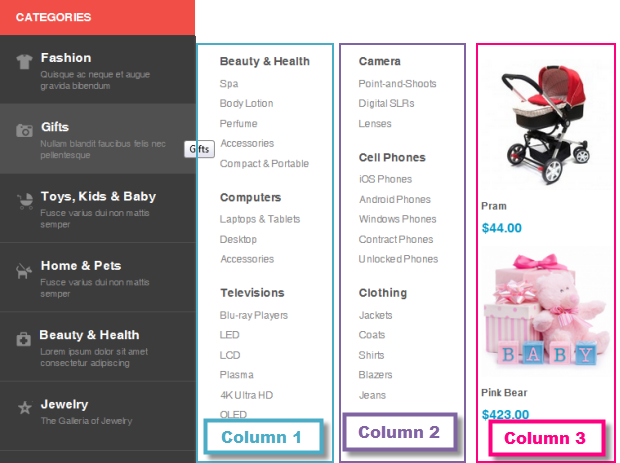
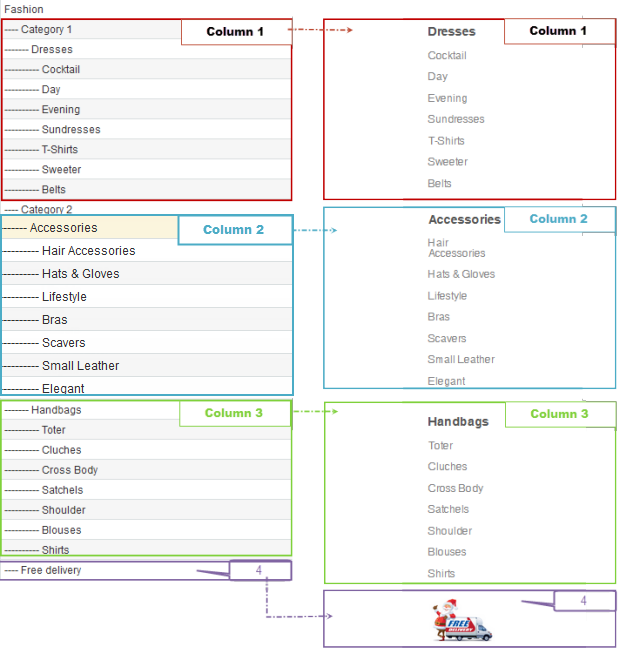
IV. Example
An example about Setting up columns for mega menu on Mega Mall
Main Menu structure (Parent & Child) in backend: