UB MegaMall for Magento 2 (new)
Theme Introduction
UB MegaMall is a premium Magento 2 theme we developed from the ground up. It is packed with UB Theme Helper -- a powerful theme customisation tool, plus 3 complimentary Magento extensions including Mega Menu, Content Slider, Quick View. This documentation is to guide you through all steps how to install and configure responsive Magento theme Megamall to your own website at the most convenient.
I. Installation Prerequisites
UB MegaMall is native with Magento 2.x. Please make sure your system meets the Magento 2 System requirements.
II. Download Packages
The download package includes:
- Theme: single theme for manual installation
- Extensions: contains all extensions built in the theme
- Quickstart: is a full Magento 2 CMS version with our template and extensions already integrated to match demo
- PSD source files: all graphic source files
III. Installation Instruction
There are two ways to install a UberTheme Magento theme:
- Manual Installation: Applicable if your store is full with content that you don’t want to overwrite.
- QuickStart Installation: Applicable if you want to get a whole new fresh site as per Demo.
Provided that you have installed the Magento base already, decide which way to install and follow steps as below.
Manual Installation
To install UB Megamall manually, you need to take a few steps, including:
- Step 1: Download and extract UB Megamall theme
- Step 2: Enable UB Theme Helper
- Step 3: Download and install Magento 2 extensions
- Step 4: Import Sample Data
- Step 5: Activate theme
Step 1. Download and extract UB Megamall theme
1.1. Download and extract UB Megamall theme
Download the ub_megamall_vx.x.x zip file from your profile at Ubertheme, and extract it on your computer. Navigate inside the extracted folder, you should see the necessary folders listed below:
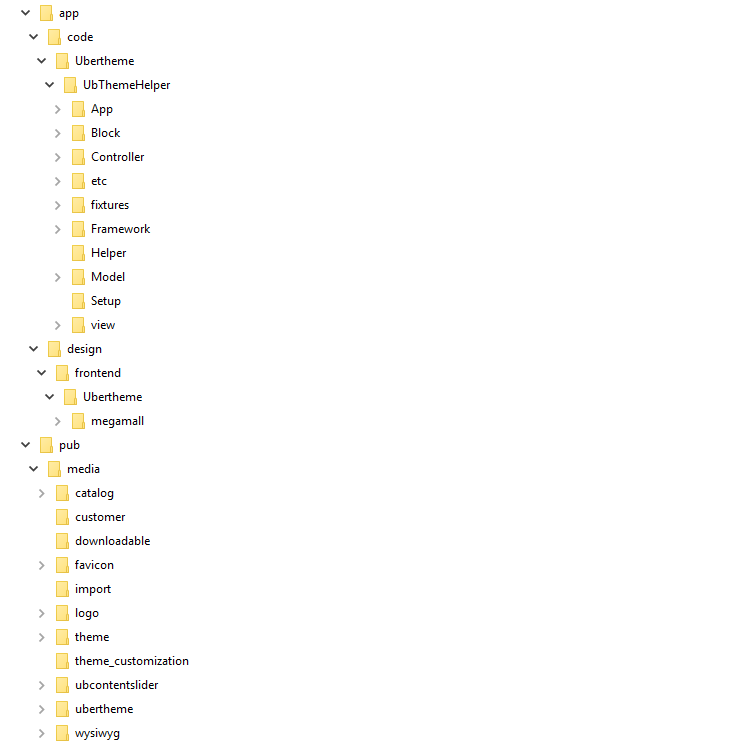
1.2. Copy and paste the folders to your web root
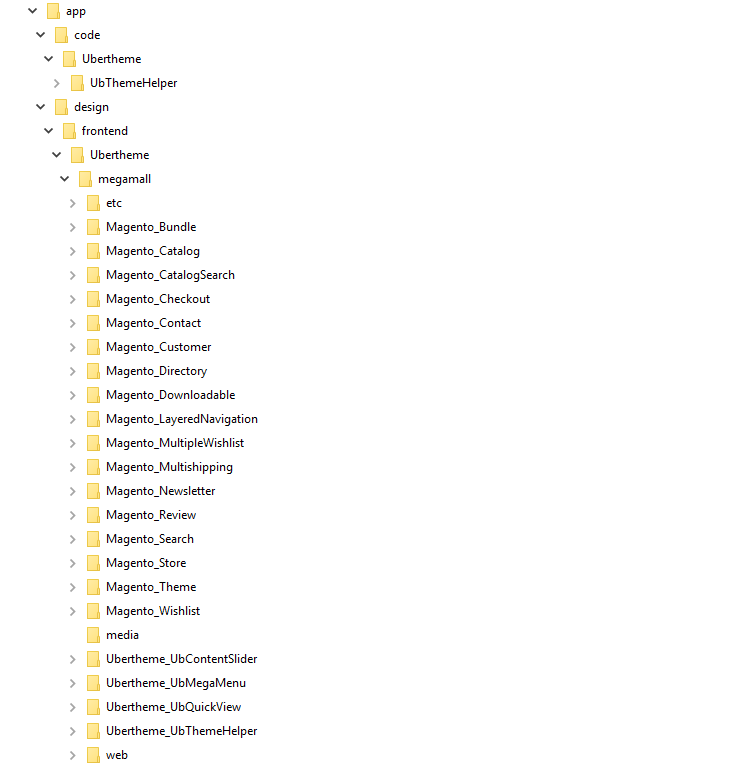
1.2.1. Copy and paste the folder app of the package you have unzipped to your web root. Once done, you should see the path:
..app/design/frontend/Ubertheme/megamall/
The overwritten folders should have a directory layout like this:
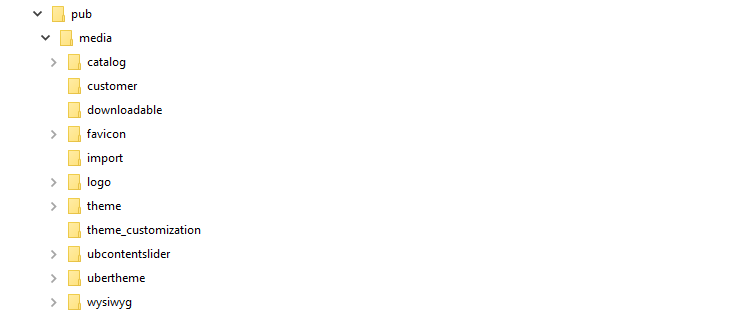
1.2.2. Copy and paste folder pub/media of the package you have unzipped to your web root. Make sure you *merge*, not ‘replace’ existing media folder contents. The overwritten folders should have a directory layout like this:
Step 2: Enable UB Theme Helper
Open your terminal and go to the Magento directory. In this directory, run the following commands:
- php -f bin/magento module:enable -c Ubertheme_UbThemeHelper
- php -f bin/magento setup:upgrade
- php -f bin/magento cache:clean
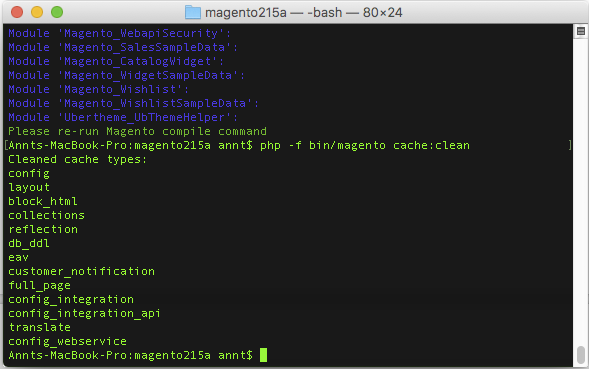
Once you finish the last command to clean cache, you have UB Theme Helper installed and ready for your use.
Step 3: Download and install built-in Magento 2 extensions
You will find UB Megamall packed with three Magento 2 extensions by default, including: UB Mega Menu, UB Content Slider and UB Quick View.
You need to download and install each extension following the guides below:
Once each extension is installed, navigate to your Magento Admin Panel | Content, you should see the extension’s menu respectively as follows:

Step 4: Import Sample Data
Now that you’ve installed UB Megamall theme and all built-in extensions, let’s move on to the next step — Import Sample data.
Sample data refers to all CMS pages, CMS blocks and widgets we created for UB Megamall.
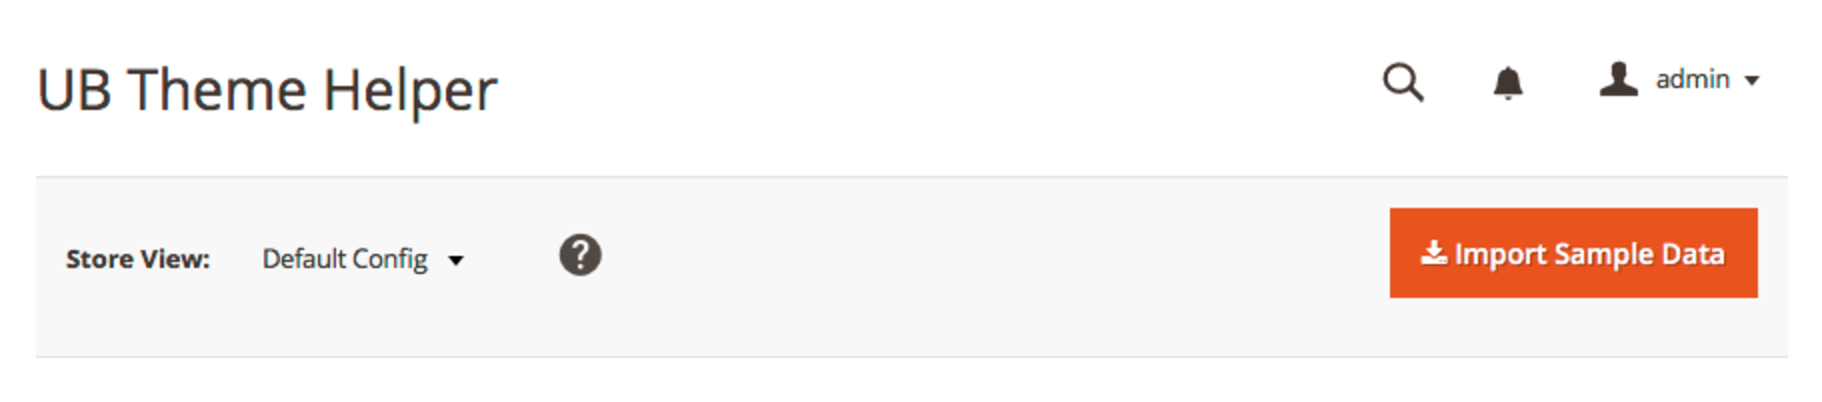
In your Magento Admin Panel, navigate to Content | (UB ThemeHelper) Theme Configuration, then simply click Import Sample Data button.
Step 5: Activate theme
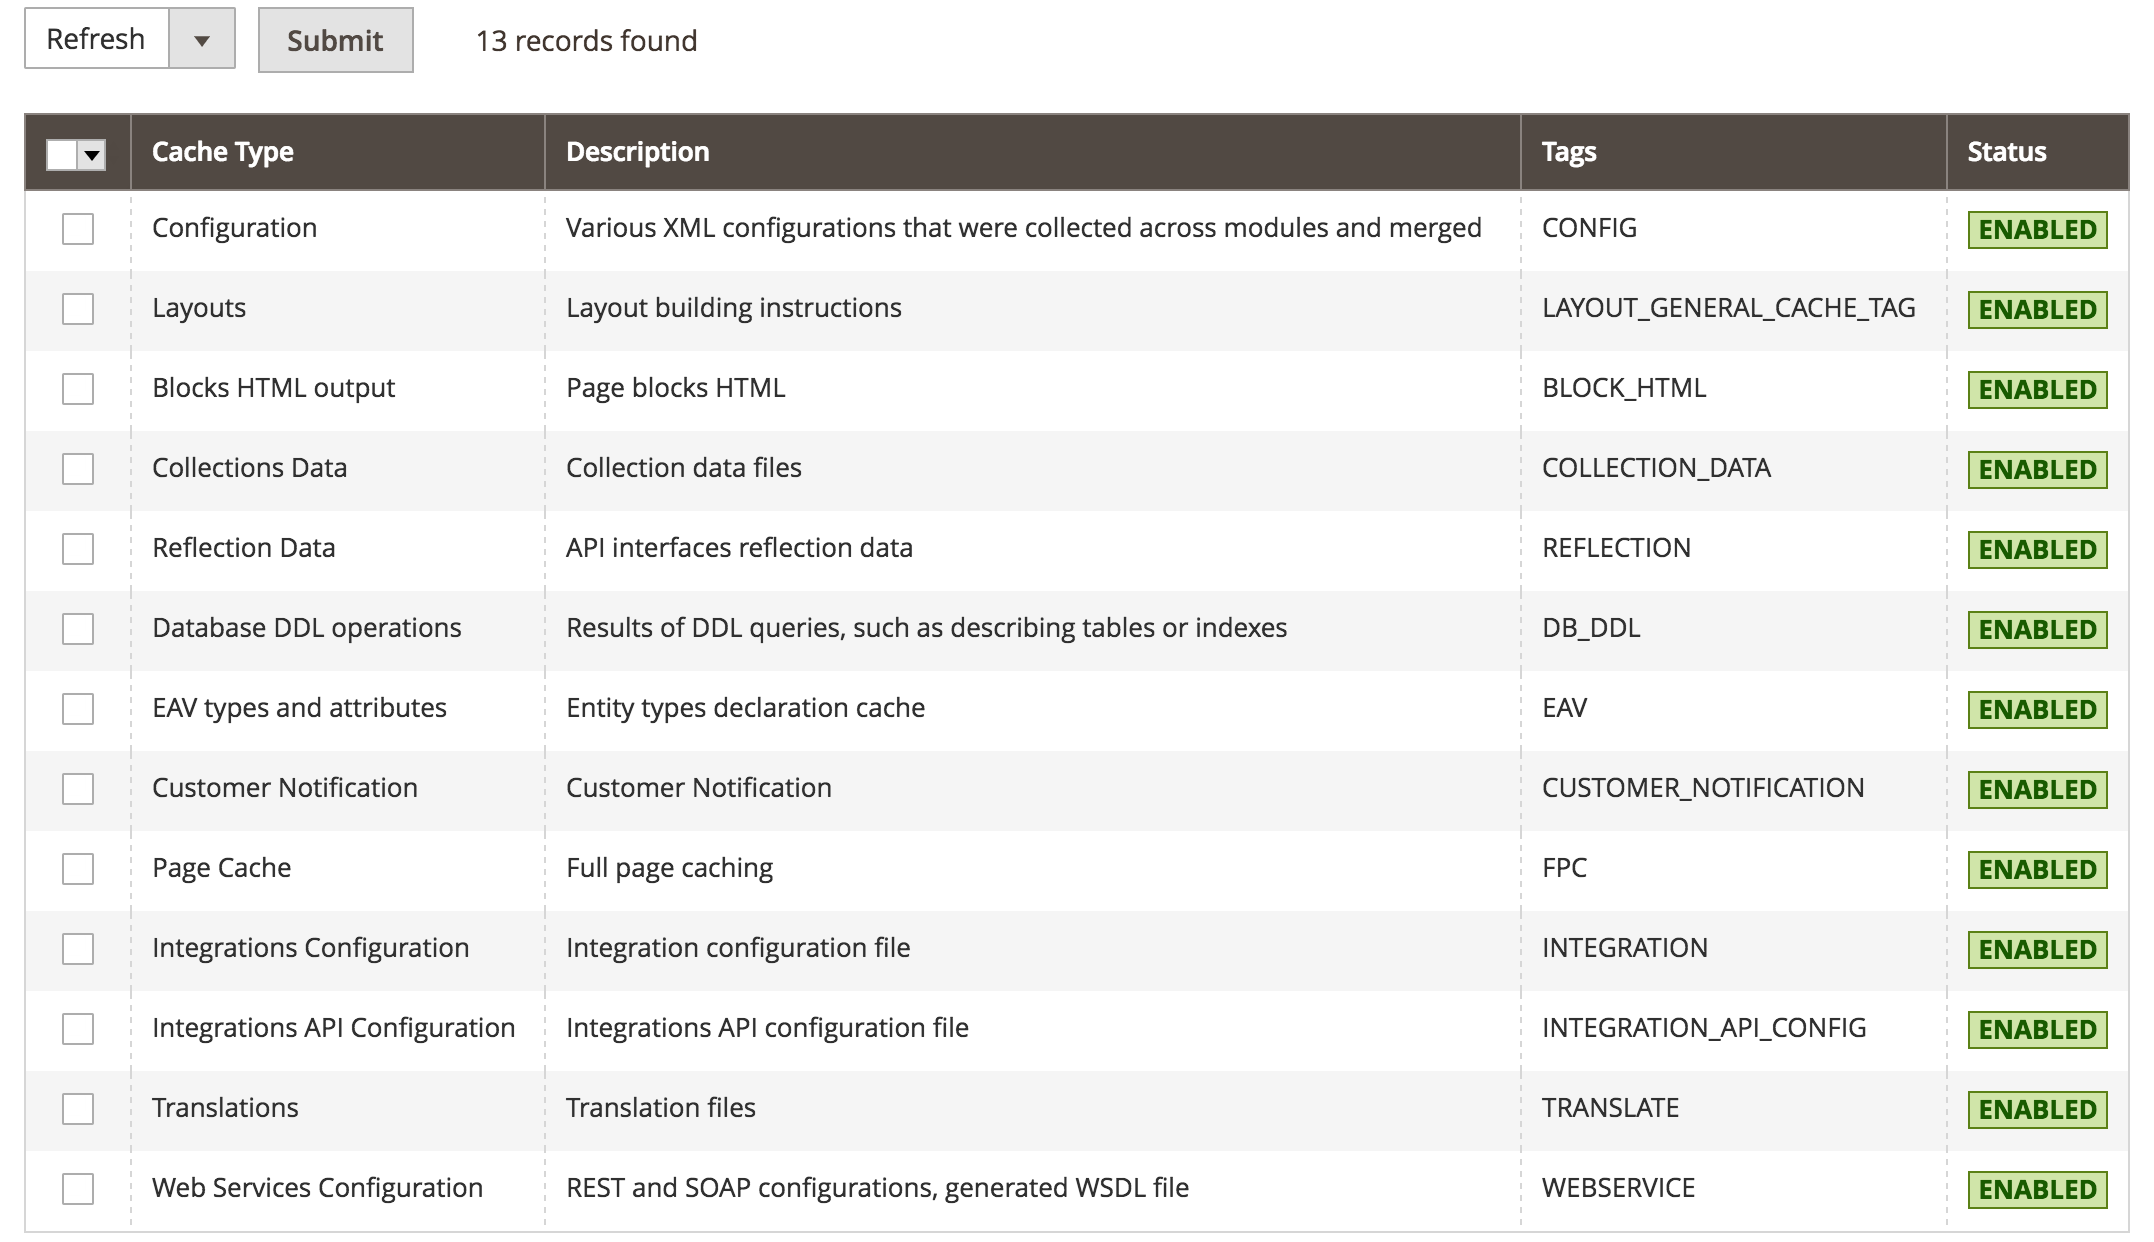
1. In your Magento Admin Panel, navigate to System | Tools | Cache Management, Sellect All the cache types, take Action as Refresh and Submit.
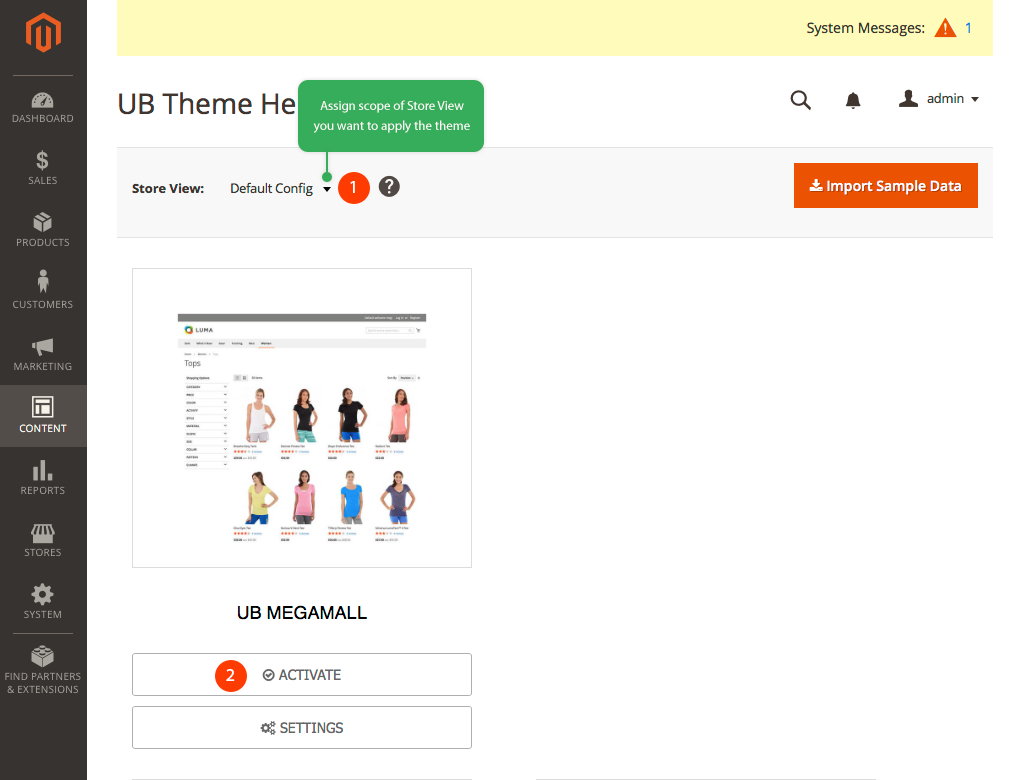
2. Then, navigate to Content | (UB ThemeHelper) Theme Configuration. You will see a grid of themes available.
3. Specify scope of Store View you want to apply the theme (if you do not set scope of Store View, Default Config will be applied). Then click Activate button to apply specific theme you select.
4. Once done, you run the following commands before you see the theme applied in the frontend.
- php -f bin/magento setup:static-content:deploy
- php -f bin/magento indexer:reindex
- php -f bin/magento cache:clean
That’s all. Now you can scroll down to learn more how to configure the theme.
Quickstart Installation
Quickstart package is to minimize time and effort in installing the theme as per Demo site. Kindly note that, with Quickstart, all your existing data will be overwritten. Thus, we recommend using Quickstart for your first installation or just in case you want to refresh your site to the very beginning. For step by step guide, please Click here
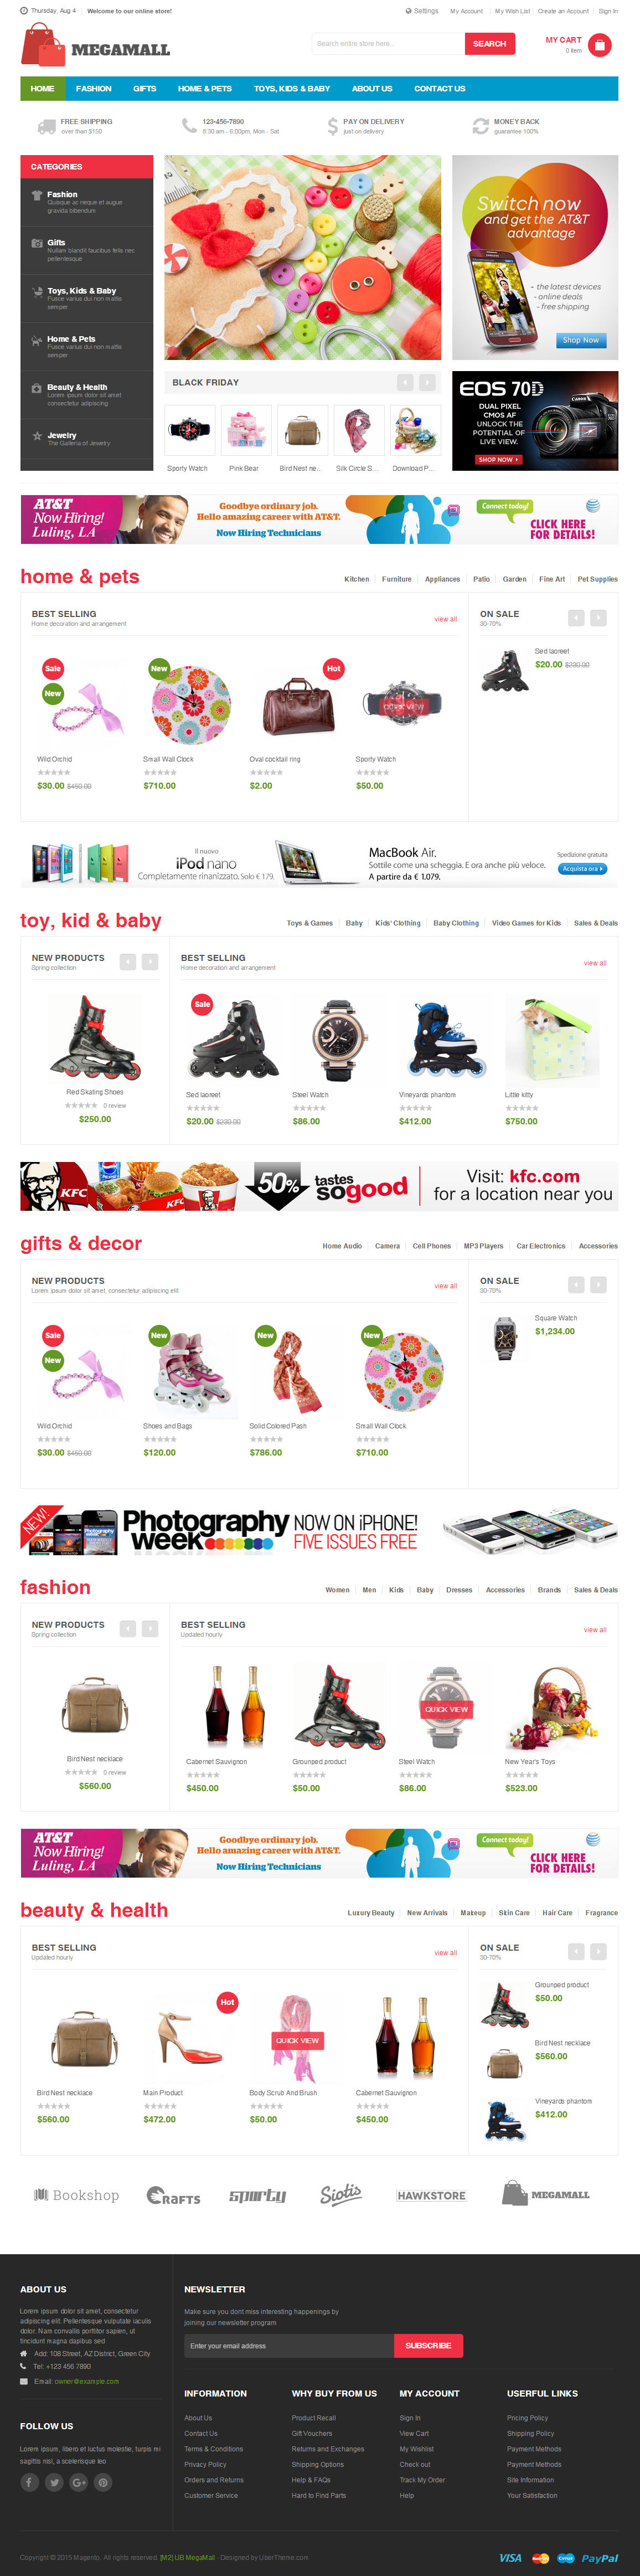
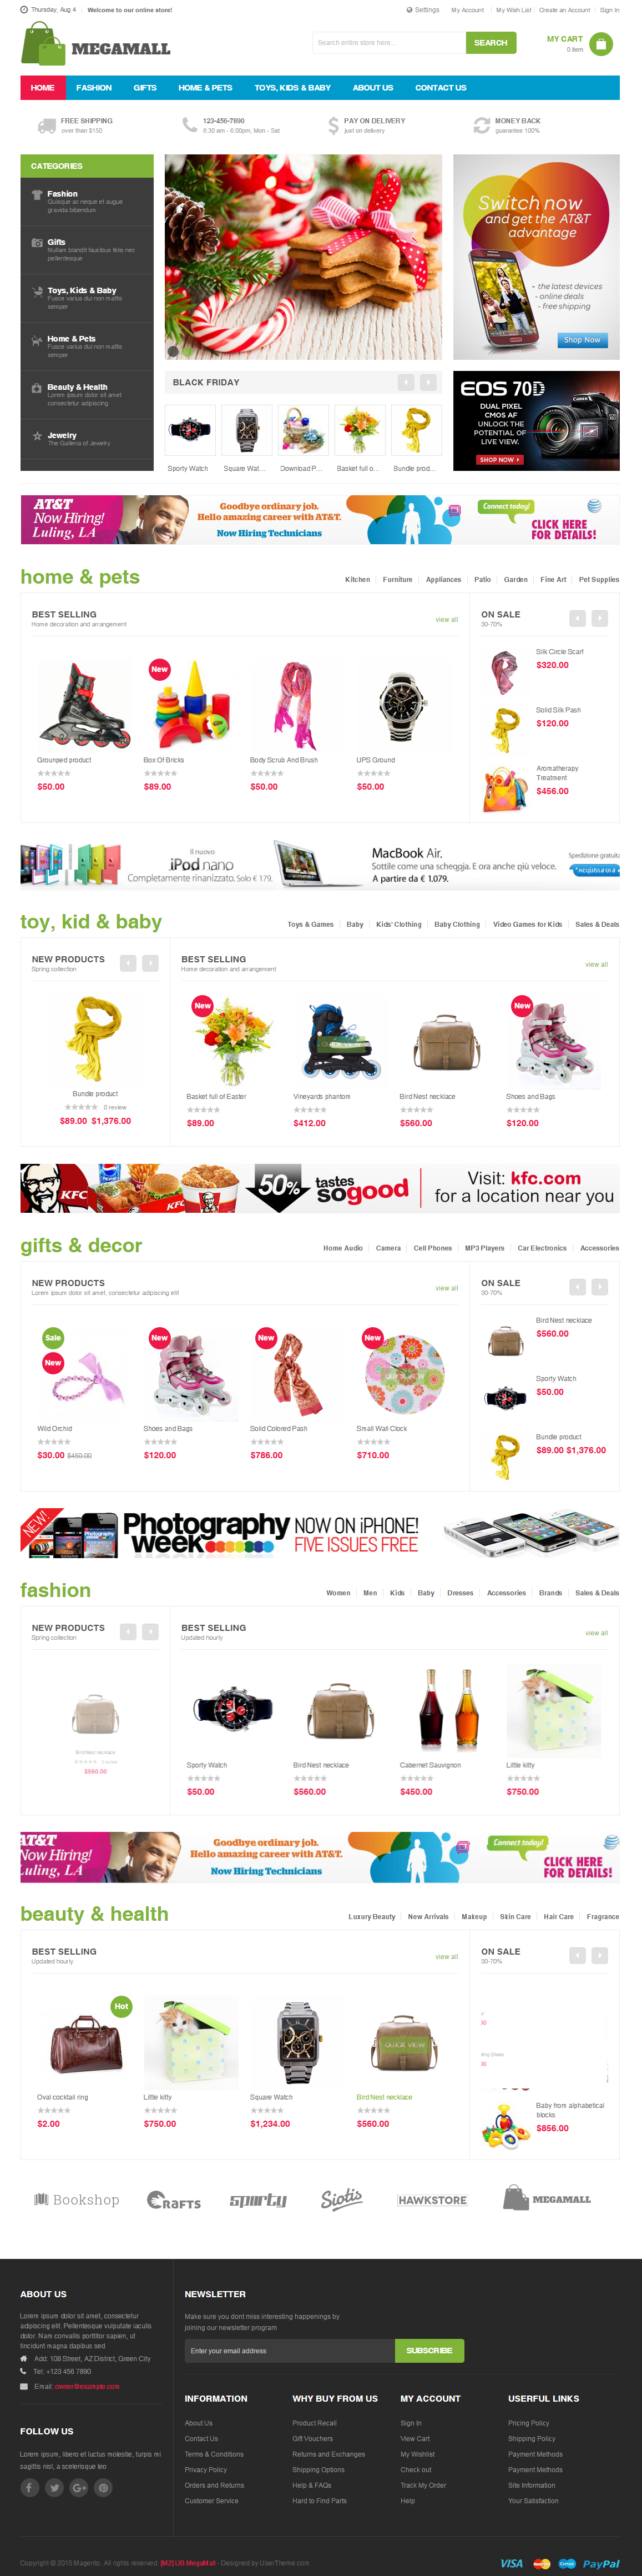
IV. Layout and Block positions
The layout of UB MegaMall Homepage can be illustrated as follows:

As seen in the screenshot, UB MegaMall storefront has the following static blocks:
- Static Block: UB Datetime
- Extension: UB MegaMenu(UB Top Menu)
- Static Block: UB Block Services
- Static Block: UB Left Menu
- Static Block: UB Image & Slider
- Static Block: UB Block Slider
- Static Block: UB Banner
- Static Block: UB Block Home&Pets
- Static Block: UB Block Toy, Kid & Baby
- Static Block: UB Block Gift & Decor
- Static Block: UB Block Fashion
- Static Block: UB Beauty & Health
- Static Block: UB Block Brand
- Static Block: UB Footer
- Static Block: UB Custom Tab (in Product Detail page)
Kindly note that, after importing sample data, please discard the guide in both sections: V -- Page Configuration and VI -- Static Block Configuration. guide. Simply follow these sections if you wish to reset to use default sample data of any specific block.
This section will guide you to configure your pages just as the Demo site of UB Megamall theme.
Homepage Configuration
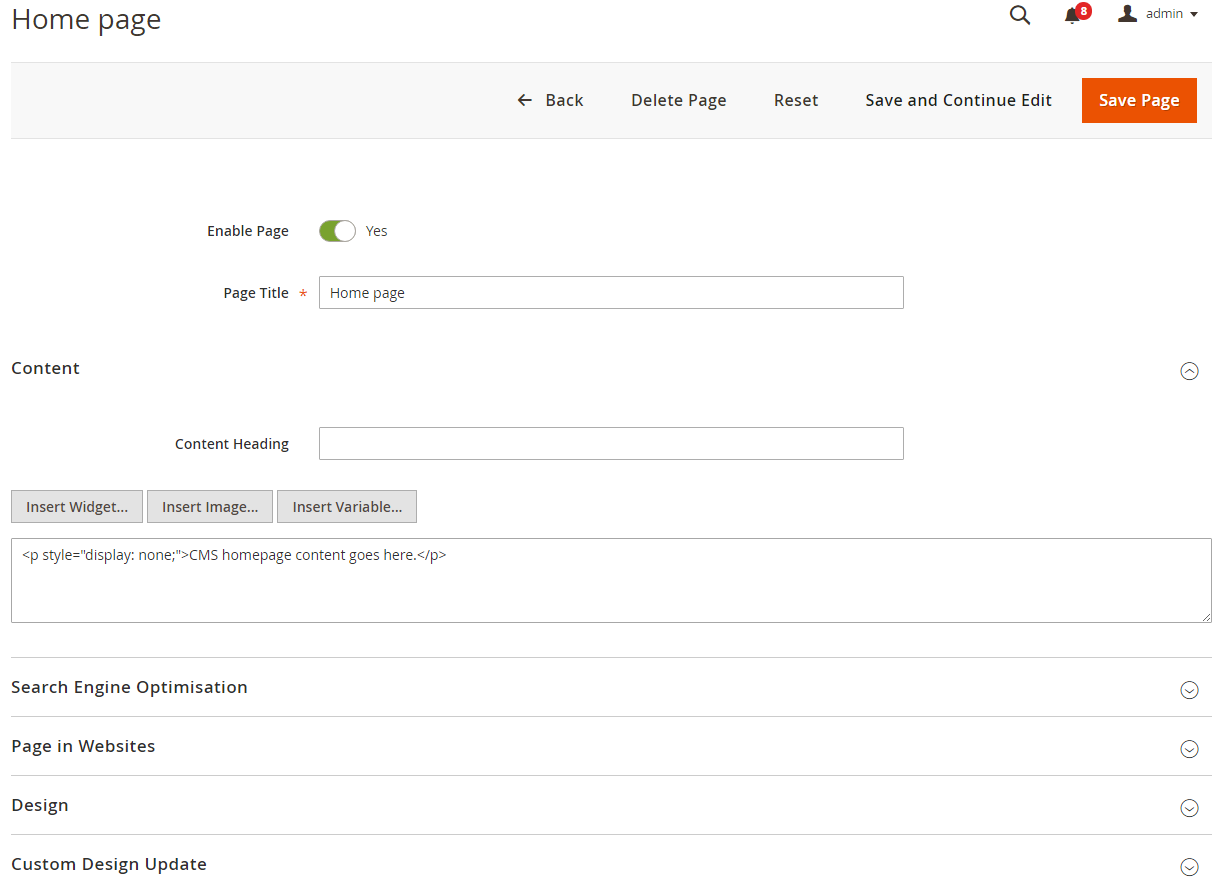
To configure this page, in the Admin Panel, navigate to Content | Elements | Pages | (Select Home Page) Edit.
- Content tab: click to see the Back-end setting
- Page in Websites tab: click to see the Back-end setting
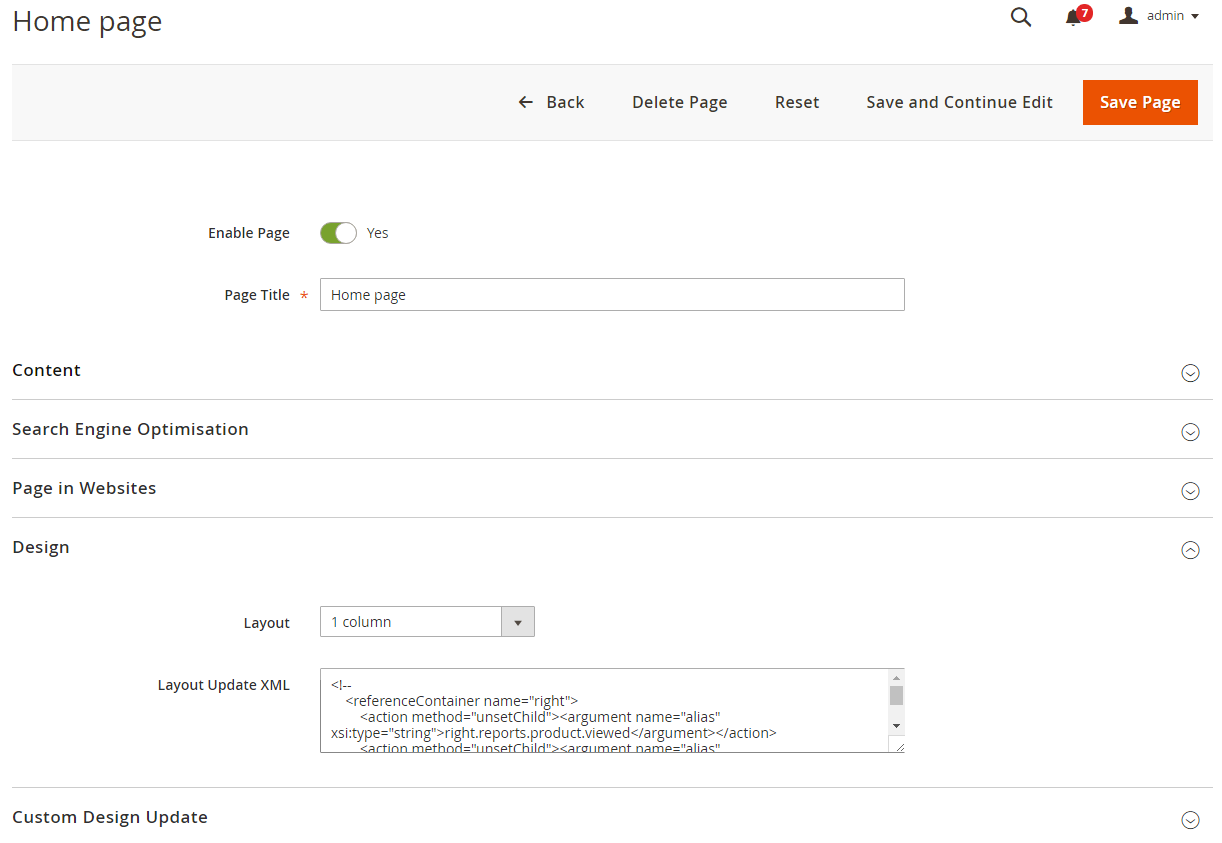
- Design tab: click to see the Back-end setting
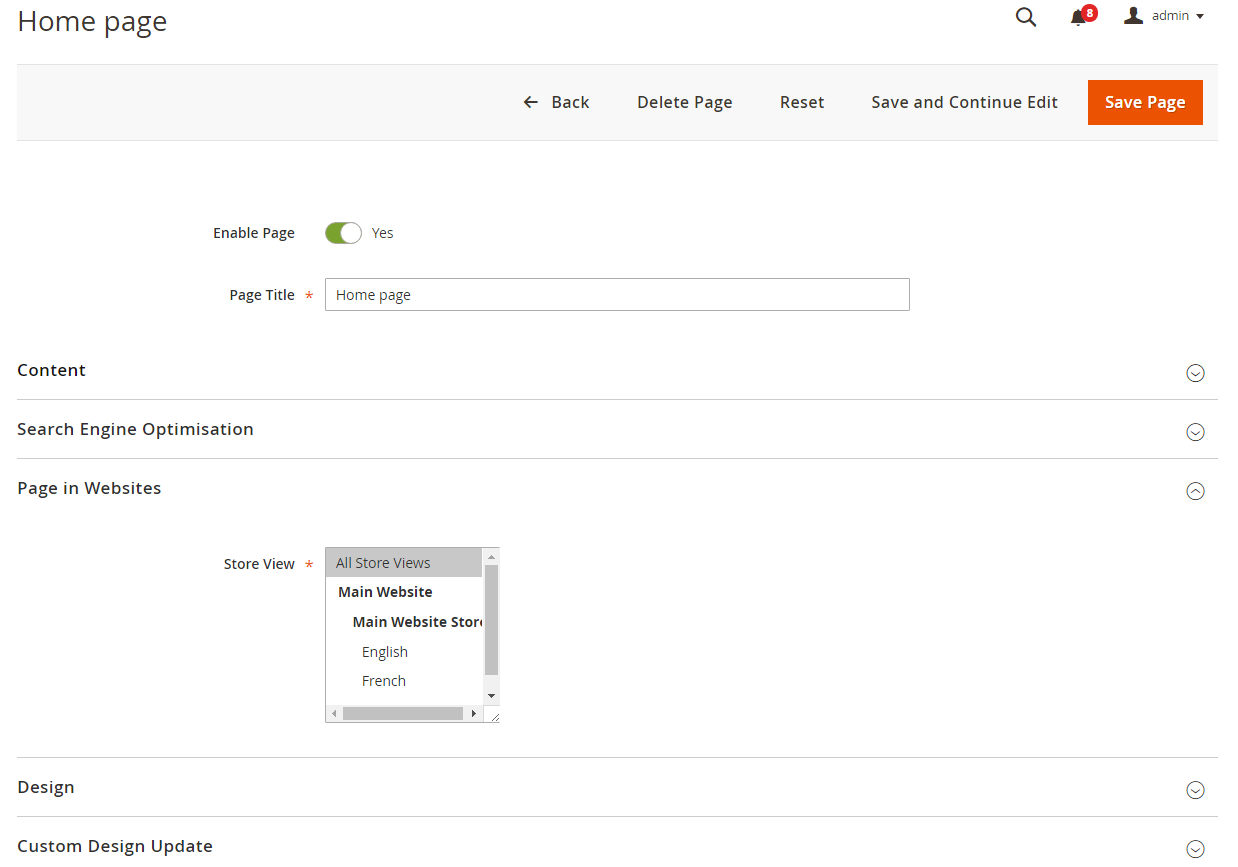
Copy and paste the following code into the “Design” field.
 <referenceContainer name="main">
 <container name="ub.pos1" htmlTag="div" htmlClass="ub-wrap-services" label="UB Block Services">
 <block class="Magento\Cms\Block\Block" name="ub-block-services">
 <arguments>
 <argument name="block_id" xsi:type="string">ub-block-services</argument>
 </arguments>
 </block>
 </container>
 <container name="ub.pos2" htmlTag="div" htmlClass="pos2" after="ub.pos1">
 <block class="Magento\Cms\Block\Block" name="ub-left-menu">
 <arguments>
 <argument name="block_id" xsi:type="string">ub-left-menu</argument>
 </arguments>
 </block>
 <container name="ub.group1" htmlTag="div" htmlClass="ub-group1">
 <block class="Magento\Cms\Block\Block" name="slider-home">
 <arguments>
 <argument name="block_id" xsi:type="string">slider-home</argument>
 </arguments>
 </block>
 <container name="ub.products.slider1" label="UB Block Black Friday">
 <block class="Magento\Cms\Block\Block" name="black-friday">
 <arguments>
 <argument name="block_id" xsi:type="string">black-friday</argument>
 </arguments>
 </block>
 </container>
 </container>
 <container name="ub.banner" label="UB Block Banner" htmlTag="div" htmlClass="ub-wrap-banner1">
 <block class="Magento\Cms\Block\Block" name="banner">
 <arguments>
 <argument name="block_id" xsi:type="string">banner</argument>
 </arguments>
 </block>
 </container>
 </container>
 <container name="ub.pos3" htmlTag="div" htmlClass="pos3" after="ub.pos2" label="UB Block Home And Pets">
 <block class="Magento\Cms\Block\Block" name="home-pets">
 <arguments>
 <argument name="block_id" xsi:type="string">home-pets</argument>
 </arguments>
 </block>
 </container>
 <container name="ub.pos4" htmlTag="div" htmlClass="pos4" after="ub.pos3" label="UB Block Toy, Kid And Baby">
 <block class="Magento\Cms\Block\Block" name="toy-kid-baby">
 <arguments>
 <argument name="block_id" xsi:type="string">toy-kid-baby</argument>
 </arguments>
 </block>
 </container>
 <container name="ub.pos5" htmlTag="div" htmlClass="pos5" after="ub.pos4" label="UB Block Gifts Anh Decor">
 <block class="Magento\Cms\Block\Block" name="gift-decor">
 <arguments>
 <argument name="block_id" xsi:type="string">gift-decor</argument>
 </arguments>
 </block>
 </container>
 <container name="ub.pos6" htmlTag="div" htmlClass="pos6" after="ub.pos5" label="UB Block Fashion">
 <block class="Magento\Cms\Block\Block" name="fashion">
 <arguments>
 <argument name="block_id" xsi:type="string">fashion</argument>
 </arguments>
 </block>
 </container>
 <container name="ub.pos7" htmlTag="div" htmlClass="pos7" after="ub.pos6" label="UB Block Beauty And Health">
 <block class="Magento\Cms\Block\Block" name="beauty-health">
 <arguments>
 <argument name="block_id" xsi:type="string">beauty-health</argument>
 </arguments>
 </block>
 </container>
 <container name="ub.pos8" htmlTag="div" htmlClass="pos8" after="ub.pos7" label="UB Brand">
 <block class="Magento\Cms\Block\Block" name="brand">
 <arguments>
 <argument name="block_id" xsi:type="string">brand</argument>
 </arguments>
 </block>
 </container>
</referenceContainer>
404 page Configuration
To configure this page, in the Admin Panel, navigate to Content | Elements | Pages, then select 404 Not Found page to update the settings as follows:
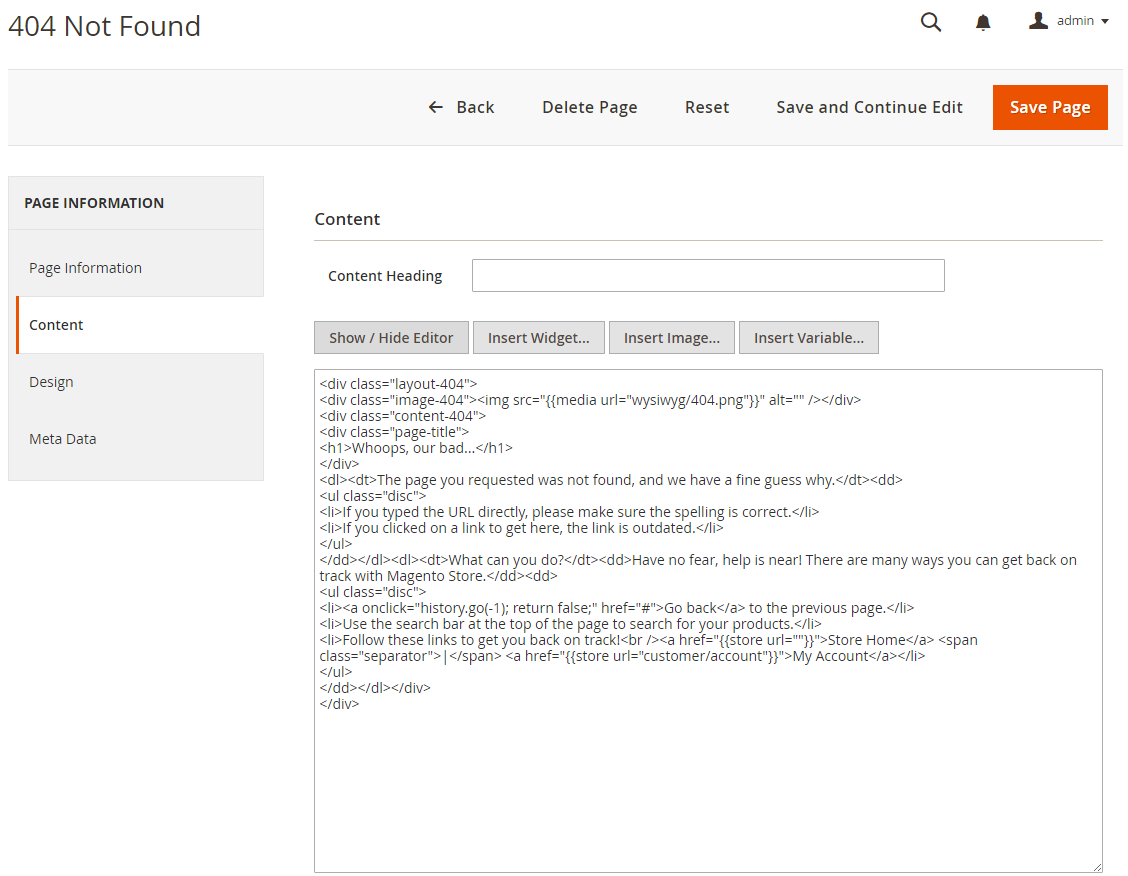
- Content tab: click to see the Back-end setting
- Page in Websites tab: click to see the Back-end setting
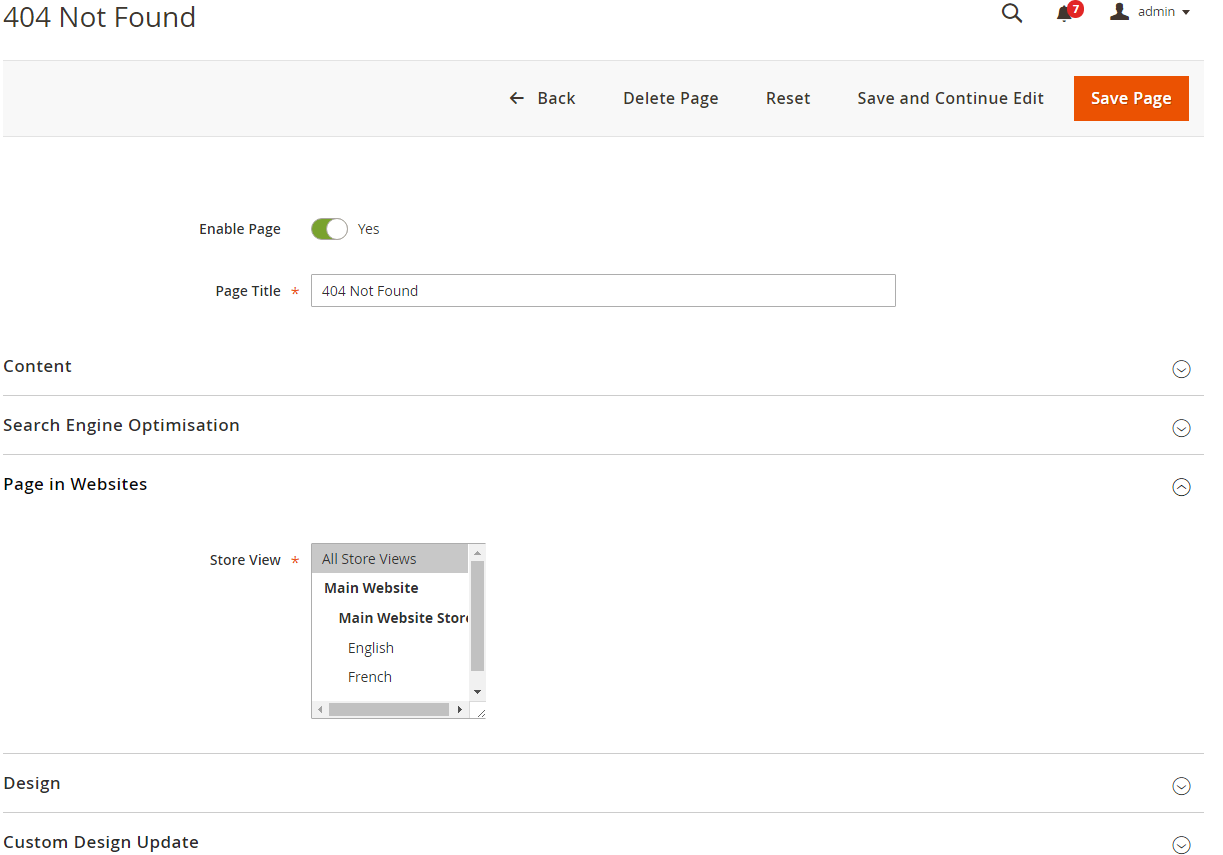
Copy and paste the code below on the Content field:
<div id="ub-error">
<div class="col-left"><img src="{{media url="wysiwyg/bg-page-404.jpg"}}" alt="" /></div>
<div class="col-right">
<div class="page-head-alt">
<h2>Not found</h2>
</div>
<h3>The page you requested was not found, and we have a fine guess why</h3>
<ul class="none-disc">
<li>If you typed the URL directly, please make sure the spelling is correct.</li>
<li>If you clicked on a link to get here, the link is outdated.</li>
</ul>
<dl><dt>What can you do?</dt><dd>Have no fear, help is near! There are many ways you can get back on track with Magento Demo Store.</dd><dd>
<ul class="none-disc">
<li><a onclick="history.go(-1);" href="#">Go back</a> to the previous page.</li>
<li>Use the search bar at the top of the page to search for your products. Follow these links to get you back on track!</li>
<li><a href="{{store url=""}}">Store Home</a> / <a href="{{store url="customer/account"}}">My Account</a></li>
</ul>
</dd></dl>
</div>
</div>
Front-end Appearance:

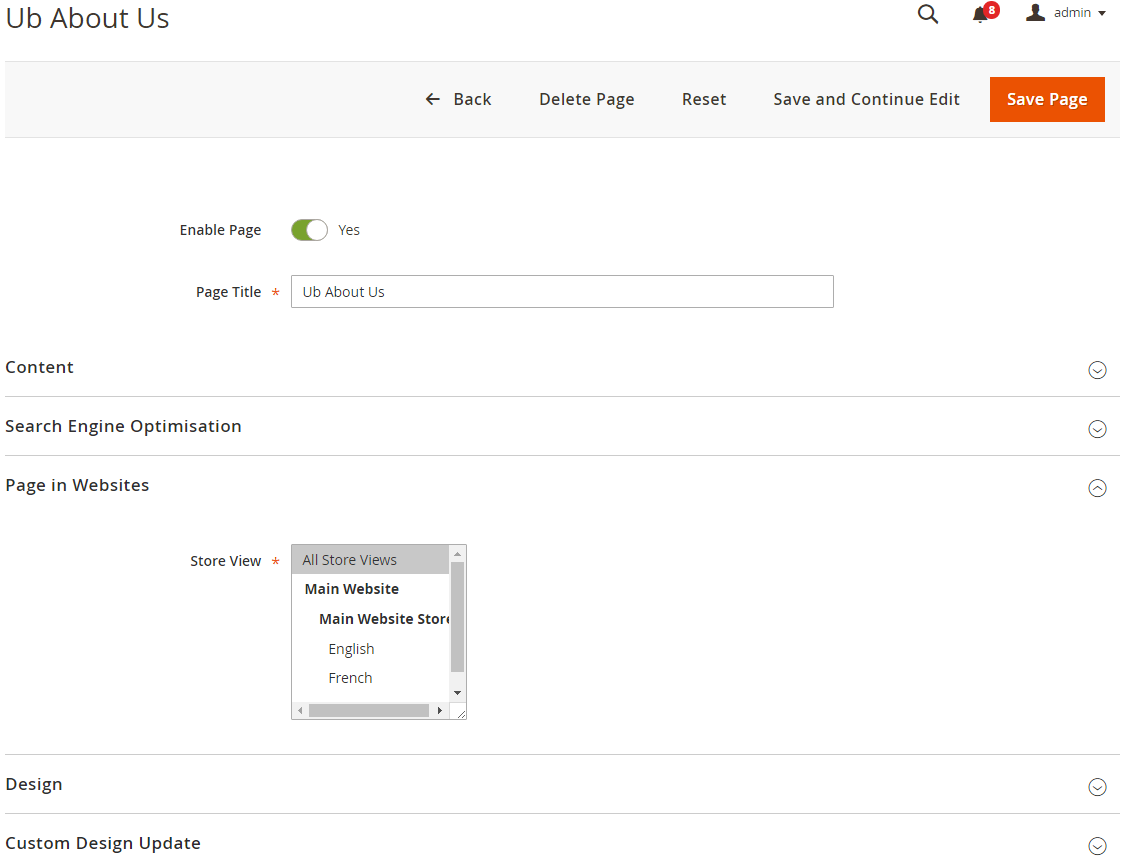
About Us Configuration
To configure this page, in the Admin Panel, navigate to Content | Elements | Pages, then select About Us page to update the settings as follows:
- Content tab: click to see the Back-end setting
- Page in Websites tab: click to see the Back-end setting
Copy and paste the code below on the Content field:
<div class="page-about">
<div class="page-title">
<h1>About Magento Store</h1>
</div>
<div class="col3-set">
<div class="col-1 col">
<p ><a class="image-first" href="http://www.varien.com/"><img title="Varien" alt="Varien" src="{{media url='wysiwyg/about_us_img.jpg'}}" /></a>Lorem ipsum dolor sit amet, consectetuer adipiscing elit. Morbi luctus. Duis lobortis. Nulla nec velit. Mauris pulvinar erat non massa. Suspendisse tortor turpis, porta nec, tempus vitae, iaculis semper, pede.</p>
<p>Lorem ipsum dolor sit amet, consectetuer adipiscing elit. Morbi luctus. Duis lobortis. Nulla nec velit. Mauris pulvinar erat non massa. Suspendisse tortor turpis, porta nec, tempus vitae, iaculis semper, pede. Cras vel libero id lectus rhoncus porta.</p>
</div>
<div class="col-2 col">
<p><strong style="color: #de036f;">Lorem ipsum dolor sit amet, consectetuer adipiscing elit. Morbi luctus. Duis lobortis. Nulla nec velit.</strong></p>
<p>Vivamus tortor nisl, lobortis in, faucibus et, tempus at, dui. Nunc risus. Proin scelerisque augue. Nam ullamcorper. Phasellus id massa. Pellentesque nisl. Pellentesque habitant morbi tristique senectus et netus et malesuada fames ac turpis egestas. Nunc augue. Aenean sed justo non leo vehicula laoreet. Praesent ipsum libero, auctor ac, tempus nec, tempor nec, justo.</p>
<p>Maecenas ullamcorper, odio vel tempus egestas, dui orci faucibus orci, sit amet aliquet lectus dolor et quam. Pellentesque consequat luctus purus. Nunc et risus. Etiam a nibh. Phasellus dignissim metus eget nisi. Vestibulum sapien dolor, aliquet nec, porta ac, malesuada a, libero. Praesent feugiat purus eget est. Nulla facilisi. Vestibulum tincidunt sapien eu velit. Mauris purus. Maecenas eget mauris eu orci accumsan feugiat. Pellentesque eget velit. Nunc tincidunt.</p>
</div>
<div class="col-3 col">
<p>Lorem ipsum dolor sit amet, consectetuer adipiscing elit. Morbi luctus. Duis lobortis. Nulla nec velit. Mauris pulvinar erat non massa. Suspendisse tortor turpis, porta nec, tempus vitae, iaculis semper, pede. Cras vel libero id lectus rhoncus porta. Suspendisse convallis felis ac enim. Vivamus tortor nisl, lobortis in, faucibus et, tempus at, dui. Nunc risus. Proin scelerisque augue. Nam ullamcorper</p>
<p><strong style="color: #de036f;">Maecenas ullamcorper, odio vel tempus egestas, dui orci faucibus orci, sit amet aliquet lectus dolor et quam. Pellentesque consequat luctus purus.</strong></p>
<p>Nunc et risus. Etiam a nibh. Phasellus dignissim metus eget nisi.</p>
<div class="divider"> </div>
<p>To all of you, from all of us at Magento Store - Thank you and Happy eCommerce!</p>
<p style="line-height: 1.2em;"><strong style="font: italic 2em Georgia, serif;">John Doe</strong><br /><small>Some important guy</small></p>
</div>
</div>
</div>
Front-end Appearance:

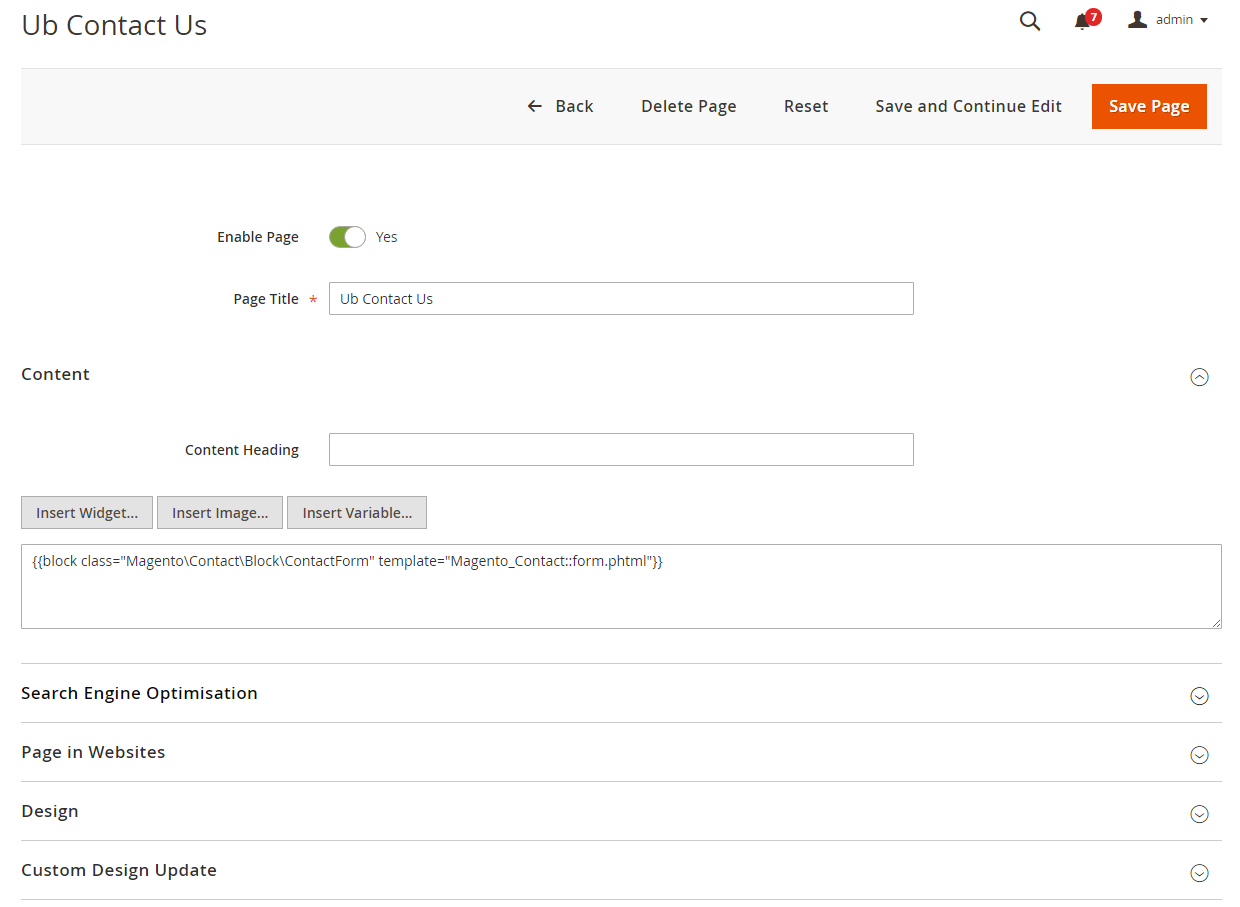
Contact us page Configuration
To configure this page, in the Admin Panel, navigate to Content | Elements | Pages, then select Contact us 1 page to update the settings as follows:
- Content tab: click to see the Back-end setting
- Page in Websites tab: click to see the Back-end setting
Copy and paste the code below on the Content field:
{{block class="Magento\Contact\Block\ContactForm" template="Magento_Contact::form.phtml"}}
Front-end Appearance:Layout and Block positions

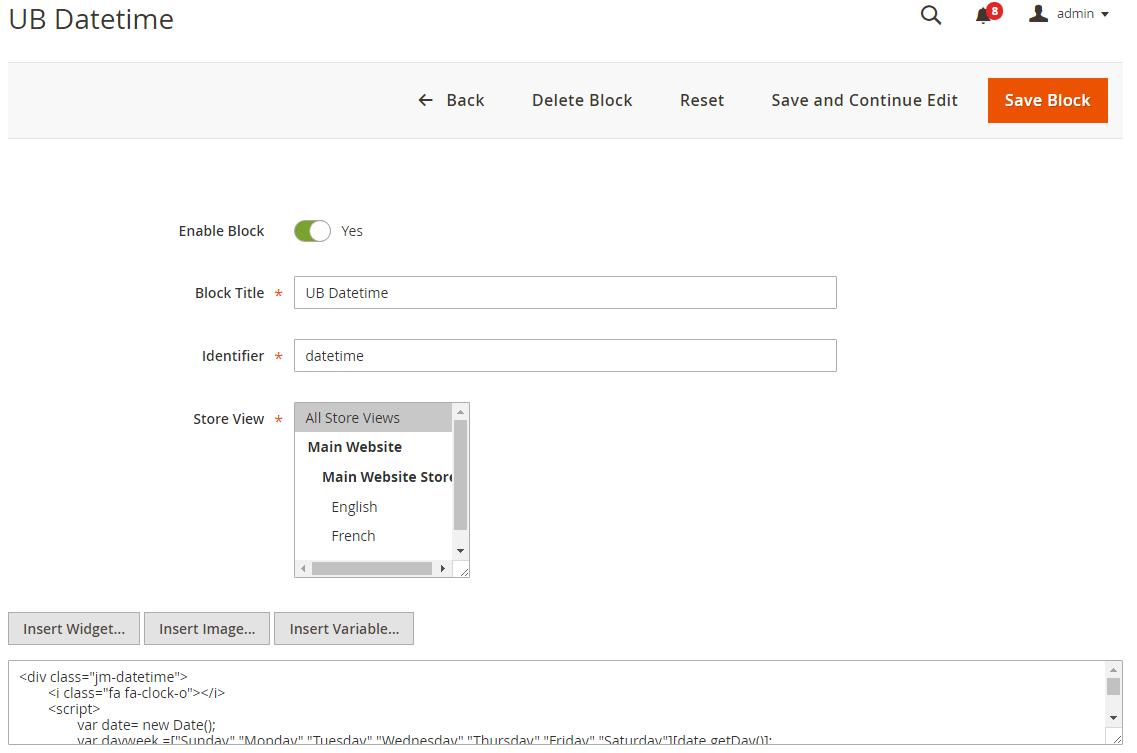
1. UB Datetime
In your admin dashboard, click Content | (Elements) Blocks | Add New Block, then create UB Datetime block with configuration as follows:
Back-end setting
In the Content field, click Show/Hide Editor button, then copy and paste the following code:
<i class="fa fa-clock-o"></i>
<script>
 var date= new Date();
 var dayweek =["Sunday","Monday","Tuesday","Wednesday","Thursday","Friday","Saturday"][date.getDay()];
 var month =["Jan","Feb","Mar","Apr","May","June","July","Aug","Sep","Oct","Nov","Dec"][date.getMonth()];
 var day = date.getDate();
 document.write(dayweek+", "+month+" "+day);
</script>
Front-end Appearance:

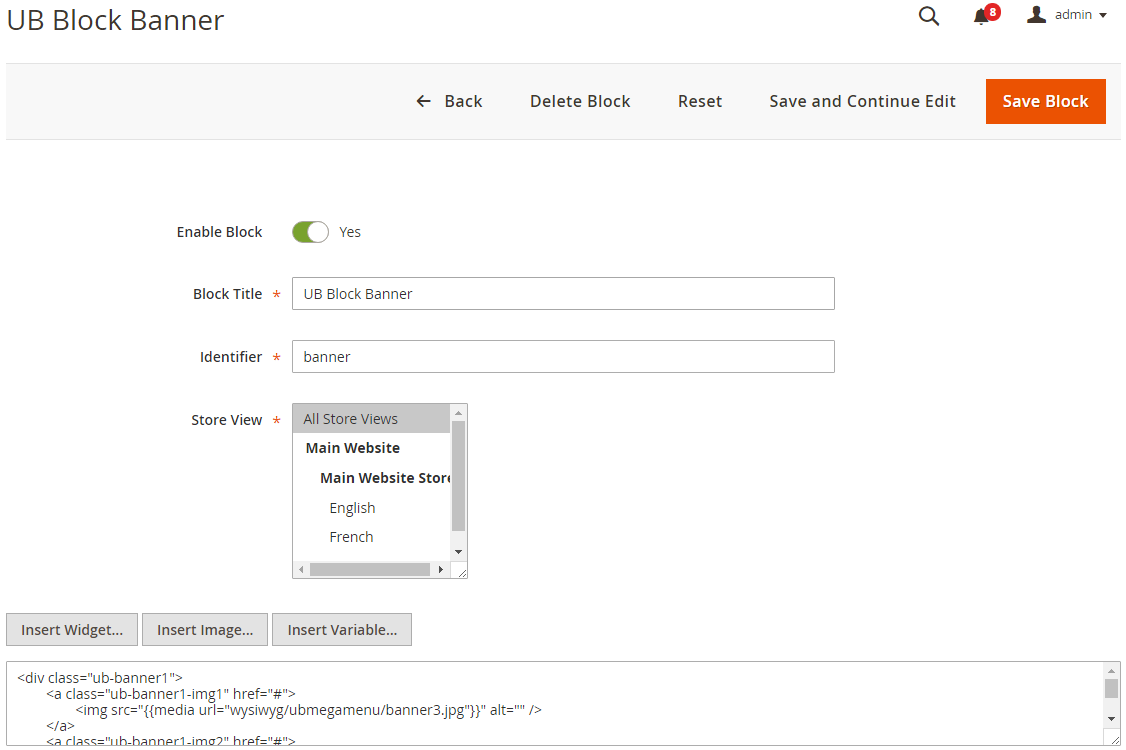
2. UB Block Banner
You create UB Block Banner block (the same way as afore-mentioned UB Datetime block) with configuration as follows:
Back-end setting
In the Content field, click Show/Hide Editor button, then copy and paste the following code:
<div class="ub-banner1">
 <a class="ub-banner1-img1" href="#">
 <img src="{{media url="wysiwyg/ubmegamenu/banner3.jpg"}}" width="300px" height="371px" alt="" />
 </a>
 <a class="ub-banner1-img2" href="#">
 <img src="{{media url="wysiwyg/ubmegamenu/banner4.jpg"}}" width="300px" height="180px" alt="" />
 </a>
</div>
Front-end Appearance:

3. UB Block Services
You create UB Block Services block (the same way as afore-mentioned UB Datetime block) with configuration as follows:
Back-end setting
In the Content field, click Show/Hide Editor button, then copy and paste the following code:
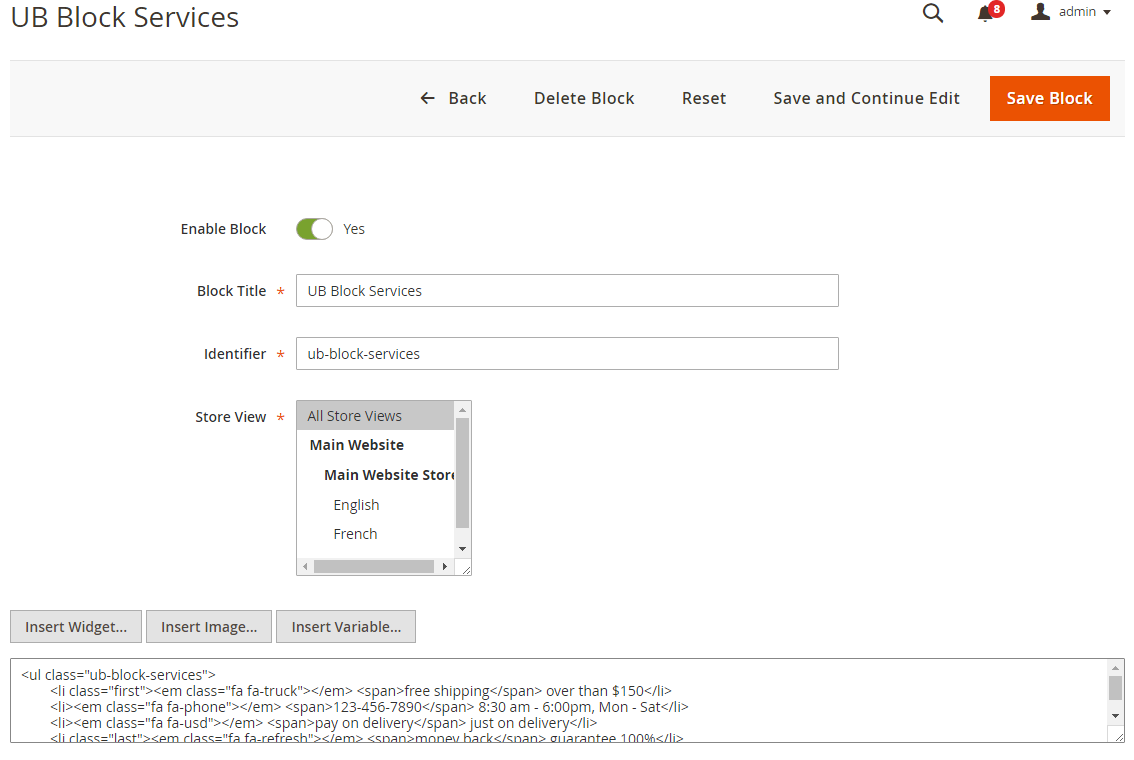
<ul class="ub-block-services">
 <li class="first"><em class="fa fa-truck"></em> <span>free shipping</span> over than $150</li>
 <li><em class="fa fa-phone"></em> <span>123-456-7890</span> 8:30 am - 6:00pm, Mon - Sat</li>
 <li><em class="fa fa-usd"></em> <span>pay on delivery</span> just on delivery</li>
 <li class="last"><em class="fa fa-refresh"></em> <span>money back</span> guarantee 100%</li>
</ul>
Front-end Appearance:

4. UB Block Home & Pets
You create UB Block Home & Pets block (the same way as afore-mentioned UB Datetime block) with configuration as follows:
Back-end setting
In the Content field, click Show/Hide Editor button, then copy and paste the following code:
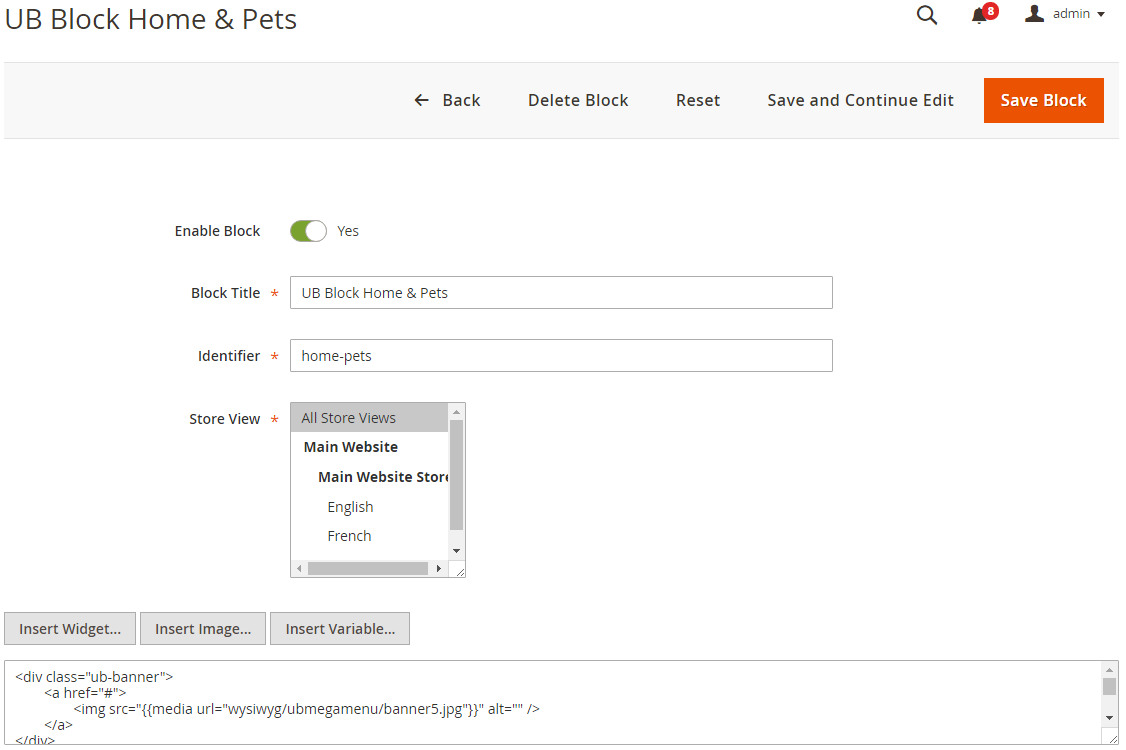
<div class="ub-banner">
<a href="#">
<img src="{{media url="wysiwyg/ubmegamenu/banner5.jpg"}}" width="1080px" height="90px" alt="" />
</a>
</div>
<div class="block block-cate">
<a class="title" href="#">home & pets</a>
<ul>
<li><a href="{{store url='fashion.html'}}">Kitchen</a></li>
<li><a href="{{store url='fashion.html'}}">Furniture</a></li>
<li><a href="{{store url='fashion.html'}}">Appliances</a></li>
<li><a href="{{store url='fashion.html'}}">Patio</a></li>
<li><a href="{{store url='fashion.html'}}">Garden</a></li>
<li><a href="{{store url='fashion.html'}}">Fine Art</a></li>
<li><a href="{{store url='fashion.html'}}">Pet Supplies</a></li>
</ul>
</div>
<div class="ub-block-products">
<div class="ub-style1">
<div class="category-title">
<h3>Best Selling <span>Home decoration and arrangement</span></h3>
<a href="{{store url='fashion.html'}}"> view all </a>
</div>
{{block class="Ubertheme\UbContentSlider\Block\Slider"
name="ub.hp.left.slider"
title="Home & Pets"
show_title="0"
content_type="random_products"
show_desc="0"
show_wishlist="0"
show_compare="0"
show_add_cart="0"
show_navigation="0"
show_paging="0"
auto_run="0"
number_items="4"
number_items_desktop="4"
}}
</div>
<div class="ub-style2 ub-style2-right">
<div class="category-title">
<h3>on sale <span>30-70%</span></h3>
</div>
{{block class="Ubertheme\UbContentSlider\Block\Slider"
name="ub.hp.right.slider"
template="slider_products_right_home.phtml"
title="on sale"
show_title="0"
content_type="random_products"
show_desc="0"
show_wishlist="0"
show_compare="0"
show_add_cart="0"
show_paging="0"
show_review="0"
number_items="1"
number_items_desktop="1"
number_items_desktop_small="1"
number_items_tablet="1"
number_items_tablet_small="1"
slide_transition="backSlide"
auto_run="0"
}}
</div>
</div>
Front-end Appearance:

5. UB Block Toy, Kid & Baby
You create UB Block Toy, Kid & Baby block (the same way as afore-mentioned UB Datetime block) with configuration as follows:
Back-end setting
<div class="ub-banner">
<a href="#">
<img src="{{media url="wysiwyg/ubmegamenu/banner6.jpg"}}" width="1080px" height="90px" alt="" />
</a>
</div>
<div class="block block-cate">
<a class="title" href="#">toy, kid & baby</a>
<ul>
<li><a href="{{store url='fashion.html'}}">Toys & Games</a></li>
<li><a href="{{store url='fashion.html'}}">Baby</a></li>
<li><a href="{{store url='fashion.html'}}">Kids' Clothing</a></li>
<li><a href="{{store url='fashion.html'}}">Baby Clothing</a></li>
<li><a href="{{store url='fashion.html'}}">Video Games for Kids</a></li>
<li><a href="{{store url='fashion.html'}}">Sales & Deals</a></li>
</ul>
</div>
<div class="ub-block-products">
<div class="ub-style2 ub-style2-left">
<div class="category-title">
<h3>New products <span>Spring collection</span></h3>
</div>
{{block class="Ubertheme\UbContentSlider\Block\Slider"
name="ub.tkb.left.slider"
title="New products"
show_title="0"
content_type="random_products"
show_desc="0"
show_wishlist="0"
show_compare="0"
show_add_cart="0"
show_paging="0"
number_items="1"
number_items_desktop="1"
number_items_desktop_small="1"
number_items_tablet="1"
number_items_tablet_small="1"
slide_transition="backSlide"
auto_run="1"
}}
</div>
<div class="ub-style1 ub-style1-right">
<div class="category-title">
<h3>Best Selling <span>Home decoration and arrangement</span></h3>
<a href="{{store url='fashion.html'}}">view all</a>
</div>
{{block class="Ubertheme\UbContentSlider\Block\Slider"
name="ub.tkb.right.slider"
title="Best Selling"
show_title="0"
content_type="random_products"
show_desc="0"
show_wishlist="0"
show_compare="0"
show_add_cart="0"
show_navigation="0"
show_paging="0"
auto_run="1"
number_items="4"
number_items_desktop="4"
}}
</div>
</div>
Front-end Appearance:

6. UB Block Gifts & Decor
You create UB Block Gifts & Decor block (the same way as afore-mentioned UB Datetime block) with configuration as follows:
Back-end setting
In the Content field, click Show/Hide Editor button, then copy and paste the following code:
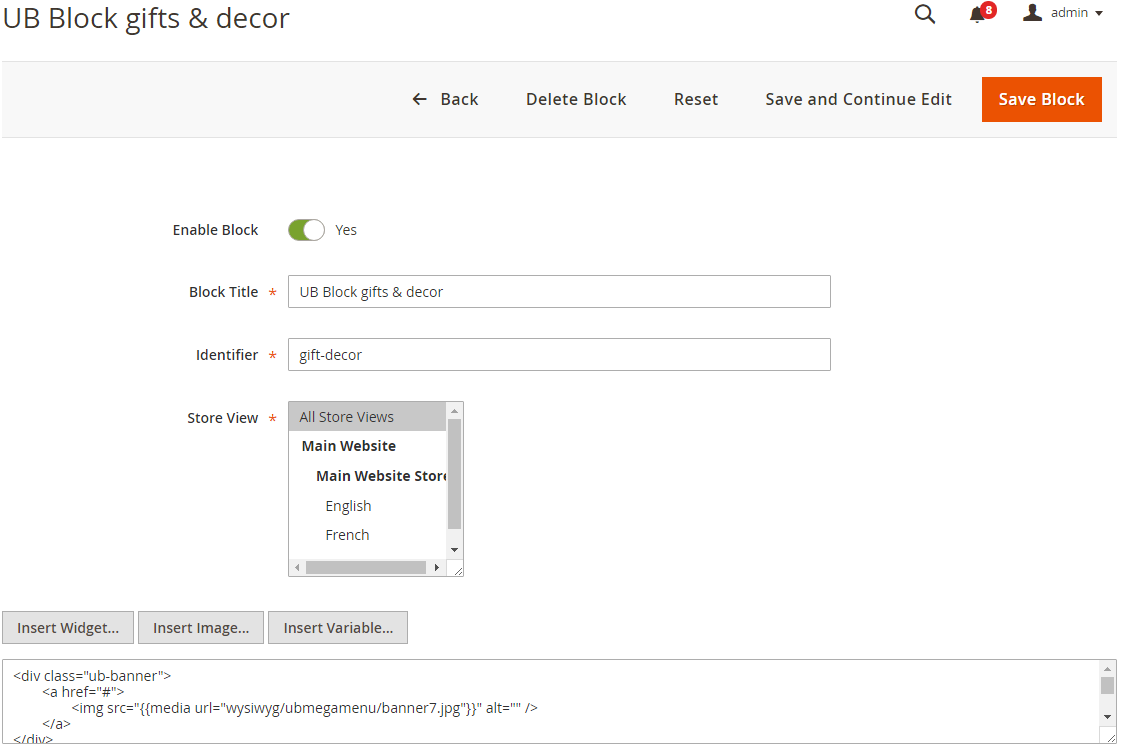
<div class="ub-banner">
<a href="#">
<img src="{{media url="wysiwyg/ubmegamenu/banner7.jpg"}}" width="1080px" height="90px" alt="" />
</a>
</div>
<div class="block block-cate">
<a class="title" href="#">gifts & decor</a>
<ul>
<li><a href="{{store url='fashion.html'}}">Home Audio</a></li>
<li><a href="{{store url='fashion.html'}}">Camera</a></li>
<li><a href="{{store url='fashion.html'}}">Cell Phones</a></li>
<li><a href="{{store url='fashion.html'}}">MP3 Players</a></li>
<li><a href="{{store url='fashion.html'}}">Car Electronics</a></li>
<li><a href="{{store url='fashion.html'}}">Accessories</a></li>
</ul>
</div>
<div class="ub-block-products">
<div class="ub-style1">
<div class="category-title">
<h3>new products <span>Lorem ipsum dolor sit amet, consectetur adipiscing elit</span></h3>
<a href="{{store url='fashion.html'}}">view all</a>
</div>
{{block class="Ubertheme\UbContentSlider\Block\Slider"
name="ub.gd.left.slider"
title="gifts & decor"
show_title="0"
content_type="new_products"
show_desc="0"
show_wishlist="0"
show_compare="0"
show_add_cart="0"
show_navigation="0"
show_paging="0"
auto_run="0"
number_items="4"
number_items_desktop="4"
from_date="2016-04-01"
to_date=""
}}
</div>
<div class="ub-style2 ub-style2-right">
<div class="category-title">
<h3>on sale <span>30-70%</span></h3>
</div>
{{block class="Ubertheme\UbContentSlider\Block\Slider"
name="ub.gd.right.slider"
template="slider_products_right_home.phtml"
title="on sale"
show_title="0"
content_type="random_products"
show_desc="0"
show_wishlist="0"
show_compare="0"
show_add_cart="0"
show_paging="0"
show_review="0"
number_items="1"
number_items_desktop="1"
number_items_desktop_small="1"
number_items_tablet="1"
number_items_tablet_small="1"
slide_transition="backSlide"
auto_run="1"
}}
</div>
</div>
Front-end Appearance:

7. UB Block Fashion
You create UB Block Fashion block (the same way as afore-mentioned UB Datetime block) with configuration as follows:
Back-end setting
In the Content field, click Show/Hide Editor button, then copy and paste the following code:
<div class="ub-banner">
<a href="#">
<img src="{{media url="wysiwyg/ubmegamenu/banner8.jpg"}}" width="1080px" height="90px" alt="" />
</a>
</div>
<div class="block block-cate">
<a class="title" href="#">fashion</a>
<ul>
<li><a href="{{store url='fashion.html'}}">Women</a></li>
<li><a href="{{store url='fashion.html'}}">Men</a></li>
<li><a href="{{store url='fashion.html'}}">Kids</a></li>
<li><a href="{{store url='fashion.html'}}">Baby</a></li>
<li><a href="{{store url='fashion.html'}}">Dresses</a></li>
<li><a href="{{store url='fashion.html'}}">Accessories</a></li>
<li><a href="{{store url='fashion.html'}}">Brands</a></li>
<li><a href="{{store url='fashion.html'}}">Sales & Deals</a></li>
</ul>
</div>
<div class="ub-block-products">
<div class="ub-style2 ub-style2-left">
<div class="category-title">
<h3>New products <span>Spring collection</span></h3>
</div>
{{block class="Ubertheme\UbContentSlider\Block\Slider"
name="ub.f.left.slider"
title="New products"
show_title="0"
content_type="random_products"
show_desc="0"
show_wishlist="0"
show_compare="0"
show_add_cart="0"
show_paging="0"
number_items="1"
number_items_desktop="1"
number_items_desktop_small="1"
number_items_tablet="1"
number_items_tablet_small="1"
slide_transition="backSlide"
auto_run="1"
}}
</div>
<div class="ub-style1 ub-style1-right">
<div class="category-title">
<h3>Best selling <span>Updated hourly</span></h3>
<a href="{{store url='fashion.html'}}">view all</a>
</div>
{{block class="Ubertheme\UbContentSlider\Block\Slider"
name="ub.f.right.slider"
title="Best Selling"
show_title="0"
content_type="random_products"
show_desc="0"
show_wishlist="0"
show_compare="0"
show_add_cart="0"
show_navigation="0"
show_paging="0"
auto_run="1"
number_items="4"
number_items_desktop="4"
}}
</div>
</div>
Front-end Appearance:

8. UB Beauty & Health
You create UB Block Banner block (the same way as afore-mentioned UB Datetime block) with configuration as follows:
Back-end setting
In the Content field, click Show/Hide Editor button, then copy and paste the following code:
<div class="ub-banner">
<a href="#">
<img src="{{media url="wysiwyg/ubmegamenu/banner9.jpg"}}" alt="" />
</a>
</div>
<div class="block block-cate">
<h2><a href="#">beauty & health</a></h2>
<ul>
<li><a href="{{store url='fashion.html'}}">Luxury Beauty</a></li>
<li><a href="{{store url='fashion.html'}}">New Arrivals</a></li>
<li><a href="{{store url='fashion.html'}}">Makeup</a></li>
<li><a href="{{store url='fashion.html'}}">Skin Care</a></li>
<li><a href="{{store url='fashion.html'}}">Hair Care</a></li>
<li><a href="{{store url='fashion.html'}}">Fragrance</a></li>
</ul>
</div>
<div class="ub-block-products">
<div class="ub-style1">
<div class="category-title">
<h2>Best selling <span>Updated hourly</span></h1>
<a href="{{store url='fashion.html'}}">view all</a>
</div>
{{block class="Ubertheme\UbContentSlider\Block\Slider"
name="ub.bh.left.slider"
title="Best Selling"
show_title="0"
content_type="random_products"
show_desc="0"
show_wishlist="0"
show_compare="0"
show_add_cart="0"
show_navigation="0"
show_paging="0"
auto_run="1"
number_items="4"
number_items_desktop="4"
}}
</div>
<div class="ub-style2 ub-style2-right">
<div class="category-title">
<h2>on sale <span>30-70%</span></h2>
</div>
{{block class="Ubertheme\UbContentSlider\Block\Slider"
name="ub.bh.right.slider"
template="slider_products_right_home.phtml"
title="on sale"
show_title="0"
content_type="random_products"
show_desc="0"
show_wishlist="0"
show_compare="0"
show_add_cart="0"
show_paging="0"
show_review="0"
number_items="1"
number_items_desktop="1"
number_items_desktop_small="1"
number_items_tablet="1"
number_items_tablet_small="1"
slide_transition="backSlide"
auto_run="1"
}}
</div>
</div>
Front-end Appearance:

9. UB Footer
You createUB Footer block (the same way as afore-mentioned UB Datetime block) with configuration as follows:
Back-end setting
In the Content field, click Show/Hide Editor button, then copy and paste the following code:
<div class="widget block block-static-block">
<div class="about-follow-us">
<div class="block block-aboutus">
<h3 class="block-title"><span>About Us</span></h3>
<div class="block-content">
<p>Lorem ipsum dolor sit amet, consectetur adipiscing elit. Pellentesque vulputate iaculis dolor. Nam convallis porttitor sapien, ut tincidunt magna dapibus sed</p>
{{block class="Magento\Framework\View\Element\Template" name="contact-info" template="Magento_Theme::html/ub-contact-info.phtml"}}
</div>
</div>
<div class="block block-followus">
<h3 class="block-title"><span>Follow us</span></h3>
<div class="block-content">
<p>Lorem ipsum, libero et luctus molestie, turpis mi sagittis nisl, a scelerisque leo</p>
<ul class="list-socials">
<li class="first"><a href="http://www.facebook.com/ubertheme"><em class="fa fa-facebook"> </em></a>
</li>
<li><a href="https://twitter.com/ubertheme"><em class="fa fa-twitter"> </em></a>
</li>
<li>
<a href="http://www.ubertheme.com"> <em class="fa fa-google-plus"> </em>
</a>
</li>
<li class="last">
<a href="http://www.ubertheme.com"> <em class="fa fa-pinterest"> </em>
</a>
</li>
</ul>
</div>
</div>
</div>
<div class="block block-subscribe">
<h3 class="block-title"><span>Newsletter</span></h3>
<div class="block-content">
<div class="form-subscribe-header">
<label for="newsletter">Make sure you dont miss interesting happenings by joining our newsletter program</label>
</div>
{{block class="Magento\Newsletter\Block\Subscribe" name="form.subscribe" as="subscribe" template="subscribe1.phtml"}}
</div>
</div>
<div class="block block-information first">
<div class="col-inner">
<h3 class="block-title"><span>Information</span></h3>
<div class="block-content">
<ul>
<li><a href="{{store url='about-us'}}">About Us</a>
</li>
<li><a href="{{store url='contact'}}">Contact Us</a>
</li>
<li><a href="{{store url='customer-service/'}}">Terms & Conditions</a>
</li>
<li><a href="{{store url='privacy-policy-cookie-restriction-mode/'}}">Privacy Policy</a>
</li>
<li><a href="{{store url='sales/guest/form/'}}">Orders and Returns</a>
</li>
<li><a href="{{store url='customer-service/'}}">Customer Service</a>
</li>
</ul>
</div>
</div>
</div>
<div class="block block-why-us">
<div class="col-inner">
<h3 class="block-title"><span>Why buy from us</span></h3>
<div class="block-content">
<ul>
<li><a href="{{store url='customer-service/'}}">Product Recall</a>
</li>
<li><a href="{{store url='customer-service/'}}">Gift Vouchers</a>
</li>
<li><a href="{{store url='customer-service/'}}">Returns and Exchanges</a>
</li>
<li><a href="{{store url='customer-service/'}}">Shipping Options</a>
</li>
<li><a href="{{store url='contact'}}">Help & FAQs</a>
</li>
<li><a href="{{store url='customer-service/'}}">Hard to Find Parts</a>
</li>
</ul>
</div>
</div>
</div>
<div class="block block-my-account">
<div class="col-inner">
<h3 class="block-title"><span>My account</span></h3>
<div class="block-content">
<ul>
<li><a href="{{store url='customer/account/login/'}}">Sign In</a>
</li>
<li><a href="{{store url='checkout/cart/'}}">View Cart</a>
</li>
<li><a href="{{store url='wishlist'}}">My Wishlist</a>
</li>
<li><a href="{{store url='checkout/'}}">Check out</a>
</li>
<li><a href="{{store url='customer-service/'}}">Track My Order</a>
</li>
<li><a href="{{store url='customer-service/'}}">Help</a>
</li>
</ul>
</div>
</div>
</div>
<div class="block block-links last">
<div class="col-inner">
<h3 class="block-title"><span>Userful links</span></h3>
<div class="block-content">
<ul>
<li><a href="{{store url='customer-service/'}}">Pricing Policy</a>
</li>
<li><a href="{{store url='customer-service/'}}">Shipping Policy</a>
</li>
<li><a href="{{store url='customer-service/'}}">Payment Methods</a>
</li>
<li><a href="{{store url='customer-service/'}}">Payment Methods</a>
</li>
<li><a href="{{store url='customer-service/'}}">Site Information</a>
</li>
<li><a href="{{store url='customer-service/'}}">Your Satisfaction</a>
</li>
</ul>
</div>
</div>
</div>
<a href="#" class="btn-btt" title="Back to Top" id="button-btt"><i class="fa fa-caret-up"></i>Top</a>
</div>
Front-end Appearance:

10. UB Block Black Friday
You create UB Block Black Friday block (the same way as afore-mentioned UB Datetime block) with configuration as follows:
Back-end setting
In the Content field, click Show/Hide Editor button, then copy and paste the following code:
<div class="widget block block-static-block">
{{block class="Ubertheme\UbContentSlider\Block\Slider"
name="ub.black.friday"
template="black-friday.phtml"
title="Black Friday"
show_title="1"
content_type="random_products"
show_desc="0"
show_wishlist="0"
show_compare="0"
show_add_cart="0"
show_paging="0"
show_review="0"
show_price="0"
number_items="5"
number_items_desktop="5"
number_items_desktop_small="5"
number_items_tablet="5"
number_items_tablet_small="4"
number_items_mobile="3"
slide_transition="backSlide"
auto_run="1"
addition_class="block-bf"}}
</div>
Front-end Appearance:

11. UB Block Brand
You createUB Block Brand block (the same way as afore-mentioned UB Datetime block) with configuration as follows:
Back-end setting
In the Content field, click Show/Hide Editor button, then copy and paste the following code:
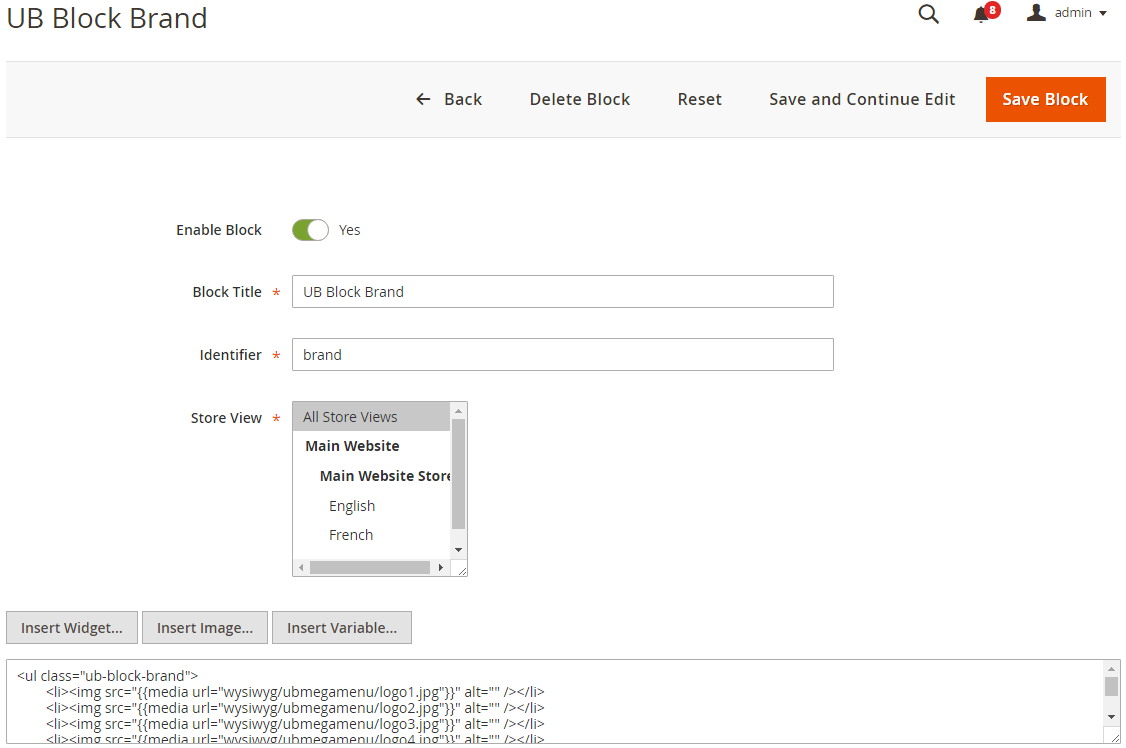
<ul class="ub-block-brand">
 <li><img src="{{media url="wysiwyg/ubmegamenu/logo1.jpg"}}" width="161px" height="60px" alt="" /></li>
 <li><img src="{{media url="wysiwyg/ubmegamenu/logo2.jpg"}}" width="109px" height="60px" alt="" /></li>
 <li><img src="{{media url="wysiwyg/ubmegamenu/logo3.jpg"}}" width="119px" height="60px" alt="" /></li>
 <li><img src="{{media url="wysiwyg/ubmegamenu/logo4.jpg"}}" width="101px" height="60px" alt="" /></li>
 <li><img src="{{media url="wysiwyg/ubmegamenu/logo5.jpg"}}" width="147px" height="60px" alt="" /></li>
 <li><img src="{{media url="wysiwyg/ubmegamenu/logo6.jpg"}}" width="184px" height="60px" alt="" /></li>
</ul>
Front-end Appearance:

12. Ub Contacts Map
You create UB Block Banner block (the same way as afore-mentioned UB Datetime block) with configuration as follows:
Back-end setting
In the Content field, click Show/Hide Editor button, then copy and paste the following code:
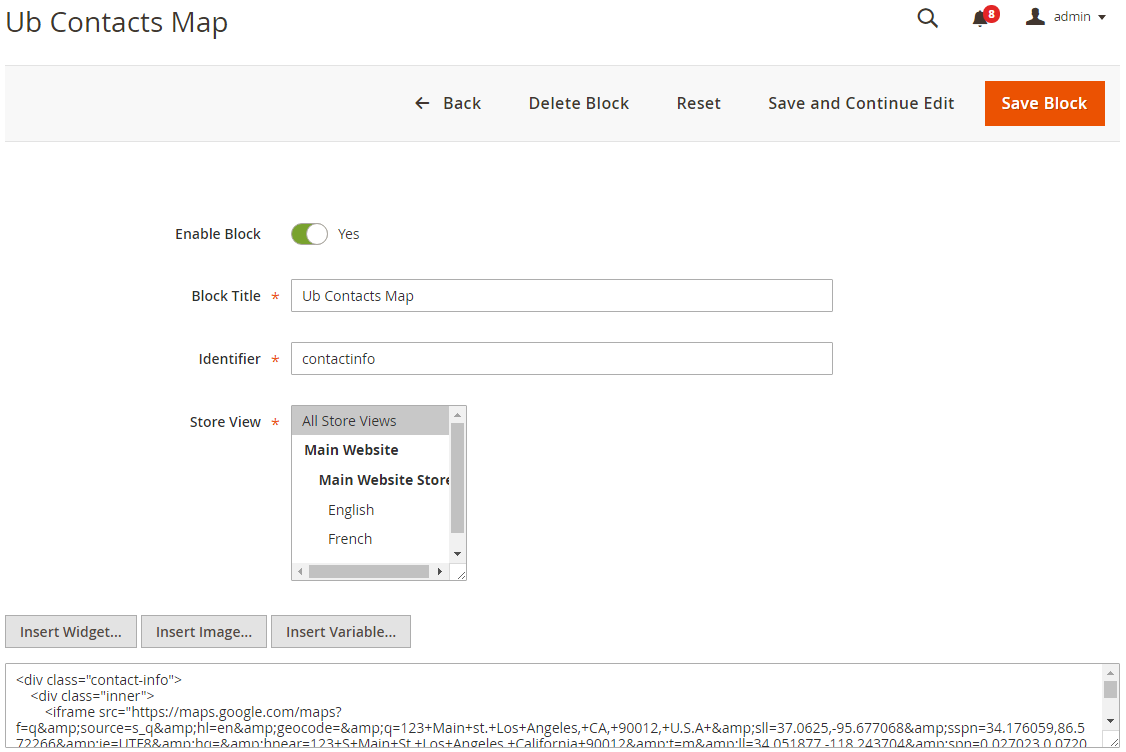
<div class="contact-info">
 <div class="inner">
 {{block class="Magento\Framework\View\Element\Template" name="contact-map" template="Magento_Theme::html/ub-contact-map.phtml"}}
 <div class="info-inner">
 <p>Lorem ipsum dolor sit amet, consectetur adipisicing elit, sed do eiusmod tempor incididunt ut labore et dolore magna aliqua. Ut enim ad minim veniam, quis nostrud exercitation ullamco laboris nisi ut aliquip ex ea commodo consequat. Duis aute irure dolor in reprehenderit in voluptate velit. Lorem ipsum dolor sit amet, consectetur adipisicing elit, sed do eiusmod tempor incididunt ut labore et dolore magna aliqua.</p>
 <p>Ut enim ad minim veniam, quis nostrud exercitation ullamco laboris nisi ut aliquip ex ea commodo consequat. Duis aute irure dolor in reprehenderit in voluptate velit.</p>
 <div class="info-inner2">{{block class="Magento\Framework\View\Element\Template" name="contact-info" template="Magento_Theme::html/ub-contact-info.phtml"}}</div>
 </div>
 </div>
</div>
Front-end Appearance:

13. UB Left Menu
In your admin dashboard, click Content | (Elements) Blocks | Add New Block, then create UB Left Menu block with configuration as follows:
Back-end setting
In the Content field, click Show/Hide Editor button, then copy and paste the following code:
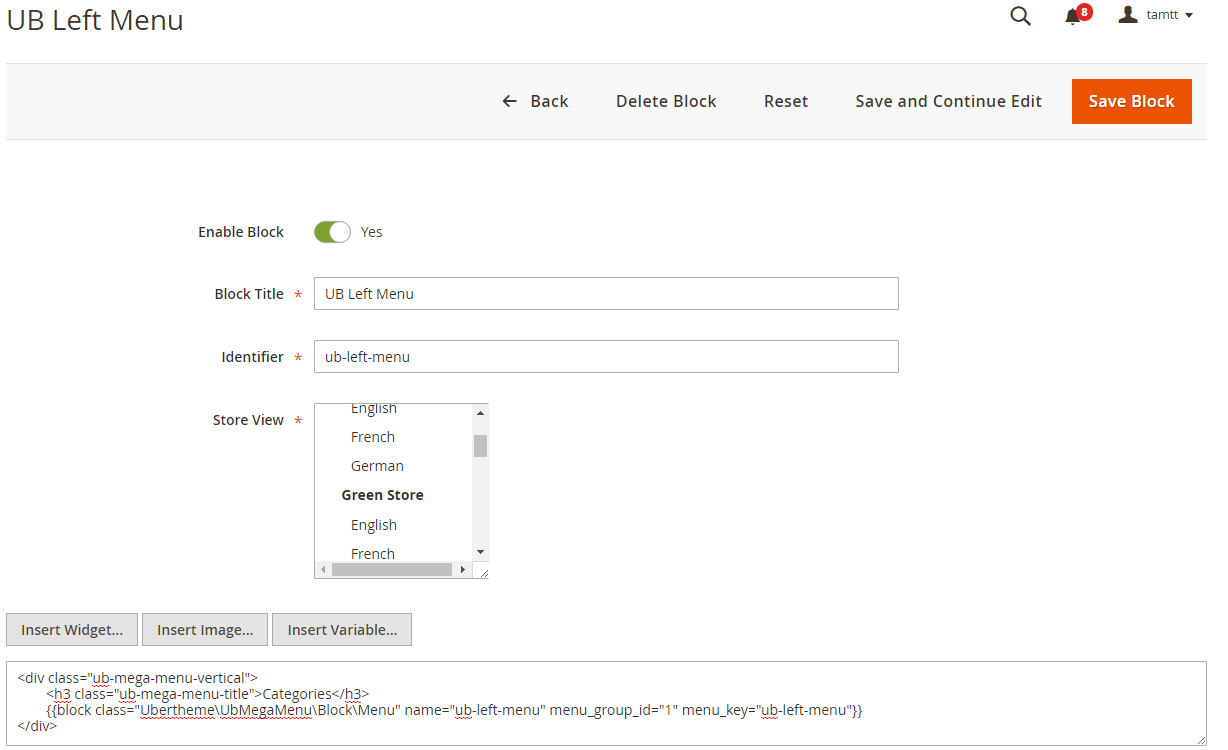
<div class="ub-mega-menu-vertical">
 <h3 class="ub-mega-menu-title">Categories</h3>
 {{block class="Ubertheme\UbMegaMenu\Block\Menu" name="ub-left-menu" menu_group_id="1" menu_key="ub-left-menu"}}
</div>
Front-end Appearance:

14. UB Slider Home
In your admin dashboard, click Content | (Elements) Blocks | Add New Block, then create UB Slider Home block with configuration as follows:
Back-end setting
In the Content field, click Show/Hide Editor button, then copy and paste the following code:
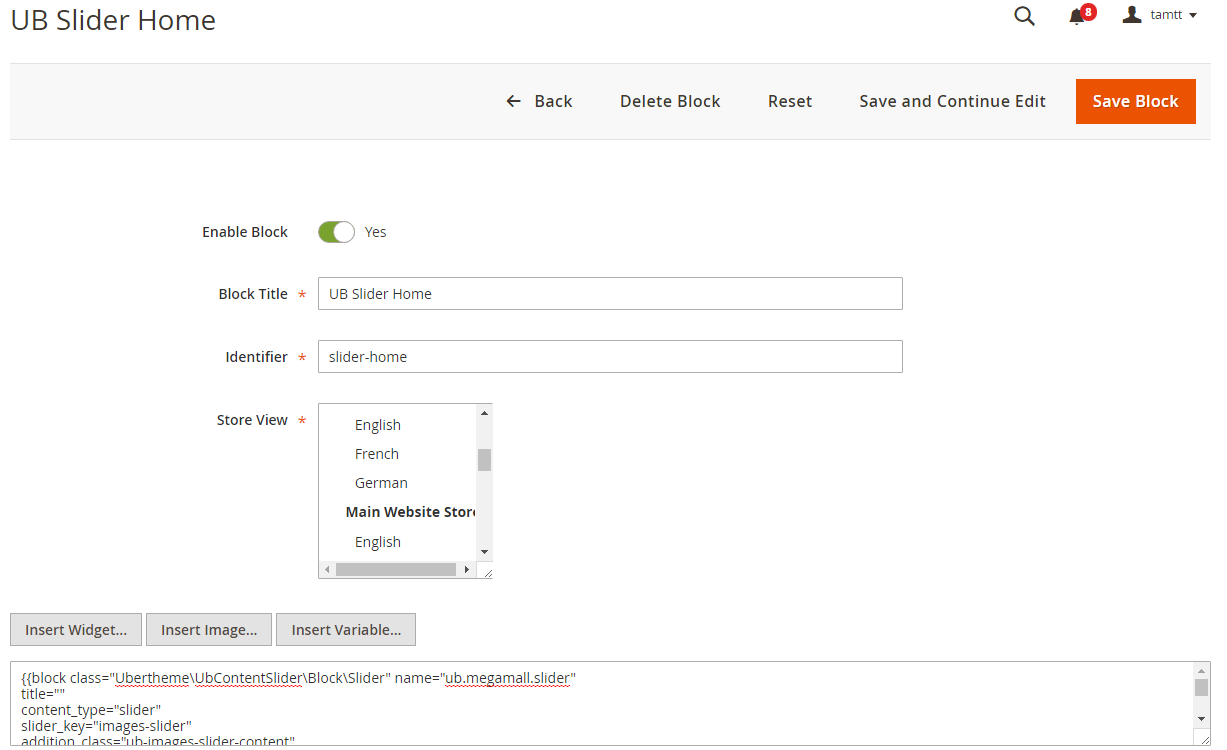
{{block class="Ubertheme\UbContentSlider\Block\Slider" name="ub.megamall.slider"
title=""
content_type="slider"
slider_key="images-slider"
addition_class="ub-images-slider-content"
show_item_title=0
show_item_desc=0
number_items=1
number_items_desktop=1
number_items_tablet=1
number_items_tablet_small=1
show_navigation=0}}
Front-end Appearance:

15. UB Custom Tab
In your admin dashboard, click Content | (Elements) Blocks | Add New Block, then create UB Custom Tab block with configuration as follows:
Back-end setting
In the Content field, click Show/Hide Editor button, then copy and paste the following code:
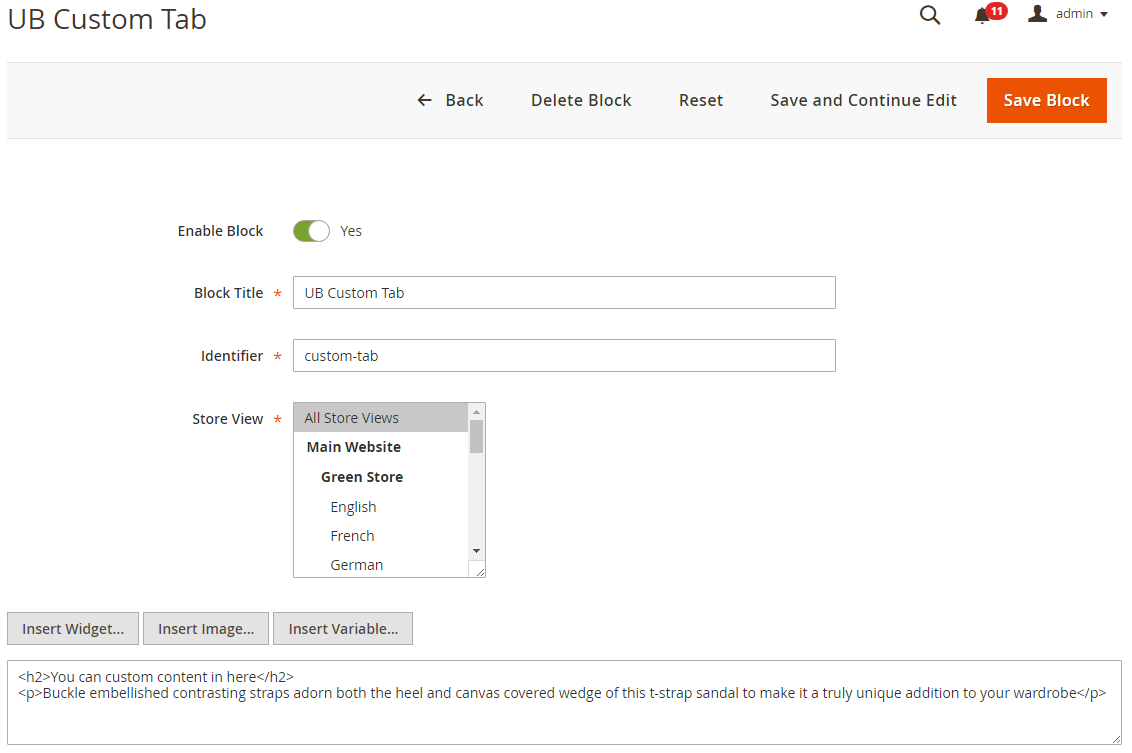
<h2>You can custom content in here</h2>
<p>Buckle embellished contrasting straps adorn both the heel and canvas covered wedge of this t-strap sandal to make it a truly unique addition to your wardrobe</p>
Front-end Appearance:

VII. Extention Configuration
Standard UB MegaMall is packed with base theme only, with no built-in extensions. If you select Extended UB MegaMall, depending the extension you purchased, please follow specific userguides below:
1. UB Content Slider extension
1.1. Image Slider
UB MegaMall supports Magento extenstion Content Slider. You can follow the steps indicated in above-mentioned guide: VI. Static Block Configuration -- section ’14. UB Slider Home’ to create UB slider Homepage static block.
1.2. Random Products Slider

In Content Static Blocks, we see the shortcode to show slider in Home Page.
{{block class="Ubertheme\UbContentSlider\Block\Slider"
name="ub.bh.left.slider"
title="Best Selling"
show_title="0"
content_type="random_products"
show_desc="0"
show_wishlist="0"
show_compare="0"
show_add_cart="0"
show_navigation="0"
show_paging="0"
auto_run="1"
number_items="4"
number_items_desktop="4"
}}
2. UB Mega Menu extension
This section provides detailed instruction to configure Mega Menu style as per our MegaMall demo site.
2.1. UB Top Menu

Step 1 -- Create the Top Menu group
In the Magento backend, navigate to Content | (UB Mega Menu) Manage Menu, then click Add New Menu. In the popup, you can configure as per this screenshot (Make sure you insert menu key as main-menu).
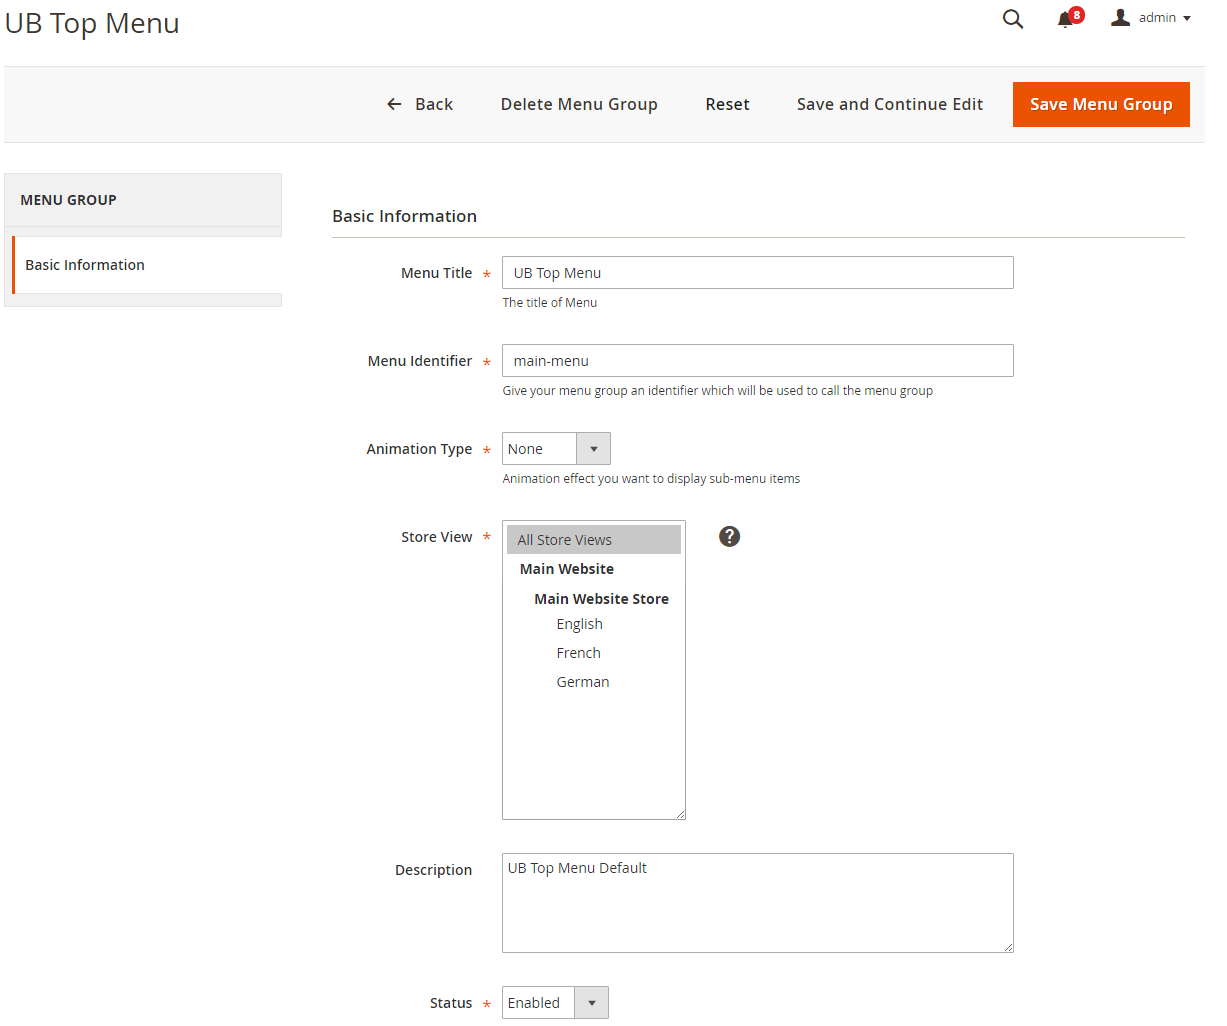
Once done, you should see the new menu group visible as illustration in the following screenshort:

Step 2 -- Create menu item in the Top Menu
Supposed that you have some sample products in place already, now we start to create menu items for the mega menu. In the same Menu Group panel, go to Select | Manage Menu items:

Step 2.1 -- Create Fashion and its sub-menu items:

Click Add New Menu Item button to create each of menu item, and follow configuration below:
- Fashion: Configuration steps -- menu setting 1 > menu setting 2
- Dresses: Configuration steps -- menu setting 1 > menu setting 2
- Belts: Configuration steps -- menu setting 1 > menu setting 2
Step 2.2 -- Insert Product banner into Mega menu

Create Products banner item (by clicking Add New Menu Item) as sub-menu of Fashion > Column 1 following settings below:
Setting 1 > Setting 2 (Make sure in the Setting 2 step, you insert Custom Content)
Step 2.3 -- Create Product List menu items
Front-end Appearance:

Click Add New Menu Item again, to create:

(1) Column 3: Configuration steps -- Setting 1 > Setting 2
NOTE: Insert Extra Class ub-submenu-products when you configure Column 3 menu item.
(2) Products: Configuration steps -- Setting 1 > Setting 2 (Make sure in the Setting 2 step, you insert Custom Content as per screenshot)
2.2. UB Left Menu
UB MegaMall uses UB Mega menu to create the sidebar menu (vertical). Below are steps to create and configure UB Left menu group (the same way as afore-mentioned UB Top Menu):
Step 1: Create menu group with menu key ub-left-menu for vertical menu, then add menu item as you wish:

Step 2: Create UB Left Menu static block (please follow the steps indicated in above-mentioned section: VI. Static Block Configuration -- section ’13. UB Left Menu’)
UB Mega Menu Documentation
3. UB Quick View extension
In the Magento Admin Panel, navigate to Content | UB Quick View | Setting and configure the default settings as:

Front-end Appearance

UB Quick View Documentation
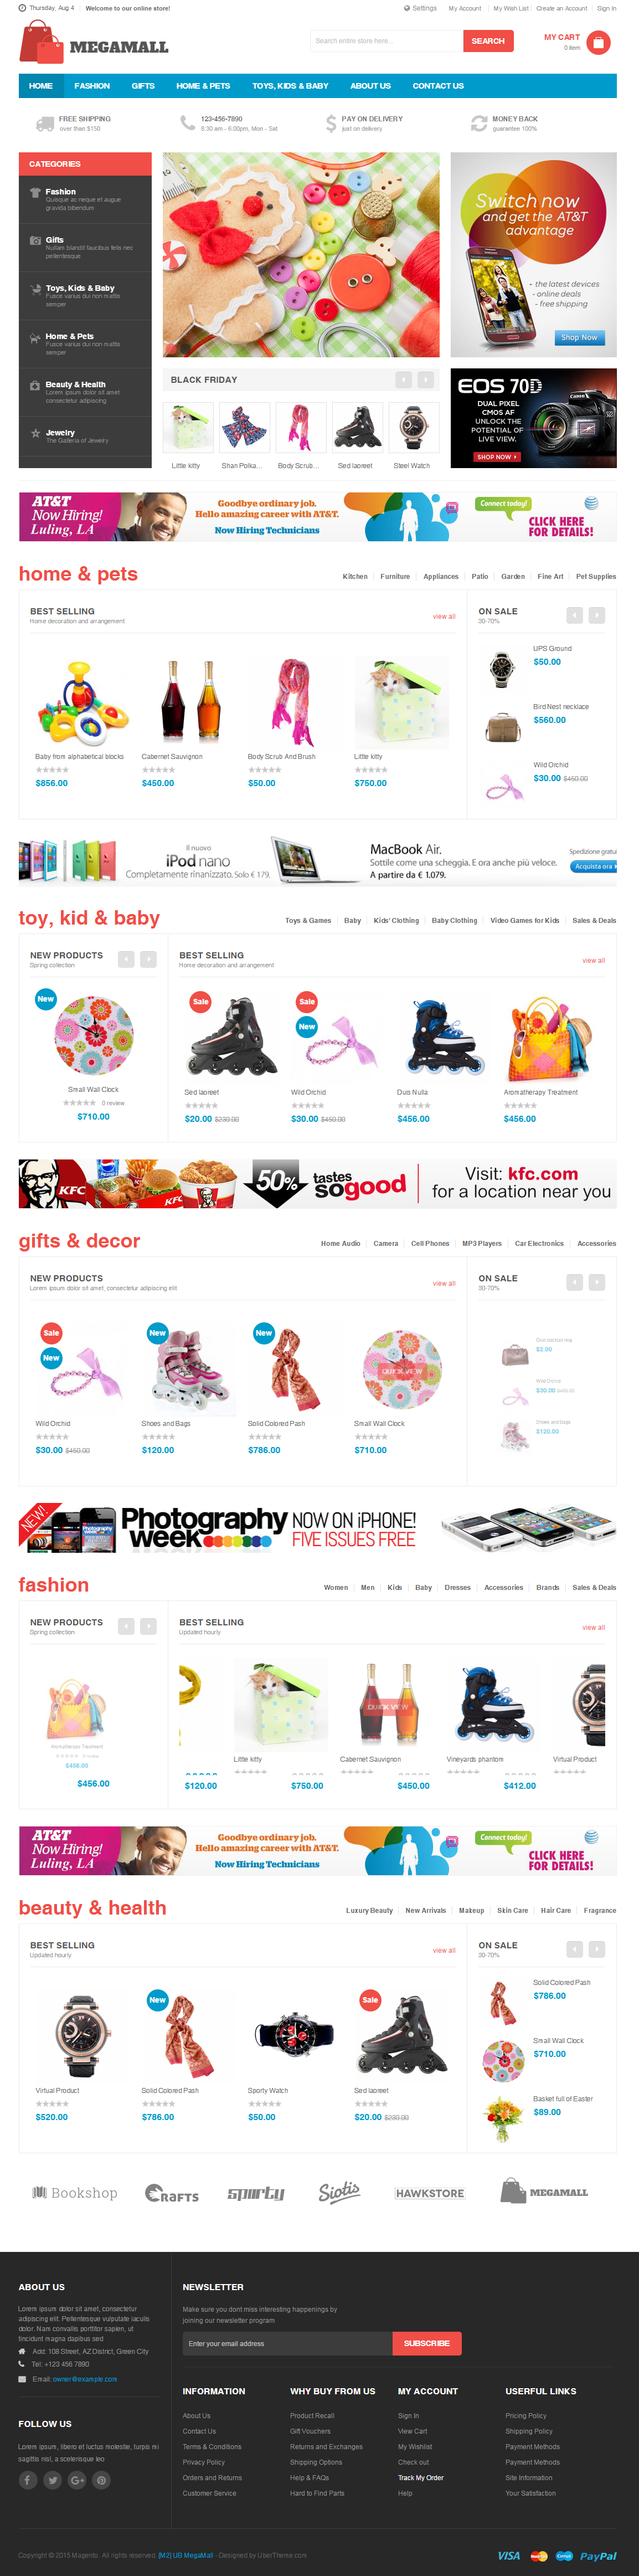
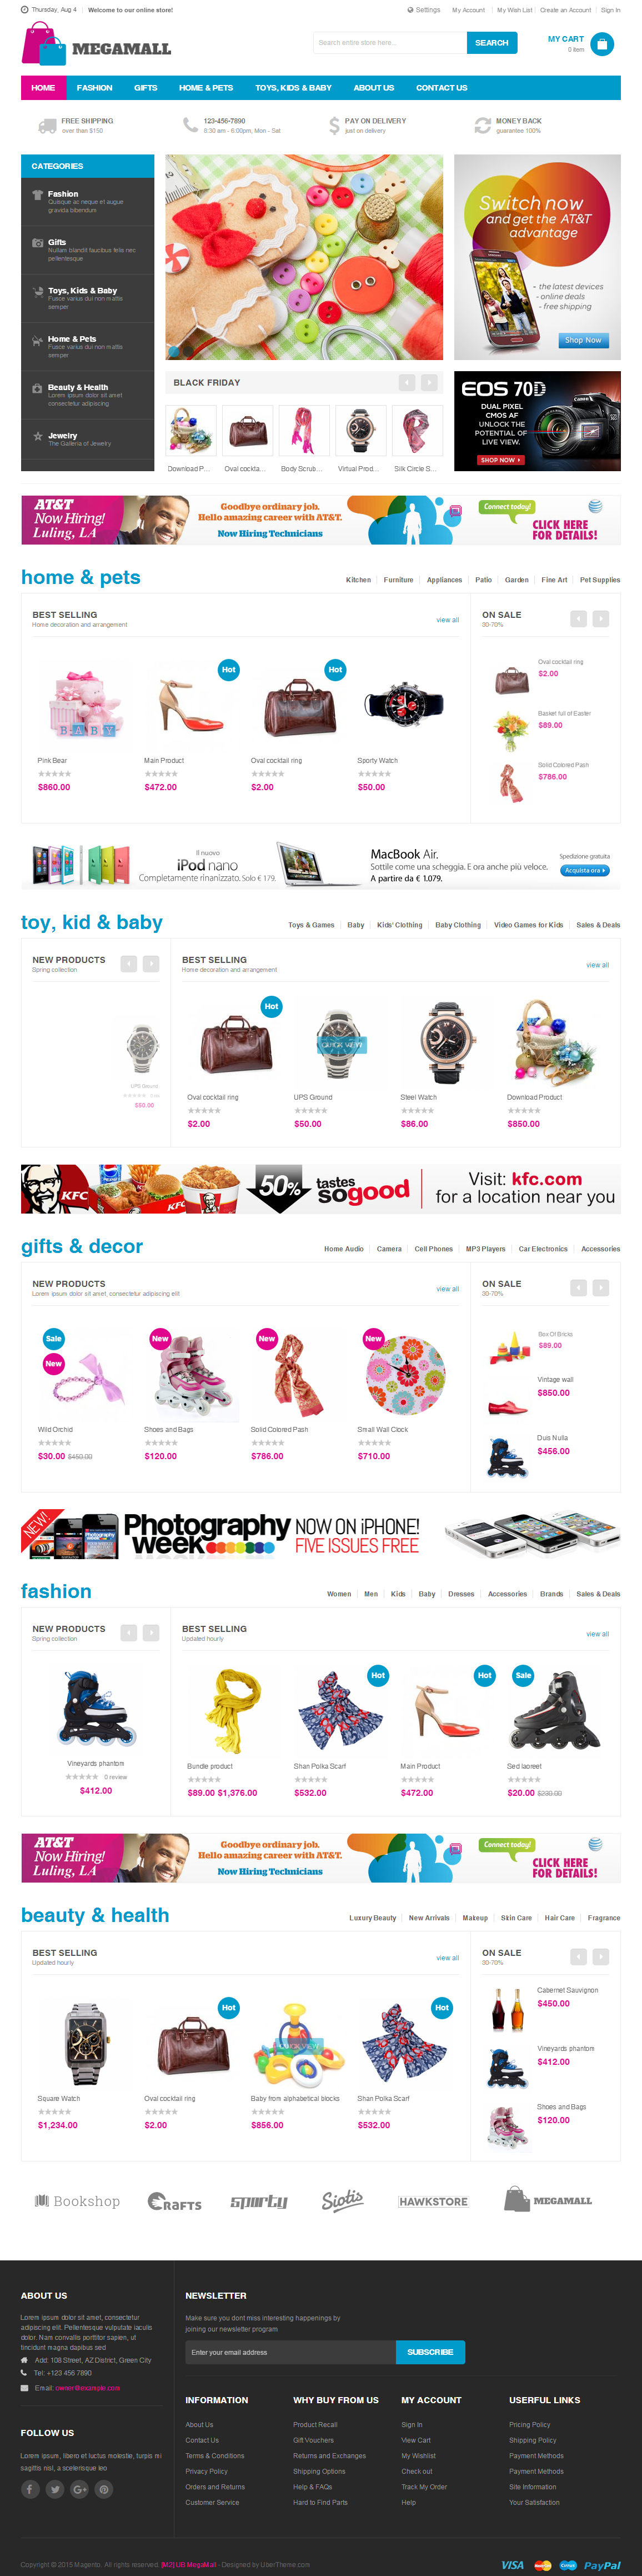
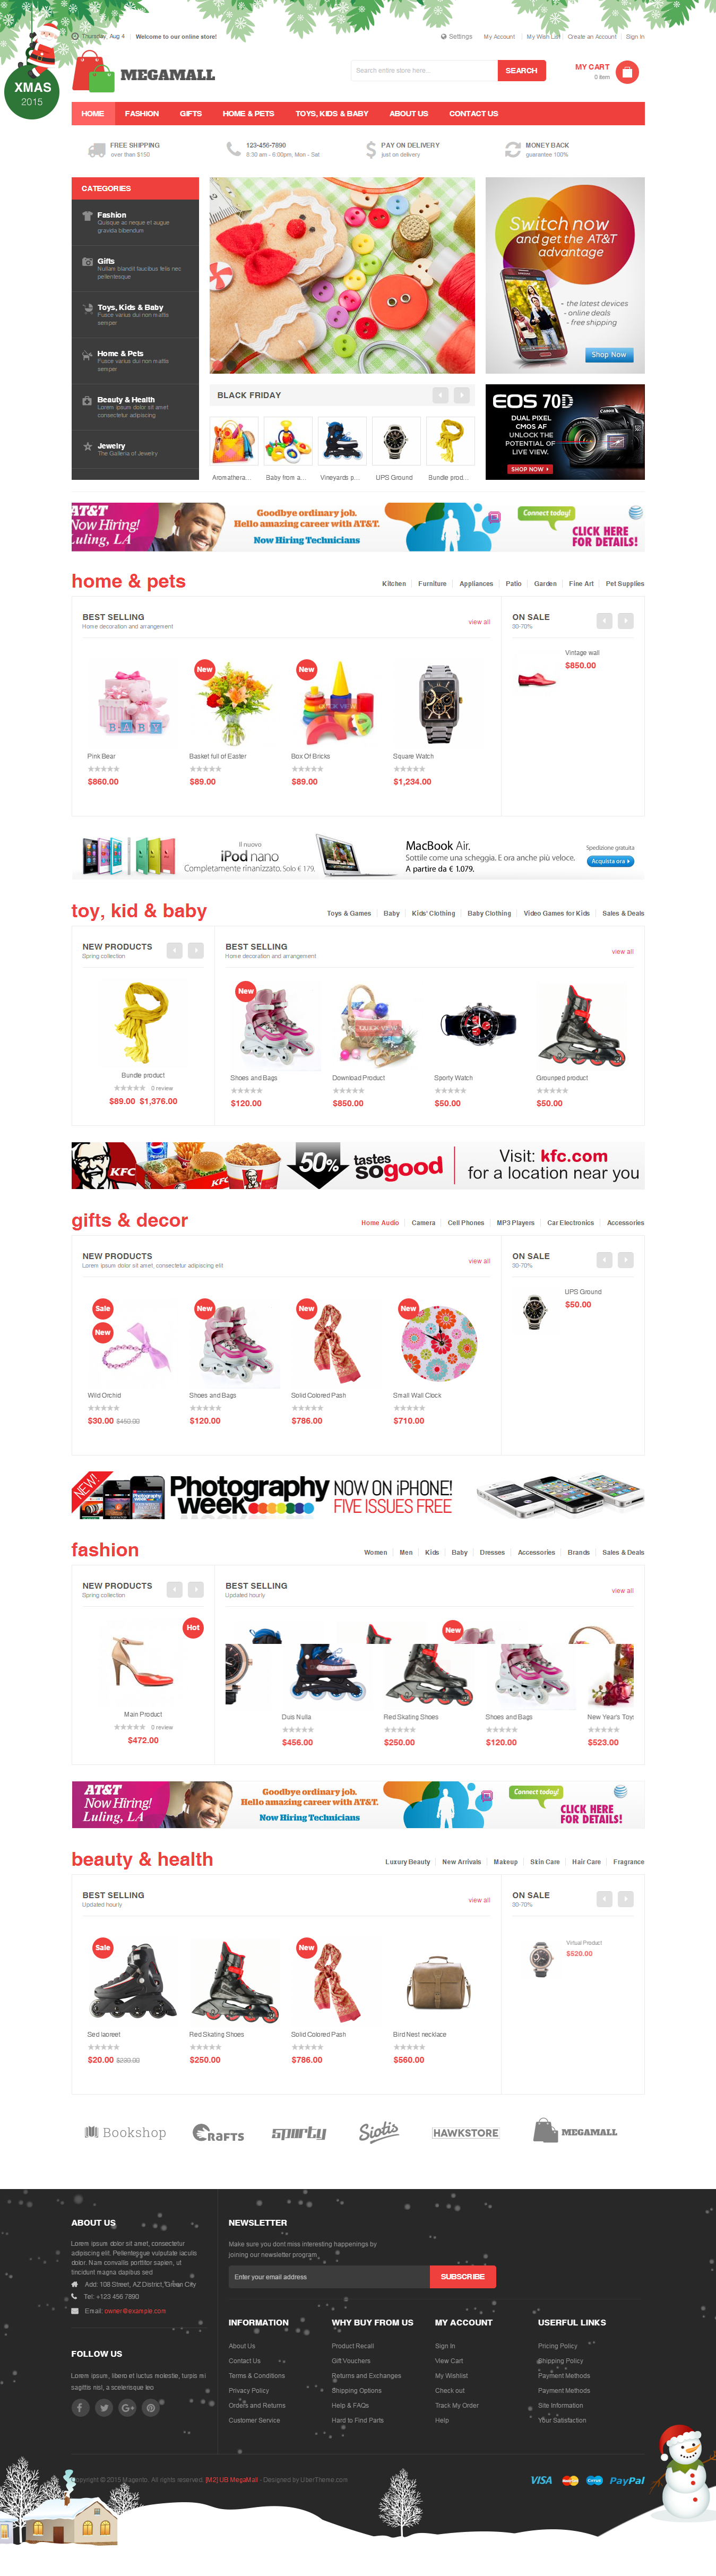
VII. Store Color Configuration
UB MegaMall built in a few color schemes for your store. Simply switch to the color you prefer.
Front-end Appearance:

- Boxes Store -- View Front-end
- Green Store -- View Front-end
- Main Website Store -- View Front-end
- Pink Store -- View Front-end
- Red Store -- View Front-end
- Violet Store -- View Front-end
- Xmas Store -- View Front-end
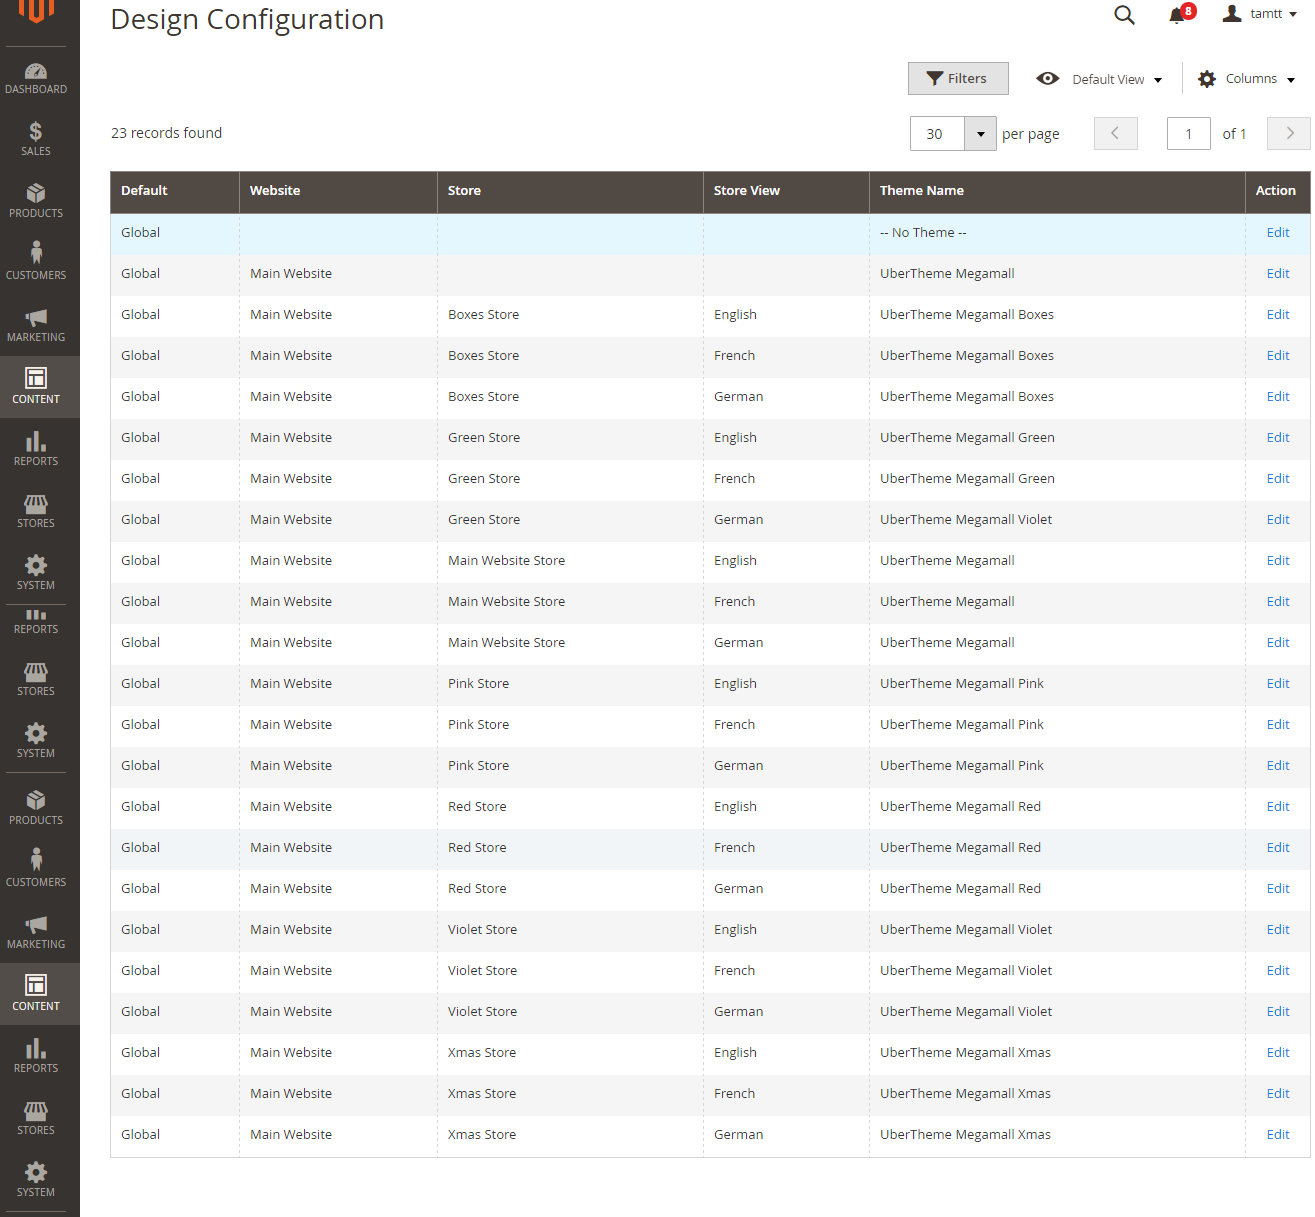
To configure this store color, in the Magento Admin Panel, navigate to Content >> Design:
- Configuration Tab: Back-end setting
- Themes Tab: Back-end setting
IX. UB Theme Helper Configuration
The documentation below will guide you step by step to customize UB Megamall theme with UB Theme Helper: