UB Trex Pro for Magento 2 – Furniture Theme
Theme Introduction
UB Trex Pro theme comes with 2 homepages -- Fashion and Furniture. These instructions will guide you through configuring the Furniture layout. If you want to use the default Fashion layout, please refer to the official documentation here.
UB Trex Pro is a handy multi-purpose Magento 2 theme with:
- 2 homepages (Fashion and Furniture)
- 6 pre-made product layouts
- Multiple category view options
- 3 complimentary Magento extensions including Mega Menu, Content Slider, Quick View
- Packed with UB Theme Helper -- a powerful theme admin dashboard
- Advanced custom product tabs
- Up-sells and cross-sells integration
- Infinite scroll & much more
This documentation describes the Furniture theme installation process, and shows how to configure the theme and built-in extensions.
We recommend installing our theme in a testing environment before deploying it to your production environment. The theme was tested in clean Magento 2 installations without 3rd party extensions and we can’t guarantee for compatibility with 3rd extensions.
I. Installation Prerequisites
UB Trex Pro is a native Magento 2.x theme, please make sure your system meets the Magento 2 System requirements.
II. Download Packages
The download package includes:
- Theme: UB Trex Pro (single theme including UB Theme Helper and all extensions built in the theme for manual installation)
- Quickstart: is a full Magento 2 CMS version with our template and extensions already integrated to match our demo
- PSD source files: all graphic source files
III. Installation Instruction
There are two ways to install a UberTheme Magento 2 theme:
- Manual Installation: Applicable if your store is full of content that you don’t want to overwrite.
- QuickStart Installation: Applicable if you want to get a whole new fresh site as per our Demo.
- Step 1: Download and extract UB Trex Pro single theme
- Step 2: Enable UB Theme Helper and our built-in Magento 2 extensions
- Step 3: Import Sample Data
- Step 4: Activate the theme
For more details, check out the Installation Guide (for both Manual Installation and Quickstart Installation options).
IV. Page and Block positions
The layout of UB Trex Pro -- Furniture Homepage can be illustrated as follows:

As seen in the screenshot, UB Trex Pro -- Furniture Homepage has the following static blocks:
- UB Top Menu (Extension: UB MegaMenu)
- Static Block: Top Bar
- Static Block: Slideshow (Extension: UB Content Slider)
- Static Block: Intro
- Static Block: Recent Products
- Static Block: Footer links
V. Page Configuration
Furniture Homepage Configuration
Step 1: First, you need to add related CMS blocks to prepare the content for the Homepage as per our demo, including:
- UB Top Menu (Extension: UB MegaMenu)
- Static Block: Top Bar
- Static Block: Slideshow (Extension: UB Content Slider)
- Static Block: Intro
- Static Block: Recent Products
- Static Block: Footer links
Step 2: Then, navigate to Content | (Elements) Pages | Add New Page with configuration as follows (You can disable the default Home page of your M2 instance for now):
- Content tab: Copy and paste the code below on the Content field (You can see the Back-end setting for reference):
<div class="cms-content-v2">
<!--TrexPro > Home > V2 > Slideshow--> {{widget type="Magento\Cms\Block\Widget\Block" template="widget/static_block/default.phtml" block_id="trex-pro-home-v2-slideshow"}}
<!--TrexPro > Home > V2 > Intro--> {{widget type="Magento\Cms\Block\Widget\Block" template="widget/static_block/default.phtml" block_id="trex-pro-home-v2-intro"}}
<!--TrexPro > Home > V2 > Arrivals--> {{widget type="Magento\Cms\Block\Widget\Block" template="widget/static_block/default.phtml" block_id="trex-pro-home-v2-arrivals"}}
</div>
- Page in Websites tab: set Store View to Store View 6
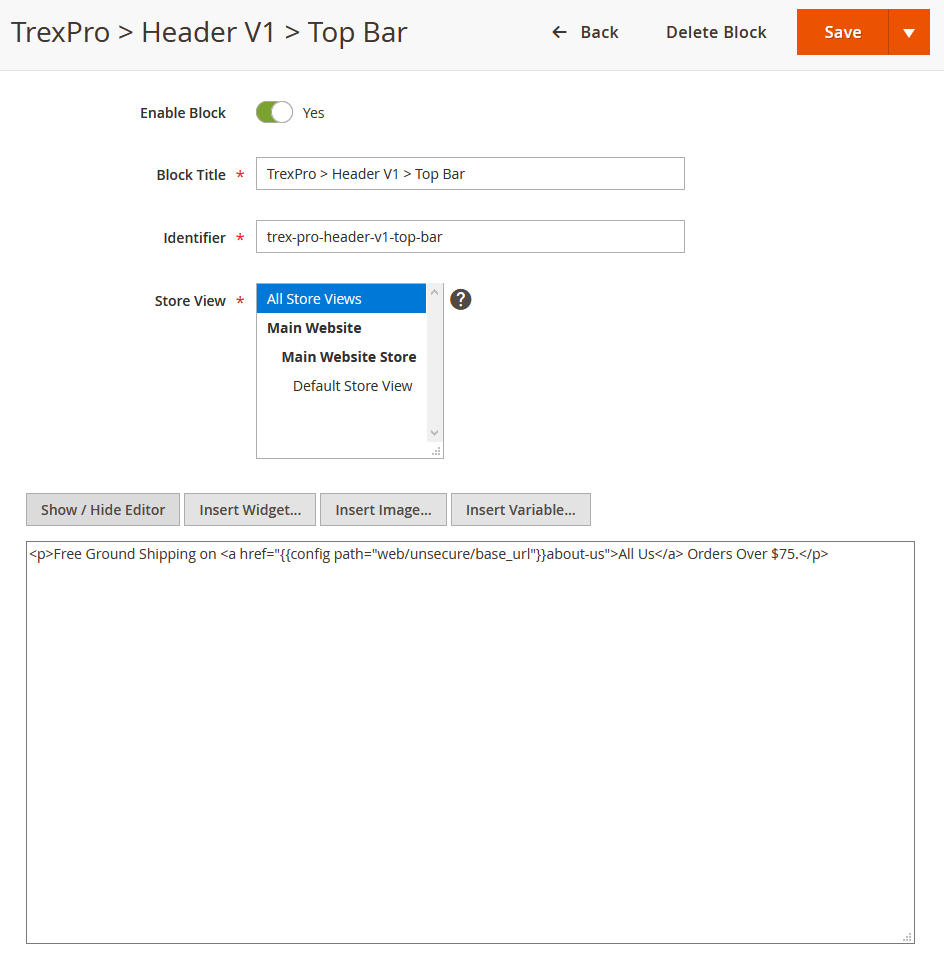
1. Top Bar
In your admin dashboard, click Content | (Elements) Blocks | Add New Block, then create Top Bar block with the configuration like this sample: Back-end setting
In the Content field, click the Show/Hide Editor button, then copy and paste the following code:
Free Ground Shipping on <a href="{{config path="web/unsecure/base_url"}}about-us">All Us</a> Orders Over $75.
Front-end Appearance:

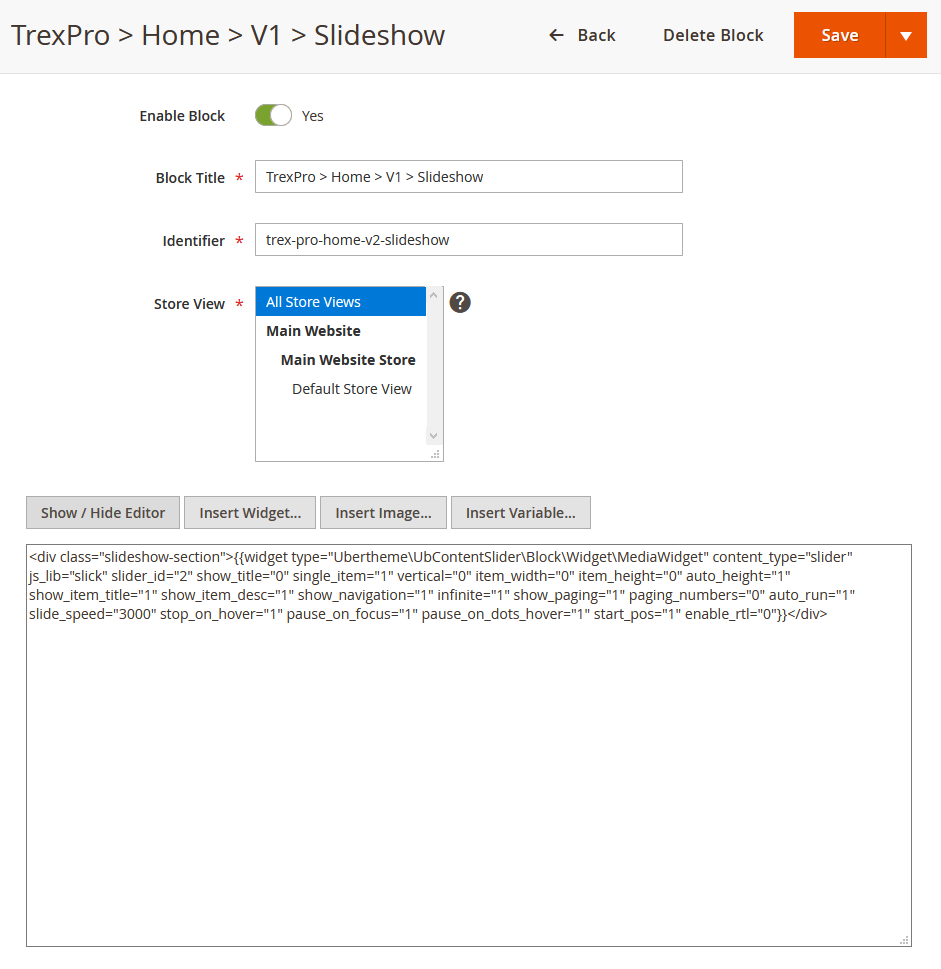
2. Slideshow
As of UB Trex Pro v1.0.4, the Slideshow comes with 2 demo types:
- Banner Slideshow
- Image Slider with Product Image Hotspot enabled
You can display the slideshow at the top of the Furniture homepage as follows:
2.1. In your admin dashboard, click Content | (Elements) Blocks | Add New Block, then create a Slideshow block with the configuration like this sample: Back-end setting
In the Content field, click the Show/Hide Editor button, then copy and paste the following code:
<div class="slideshow-section">{{widget type="Ubertheme\UbContentSlider\Block\Widget\MediaWidget" content_type="slider" js_lib="slick" slider_key="home-furniture-version-v1" show_title="0" single_item="1" vertical="0" item_width="0" item_height="0" auto_height="1" show_item_title="1" show_item_desc="1" show_navigation="1" infinite="1" show_paging="1" paging_numbers="0" auto_run="1" slide_speed="3000" stop_on_hover="1" pause_on_focus="1" pause_on_dots_hover="1" start_pos="1" enable_rtl="0"}}</div>
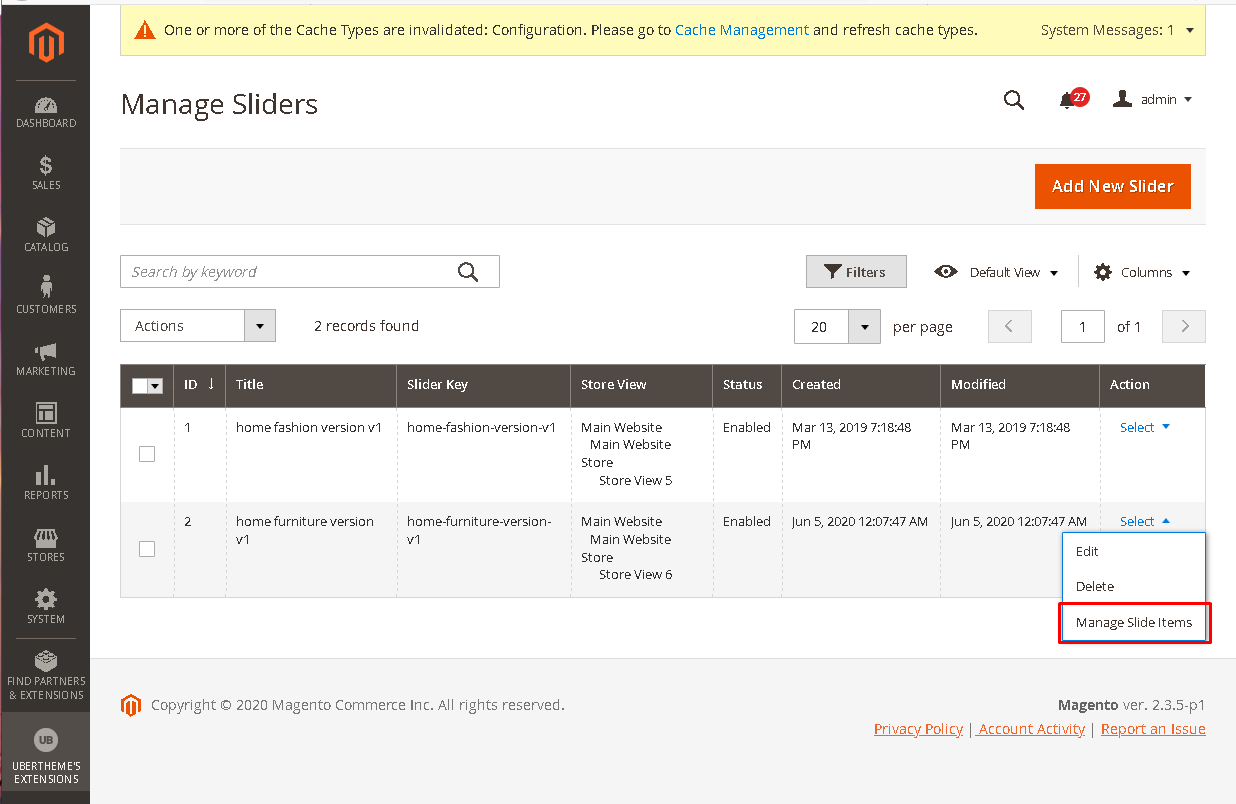
2.2. Then, go to Ubertheme’s Extensions | [Content Slider] Manage Sliders | click “Add New Slider” button and fill in the required configuration as per this screenshot.
After that, you click ‘Manage Slide Item’ to create slide items like this:
2.2.1 Create a Banner Slideshow: You can add multiple slides filled with your featured images and captions. You can use this HTML as a sample block content (Fill in the Description field with the following code):
<div class="slide-content-details"><h2 class="title">Kenya Standing<br/>Collection</h2>
<div class="desc">Integer vitae turpis quis enim luctus luctus dignissim.<br/>Mauris non commodo ligula acumin dolor.</div>
<div class="actions"><a href="#" class="action primary" title="Shop The Lookbook" ><span>Shop The Lookbook</span></a></div>
</div>
Front-end Appearance:

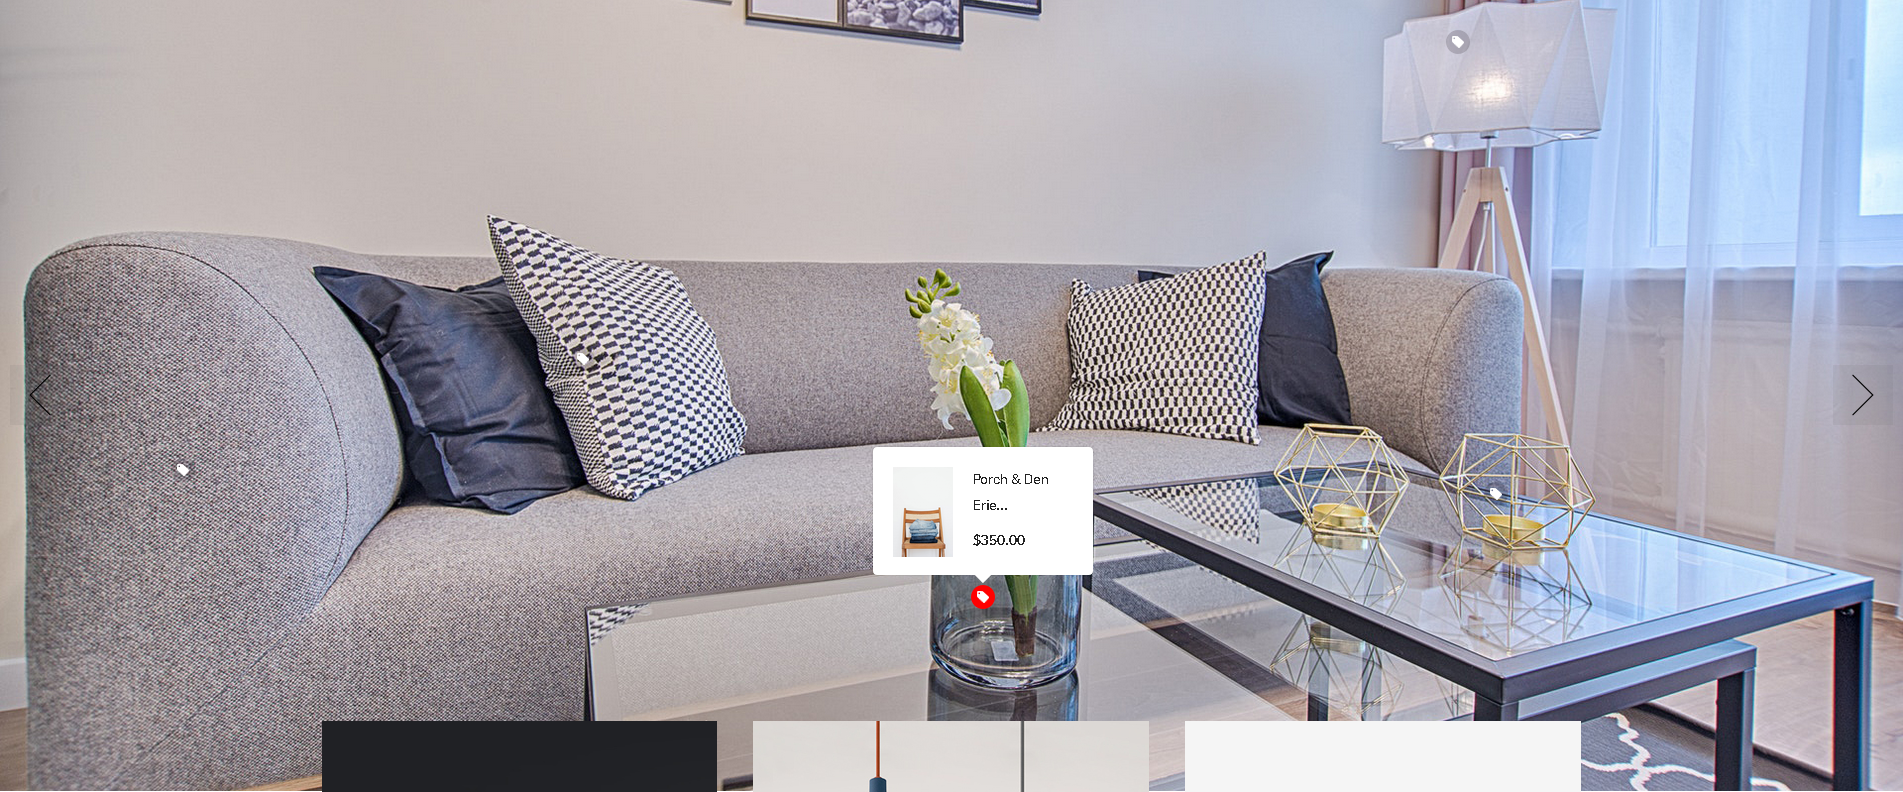
2.2.2 Create an Image Slideshow with Product Image Hotspot: Click the Manage Slide Items (as mentioned in section 2.2 above), then click Add New Slide Item button to create slide items like this:
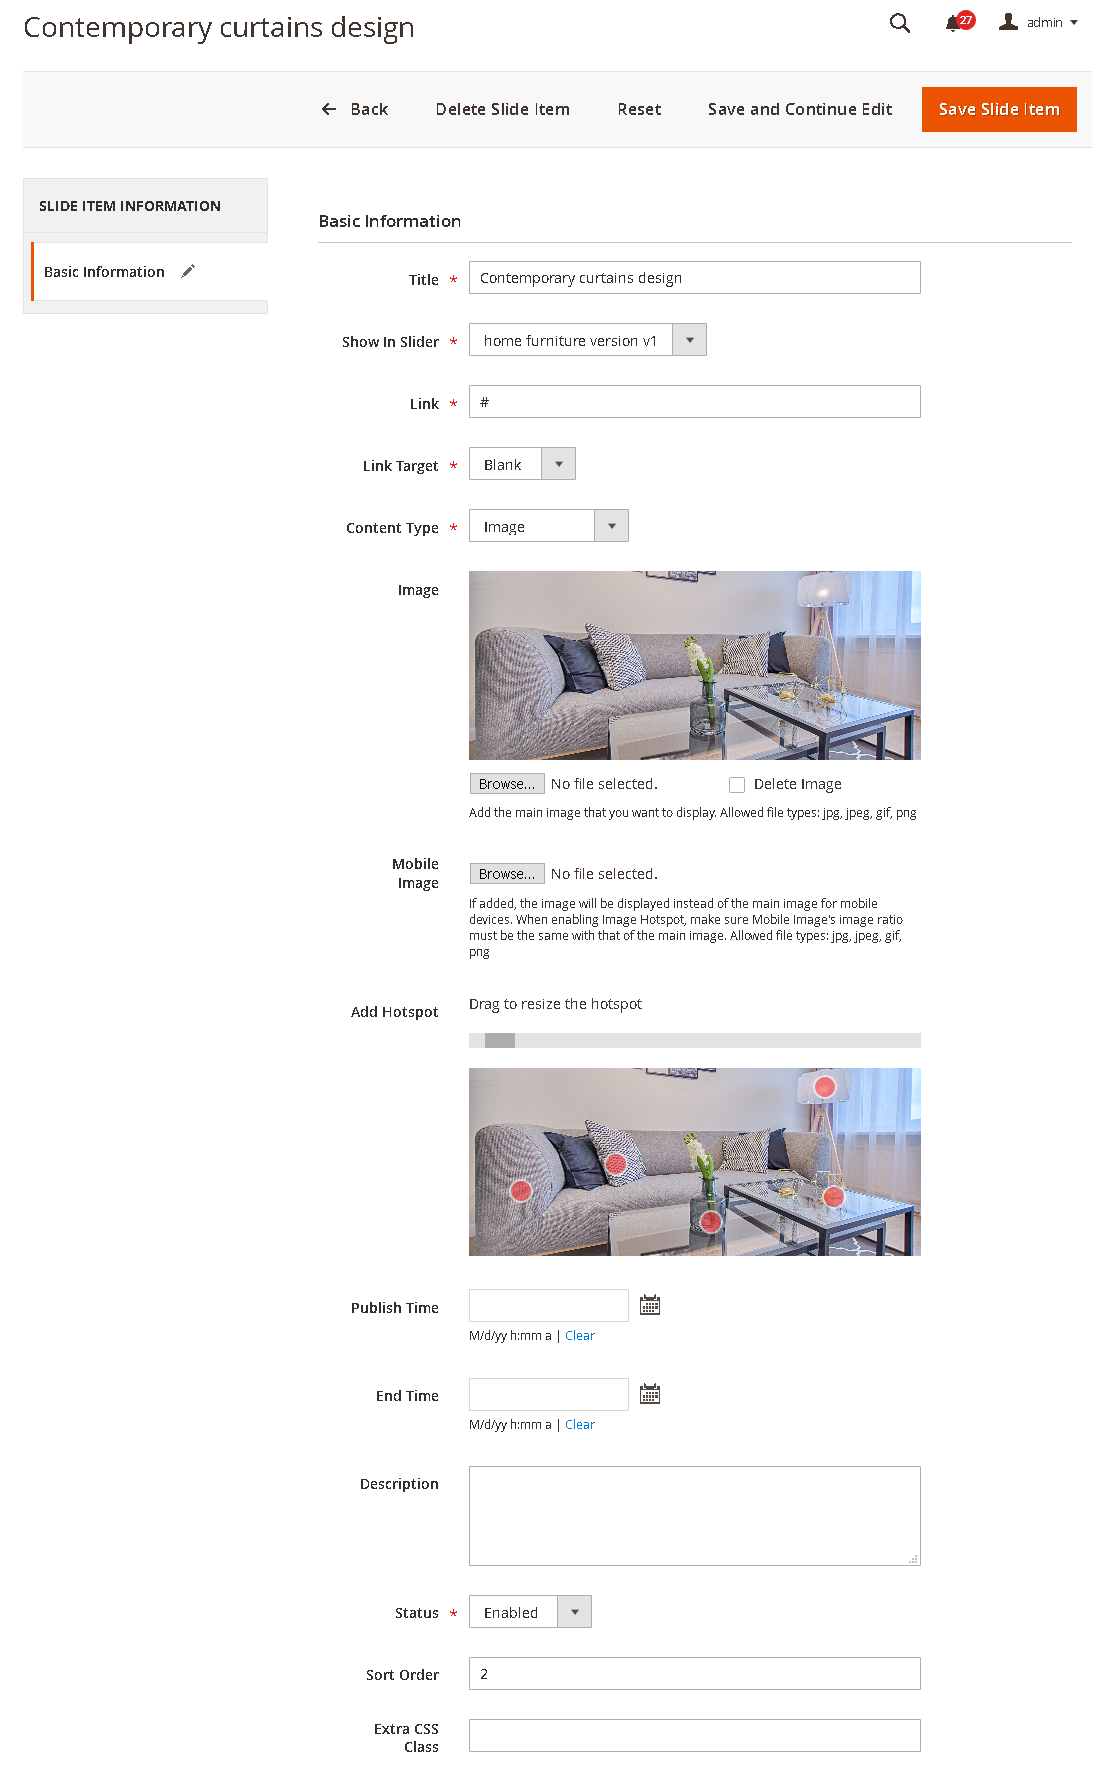
Front-end Appearance:
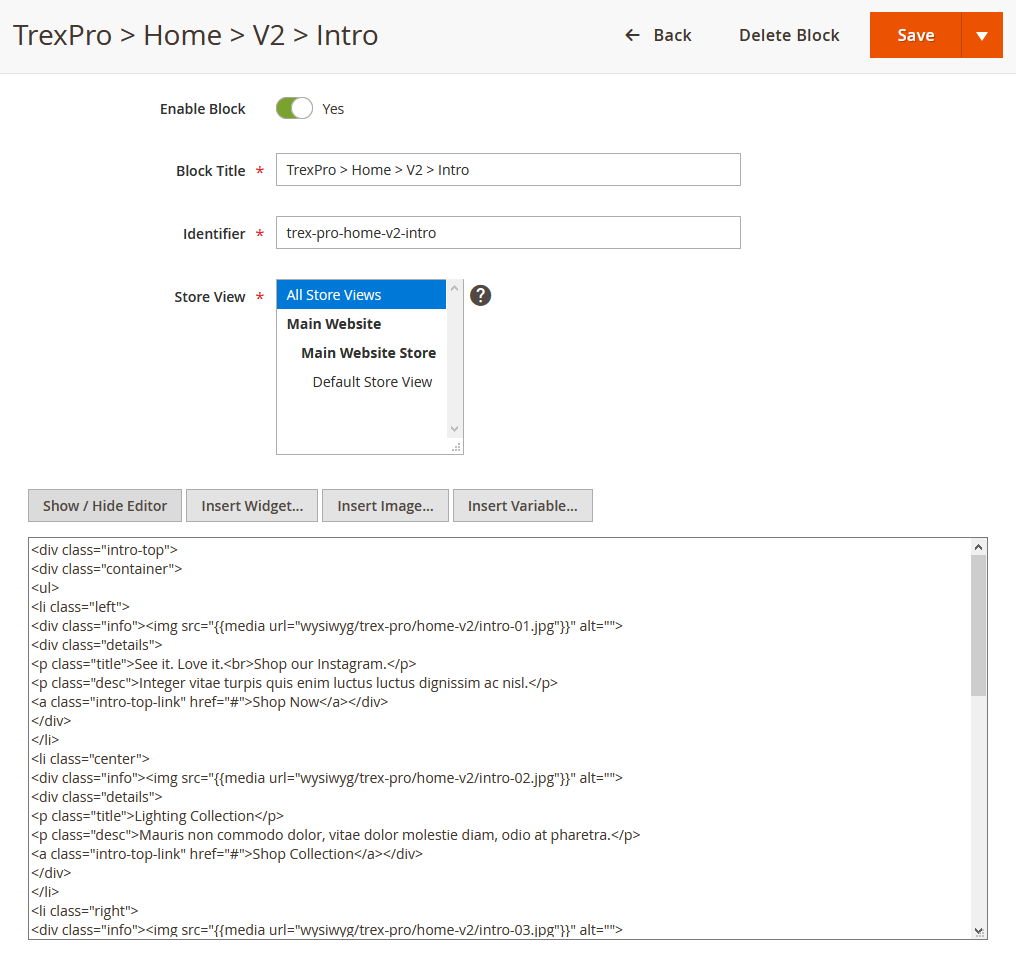
3. Intro
You create the Intro block with the configuration as follows:
Back-end setting
In the Content field, click the Show/Hide Editor button, then copy and paste the following code:
<div class="intro-top">
<div class="container">
<ul>
<li class="left">
<div class="info"><img src="{{media url="wysiwyg/trex-pro/home-v2/intro-01.jpg"}}" alt="">
<div class="details">
<p class="title">See it. Love it.<br>Shop our Instagram.</p>
<p class="desc">Integer vitae turpis quis enim luctus luctus dignissim ac nisl.</p>
<a class="intro-top-link" href="#">Shop Now</a></div>
</div>
</li>
<li class="center">
<div class="info"><img src="{{media url="wysiwyg/trex-pro/home-v2/intro-02.jpg"}}" alt="">
<div class="details">
<p class="title">Lighting Collection</p>
<p class="desc">Mauris non commodo dolor, vitae dolor molestie diam, odio at pharetra.</p>
<a class="intro-top-link" href="#">Shop Collection</a></div>
</div>
</li>
<li class="right">
<div class="info"><img src="{{media url="wysiwyg/trex-pro/home-v2/intro-03.jpg"}}" alt="">
<div class="details">
<p class="title">Decor your Home</p>
<p class="desc">Integer vitae turpis quis enim luctus luctus dignissim ac nisl.</p>
<a class="intro-top-link" href="#">Shop Now</a></div>
</div>
</li>
</ul>
</div>
</div>
<div class="intro-middle">
<div class="container">
<div class="info"><img src="{{media url="wysiwyg/trex-pro/home-v2/intro-04.jpg"}}" alt="">
<div class="details">
<p class="title">Storq is a multi-purpose <br>eCommerce template for <br>Fashion, Furniture, <br>and more…</p>
<p class="desc">In sodales lobortis mollis. Mauris commodo metus in est marius acumin eleifend ultrices duis ligula tincidunt ultricies enim, in iverra ligula dolo condimentum nec.</p>
<a class="action primary" href="#">Read more about us</a></div>
</div>
</div>
</div>
<div class="intro-bottom">
<div class="info">
<div class="details">
<p class="title">#Modern #Minimalist<br>2018 Collection</p>
<p class="desc">Duis autem vel eum iriure dolor in hendrerit in ulputate elit esse molestie consequat, vel illum dolore eu feugiat nulla facilisis at vero eros et vehicula tortor. Sed sit amet lectus eget tortor porta.</p>
<a class="action primary" href="#">Shop Collection</a></div>
<img src="{{media url="wysiwyg/trex-pro/home-v2/intro-05.jpg"}}" alt=""></div>
</div>
Front-end Appearance:

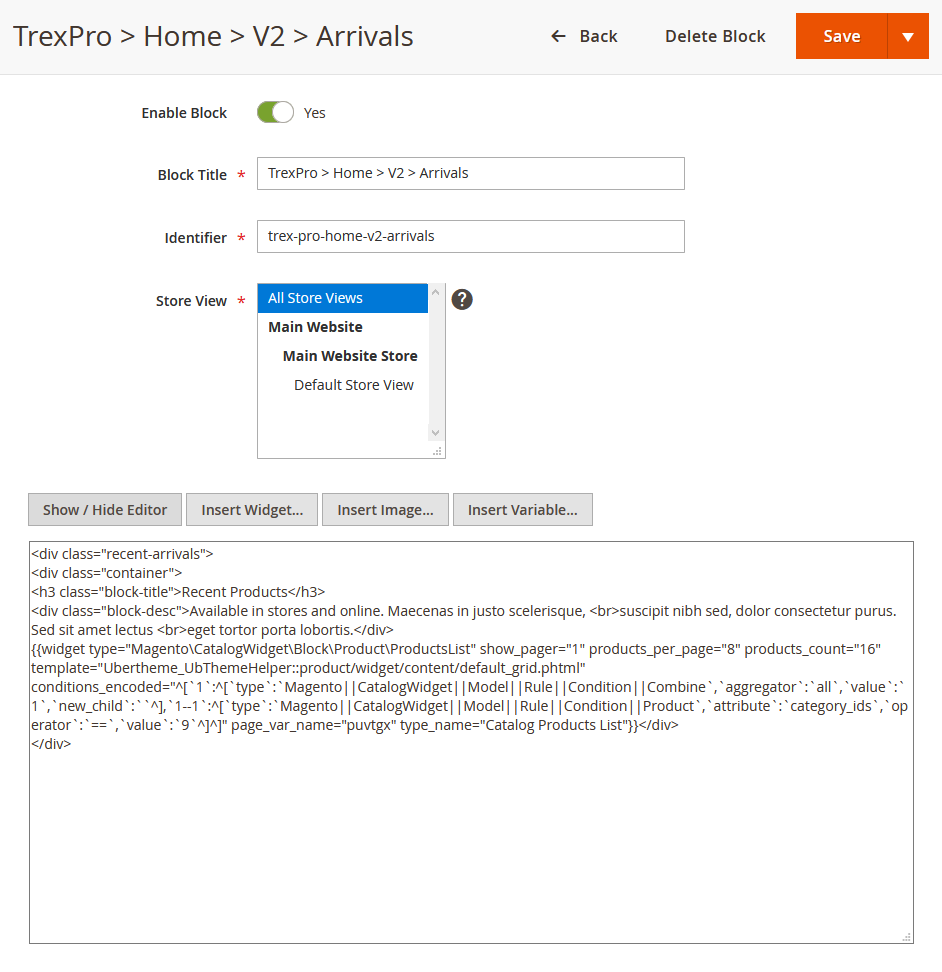
4. Recent Products
You create the Recent Products block with the configuration as follows:
Back-end setting
In the Content field, click the Show/Hide Editor button, then copy and paste the following code:
<div class="recent-arrivals">
<div class="container">
<h3 class="block-title">Recent Products</h3>
<div class="block-desc">Available in stores and online. Maecenas in justo scelerisque, <br>suscipit nibh sed, dolor consectetur purus. Sed sit amet lectus <br>eget tortor porta lobortis.</div>
{{widget type="Magento\CatalogWidget\Block\Product\ProductsList" show_pager="1" products_per_page="8" products_count="16" template="Ubertheme_UbThemeHelper::product/widget/content/default_grid.phtml" conditions_encoded="^[`1`:^[`type`:`Magento||CatalogWidget||Model||Rule||Condition||Combine`,`aggregator`:`all`,`value`:`1`,`new_child`:``^],`1--1`:^[`type`:`Magento||CatalogWidget||Model||Rule||Condition||Product`,`attribute`:`category_ids`,`operator`:`==`,`value`:`9`^]^]" page_var_name="puvtgx" type_name="Catalog Products List"}}</div>
</div>
Front-end Appearance:

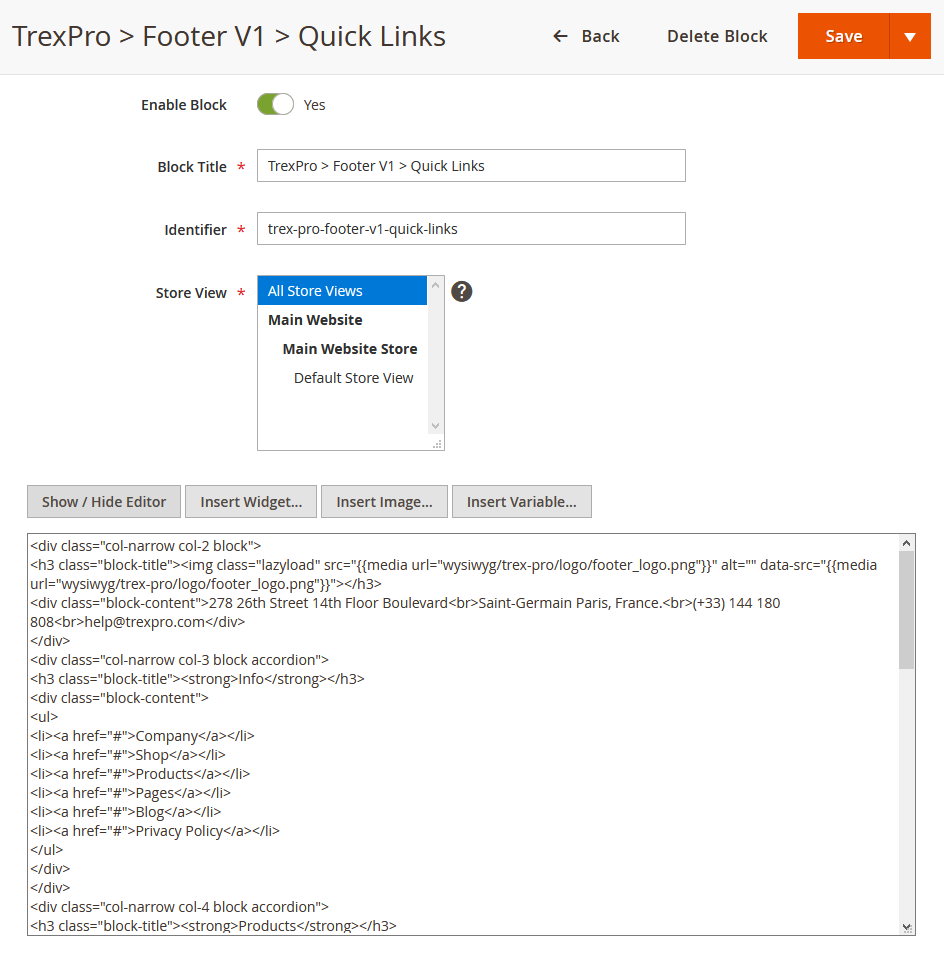
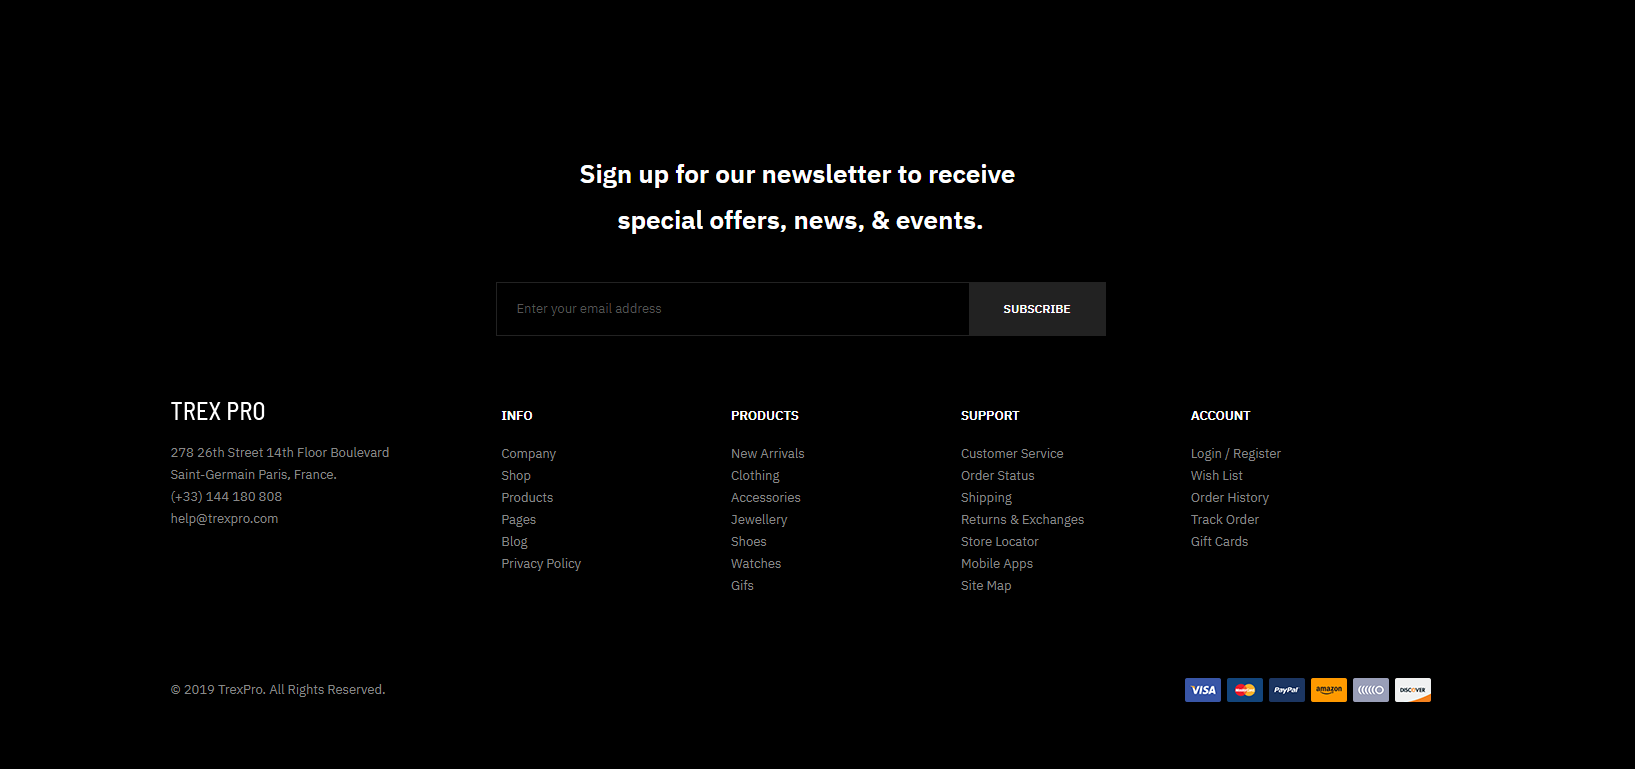
5. Footer links
You create the Footer links block with the configuration as follows:
Back-end setting
In the Content field, click the Show/Hide Editor button, then copy and paste the following code:
<div class="col-narrow col-2 block">
<h3 class="block-title"><img class="lazyload" src="{{media url="wysiwyg/trex-pro/logo/footer_logo.png"}}" alt="" data-src="{{media url="wysiwyg/trex-pro/logo/footer_logo.png"}}"></h3>
<div class="block-content">278 26th Street 14th Floor Boulevard<br>Saint-Germain Paris, France.<br>(+33) 144 180 808<br>[email protected]</div>
</div>
<div class="col-narrow col-3 block accordion">
<h3 class="block-title"><strong>Info</strong></h3>
<div class="block-content">
<ul>
<li><a href="#">Company</a></li>
<li><a href="#">Shop</a></li>
<li><a href="#">Products</a></li>
<li><a href="#">Pages</a></li>
<li><a href="#">Blog</a></li>
<li><a href="#">Privacy Policy</a></li>
</ul>
</div>
</div>
<div class="col-narrow col-4 block accordion">
<h3 class="block-title"><strong>Products</strong></h3>
<div class="block-content">
<ul>
<li><a href="#">New Arrivals</a></li>
<li><a href="#">Clothing</a></li>
<li><a href="#">Accessories</a></li>
<li><a href="#">Jewellery</a></li>
<li><a href="#">Shoes</a></li>
<li><a href="#">Watches</a></li>
<li><a href="#">Gifs</a></li>
</ul>
</div>
</div>
<div class="col-narrow col-5 block accordion">
<h3 class="block-title"><strong>Support</strong></h3>
<div class="block-content">
<ul>
<li><a href="#">Customer Service</a></li>
<li><a href="#">Order Status</a></li>
<li><a href="#">Shipping</a></li>
<li><a href="#">Returns & Exchanges</a></li>
<li><a href="#">Store Locator</a></li>
<li><a href="#">Mobile Apps</a></li>
<li><a href="#">Site Map</a></li>
</ul>
</div>
</div>
<div class="col-narrow col-6 block accordion">
<h3 class="block-title"><strong>Account</strong></h3>
<div class="block-content">
<ul>
<li><a href="#">Login / Register</a></li>
<li><a href="#">Wish List</a></li>
<li><a href="#">Order History</a></li>
<li><a href="#">Track Order</a></li>
<li><a href="#">Gift Cards</a></li>
</ul>
</div>
</div>
Front-end Appearance:
VII. Extension Configuration
All complimentary extensions including UB Mega Menu, UB Content Slider, UB Quick View and UB Rich Snippets are integrated in the UB Trex Pro theme by default.
So, please refer to the UB Trex Pro’s main user guide here for more details about each module’s configurations.