When doing your business globally, having a multilingual store is a smart step to take.
By default, Magento 2 enables you to localize your store in multiple languages easily with the help of translation dictionaries and language packages:
- A translation dictionary refers to a comma-separated value (.csv) file which is a convenient way to create translation for a custom module or theme.
- A language package is a collection of translation dictionaries for all words and phrases in Magento 2 application.
This article will guide you through the process of creating a new language for your Magento 2 theme. For demonstration purpose, we will use our Magento 2 theme -- Crafts 2.0 -- as an example and explain how you can add the German language as well as the English language that is set as default in the theme.
When working with a Magento 2 theme that will give support for more than one language, it is highly recommended to create a dictionary for each distinct translation.
Let’s go through the process step by step:
Step 1: Generating a translation dictionary for the Crafts 2.0 theme
Creating the pattern structure of translation on the Crafts 2.0 theme involves the following steps:
- Create the directory /app/design/frontend/Ubertheme/crafts/i18n. For your custom theme, you simply replace with your <VendorName>/<ThemeName> accordingly:
<magento_root>/app/design/frontend/<VendorName>/<ThemeName>/i18n
Magento 2 adopted the internationalization (i18n) pattern that facilitates and organizes the product development process in different languages. Magento 2 will auto-discover these i18n packages.
- For adding translation for the theme, we have to create the following files in the i18n directory. With this tutorial, you will create the files de_DE.csv and en_US.csv. Once done, you should have:
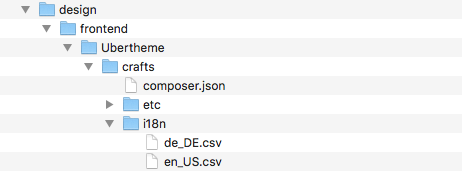
Create translation dictionaries for Magento 2 theme
- Open the terminal or command prompt and run the following command to generate the en_US and de_DE dictionaries. These commands help to extract translatable words and phrases automatically from the Crafts 2.0 theme.
php -f bin/magento i18n:collect-phrases -o “app/design/frontend/Ubertheme/crafts/i18n/en_US.csv” app/design/frontend/Ubertheme/crafts
php -f bin/magento i18n:collect-phrases -o “app/design/frontend/Ubertheme/crafts/i18n/de_DE.csv” app/design/frontend/Ubertheme/crafts
Automatically extract translatable words and phrases for Magento 2 theme
Step 2: Translating words and phrases
The English language -- en_US locale -- is set as default in the theme. So let’s open the de_DE.csv file and put your German translation theme. You should see the following sample where the left column contains the default values (keys), and the right columns contains the values to be translated to the German language:
“In stock”,”In stock”
“Out of stock”,”Out of stock”
“Customize: %1″,”Customize: %1”
“Select the product options”,”Select the product options”
“No options of this product are available.”,”No options of this product are available.”
“We can’t find products matching the selection.”,”We can’t find products matching the selection.”
“Add to Cart”,”Add to Cart”
“Add to Wish List”,”Add to Wish List”
“Add to Compare”,”Add to Compare”
It’s important to remember that you just change the contents of the second column only while translating the phrases from English (US) to the German language. For example, “In stock”, “In stock” should be interpreted as “In stock”,”AUF Lager”.
Besides, you will need to pay attention to placeholders like %1, %2 and so on. They are used by the Magento 2 to insert context values, not for translations.
Step 3: Create a new Store View
Now you to activate a second Store View in the Magento 2 administrative area which will be configured to the German language:
On the Stores page (Stores | Settings | All Stores), click on Create Store View and input parameters as follows:
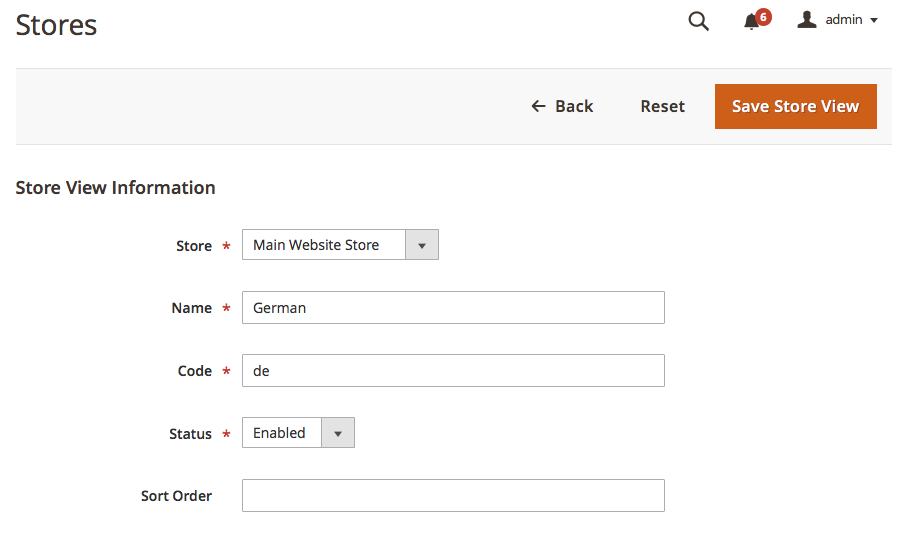
Create a new Store view for German language
- Store: Set Store to the parent store of this view.
- Name: Fill in Name for store view e.g. German. This name will appear in the language chooser in the store header.
- Code: Enter a unique name in lowercase to identify the store view e.g de.
- Status: Set Enable option
- Sort order: Determine the sequence in which this view is listed with other views
Click Save Store View button. Now your German Store has been added to the Store View list.
Step 4. Configure the Locale of the new Store View
Once the German Store View is saved, you need to change this store view to the de_DE locale:
- Go to Stores | Configuration | (Settings) Configuration, change the Store View scope at the top to the “German” view. You will be prompted when switching; press OK to continue.
- Then go to General section, open Locale Options tab. Uncheck Use Website checkbox of Locale and select “German” as follows:
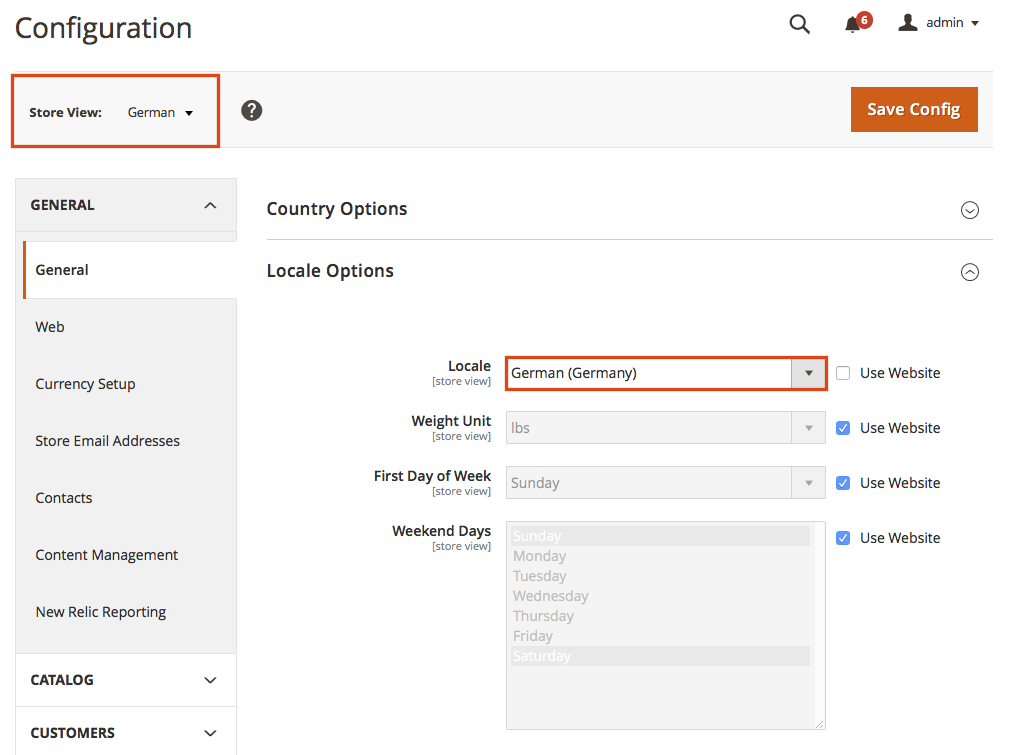
Configure the locale of the new Store view
- Click Save Config button
Step 5: Making a new deployment to apply the change
Now you can run deploy command to get changes of localization:
When cleaning the cache (via System | Tools | Cache Management) and reloading the frontend, you will see that the interface texts are translated into German. A sample of a product view page:
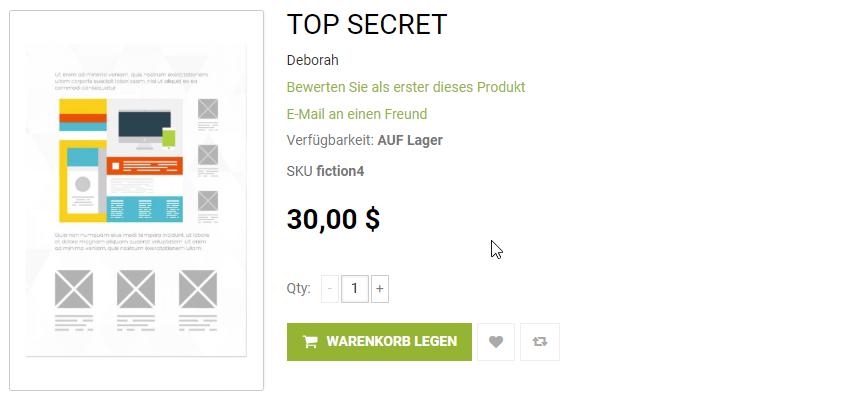
Sample German language in Crafts 2.0 theme
Please note this is Magento 2 with sample data, you need to translate the remaining content to have all content translated to German language, including product names, descriptions, and categories must be translated separately for each store view.
Got questions about Magento 2 extensions or themes? Talk to Ubertheme, we’re happy to help.