This second article in the Magento 2 multi-stores tutorial shows how you can create multiple websites, stores, and store views in Magento 2. Check out Part 1 to catch up on the topic.
For the purpose of this tutorial, let’s assume that we need to create a Magento 2 multi-store structure including:
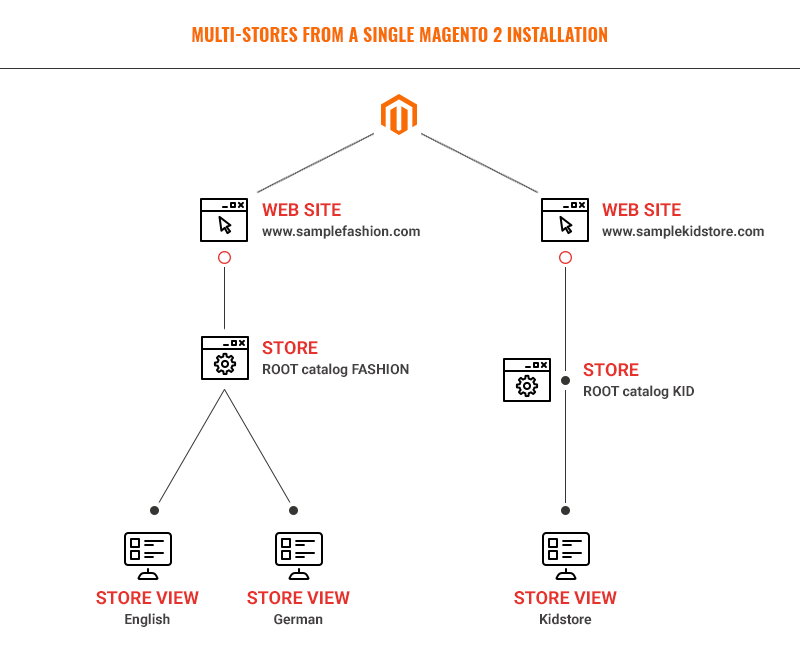
- The 1st Website (samplefashion.com) with two store views -- English and German
- The 2nd Website (samplekidstore.com) with one store view -- Kidstore
Set up Magento 2 multi stores
Multiple websites or stores may seem like a daunting process at first but it is really quite simple. The following steps will guide you through setting up such multi stores on Magento 2.
- Step 1: Create a new website
- Step 2: Create a new store
- Step 3: Create store views
- Step 4: Configure the Store URL
- Step 5: Create a Root Category
1. Create a new website (samplekidstore.com)
Login into Magento 2 admin, and go to Stores | All Stores. If you install a fresh Magento 2 instance that doesn’t have a store yet, you will see just one row on the Stores grid including Main Website, Main Store and The Main Store View which are default in Magento 2.
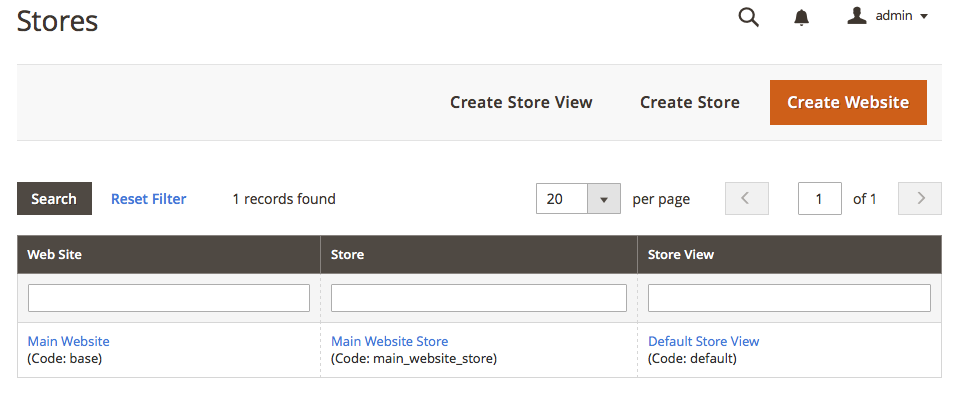
Default Magento 2 Website, Store, and Store View
First, click on Create Website and commit the following details:
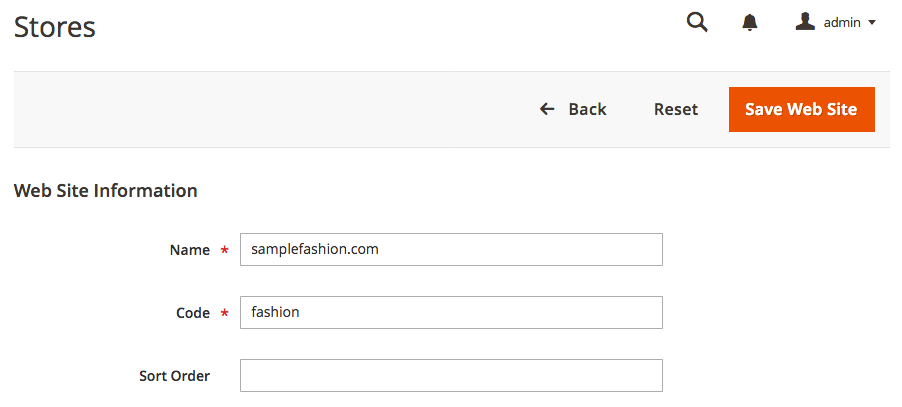
Magento 2 Multi Stores -- Create a new Website
- Name: Enter your website name (eg. the domain of the new website)
- Code: Enter a unique (lowercase) code for the website. The code will be used on the server to point to the domain.
- (Optional) Sort Order: determine the sequence in which the site is listed with other sites. Enter a zero to make the site appear at the top of the list.
2. Create a new store
On the Stores page (Stores | Settings | All Stores), click on Create Store and commit the following details:
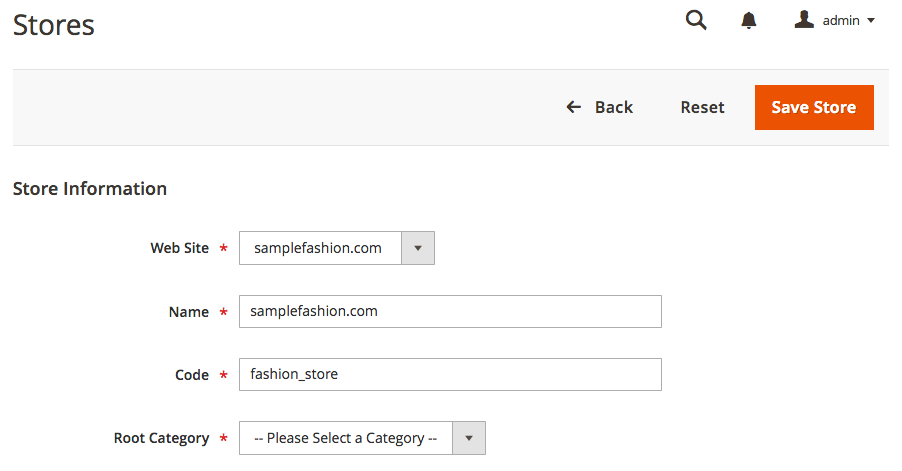
Magento 2 Multi Stores -- Create a new Store
- Web Site: Assign the name of the website we just created above that is the parent of the new store.
- Name: Enter a name to identify the store. The name is for internal reference only.
- Code: Enter a unique code to identify the store.
- Root Category: Set the root category for this store. The root category defines the category structure for the main menu of the store. You can come back and change the Root category later.
3. Create store views
On the Stores page (Stores | Settings | All Stores), click on Create Store View and commit the following details:

Magento 2 Multi Stores -- Create a new Store View
- Store: Set Store to the parent store of this view.
- Name: Enter a name to identify this store view. This name will appear in the language chooser in the store header.
- Code: Enter a unique (lowercase) name to identify this store view.
- Status: set to Enabled option
- (Optional) Sort Order: to determine the sequence in which this view is listed with other views
- You can repeat the same steps to create new websites, stores or store views. Here are the sample multi-stores we’ve just created above:
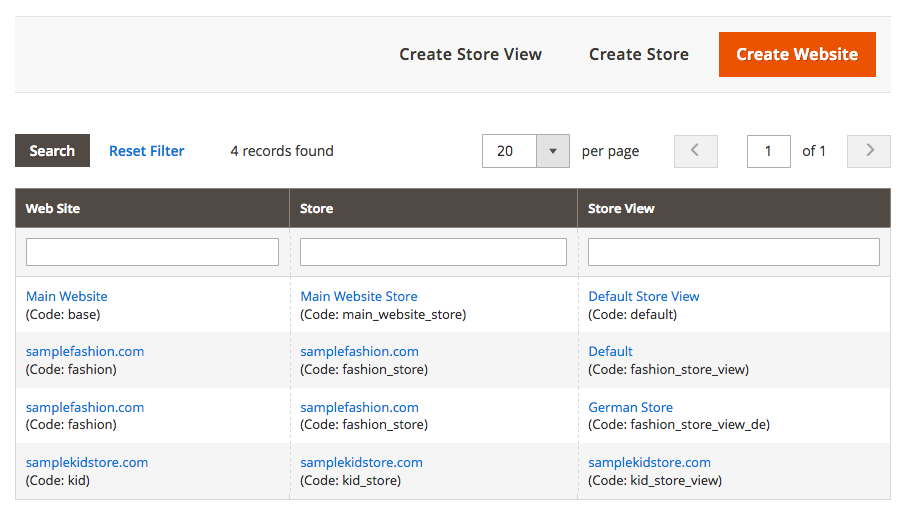
Sample Magento 2 Multi Stores
4. Configure the Store URL
The next important step is to map the websites with the domain name.
Within this tutorial, let’s assume that you try testing multi-websites on your localhost environment, pointing to two testing domains:
- www.samplefashion.com (for Default store view and German store view)
- www.samplekidstore.com (for Kidstore view).
Here’re the steps:
4.1 Configure a Virtual Host (vhost)
Depending on whether you are using Windows or Mac OS, apply the options accordingly:
Window: Open up the hosts file as an administrator (Go to C:\Windows\System32\drivers\etc). Add the following (change the IP and domain name accordingly)
127.0.0.1 www.samplefashion.com
127.0.0.1 www.samplekidstore.com
Mac OS: Open up the hosts file as a superuser (Go to /etc/ directory). Add the following (change the IP and domain name accordingly)
127.0.0.1 www.samplefashion.com
127.0.0.1 www.samplekidstore.com
Save the file and run the following command on the terminal:
Depending on your Mac version, you might need to check the commands accordingly.
4.2 Map the vhost to work with Magento 2
Depending on your set up preferences, you can follow one of the following options:
Option 1: Editing the index.php file
(This option works for both NGINX and Apache server)
Open up the file index.php in your Magento 2 root folder (Make sure you backup this file before editing), and replace the whole code with:
<?php
require __DIR__ . ‘/app/bootstrap.php’;
$params = $_SERVER;
$domainName = $_SERVER[‘SERVER_NAME’];switch ($domainName) {
case ‘
www.samplefashion.com‘:$runType = ‘
website‘;$runCode = ‘
fashion‘;break;case ‘
www.samplekidstore.com‘:$runType = ‘
website‘;$runCode = ‘
kid‘;break;
default:
$runType = ‘website‘;
$runCode = ‘base‘;
}
$params[\Magento\Store\Model\StoreManager::PARAM_RUN_CODE] = $runCode;
$params[\Magento\Store\Model\StoreManager::PARAM_RUN_TYPE] = $runType;
$bootstrap = \Magento\Framework\App\Bootstrap::create(BP, $params);
$app = $bootstrap->createApplication(\Magento\Framework\App\Http::class);
$bootstrap->run($app);
NOTE:
- Case ‘’: refers to your custom testing domain
- $runType: The sample setup above uses the $runType ‘website’ variable. You may change website to ‘store’, at your discretion.
- $runCode: refers to the unique code for the website that you specify when creating your Website. This code will be used on the server to point to the domain.
- If you set $runType ‘website’, the $runCode should be your Website code
- If you set $runType ‘store’, the $runCode should be your Store View code
Option 2: Editing the .htaccess file:
(NOTE: this option applies for Apache server only)
Add the following code to the bottom of your .htaccess file:
<IfModule mod_rewrite.c>
Options +FollowSymLinksSetEnvIf Host .*
www.samplefashion.com.* MAGE_RUN_CODE=fashionSetEnvIf Host .*
www.samplefashion.com.* MAGE_RUN_TYPE=website
SetEnvIf Host .*www.samplekidstore.com.* MAGE_RUN_CODE=kid
SetEnvIf Host .*www.samplekidstore.com.* MAGE_RUN_TYPE=website
RewriteEngine on
RewriteRule .* -- [E=HTTP_AUTHORIZATION:%{HTTP:Authorization}]
RewriteCond %{REQUEST_METHOD} ^TRAC[EK]
RewriteRule .* -- [L,R=405]
RewriteCond %{REQUEST_FILENAME} !-f
RewriteCond %{REQUEST_FILENAME} !-d
RewriteCond %{REQUEST_FILENAME} !-l
RewriteRule .* index.php [L]
</IfModule>
You can replace the SetEnvlf Host and MAGE_RUN_CODE variables with your own value accordingly.
- SetEnvlf Host: refers to your custom testing domain
- MAGE_RUN_CODE: refers to the unique code for the website that you specify when creating your Website. This code will be used on the server to point to the domain.
4.3 Configure the base URL
In this tutorial, we still keep the default Magento 2 Stores including Main Website, Main Store and The Main Store View unchanged.
Now let’s configure the Store URL for the two websites -- www.samplefashion.com and www.samplekidstore.com -- that we just created for testing above:
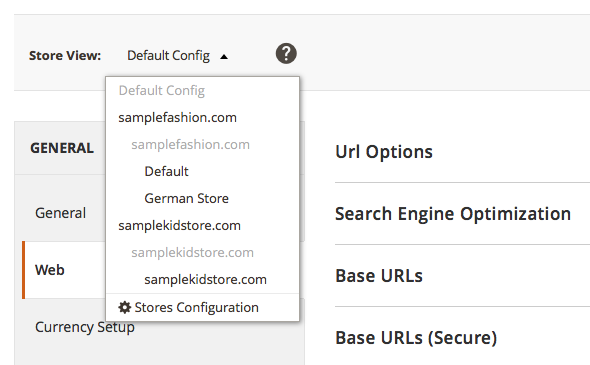
Magento 2 multi stores’ scope
Go to Stores | Configuration | (General) Web | Base URLs. Change the Store View scope at the top to the samplekidstore.com Website that we created above. You will be prompted when switching; press OK to continue.
Now uncheck the checkbox called Use system value from the Base URL and Base Link URL fields and commit your domain name. Now click Save Config and continue the same procedure for the other website. The output should look like this:
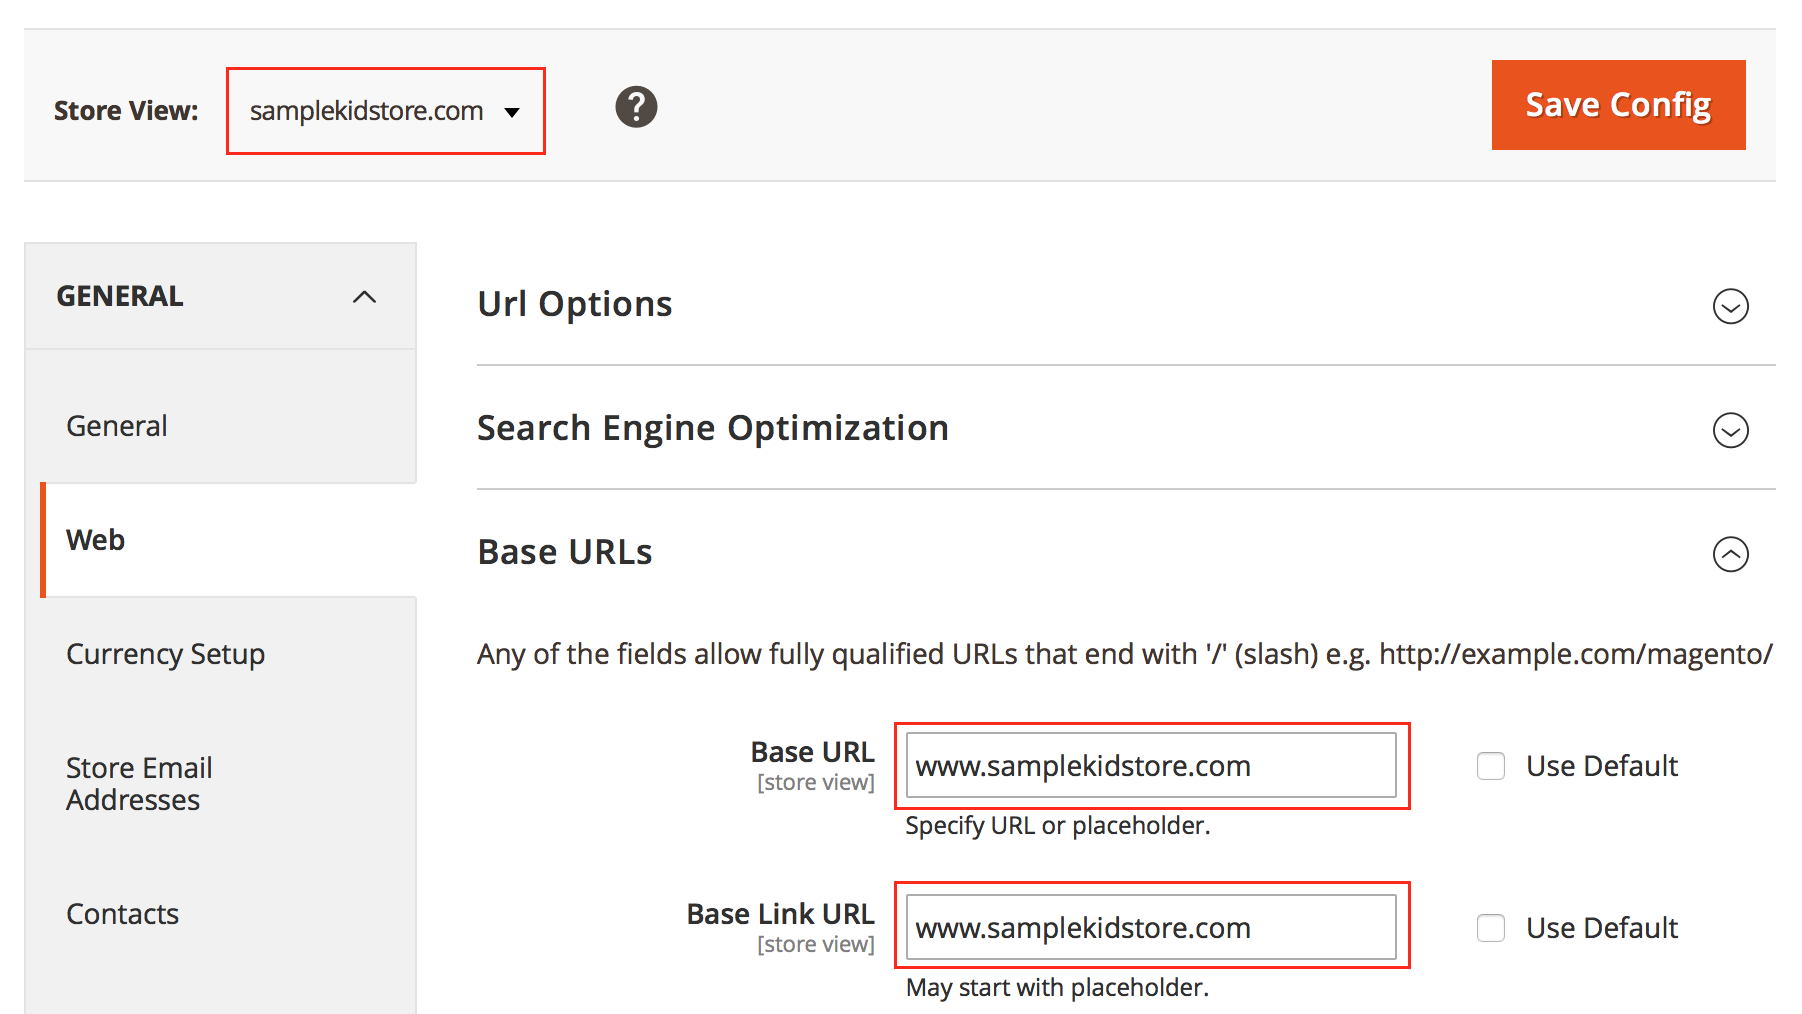
Magento 2 multi stores -- Configure Base URL’ scope
Apply the same steps to configure the base URL for the www.samplekidstore.com website.
Once done, save your entire configuration and clear your Magento and browser cache. Then you should be able to surf to the custom domains from your storefront.
5. Create a Root Category
Now go to Catalog | Categories and click on Add Root Category as follows:
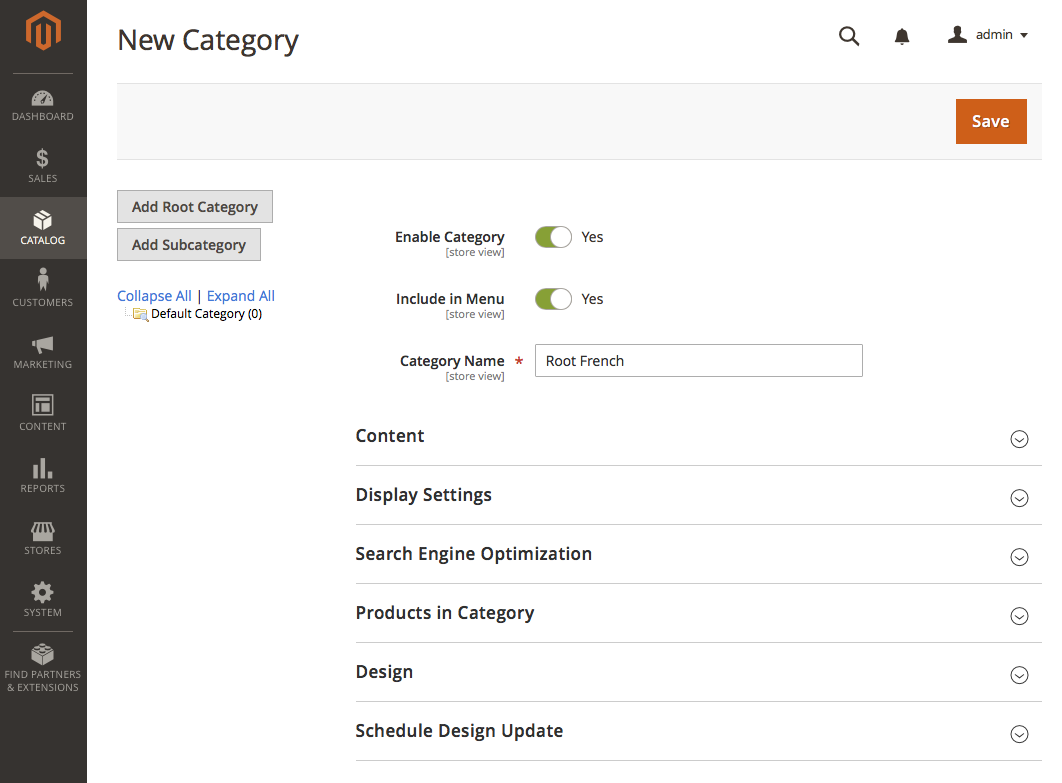
Magento 2 multi stores -- Root Categories’ scope
Setting up a catalog structure is not difficult, but needs to be well thought out. You may add additional information here at your discretion.
Save your configuration and go to Stores | All Stores and change the store to the appropriate Root Catalog we just created.
Summary
You have now created a multi-stores within a single Magento 2 installation and map those websites to custom testing domains. Most important, you also understand the difference between the three levels -- websites, stores, and store views, so you have a good idea how the multi-stores are structured in Magento 2.
Got questions about Magento 2 extensions or themes? Talk to Ubertheme, we’re happy to help.