UB Data Migration Pro v3.2.4 here. Fully compatible with Magento 2.4.0.
Sept 20, 2018 Update:
Check out the latest UB Data Migration Pro v3.1.6, with the biggest upgrade in Dashboard UI. Fully compatible with Magento 2.2.6.
As you know, we are developing a tool for data migration from Magento 1.x to Magento 2. We mentioned in detail about it in our earlier blog post. We have improved it a lot this time and it is more user-friendly now. This tool is under active development and we will keep working on it. Let me tell you about the phase 2 of this project and changes done in tool’s configuration.
Magento 2 data migration in done in two stages

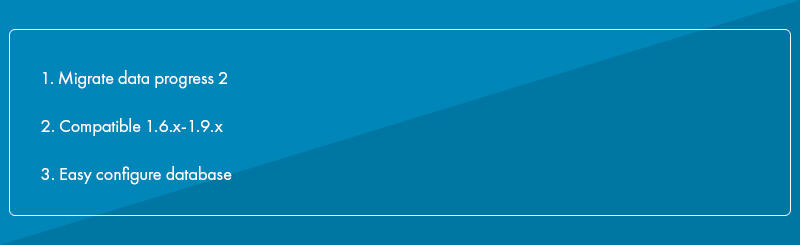
This upcoming Magento 2 migration tool will help to transfer your database from older versions to the latest Magento 2 in some simple steps. Our aim is to make it the most handy as possible.
Here are what the tool will help to migrate : Version 0.1.11
Changes in tables.
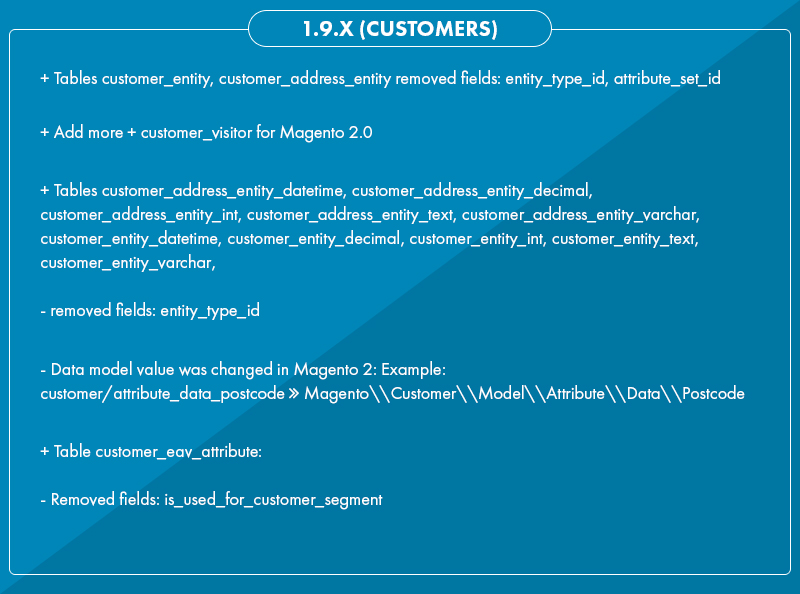
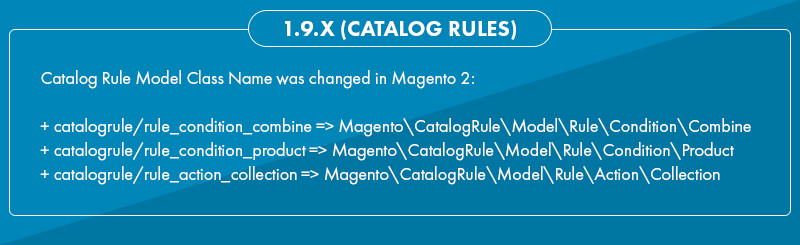
+ Change for Magento 1.9.x
# Change for Customers
# Change for Sales

# Change for Catalog Rules
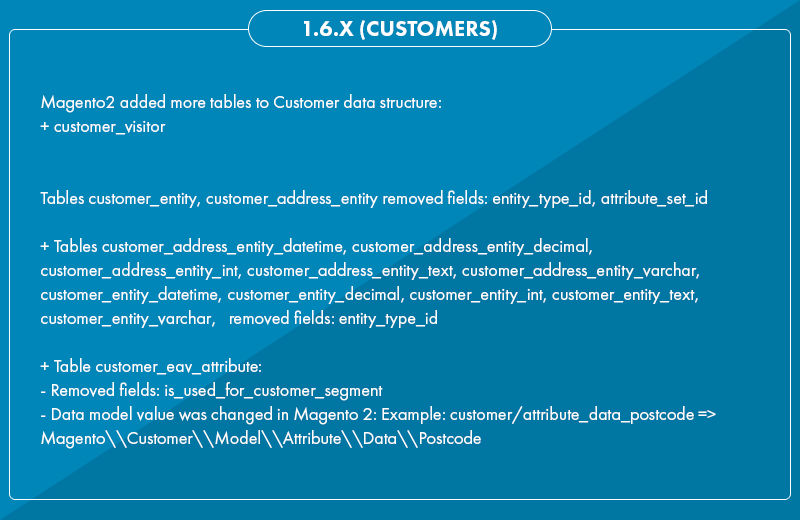
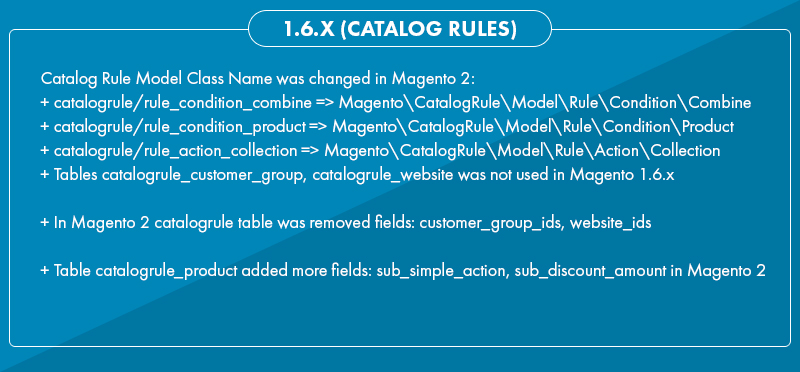
+ Change for Magento 1.6.x
# Change for Customers
# Change for Sales

# Change for Catalog Rules
To use this migration tool, follow the steps below.
Install Magento 2
Download the latest version of Magento2 from Github + Follow our Installation guide to Install Magento 2
# Configure the tool
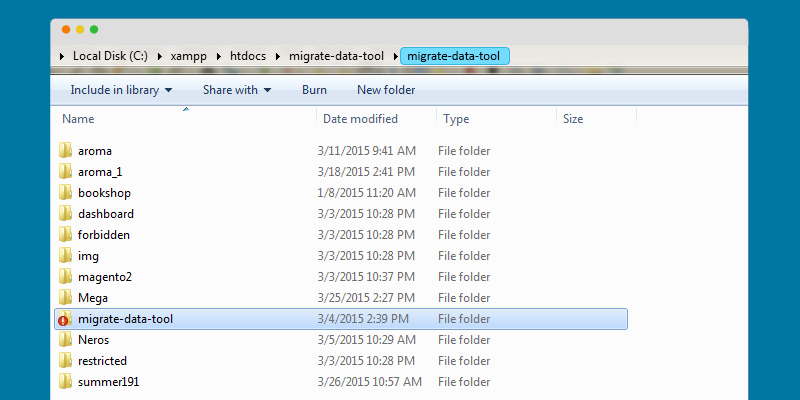
1 -- Make a folder named “migrate_data_tool” in your web root. For example: PATH_TO_YOUR_WEB_ROOT_FOLDER\migrate-data-tool
+ Download the latest version of this tool at Magento 2 Data Migration Tool
+ Extract all source code from downloaded file to the folder you have just created (migrate_data_tool)
+ Make writeable permission for folders at:
>>> PATH_TO_YOUR_WEB_ROOT_FOLDER\migrate-data-tool\assets
>>> PATH_TO_YOUR_WEB_ROOT_FOLDER\migrate-data-tool\protected\runtime
+ Make writeable permission for config file at:
>>> PATH_TO_YOUR_WEB_ROOT_FOLDER\migrate-data-tool\protected\config\config.php
# Step 1: Database Configure
Open your browser and type in the url to run this tool. For example: go to //localhost/migrate-data-tool/ and press Enter key.
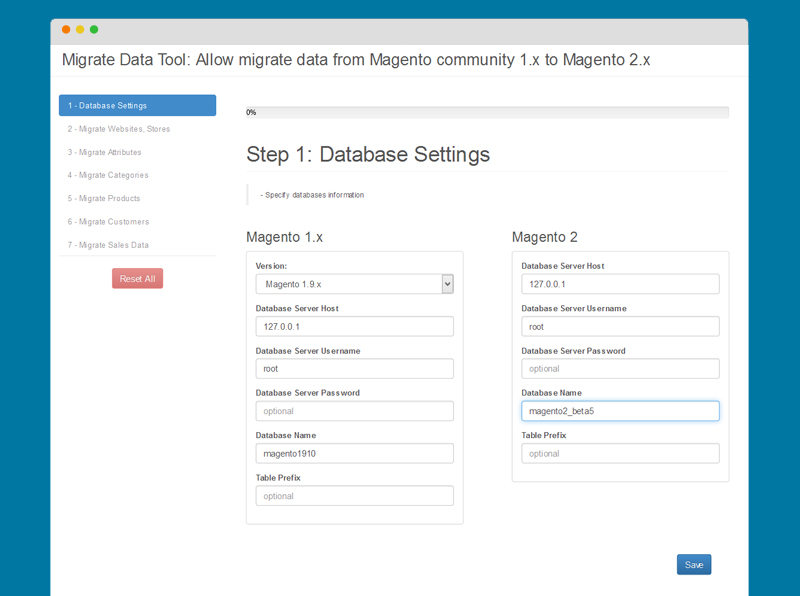
- Version: to select version of Magento
- Database Server Host: identify the database server host name
- Database Server UserName: indentify the username of database server
- Database Server Password: identify the password of database server
- Table Prefix: identify the table prefix
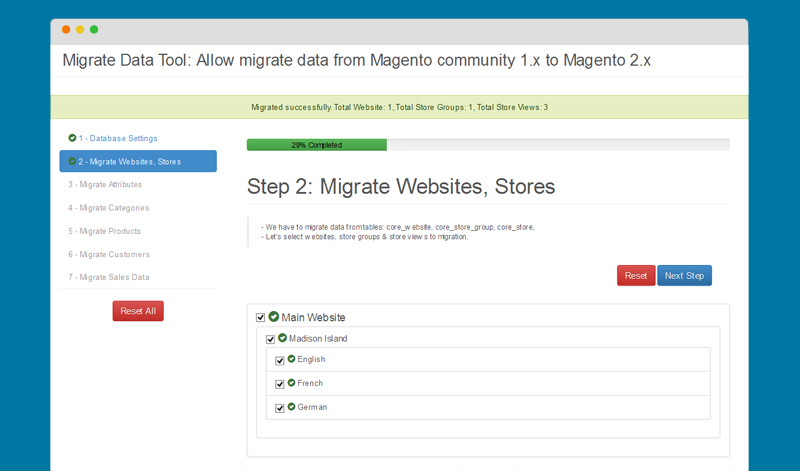
# Step 2: Migrate Websites, Stores
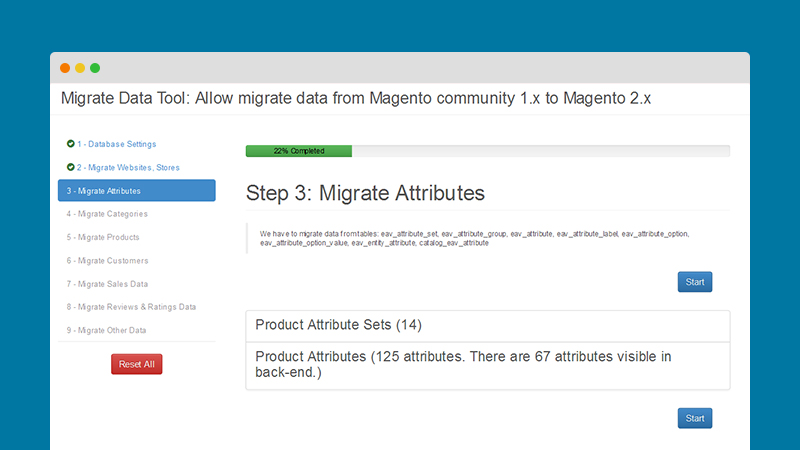
# Step 3: Migrate Attributes
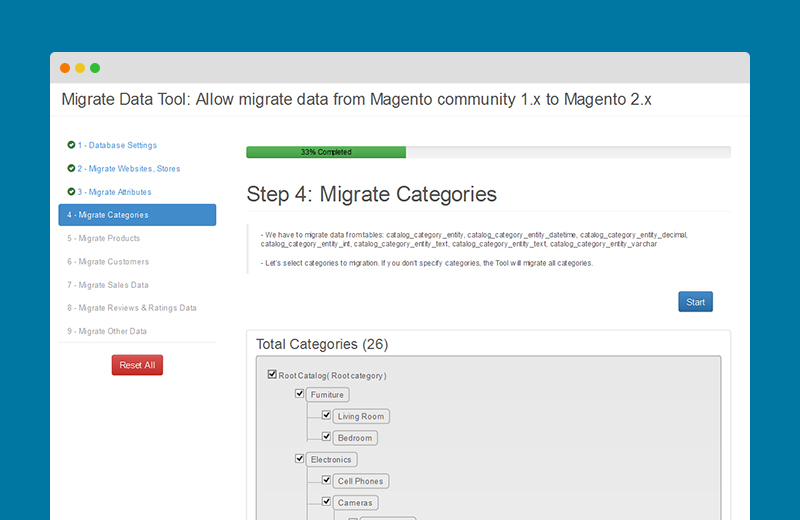
# Step 4: Migrate Categories
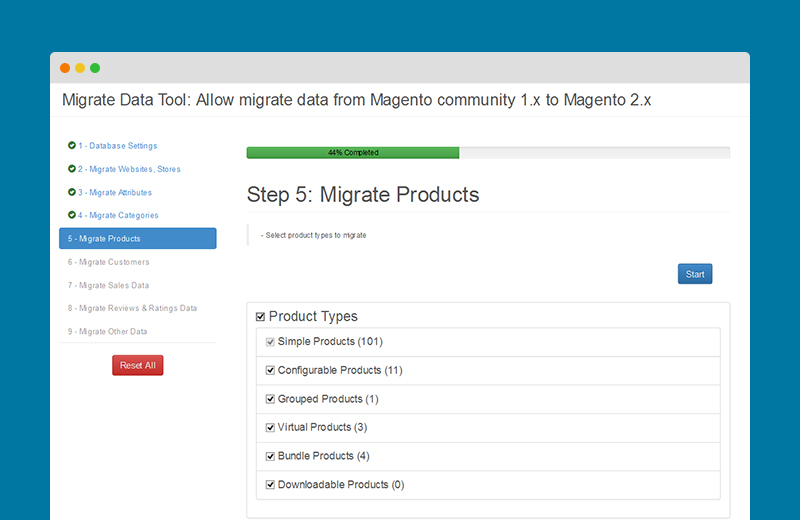
# Step 5: Migrate Products
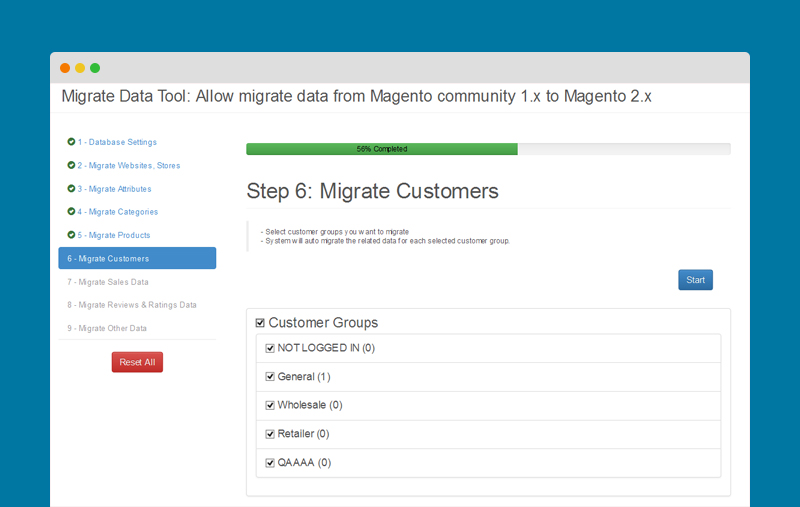
# Step 6: Migrate Customers
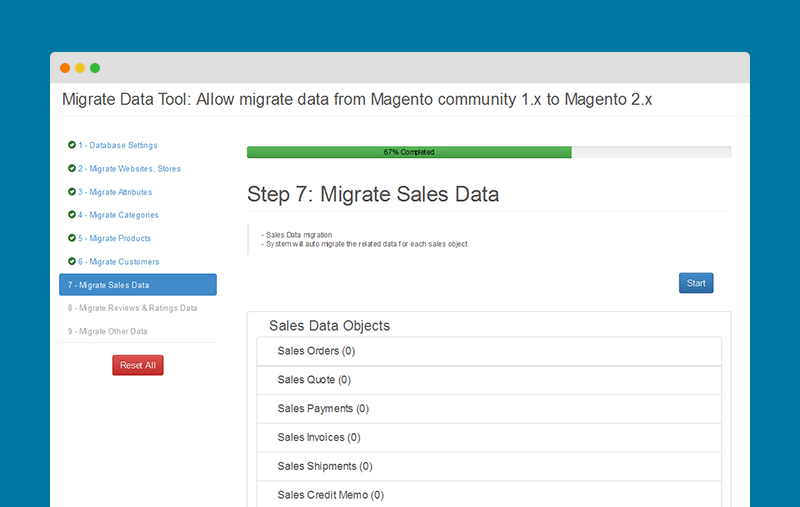
# Step 7: Migrate Sales Data
# Step 7: Migrate Reviews and Ratings Data

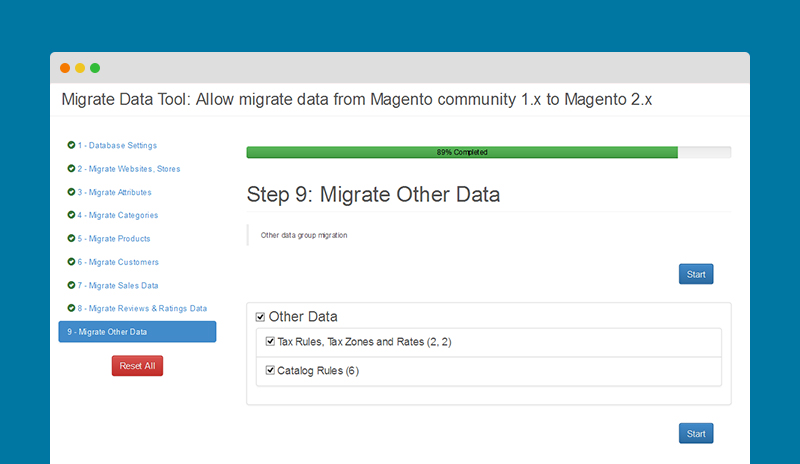
# Step 8: Migrate Other Data
4 Complete the tasks below to finish the data migration process.
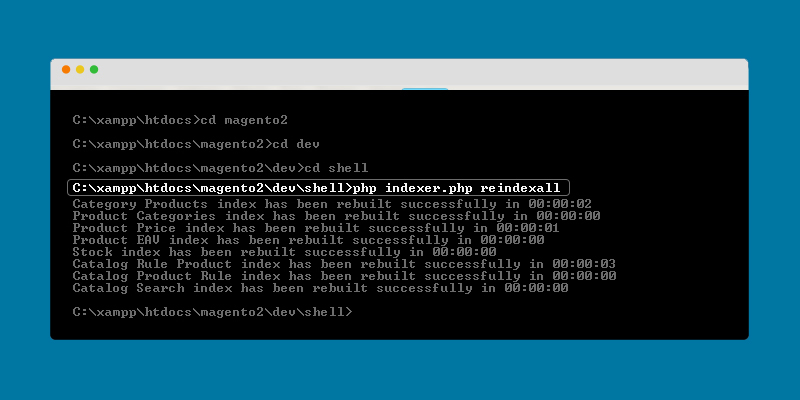
Re-save all the Attribute Sets (Product Template) migrated in the back-end of your Magento 2 website. (Open the attribute set, edit it if needed and click the save button) Open the command line window and go to the folder: PATH_TO_YOUR_WEB_ROOT_FOLDER\your_magento2_folder\dev\shell\ and type in the command line: php indexer.php reindexall then press enter key to re-index all data in your Magento 2 website.
5 Copy media files to complete migration:
+ Copy the folder at PATH_TO_YOUR_WEB_ROOT_FOLDER\your_magento1_folder\media\catalog and paste replace to PATH_TO_YOUR_WEB_ROOT_FOLDER\your_magento2_folder\pub\media\
+ Copy the folder at PATH_TO_YOUR_WEB_ROOT_FOLDER\your_magento1_folder\media\downloadable and paste replace to PATH_TO_YOUR_WEB_ROOT_FOLDER\your_magento2_folder\pub\media\
6 Now you can test the data which have been migrated into your Magento 2 website from the browser.
Download Magento 2 Migration Tool Crafts: Free Magento 2 Theme